Difference between revisions of "Matrix - Joystick"
(→Update Log) |
|||
| (4 intermediate revisions by the same user not shown) | |||
| Line 33: | Line 33: | ||
| − | == | + | ==Applications== |
| − | + | The Matrix-Joystick module outputs analog signals which can be converted to digital signals with an ADC converter e.g. the Matrix-Analog_to_Digital_Converter.<br> | |
| − | + | For more details about the Matrix-Analog_to_Digital_Converter module refer to wiki: [[Matrix_-_Analog_to_Digital_Converter]].<br> | |
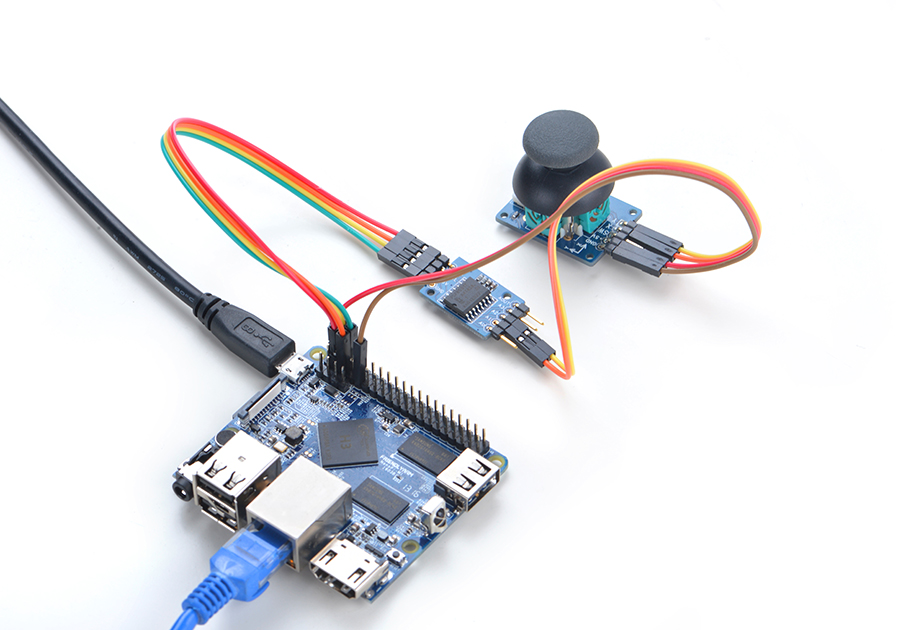
| − | === | + | ===Connect to NanoPi M1=== |
| − | + | Refer to the following connection diagram to connect the module to the NanoPi M1:<br> | |
[[File:Matrix_Joystick_nanopi_m1.jpg|frameless|600px|Matrix_Joystick_nanopi_m1]] | [[File:Matrix_Joystick_nanopi_m1.jpg|frameless|600px|Matrix_Joystick_nanopi_m1]] | ||
| − | + | Connection Details: | |
{| class="wikitable" | {| class="wikitable" | ||
|- | |- | ||
| Line 55: | Line 55: | ||
|} | |} | ||
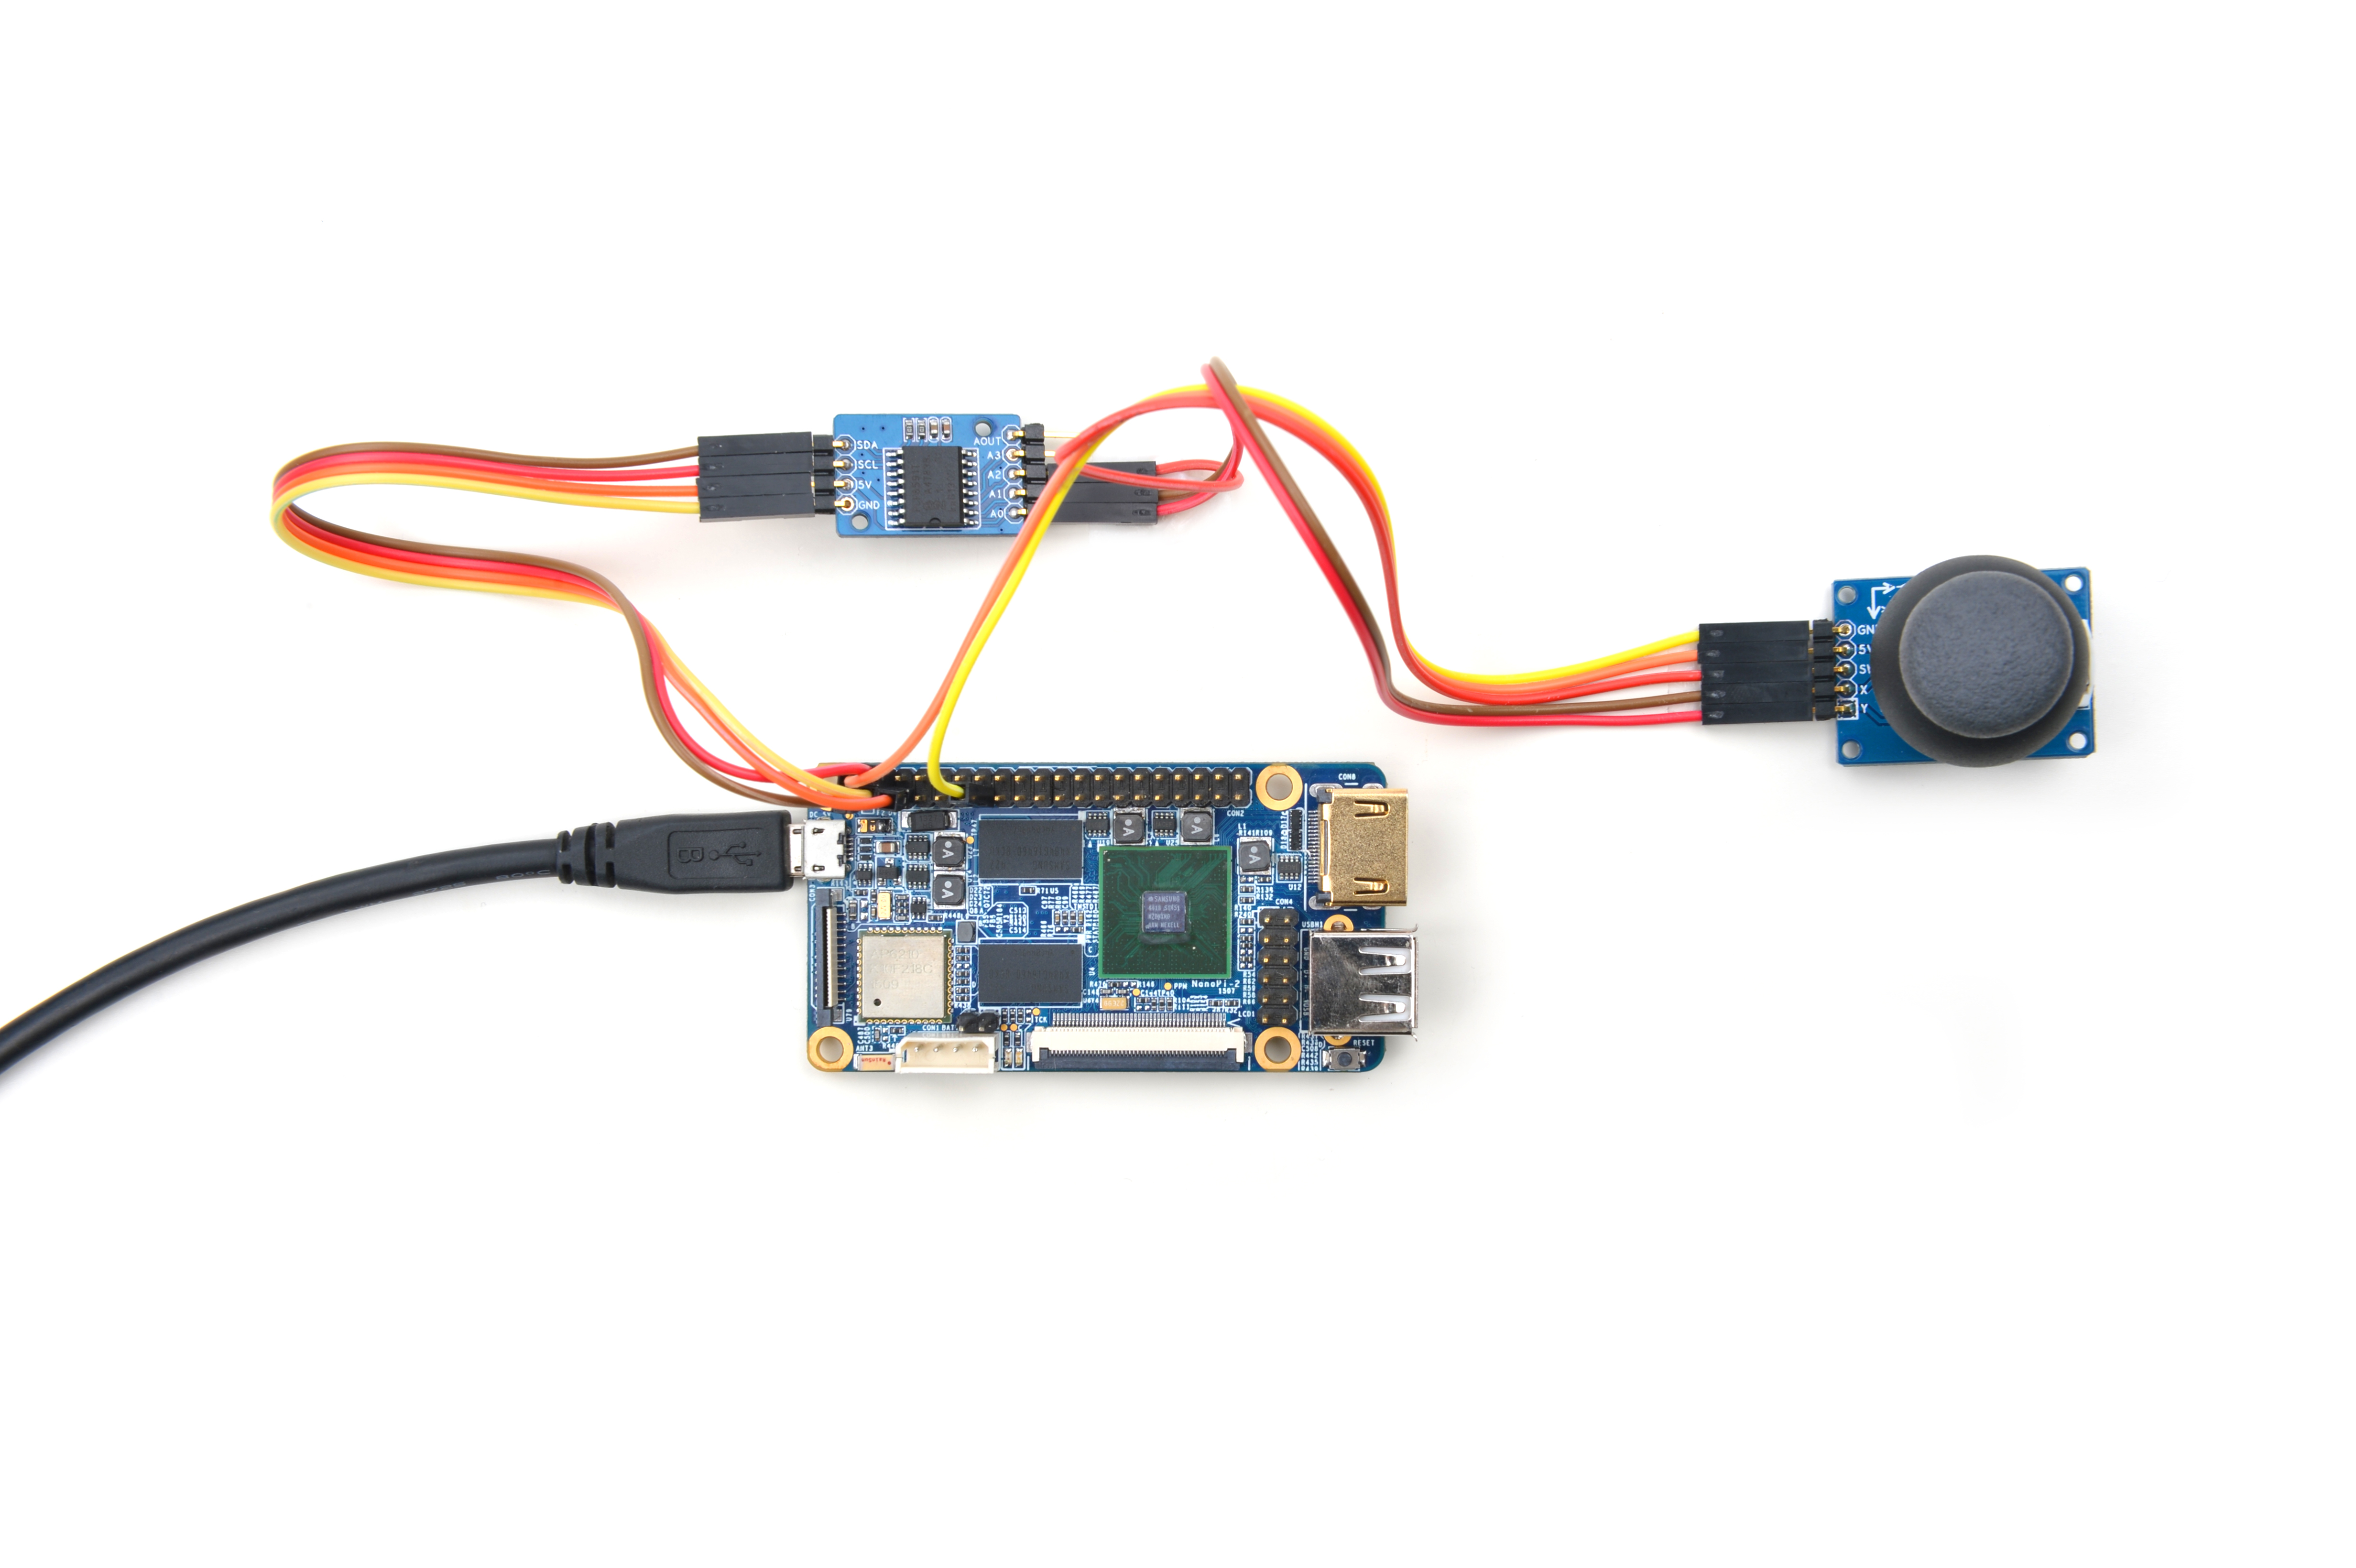
| − | === | + | ===Connect to NanoPi 2=== |
| − | + | Refer to the following connection diagram to connect the module to the NanoPi 2:<br> | |
[[File:Matrix-Joystick_nanopi_2.jpg|frameless|600px|Matrix-Joystick_nanopi_2]] | [[File:Matrix-Joystick_nanopi_2.jpg|frameless|600px|Matrix-Joystick_nanopi_2]] | ||
| − | + | Connection Details: | |
{| class="wikitable" | {| class="wikitable" | ||
|- | |- | ||
| Line 73: | Line 73: | ||
|} | |} | ||
| − | === | + | ===Connect to NanoPi M2 / NanoPi 2 Fire=== |
| − | NanoPi | + | Refer to the following connection diagram to connect the module to the NanoPi M2/ NanoPi 2 Fire:<br> |
| − | + | ||
[[File:Matrix_Joystick_nanopi_m2.jpg|frameless|600px|Matrix_Joystick_nanopi_m2]] | [[File:Matrix_Joystick_nanopi_m2.jpg|frameless|600px|Matrix_Joystick_nanopi_m2]] | ||
| − | + | Connection Details: | |
{| class="wikitable" | {| class="wikitable" | ||
|- | |- | ||
| Line 92: | Line 91: | ||
|} | |} | ||
| − | === | + | ===Connect to NanoPC-T2=== |
| − | + | Refer to the following connection diagram to connect the module to the NanoPC-T2:<br> | |
[[File:Matrix_Joystick_NanoPC-T2.jpg|frameless|600px|Matrix_Joystick_NanoPC-T2]] | [[File:Matrix_Joystick_NanoPC-T2.jpg|frameless|600px|Matrix_Joystick_NanoPC-T2]] | ||
| − | + | Connection Details: | |
{| class="wikitable" | {| class="wikitable" | ||
|- | |- | ||
| Line 110: | Line 109: | ||
|} | |} | ||
| − | == | + | ==Compile & Run Test Program== |
| − | + | Boot your ARM board with Debian and copy the matrix code: | |
<syntaxhighlight lang="bash"> | <syntaxhighlight lang="bash"> | ||
$ apt-get update && apt-get install git | $ apt-get update && apt-get install git | ||
$ git clone https://github.com/friendlyarm/matrix.git | $ git clone https://github.com/friendlyarm/matrix.git | ||
</syntaxhighlight> | </syntaxhighlight> | ||
| − | + | If your cloning is done successfully a "matrix" directory will be generated. | |
| − | + | Compile and install Matrix: | |
<syntaxhighlight lang="bash"> | <syntaxhighlight lang="bash"> | ||
$ cd matrix | $ cd matrix | ||
| Line 124: | Line 123: | ||
</syntaxhighlight> | </syntaxhighlight> | ||
| − | + | Run test program: | |
<syntaxhighlight lang="bash"> | <syntaxhighlight lang="bash"> | ||
$ matrix-joystick | $ matrix-joystick | ||
</syntaxhighlight> | </syntaxhighlight> | ||
| − | + | Note: this module is not plug and play therefore before running the module please make sure it is connected to an ARM board.<br> | |
| − | + | Here is what you should observe:<br> | |
<syntaxhighlight lang="bash"> | <syntaxhighlight lang="bash"> | ||
x=1280 y=1280 | x=1280 y=1280 | ||
</syntaxhighlight> | </syntaxhighlight> | ||
| − | + | When you move the stick you will see X and Y's value changes. | |
| − | == | + | ==Code Sample== |
| − | + | This Matrix code sample can work with all the ARM boards mentioned in this module's wiki. The name of this code sample is "matrix-joystick". Here is its source code: | |
<syntaxhighlight lang="c"> | <syntaxhighlight lang="c"> | ||
int main(int argc, char ** argv) | int main(int argc, char ** argv) | ||
| Line 160: | Line 159: | ||
} | } | ||
</syntaxhighlight> | </syntaxhighlight> | ||
| − | + | For more details about this APIs called in this code sample refer to [[Matrix API reference manual]] <br> | |
<!--- | <!--- | ||
==Download Matrix Source Code== | ==Download Matrix Source Code== | ||
| Line 448: | Line 447: | ||
==Connect to Arduino== | ==Connect to Arduino== | ||
---> | ---> | ||
| + | |||
==Resources== | ==Resources== | ||
| Line 454: | Line 454: | ||
* Added the description for "NanoPi 2 branch" in Section 4 | * Added the description for "NanoPi 2 branch" in Section 4 | ||
* Added Section 5: Connect to NanoPi 2 | * Added Section 5: Connect to NanoPi 2 | ||
| − | + | ===June-21-2016=== | |
| + | * Re-organized and simplified wiki | ||
<!-- | <!-- | ||
==Introduction== | ==Introduction== | ||
Latest revision as of 14:03, 21 June 2016
Contents
1 Introduction
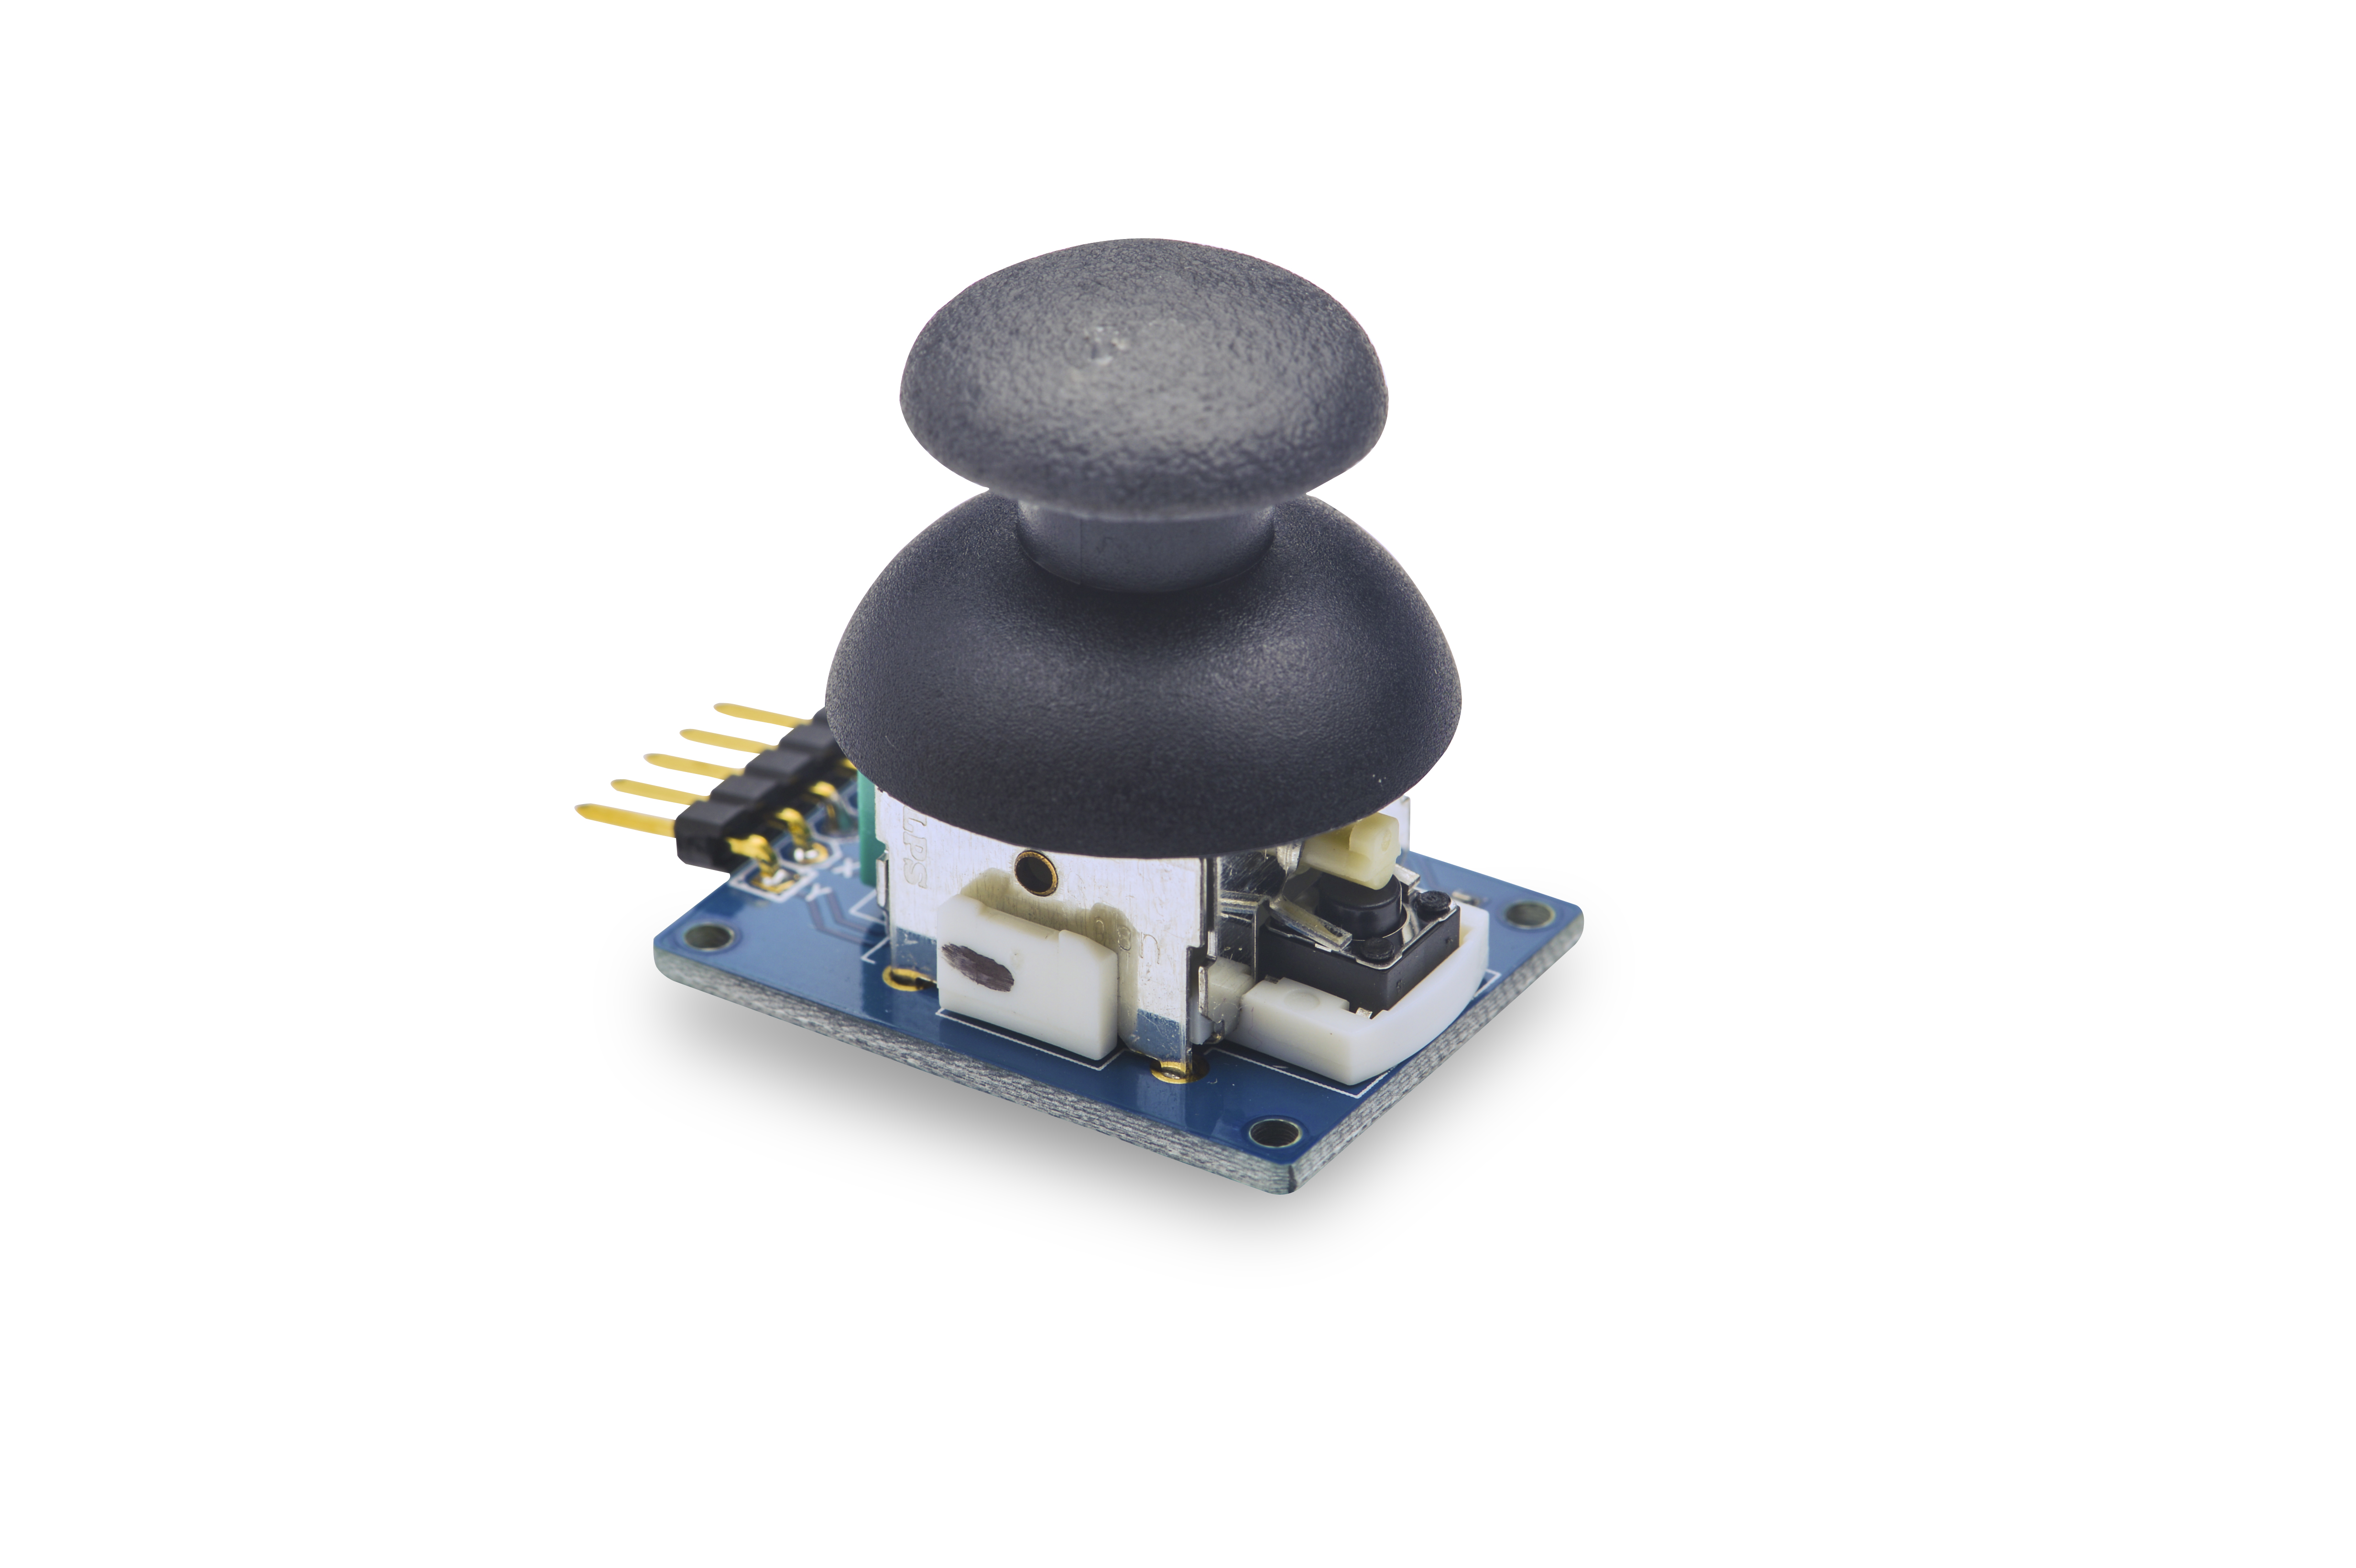
- The matrix-joystick module is a two-axis stick module. It consists of two Sliding rheostats and one button. It has two analog outputs and one digital output. Its positional states can be measured as X and Y axis values as the calibrated resistance of the two potentiometers.
- When you move the joystick the sliding rheostats' resistance will change and the corresponding x/y values will change too. When you push the joystick the SW level will turn low.
2 Features
- X and Y axis, and one button
- 2.54mm spacing pin
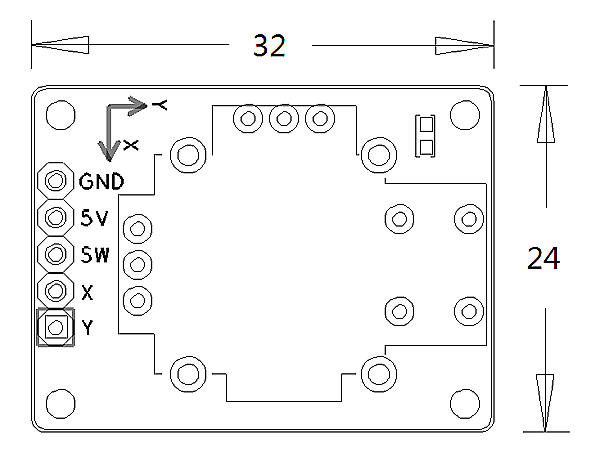
- PCB dimension(mm): 24 X 32
- Pin Description:
| Pin | Description |
| GND | Ground |
| 5V | Supply Voltage 5V |
| SW | Button |
| X | X Axis |
| Y | Y Axis |
3 Basic Device Operation
- It has two analog outputs and one digital output. The two analog outputs are measured as X and Y values as the calibrated resistance of the two potentiometers. The digital output is measured as Z value indicating whether or not the button is pressed.
- We extend all three outputs: X, Y and Z and users can use them easily.
4 Applications
The Matrix-Joystick module outputs analog signals which can be converted to digital signals with an ADC converter e.g. the Matrix-Analog_to_Digital_Converter.
For more details about the Matrix-Analog_to_Digital_Converter module refer to wiki: Matrix_-_Analog_to_Digital_Converter.
4.1 Connect to NanoPi M1
Refer to the following connection diagram to connect the module to the NanoPi M1:

Connection Details:
| Matrix-Joystick | |
| GND | NanoPi M1 Pin9 |
| 5V | NanoPi M1 Pin2 |
| X | Matrix-Analog_to_Digital_Converter A1 |
| Y | Matrix-Analog_to_Digital_Converter A2 |
4.2 Connect to NanoPi 2
Refer to the following connection diagram to connect the module to the NanoPi 2:

Connection Details:
| Matrix-Joystick | |
| GND | NanoPi 2 Pin9 |
| 5V | NanoPi 2 Pin2 |
| X | Matrix-Analog_to_Digital_Converter A1 |
| Y | Matrix-Analog_to_Digital_Converter A2 |
4.3 Connect to NanoPi M2 / NanoPi 2 Fire
Refer to the following connection diagram to connect the module to the NanoPi M2/ NanoPi 2 Fire:
Matrix_Joystick_nanopi_m2
Connection Details:
| Matrix-Joystick | |
| GND | NanoPi M2 Pin9 |
| 5V | NanoPi M2 Pin2 |
| X | Matrix-Analog_to_Digital_Converter A1 |
| Y | Matrix-Analog_to_Digital_Converter A2 |
4.4 Connect to NanoPC-T2
Refer to the following connection diagram to connect the module to the NanoPC-T2:
Matrix_Joystick_NanoPC-T2
Connection Details:
| Matrix-Joystick | |
| GND | NanoPC-T2 USB Host GND |
| 5V | NanoPC-T2 USB Host 5V |
| X | Matrix-Analog_to_Digital_Converter A1 |
| Y | Matrix-Analog_to_Digital_Converter A2 |
5 Compile & Run Test Program
Boot your ARM board with Debian and copy the matrix code:
$ apt-get update && apt-get install git
$ git clone https://github.com/friendlyarm/matrix.git
If your cloning is done successfully a "matrix" directory will be generated.
Compile and install Matrix:
$ cd matrix
$ make && make install
Run test program:
$ matrix-joystickNote: this module is not plug and play therefore before running the module please make sure it is connected to an ARM board.
Here is what you should observe:
x=1280 y=1280
When you move the stick you will see X and Y's value changes.
6 Code Sample
This Matrix code sample can work with all the ARM boards mentioned in this module's wiki. The name of this code sample is "matrix-joystick". Here is its source code:
int main(int argc, char ** argv)
{
    int i = 0;
    int x, y, board;

    x = y = 0;
    if ((board = boardInit()) < 0) {
        printf("Fail to init board\n");
        return -1;
    }

    system("modprobe "DRIVER_MODULE);
    signal(SIGINT, intHandler);
    for (i=0; i<PS2_READ_TIMES; i++) {
        if (pcf8591Read(1, &x) != -1 && pcf8591Read(2, &y) != -1) {
            printf("x=%4d y=%4d\n", x, y);
        }
    }
    system("rmmod "DRIVER_MODULE);
    return 0;
}
For more details about this APIs called in this code sample refer to Matrix API reference manual
7 Resources
8 Update Log
8.1 Feb-23-2016
- Added the description for "NanoPi 2 branch" in Section 4
- Added Section 5: Connect to NanoPi 2
8.2 June-21-2016
- Re-organized and simplified wiki

