Matrix - Joystick
Contents
1 Introduction
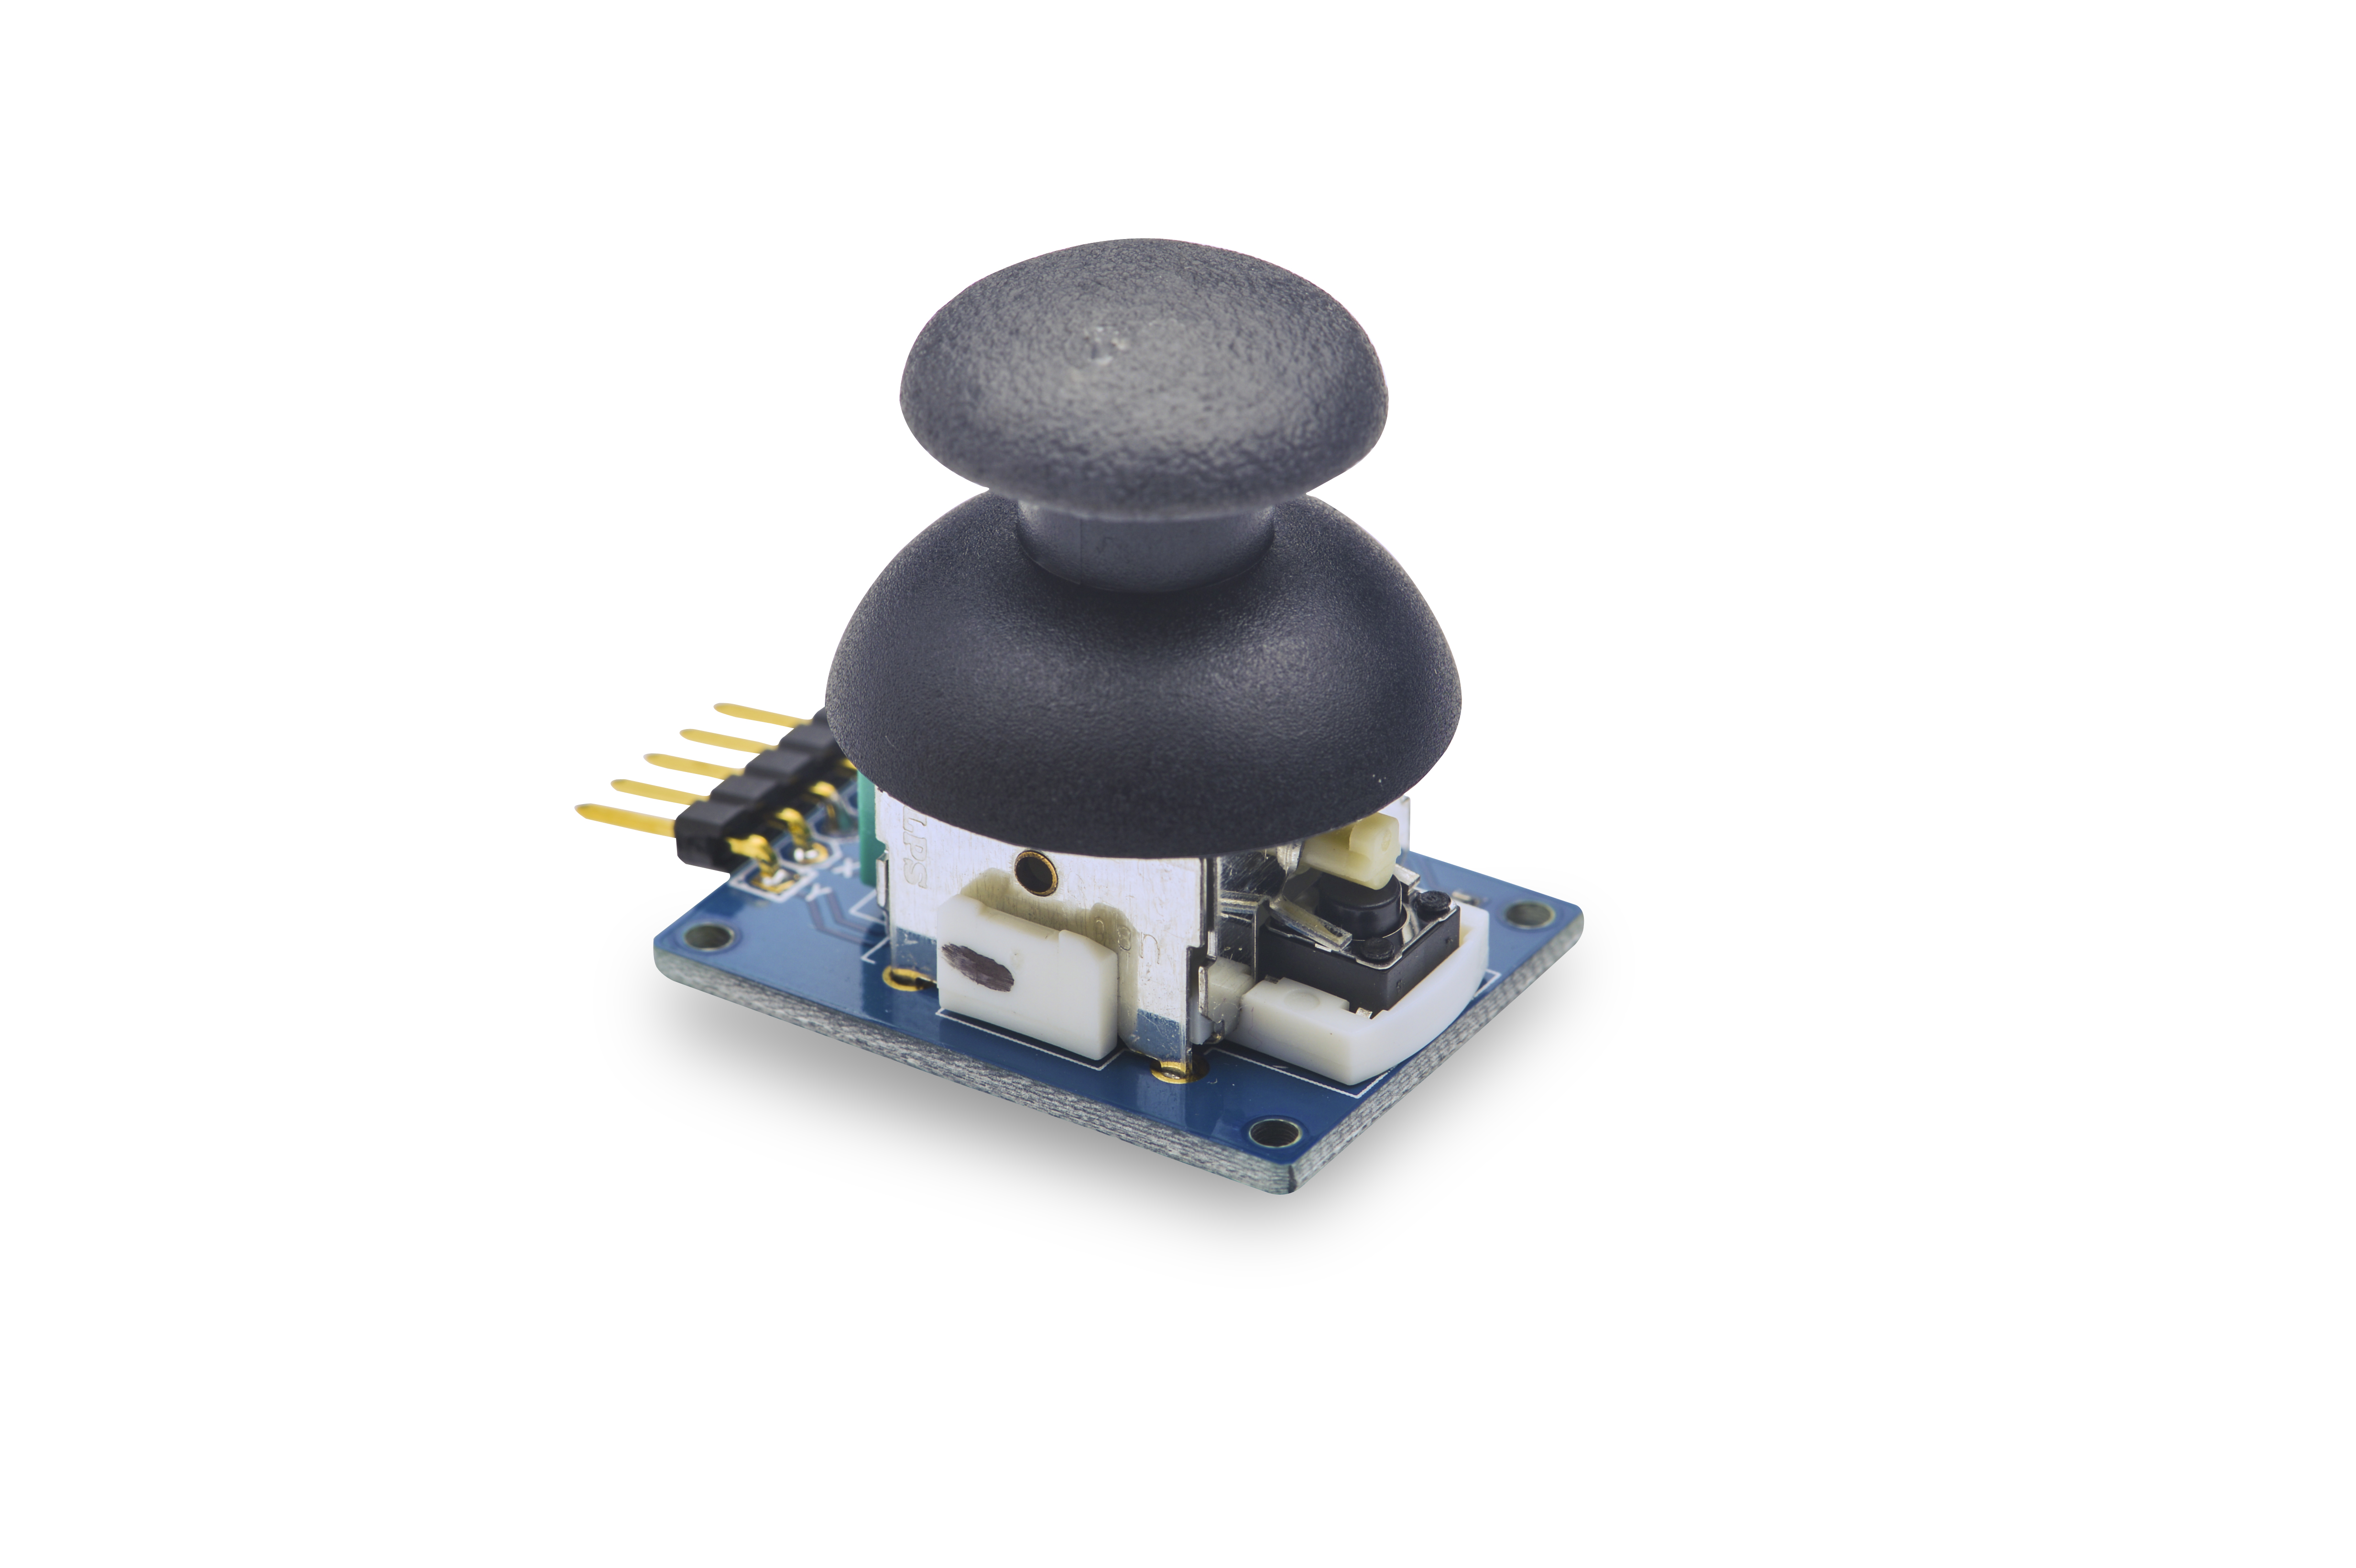
- The matrix-joystick module is a two-axis stick module. It consists of two Sliding rheostats and one button. It has two analog outputs and one digital output. Its positional states can be measured as X and Y axis values as the calibrated resistance of the two potentiometers.
- When you move the joystick the sliding rheostats' resistance will change and the corresponding x/y values will change too. When you push the joystick the SW level will turn low.
2 Features
- X and Y axis, and one button
- 2.54mm spacing pin
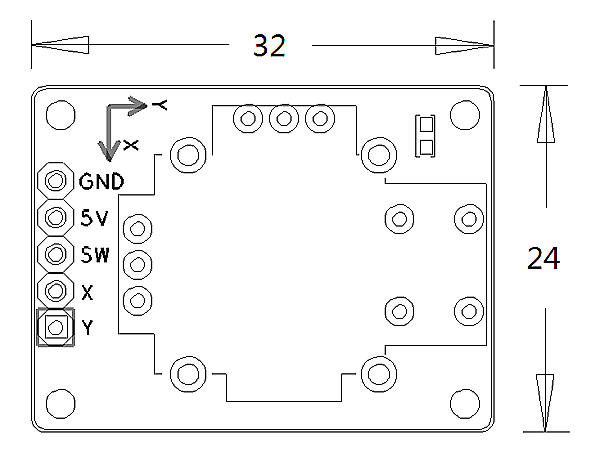
- PCB dimension(mm): 24 X 32
- Pin Description:
| Pin | Description |
| GND | Ground |
| 5V | Supply Voltage 5V |
| SW | Button |
| X | X Axis |
| Y | Y Axis |
3 Basic Device Operation
- It has two analog outputs and one digital output. The two analog outputs are measured as X and Y values as the calibrated resistance of the two potentiometers. The digital output is measured as Z value indicating whether or not the button is pressed.
- We extend all three outputs: X, Y and Z and users can use them easily.
4 Download Matrix Source Code
All the matrix modules' code samples are open source. They are maintained on GitHub - https://github.com/friendlyarm/matrix.git
Each branch in this hub contains the matrix modules' code samples for a board that the matrix modules can work with.
- The nanopi branch contains the matrix modules' code samples for the NanoPi
- The nanopi 2 branch contains the matrix modules' code samples for the NanoPi 2
- The tiny4412 branch contains the matrix modules' code samples for the Tiny4412
- The raspberrypi branch contains the matrix modules' code samples for the RaspberryPi
Please follow the steps below to get the source code:
Install the git utility on a PC running Ubuntu14.04
$ sudo apt-get install git
Clone the matrix code from GitHub
$ git clone https://github.com/friendlyarm/matrix.git
If this is successful a "matrix" directory will be generated, which will contain all the matrix modules' code samples.
5 Connect to NanoPi 2
5.1 Hardware Connection
Please refer to the following connection diagram to connect the Matrix-Joystick to the NanoPi 2:
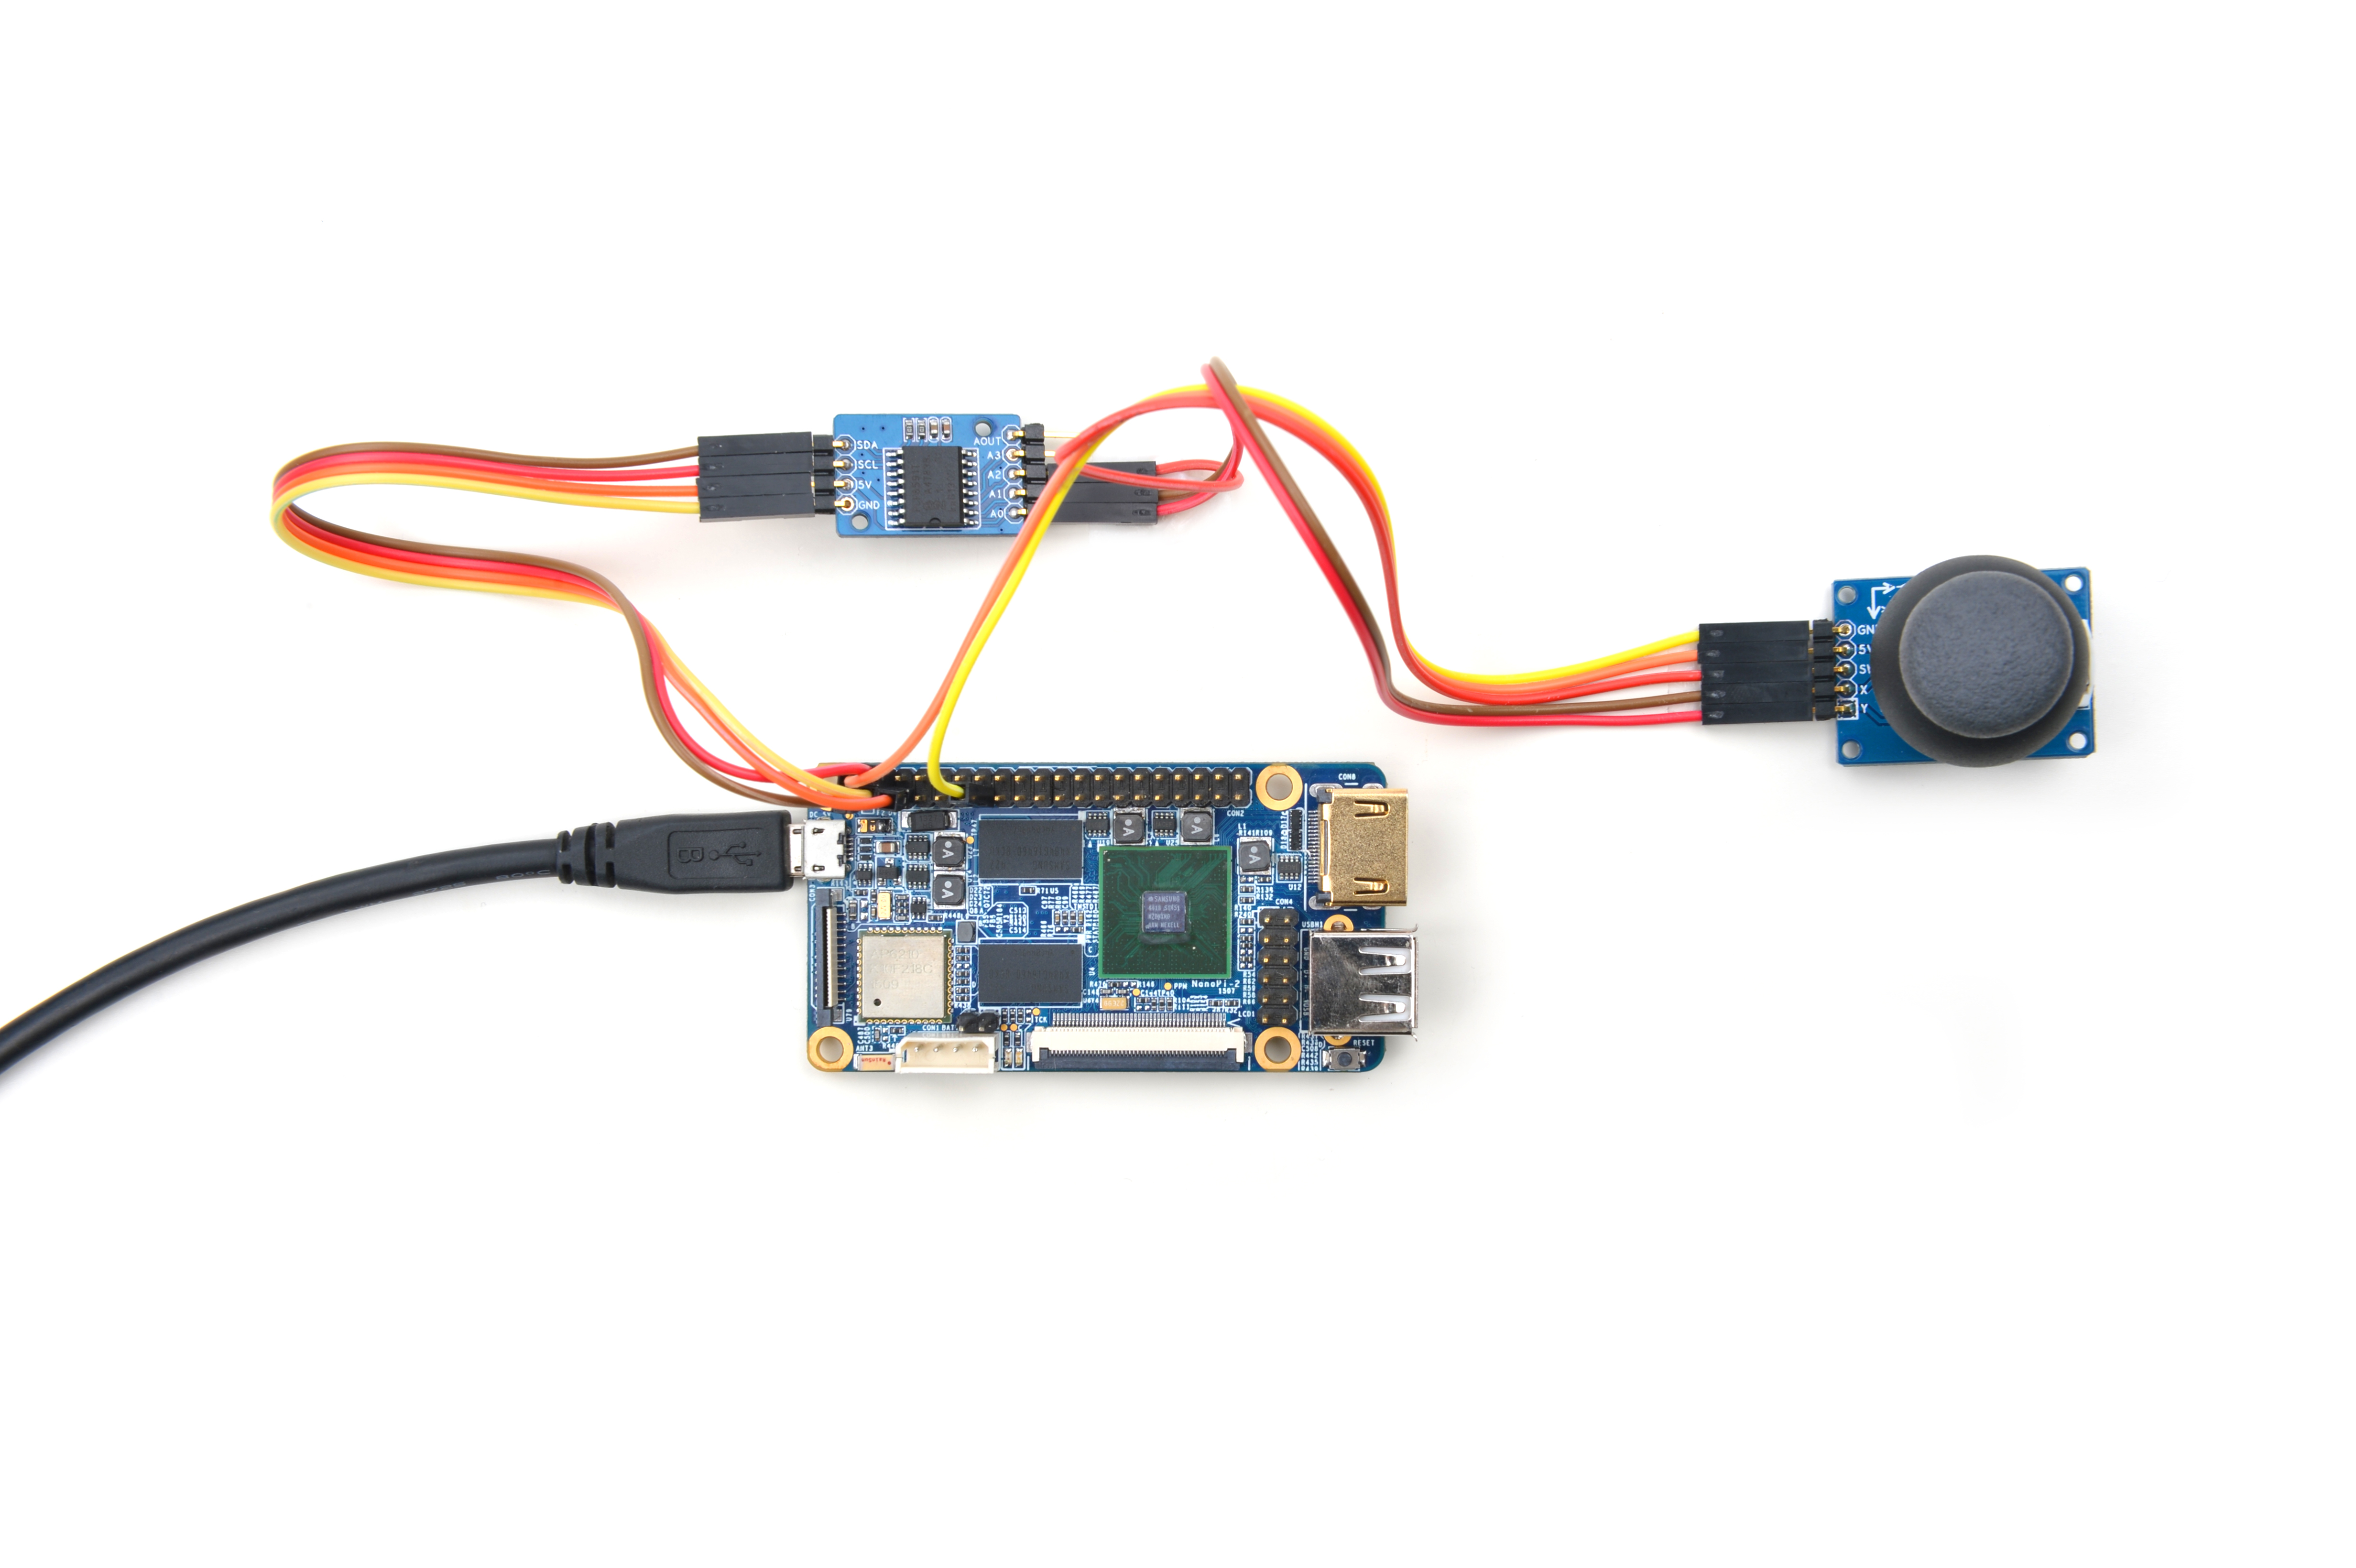
Connection Details:
| Matrix-Joystick | |
| GND | NanoPi 2 Pin14 |
| 5V | NanoPi 2 Pin2 |
| X | Matrix-Analog_to_Digital_Converter A1 |
| Y | Matrix-Analog_to_Digital_Converter A2 |
5.2 Compile Test Program
Please login the matrix hub and enter the nanopi2 branch
$ cd matrix
$ git checkout nanopi2
Compile the matrix code
$ make CROSS_COMPILE=arm-linux- clean
$ make CROSS_COMPILE=arm-linux-
$ make CROSS_COMPILE=arm-linux- install
Note: please make sure to install the cross compiler "arm-linux-gcc-4.9.3" on your PC, which is used to compile files for the NanoPi 2.
Generated library files are under the "install/lib" directory. The test program is under the "install/usr/bin" directory.
The modules are under the "modules" directory. The driver's source code is in github: https://github.com/friendlyarm/linux-3.4.y.git
5.3 运行测试程序
将带有Debian系统的SD卡插入一台运行Linux的电脑,可以挂载SD卡上的boot和rootfs分区。
假设rootfs分区的挂载路径为/media/rootfs,执行以下命令将Matrix的硬件驱动、库文件和测试程序拷贝到NanoPi 2的文件系统上。
$ cp modules /media/rootfs/ -r
$ cp install/lib/* /media/rootfs/lib/ -d
$ cp install/usr/bin/* /media/rootfs/usr/bin/
将SD卡重新插入NanoPi 2,上电启动,在Debian的shell终端中执行以下命令加载硬件驱动。
$ cd /modules
$ insmod pcf8591.ko
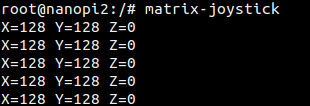
运行模块Matrix-Joystick的测试程序。
$ matrix-joystick5.4 Code Sample
int main(int argc, char ** argv)
{
    int i = 0;
    int x, y;

    x = y = 0;
    for (i=0; i<PS2_READ_TIMES; i++) {
        if (pcf8591Read(1, &x) != -1 && pcf8591Read(2, &y) != -1) {
            printf("x=%4d y=%4d\n", x, y);
        }
    }
    return 0;
}
6 Connect to NanoPi
6.1 Preparations
Please install a Debian on a NanoPi and an appropriate cross compiler on a PC. Please refer to wiki: NanoPi
Compile a NanoPi kernel. Note: please use the kernel's source code from the nanopi-v4.1.y-matrix branch.
$ git clone https://github.com/friendlyarm/linux-4.x.y.git
$ cd linux-4.x.y
$ git checkout nanopi-v4.1.y-matrix
$ make nanopi_defconfig
$ touch .scmversion
$ make
6.2 Hardware Connection
Please refer to the following connection diagram to connect the Matrix-Joystick and Matrix-Analog_to_Digital_Converter to the NanoPi
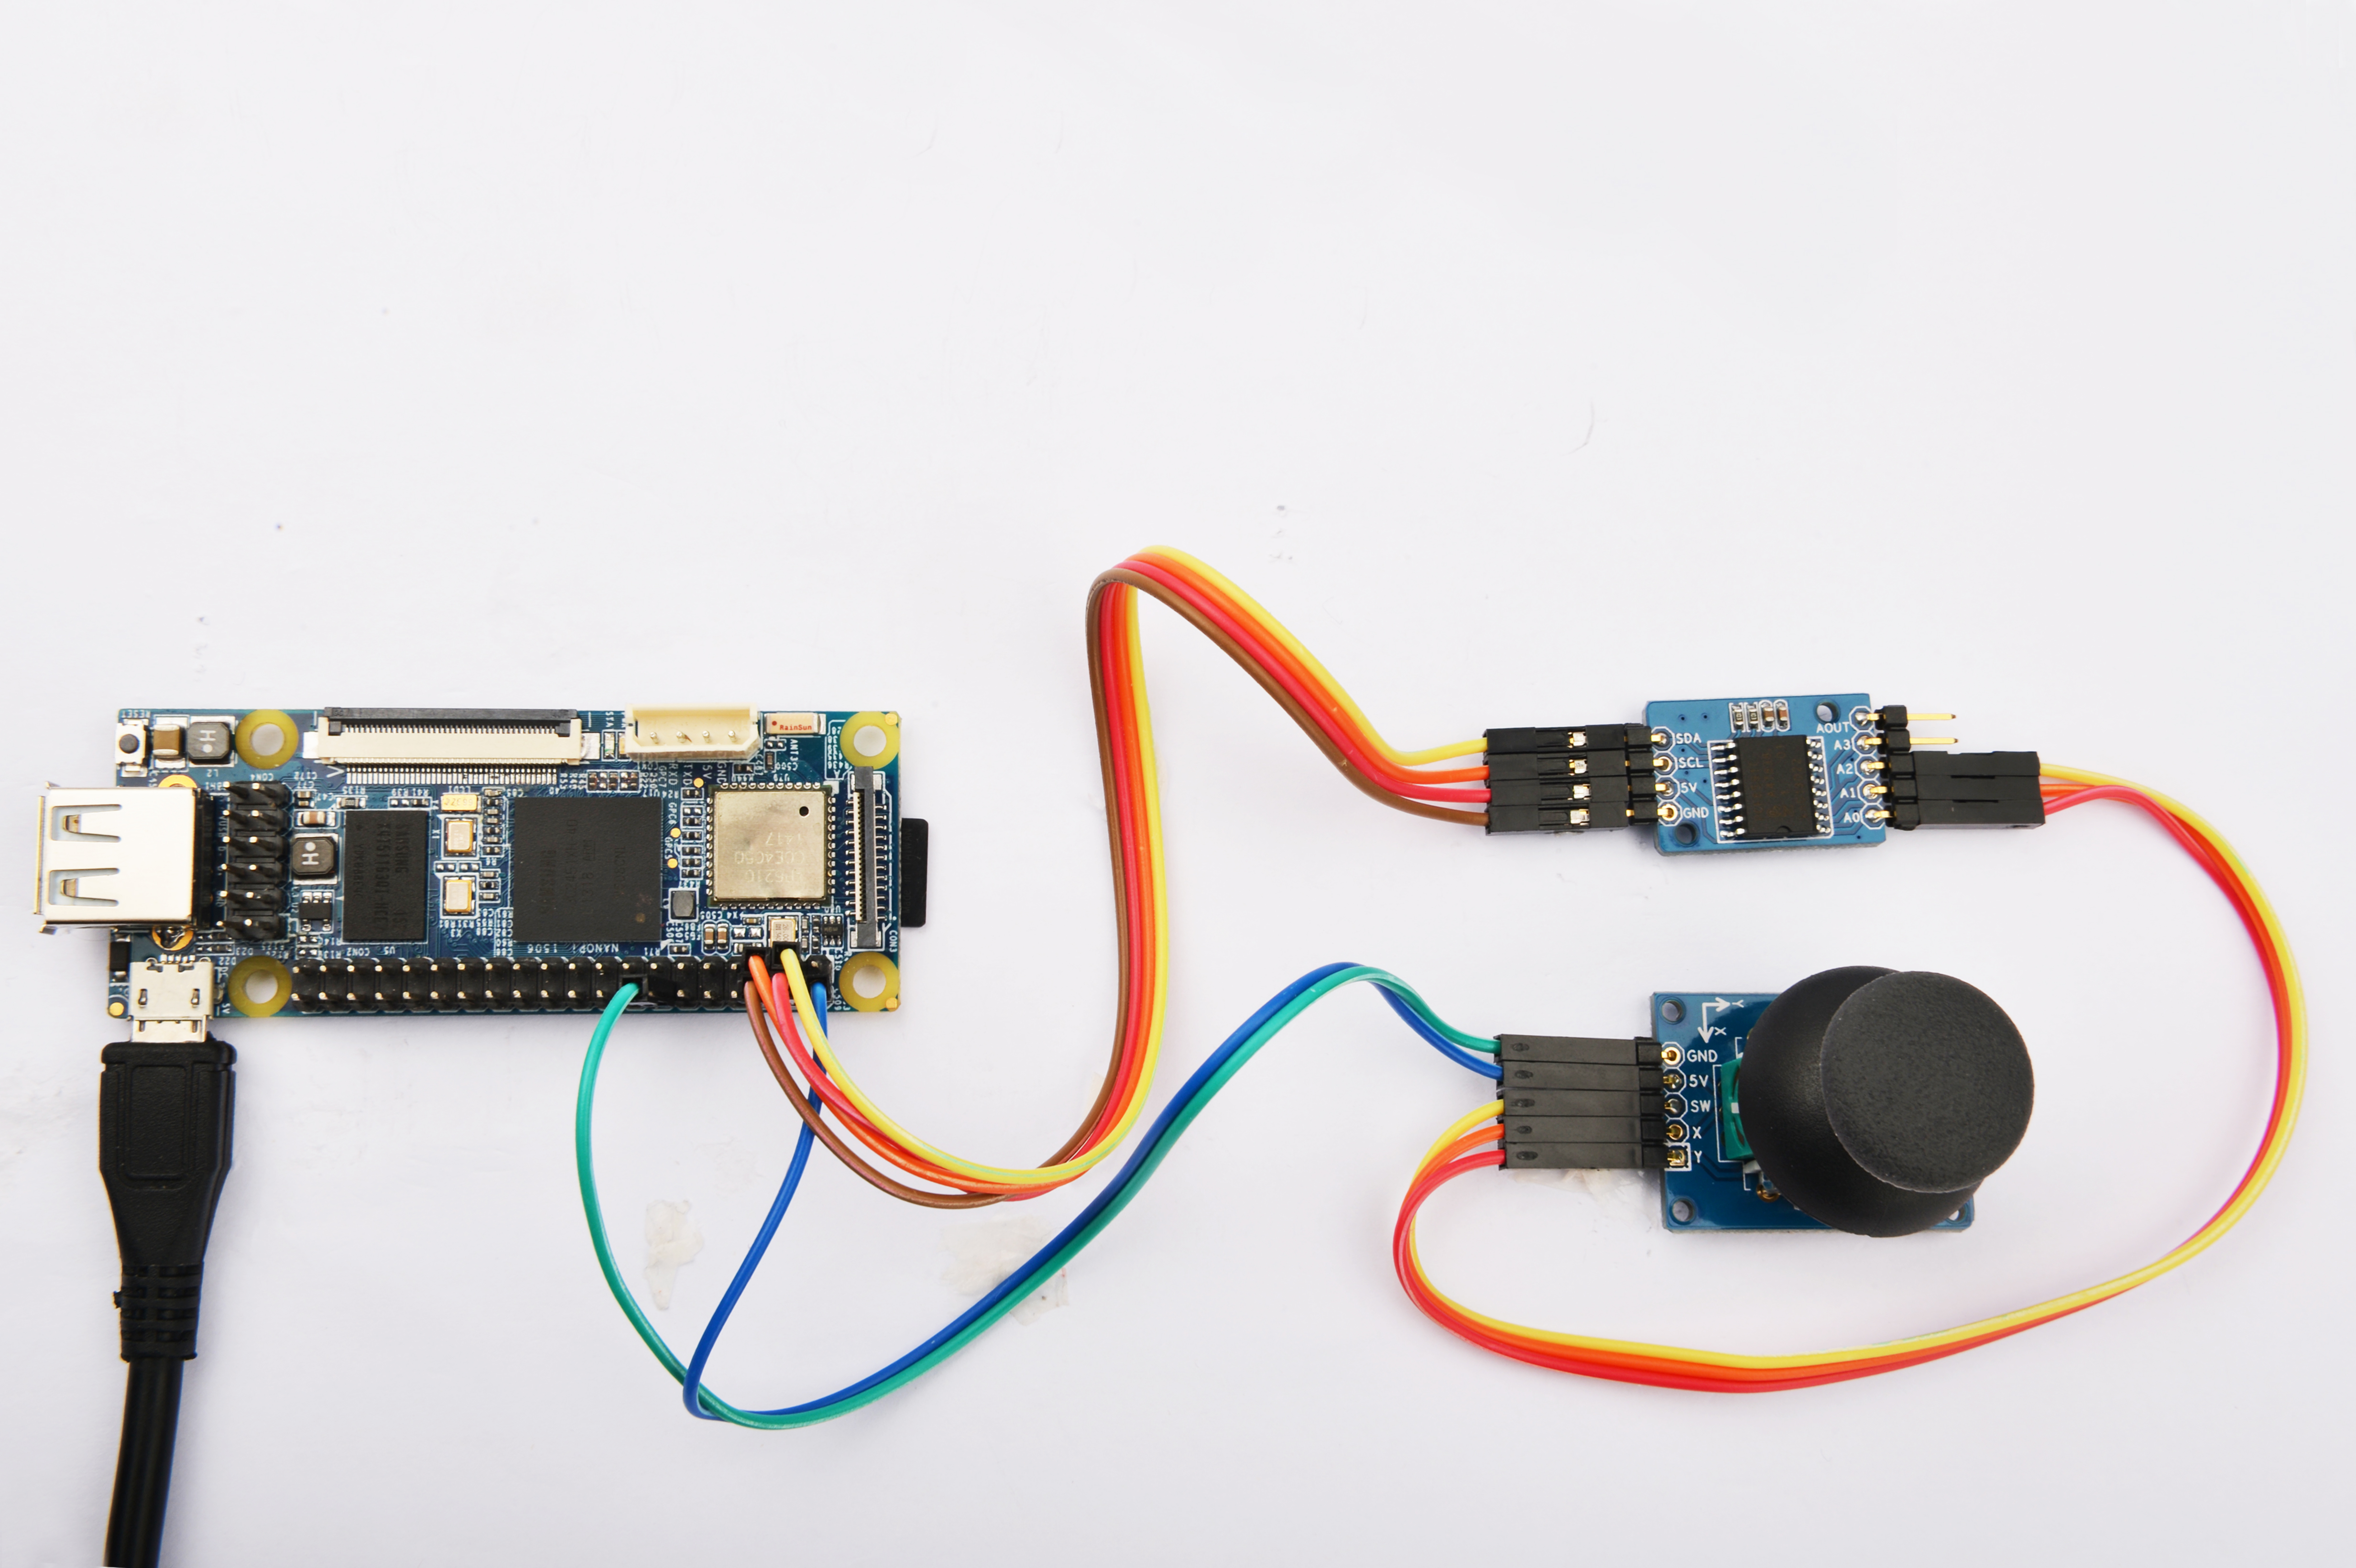
Connection Details:
| Matrix-Joystick | |
| GND | NanoPi Pin14 |
| 5V | NanoPi Pin2 |
| SW | Matrix-Analog_to_Digital_Converter A2 |
| X | Matrix-Analog_to_Digital_Converter A1 |
| Y | Matrix-Analog_to_Digital_Converter A0 |
6.3 Compile Test Program
Please login the matrix hub and enter the nanopi branch
$ cd matrix
$ git checkout nanopi
Compile the matrix code
$ make CROSS_COMPILE=arm-linux- clean
$ make CROSS_COMPILE=arm-linux-
$ make CROSS_COMPILE=arm-linux- install
Note: please make sure to install the cross compiler "arm-linux-gcc-4.4.3" on your PC, which is used to compile files for the NanoPi-Debian.
Generated library files are under the "install/lib" directory. Applications are under the "install/usr/bin" directory. The test program for the "Matrix-Joystick" module is "matrix-joystick".
6.4 Run Test Program
Please copy the library files and test program to the NanoPi
$ cp install/usr/bin/* nanopi_rootfs/usr/bin/
$ cp install/lib/* nanopi_rootfs/lib/ -d
Power on the NanoPi and run the following command in Debian's terminal
$ matrix-joystick6.5 Code Sample
int main(int argc, char ** argv)
{
	int mode = 0x0;

	if ((devFD = pcf8591Init()) == -1) {
        printf("Fail to init pcf8591 AD\n");
        return -1;
    }
    if (pcf8591SetCtrl(devFD, PCF8591_INIT_AD_CONTROL) == -1) {
        printf("Fail to Set pcf8591 control AD\n");
        pcf8591DeInit(devFD);
        return -1;
    }

    int i = 0;
	int x, y, z;
	signal(SIGINT, PS2Handler);
	for (i=0; i<PS2_READ_TIMES; i++) {
		x = pcf8591Read(devFD, mode, PCF8591_AIN_CHANNEL0);
		y = pcf8591Read(devFD, mode, PCF8591_AIN_CHANNEL1);
		z = pcf8591Read(devFD, mode, PCF8591_AIN_CHANNEL2);
		if (z > SW_TRIGGER) {
			z = 0;
		} else {
			z = 1;
		}
		printf("X=%3d Y=%3d Z=%d\n", x, y, z);
		sleep(1);
	}
	pcf8591DeInit(devFD);
	return 0;
}
7 Connect to Tiny4412
7.1 Preparations
Please refer to the Tiny4412's user's manual to install a UbuntuCore on the Tiny4412 and install an appropriate cross compiler on a PC.
Note: only the Tiny4412SDK-1506 carrier board can work with this module.
7.2 Hardware Connection
Please refer to the following diagram to connect the Matrix-Joystick and Matrix-Analog_to_Digital_Converter to the Tiny4412
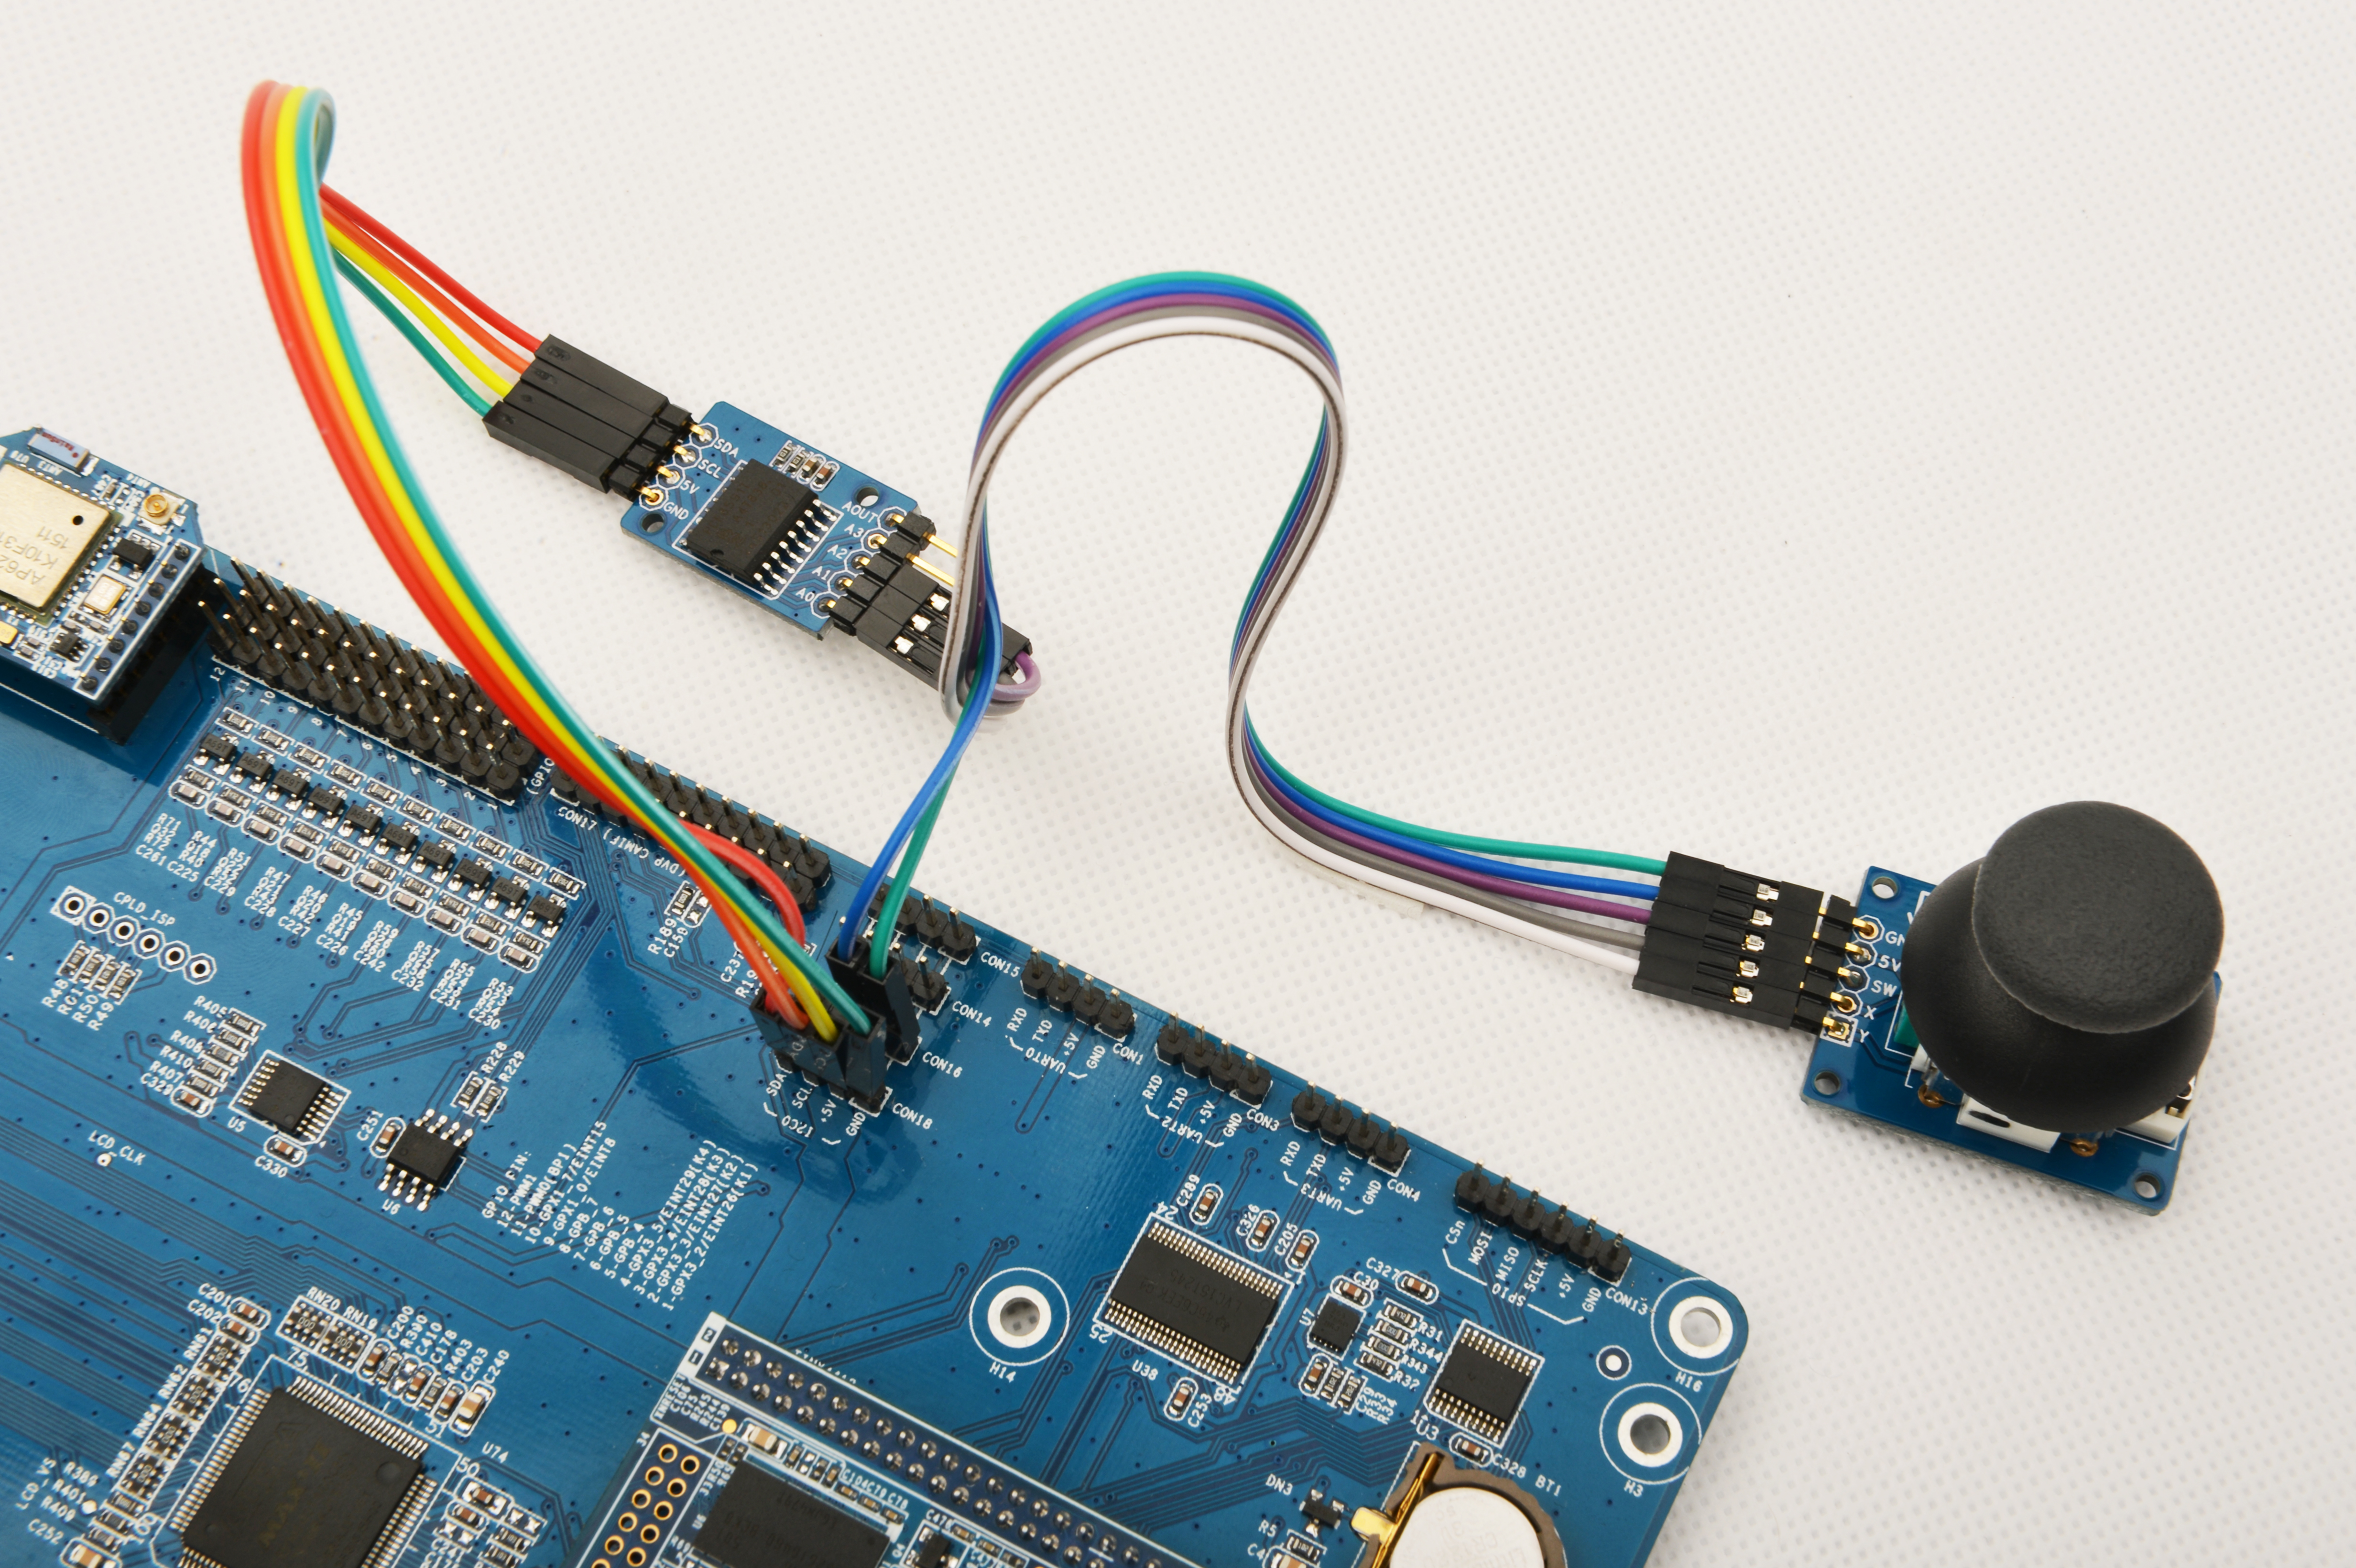
Connection Details:
| Matrix-Joystick | |
| GND | Tiny4412 CON16 GND |
| 5V | Tiny4412 CON16 5V |
| SW | Matrix-Analog_to_Digital_Converter A2 |
| X | Matrix-Analog_to_Digital_Converter A1 |
| Y | Matrix-Analog_to_Digital_Converter A0 |
7.3 Compile Test Program
Please login the Matrix hub and enter the matrix-tiny4412 branch
$ cd matrix
$ git checkout tiny4412
Compile the matrix code
$ make CROSS_COMPILE=arm-linux-gnueabihf- clean
$ make CROSS_COMPILE=arm-linux-gnueabihf-
$ make CROSS_COMPILE=arm-linux-gnueabihf- install
Note: please make sure to install the cross compiler "arm-linux-gnueabihf-gcc-4.7.3" on your PC, which is used to compile files for the Tiny4412-UbuntuCore.
Generated library files are under the "install/lib" directory. Applications are under the "install/usr/bin" directory. The test program for the "Matrix-Joystick" module is "matrix-joystick".
7.4 Run Test Program
Please copy the library files and test program to the Tiny4412
$ cp install/usr/bin/* tiny4412_rootfs/usr/bin/
$ cp install/lib/* tiny4412_rootfs/lib/ -d
Power on the Tiny4412 and run the following command in UbuntuCore's terminal
$ matrix-joystick7.5 Code Sample
int main(int argc, char ** argv)
{
	int mode = 0x0;

	if ((devFD = pcf8591Init()) == -1) {
        printf("Fail to init pcf8591 AD\n");
        return -1;
    }
    if (pcf8591SetCtrl(devFD, PCF8591_INIT_AD_CONTROL) == -1) {
        printf("Fail to Set pcf8591 control AD\n");
        pcf8591DeInit(devFD);
        return -1;
    }

    int i = 0;
	int x, y, z;
	signal(SIGINT, PS2Handler);
	for (i=0; i<PS2_READ_TIMES; i++) {
		x = pcf8591Read(devFD, mode, PCF8591_AIN_CHANNEL0);
		y = pcf8591Read(devFD, mode, PCF8591_AIN_CHANNEL1);
		z = pcf8591Read(devFD, mode, PCF8591_AIN_CHANNEL2);
		if (z > SW_TRIGGER) {
			z = 0;
		} else {
			z = 1;
		}
		printf("X=%3d Y=%3d Z=%d\n", x, y, z);
		sleep(1);
	}
	pcf8591DeInit(devFD);
	return 0;
}
8 Connect to RaspberryPi
9 Connect to Arduino
10 Resources
11 Update Log
11.1 Feb-23-2016
- Added the description for "NanoPi 2 branch" in Section 4
- Added Section 5: Connect to NanoPi 2
