NanoPi R1
Contents
1 Introduction
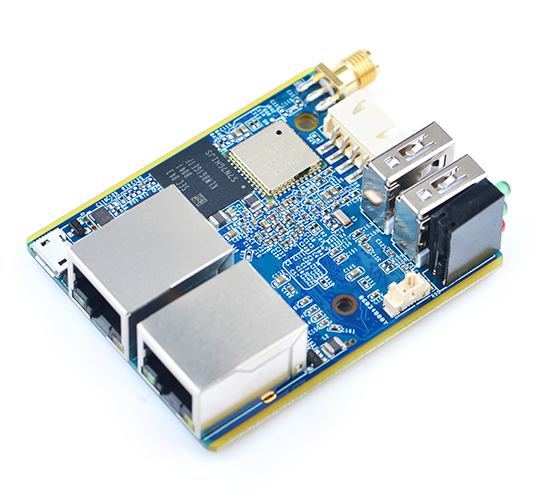
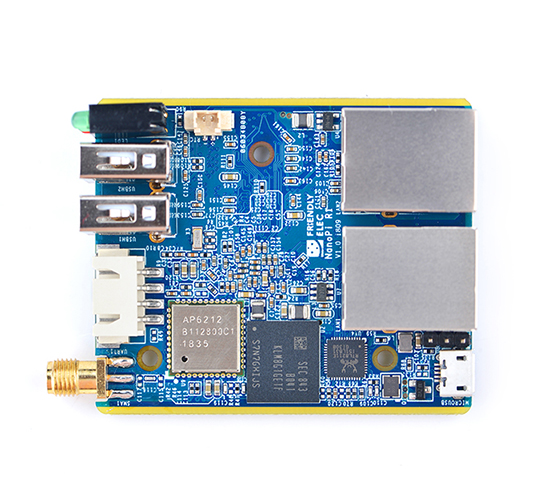
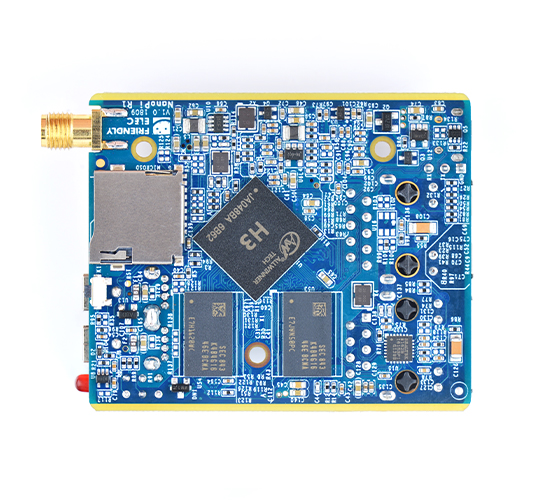
- The NanoPi R1("R1") is a complete open source board developed by FriendlyElec for makers, hobbyists, fans and etc.
- The NanoPi R1 has one Gbps Ethernet port and one Fast Ethernet port. It has an onboard 2.4G Wi-Fi module. FriendlyElec ported OpenWRT to the R1. With some additional settings it will work like a router.Its good networking performance and features make it a good platform for various network applications.
2 Hardware Spec
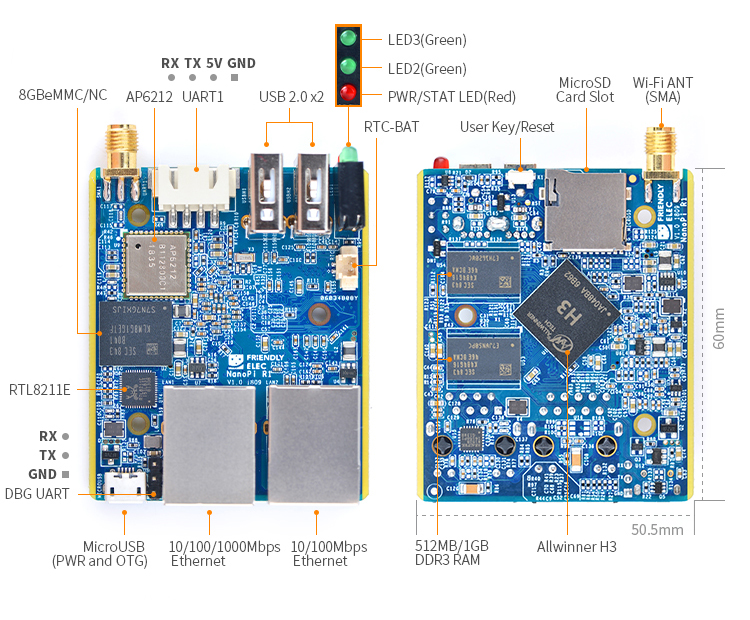
- CPU: Allwinner H3, Quad-core Cortex-A7 Up to 1.2GHz
- DDR3 RAM: 512MB/1GB
- Storage: NC/8GB eMMC
- Network:
- 10/100/1000M Ethernet x 1,
- 10/100M Ethernet x 1
- WiFi: 802.11b/g/n, with SMA antenna interface
- Bluetooth:4.0 dual mode
- USB Host: Type-A x2
- MicroSD Slot x 1
- MicroUSB: for OTG and power input
- Debug Serial Port: 3Pin 2.54mm pitch pin-header
- UART: 4Pin 2.54mm pitch pin-header
- LED: LED x 3
- KEY: KEY x 1
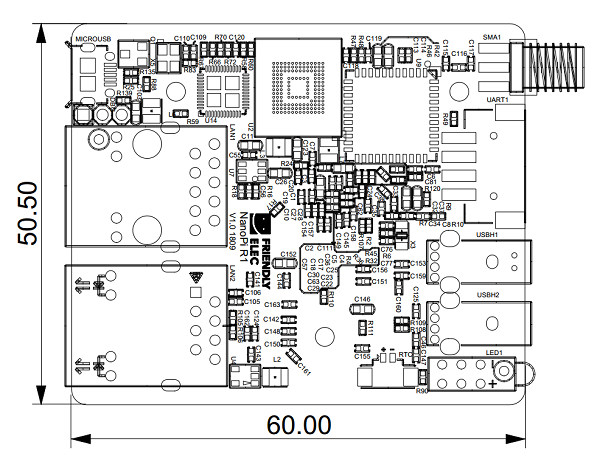
- PC Size: 50.5 x 60mm
- Power Supply: DC 5V/2A
- Temperature measuring range: -40℃ to 80℃
- OS/Software: U-boot,Ubuntu-Core,OpenWRT
- Weight: xxg
3 Diagram, Layout and Dimension
3.1 Layout
3.2 Board Dimension
- For more details refer to:NanoPi_R1 pcb file in dxf format
4 Get Started
4.1 Essentials You Need
Before starting to use your NanoPi R1 get the following items ready
- NanoPi R1
- MicroSD Card/TF Card: Class 10 or Above, minimum 8GB SDHC
- MicroUSB 5V/2A power adapter
- A host computer running Ubuntu 16.04 64-bit system
4.2 TF Cards We Tested
To make your NanoPi R1 boot and run fast we highly recommend you use a Class10 8GB SDHC TF card or a better one. The following cards are what we used in all our test cases presented here:
- SanDisk TF 8G Class10 Micro/SD High Speed TF card:
- SanDisk TF128G MicroSDXC TF 128G Class10 48MB/S:
- 川宇 8G C10 High Speed class10 micro SD card:
4.3 Install OS
4.3.1 Download Image Files
Go to download link to download the image files under the officail-ROMs directory and the flashing utility under the tools directory:
Image Files nanopi-r1_sd_friendlycore-xenial_4.14_armhf_YYYYMMDD.img.zip FriendlyCore based on UbuntuCore and Linux-4.14 kernel nanopi-r1_sd_openwrt_4.14_armhf_YYYYMMDD.img.zip OpenWrt and Linux-4.14 kernel nanopi-r1_eflasher_friendlycore-xenial_4.14_armhf_YYYYMMDD.img.zip eflasher image which is used to install FriendlyCore(Linux-4.14) to eMMC nanopi-r1_eflasher_openwrt_4.14_armhf_YYYYMMDD.img.zip eflasher image which is used to install OpenWrt(Linux-4.14) to eMMC Flashing Utility win32diskimager.rar Windows utility. Under Linux users can use "dd"
4.3.1.1 Flash to eMMC
4.3.1.1.1 Flash OS with eflasher Utility
- For more details about eflasher refer to the wiki link: EFlasher。
- Extract the eflasher Image and win32diskimager.rar files. Insert a TF card(at least 4G) into a Windows PC and run the win32diskimager utility as administrator. On the utility's main window select your TF card's drive, the wanted image file and click on "write" to start flashing the TF card.
- Insert this card into your board's BOOT slot and power on (with a 5V/2A power source). If the green LED is on and the blue LED is blinking this indicates your board has successfully booted.
- If your board doesn't support HDMI or no monitor is connected you can select an OS by running the following command:
$ su root
$ eflasher
The password for "root" is "fa".
We take "nanopi-r1_eflasher_friendlycore-xenial_4.14_armhf_YYYYMMDD.img" as an example. After you run the "eflasher" command you will see the following messages:
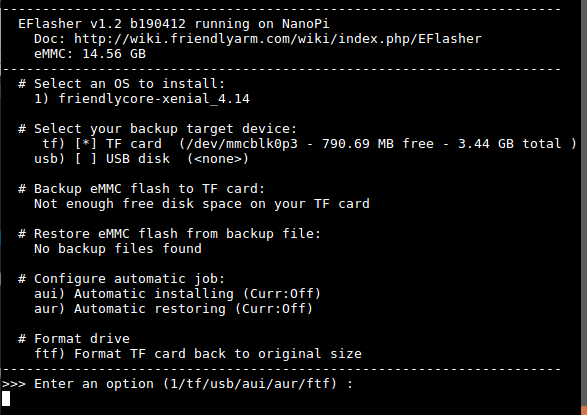
Type "1", select writing friendlycore system to eMMC you will see the following messages:
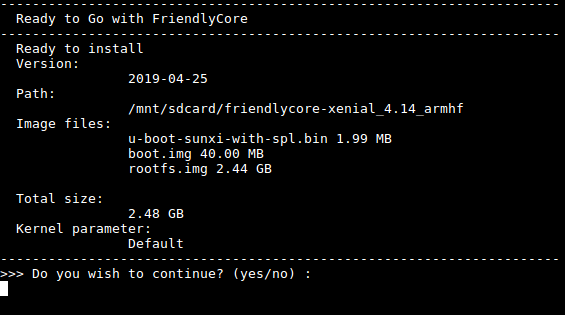
Type "yes" to start installation:

After it is done power off the system, take off the TF card, power on again your system will be booted from eMMC.
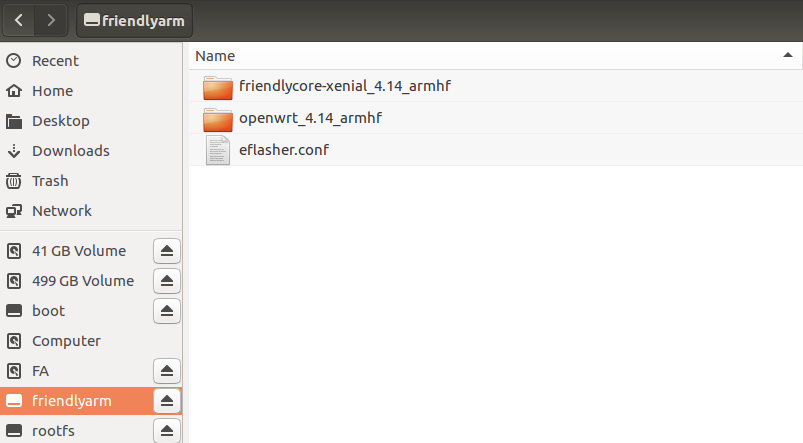
- If you want to flash other system to eMMC you can download the whole images-for-eflasher directory and extract the package under that directory to the FRIENDLYARM partition of an installation SD card.
5 How to Use OpenWrt
5.1 Introduction
OpenWrt is a highly extensible GNU/Linux variant for embedded devices. Unlike many other distributions for routers, OpenWrt is built from the ground up to be a full-featured, easily modifiable OS for a router. In practice this means you can have all the features with none of the bloat, powered by a Linux kernel that is more recent than most other distributions. For more details you can refer to OpenWrt website.
5.2 Login OpenWrt
- Login from serial port
Here is a hardware setup to connect your board to a serial device:
1) Connect your board to a FriendlyElec's PSU_ONECOM module. Both the module's DC port and the board's MicroUSB need to be powered by a 5V/2A power supply.Note: insufficient power supply may not make the system work normally.
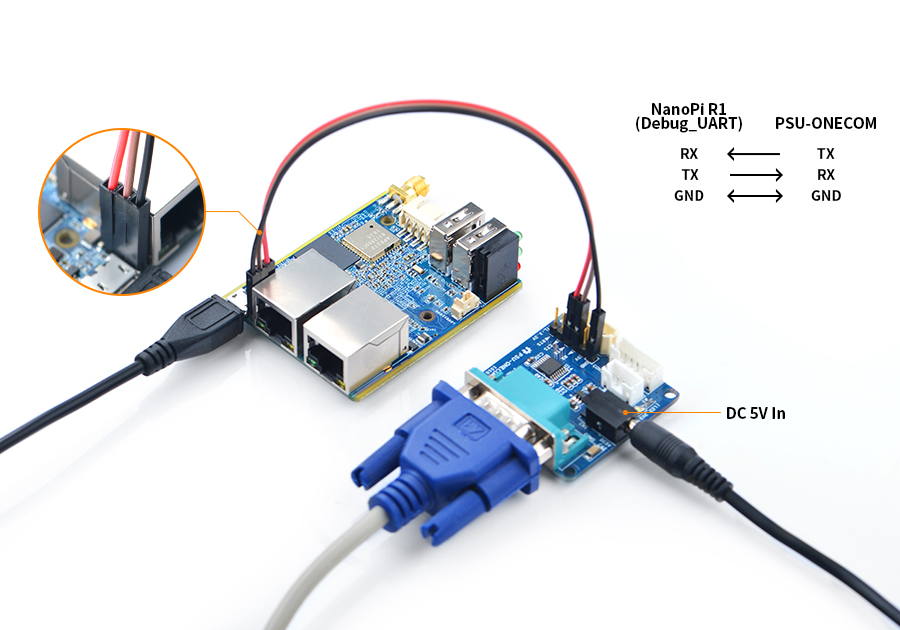
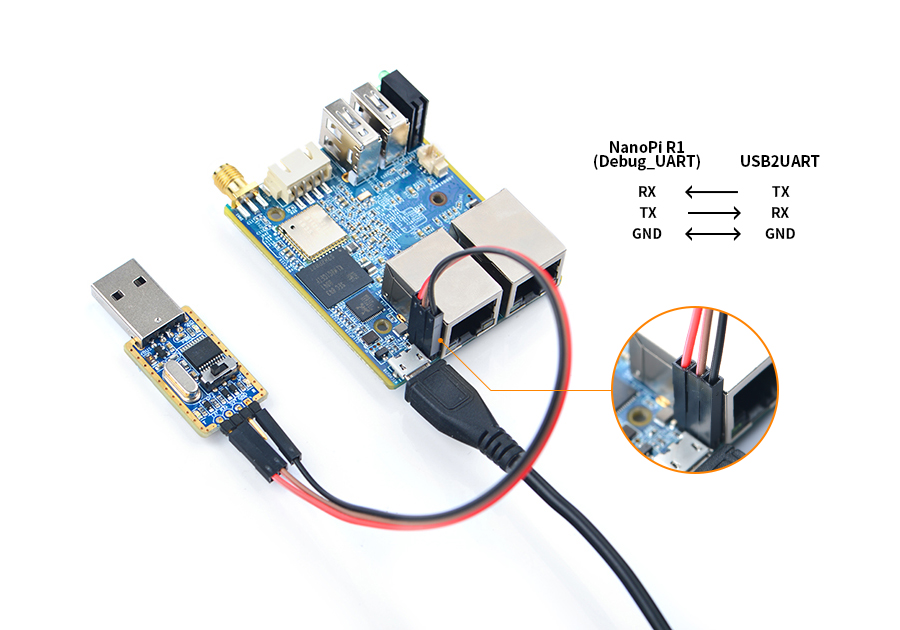
2) Connect your board to a FriendlyElec's Matrix-USB2UART module. The board's MicroUSB needs to be powered by a 5V/2A power supply
By default a user logs in as "root" and doesn't need a password for "root". You can set a password for "root" by using the "passwd" command.
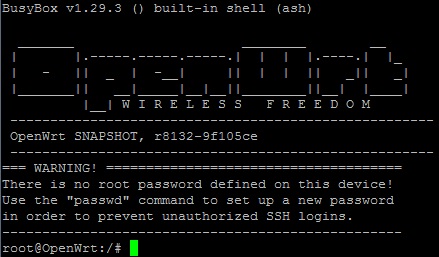
When your board is booted for the first time it will automatically extend its TF card's rootfs file system to its max available space:

This will take a while and you need to wait for the process to complete.
- Login via SSH
NanoPi R1的OpenWrt系统默认被配置为二级无线路由功能,其中千兆以太网口(eth0)被配置为WAN功能,百兆以太网口(eth1)被配置LAN功能。
如果您想通过SSH登录系统,那么启动系统前,请先用网线连接R1的千兆以太网口到一级路由器的LAN口,以便千兆以太网能通过DHCP获取到IP地址, 如下:
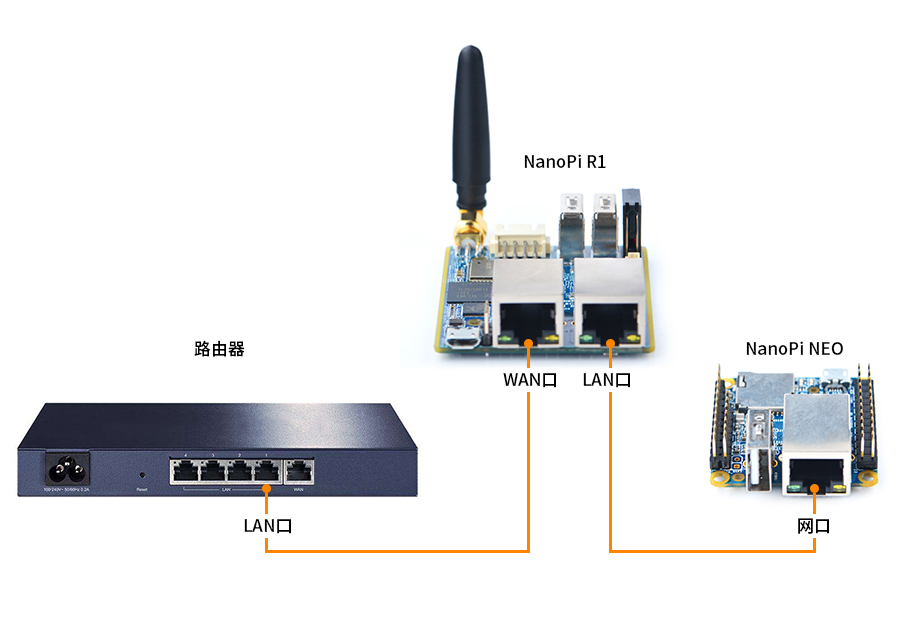
这里假设已经通过调试串口或者一级路由器确定板子的千兆以太网(eth0)的IP地址为192.168.1.163,执行下列命令可以通过SSH登录系统:
$ ssh root@192.168.1.163
系统默认设置root用户不需要密码就可以登录。
- Web登录
OpenWrt系统支持通过LuCI Web界面进行访问和配置,请参考<SSH登录>章节的设置启动系统,这里假设板子的千兆以太网的IP地址为192.168.1.163,在浏览器中输入该IP地址就可以登录OpenWrt-LuCI界面:
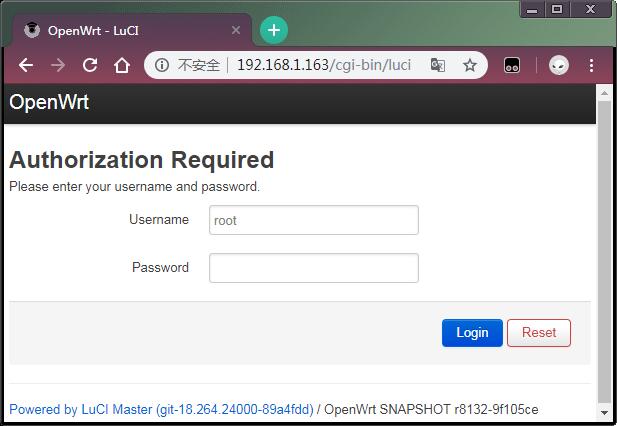
默认用户名为root,无需密码,所以直接点击"Login"按键即可登录。
- If you want to do kernel development you'd better get a serial communication board and connect this board to your R1.
Here is a hardware setup.
When your R1's serial port is connected to a serial board you can power your board from its MicroUSB port:
 USB2UART-R1
- By default a user logs in as root without a password. You can set the root's password by commanding "passwd".
- Run the following commands to install a language package(in our test we installed a Chinese package):
 opkg update
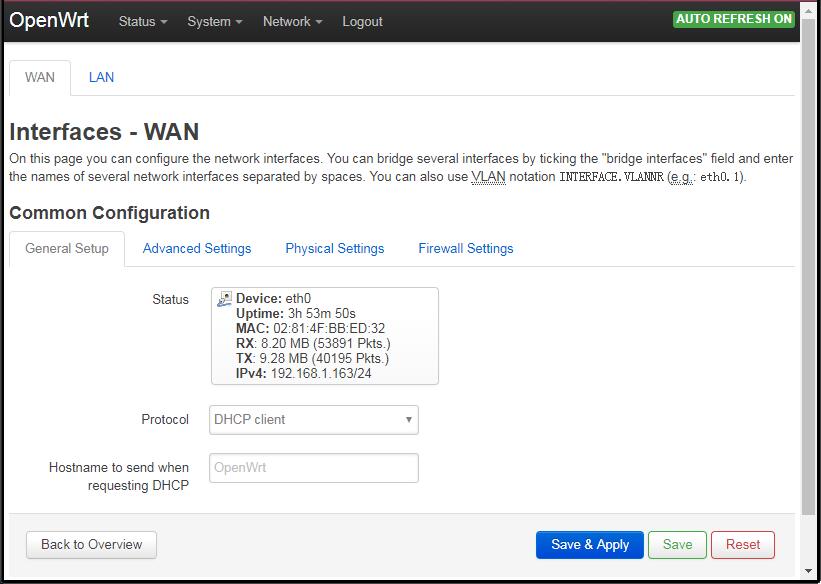
opkg install luci-i18n-base-zh-cn- By default a NanoPi R1 that runs OpenWrt is used as a secondary router. You can check its IP address from a main router by commanding "ifconfig" in a commandline utility(in our test the IP address was 192.168.1.163), type its IP address in the address bar of a browser to load the OpenWrt-LiCI page and type your user account and password to login(by default the password is not set and you can login without a password by clicking on the "Login" button).
5.2.1 Configure WAN and LAN
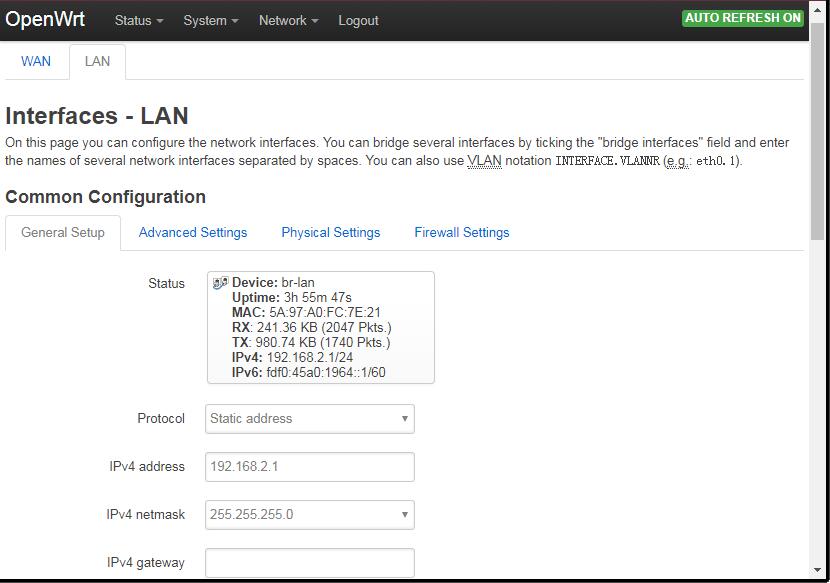
- After login, navigate to the top of the page, click on Network ---> Interfaces, and click on "WAN" and "LAN" to configure WAN and LAN.
5.2.2 Configure Wireless
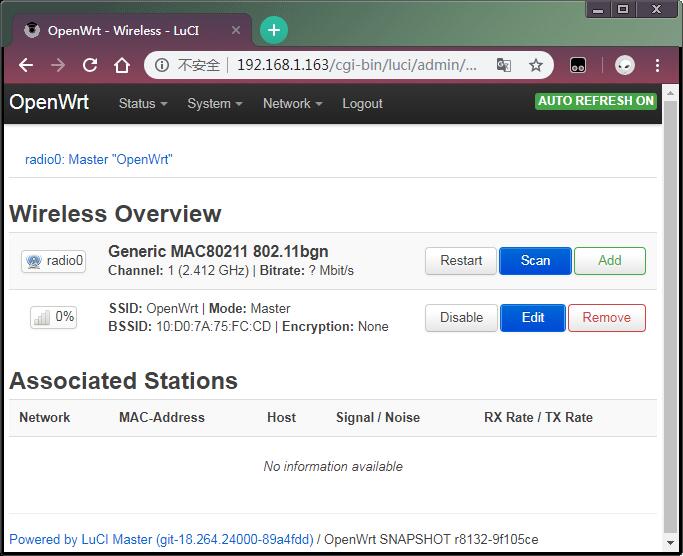
- After login, navigate to the top of the page, click on Network ---> Wireless, enter the configuration page for WiFi hotspot and click on "Edit" to configure WiFi hotspot.
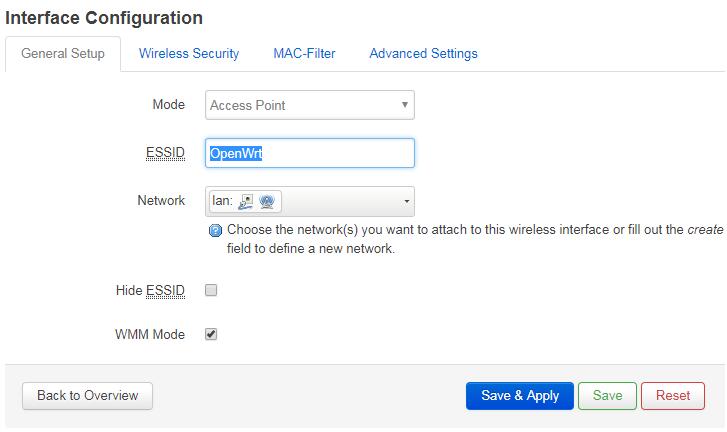
- Go to Interface Configuration ---> General Setup ---> ESSID and you can change your wifi hotspot's name. After you make your change click on Save & Apply to save your change.
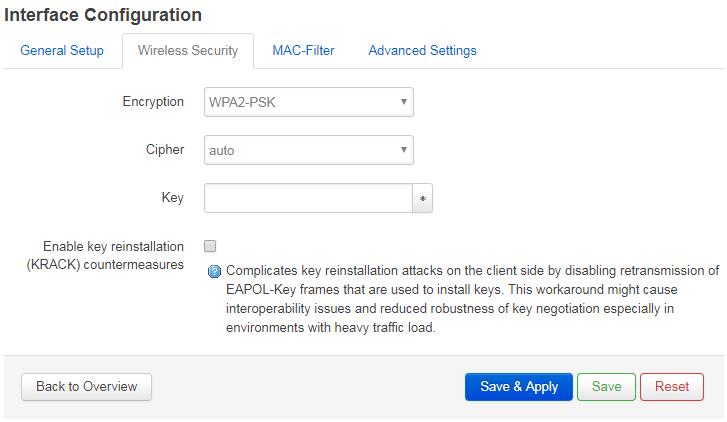
- Go to Interface Configuration ---> Wireless Security and you can reset your WiFi hotspot's Encryption. You can reset your WiFi hotspot's password in the "Key" field and click on Save & Apply to save your change.
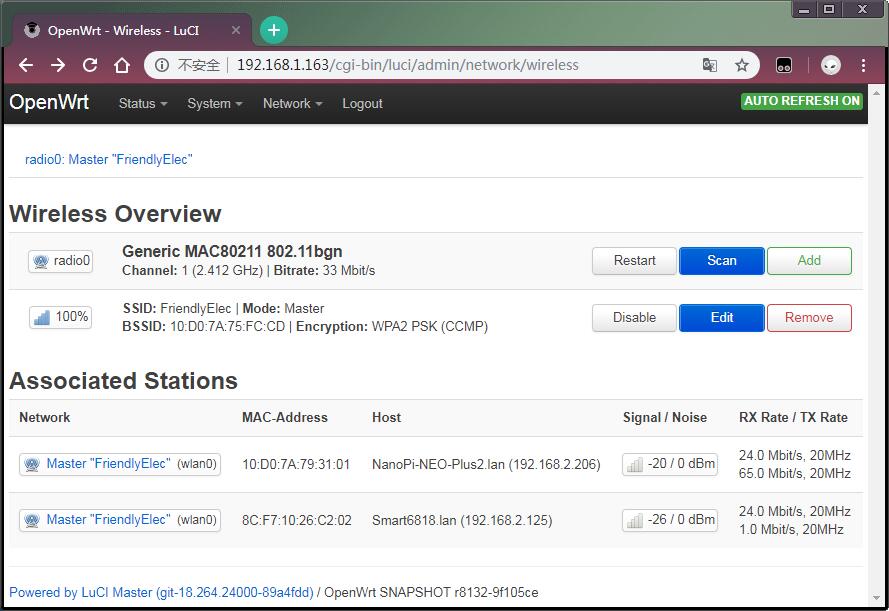
- Go to Network ---> Wireless and you can check all the available WiFi hotspot devices listed in "Associated Stations".
6 Developer's Guide
- System Development
- System Configurations
- Hardware Access
7 Resources
7.1 Schematics and Datasheets
- Schematics
- Dimensional Diagram
- H3 datasheet Allwinner_H3_Datasheet_V1.2.pdf
8 Update Log
8.1 Jan-02-2019
- Released English Version
