Difference between revisions of "NanoHat OLED"
From FriendlyELEC WiKi
| Line 1: | Line 1: | ||
[[NanoHat OLED/zh|查看中文]] | [[NanoHat OLED/zh|查看中文]] | ||
| + | |||
| + | ==介绍== | ||
| + | [[File:NanoHat Oled.png|thumb|0.96inch 128x64 OLED]] | ||
| + | *NanoHat OLED是一款精致小巧的单色OLED显示屏,只有0.96英寸,分辨率是128x64,对比度高,功耗低,可以用来显示文字或图案。通过I2C和NanoPi NEO通讯。 | ||
| + | *NanoHat OLED和NanoPi NEO的外形尺寸和接口完全相同,可直接堆叠在NanoPi NEO上使用。 | ||
| + | *板载了3个按键,用户可以自定义按键功能。板载了2.0mm 4Pin I2C接口插座,可外接其他I2C模块。 | ||
| + | |||
| + | ==特性== | ||
| + | * 屏幕尺寸:0.96英寸 | ||
| + | * 分辨率:128x64 | ||
| + | * 高对比度,低功耗 | ||
| + | * 板载3个按键 | ||
| + | * PCB尺寸(mm):40x40 | ||
| + | [[File:NanoHat OLED.png|frameless|400px|NanoHat OLEDPCB]] | ||
| + | |||
| + | * '''GPIO管脚定义''' | ||
| + | ::{| class="wikitable" | ||
| + | |- | ||
| + | |Pin# || Name || Linux gpio ||Pin# || Name || Linux gpio | ||
| + | |- | ||
| + | |1 || SYS_3.3V || ||2 || VDD_5V || | ||
| + | |- | ||
| + | |3 || I2C0_SDA || ||4 || VDD_5V || | ||
| + | |- | ||
| + | |5 || I2C0_SCL || ||6 || GND || | ||
| + | |- | ||
| + | |7 || NC || ||8 || NC || | ||
| + | |- | ||
| + | |9 || GND || ||10 || NC || | ||
| + | |- | ||
| + | |11 || K1 || 0 ||12 || NC || | ||
| + | |- | ||
| + | |13 || K2 || 2 ||14 || GND || | ||
| + | |- | ||
| + | |15 || K3 || 3 ||16 || NC || | ||
| + | |- | ||
| + | |17 || SYS_3.3V || ||18 || NC || | ||
| + | |- | ||
| + | |19 || NC || ||20 || GND || | ||
| + | |- | ||
| + | |21 || NC || ||22 || NC || | ||
| + | |- | ||
| + | |23 || NC || ||24 || NC || | ||
| + | |} | ||
| + | 12Pin排针未使用,引脚功能定义在此不列举,请在NanoPi NEO/Air/NEO2维基页面查阅。 | ||
| + | |||
| + | ==硬件连接== | ||
| + | 目前支持的开发板有NanoPi NEO/Air。 | ||
| + | NanoHat OLED模块和NanoPi NEO/Air尺寸和接口完全相同,可直接堆叠在NanoPi NEO/Air上使用。 | ||
| + | 参考下图连接模块:<br> | ||
| + | [[File:NanoHat OLED_nanopi_NEO.jpg|frameless|600px|NanoHat OLED_nanopi_NEO]] | ||
| + | |||
| + | 当前支持的开发板:<br /> | ||
| + | NanoPi NEO<br /> | ||
| + | NanoPi Fire<br /> | ||
| + | NanoPi NEO2<br /> | ||
| + | |||
| + | ==软件安装== | ||
| + | NanoHat OLED的演示程序包含在 NanoHatOLED 软件仓库里,在 Ubuntu core系统下,执行以下命令进行安装:<br /> | ||
| + | <syntaxhighlight lang="bash"> | ||
| + | git clone https://github.com/friendlyarm/NanoHatOLED.git | ||
| + | cd NanoHatOLED | ||
| + | sudo -H ./install.sh | ||
| + | </syntaxhighlight> | ||
| + | <br /> | ||
| + | 安装脚本会在线下载并安装一系列的软件包,安装时间视网络环境而定,国内用户为了获得更快的安装速度,可以在安装之前先将软件包的源设置为国内源,方法如下:<br /> | ||
| + | 首先,编辑文件 /etc/apt/sources.list,将里面的内容清空并更改为:<br /> | ||
| + | <syntaxhighlight lang="bash"> | ||
| + | deb http://mirrors.ustc.edu.cn/ubuntu-ports/ xenial main multiverse restricted universe | ||
| + | deb http://mirrors.ustc.edu.cn/ubuntu-ports/ xenial-backports main multiverse restricted universe | ||
| + | deb http://mirrors.ustc.edu.cn/ubuntu-ports/ xenial-proposed main multiverse restricted universe | ||
| + | deb http://mirrors.ustc.edu.cn/ubuntu-ports/ xenial-security main multiverse restricted universe | ||
| + | deb http://mirrors.ustc.edu.cn/ubuntu-ports/ xenial-updates main multiverse restricted universe | ||
| + | deb-src http://mirrors.ustc.edu.cn/ubuntu-ports/ xenial main multiverse restricted universe | ||
| + | deb-src http://mirrors.ustc.edu.cn/ubuntu-ports/ xenial-backports main multiverse restricted universe | ||
| + | deb-src http://mirrors.ustc.edu.cn/ubuntu-ports/ xenial-proposed main multiverse restricted universe | ||
| + | deb-src http://mirrors.ustc.edu.cn/ubuntu-ports/ xenial-security main multiverse restricted universe | ||
| + | deb-src http://mirrors.ustc.edu.cn/ubuntu-ports/ xenial-updates main multiverse restricted universe | ||
| + | </syntaxhighlight> | ||
| + | 然后,编辑(或新建) 文件 $HOME/.pip/pip.conf,将python的pip源设置为国内源,pip.conf内容如下: | ||
| + | <syntaxhighlight lang="bash"> | ||
| + | [global] | ||
| + | trusted-host = mirrors.aliyun.com | ||
| + | index-url = http://mirrors.aliyun.com/pypi/simple | ||
| + | </syntaxhighlight> | ||
| + | 完成后成后,执行 sudo apt-get update更新软件包,然后再次执行 ./install.sh 安装脚本安装即可。 | ||
| + | <br /> | ||
| + | |||
| + | ==演示程序的操作说明== | ||
| + | |||
| + | 演示程序在安装后会在开机时自动运行,并默认显示 日期与时间 画面。<br /> | ||
| + | NanoHat OLED配件上的三个按键功能如下:<br /> | ||
| + | K1 -> 显示日期时间; <br /> | ||
| + | K2 -> 显示开发板的运行状态,例如 IP地址, 负载, 存储状态,CPU温度等信息; <br /> | ||
| + | K3 -> 关机操作,并不会立即关机,而是先弹出询问画面,在询问画面的状态下,用 K1 切换 Yes和No选项,K2进行确认; <br /> | ||
| + | <br /> | ||
| + | |||
| + | ==相关资料== | ||
Revision as of 01:45, 27 April 2017
1 介绍
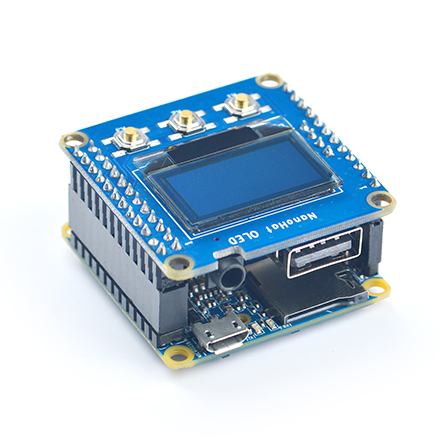
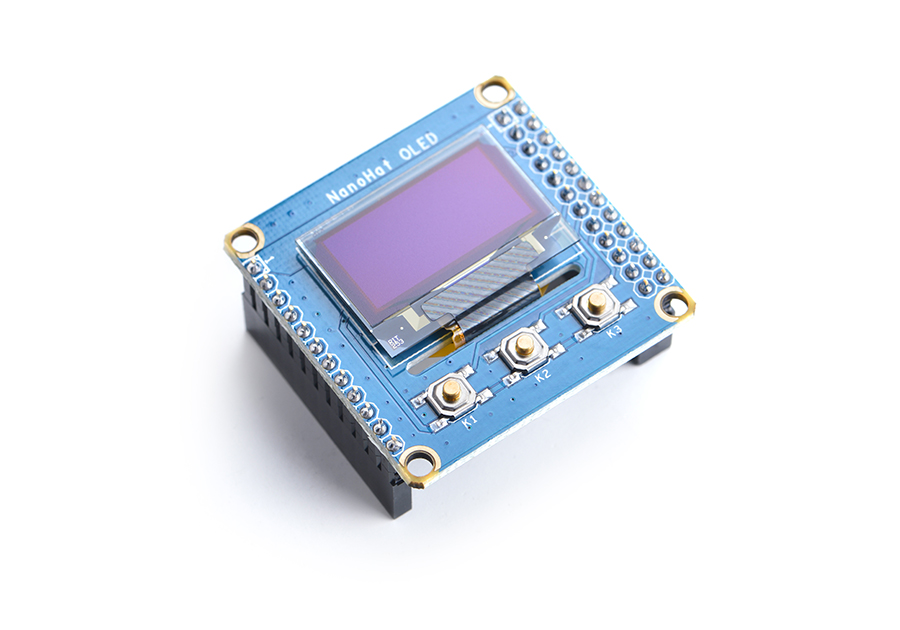
- NanoHat OLED是一款精致小巧的单色OLED显示屏,只有0.96英寸,分辨率是128x64,对比度高,功耗低,可以用来显示文字或图案。通过I2C和NanoPi NEO通讯。
- NanoHat OLED和NanoPi NEO的外形尺寸和接口完全相同,可直接堆叠在NanoPi NEO上使用。
- 板载了3个按键,用户可以自定义按键功能。板载了2.0mm 4Pin I2C接口插座,可外接其他I2C模块。
2 特性
- 屏幕尺寸:0.96英寸
- 分辨率:128x64
- 高对比度,低功耗
- 板载3个按键
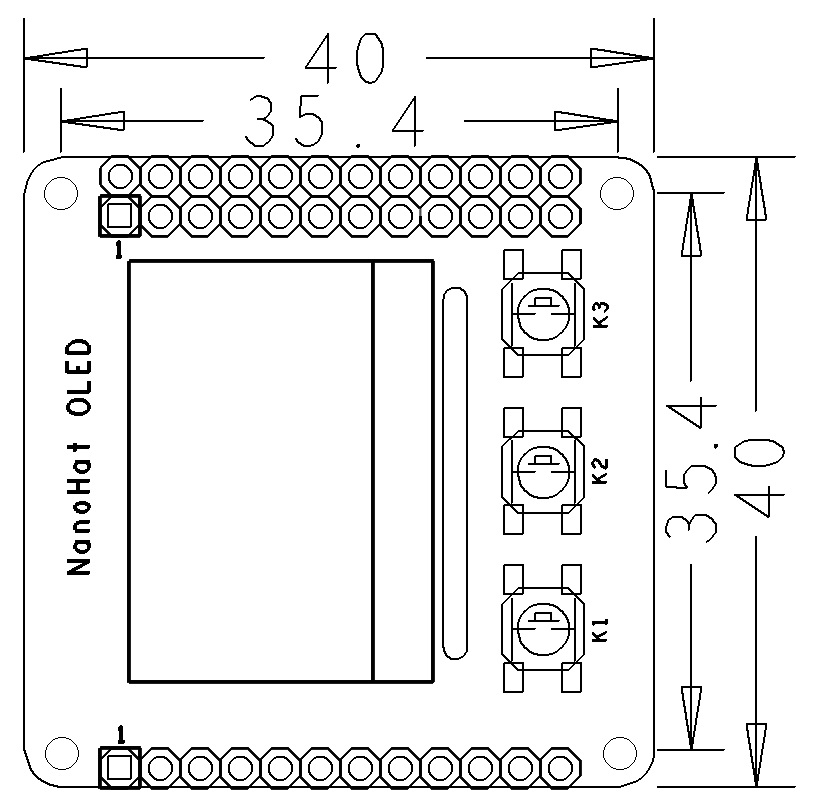
- PCB尺寸(mm):40x40
- GPIO管脚定义
Pin# Name Linux gpio Pin# Name Linux gpio 1 SYS_3.3V 2 VDD_5V 3 I2C0_SDA 4 VDD_5V 5 I2C0_SCL 6 GND 7 NC 8 NC 9 GND 10 NC 11 K1 0 12 NC 13 K2 2 14 GND 15 K3 3 16 NC 17 SYS_3.3V 18 NC 19 NC 20 GND 21 NC 22 NC 23 NC 24 NC
12Pin排针未使用,引脚功能定义在此不列举,请在NanoPi NEO/Air/NEO2维基页面查阅。
3 硬件连接
目前支持的开发板有NanoPi NEO/Air。
NanoHat OLED模块和NanoPi NEO/Air尺寸和接口完全相同,可直接堆叠在NanoPi NEO/Air上使用。
参考下图连接模块:

当前支持的开发板:
NanoPi NEO
NanoPi Fire
NanoPi NEO2
4 软件安装
NanoHat OLED的演示程序包含在 NanoHatOLED 软件仓库里,在 Ubuntu core系统下,执行以下命令进行安装:
git clone https://github.com/friendlyarm/NanoHatOLED.git
cd NanoHatOLED
sudo -H ./install.sh
安装脚本会在线下载并安装一系列的软件包,安装时间视网络环境而定,国内用户为了获得更快的安装速度,可以在安装之前先将软件包的源设置为国内源,方法如下:
首先,编辑文件 /etc/apt/sources.list,将里面的内容清空并更改为:
deb http://mirrors.ustc.edu.cn/ubuntu-ports/ xenial main multiverse restricted universe
deb http://mirrors.ustc.edu.cn/ubuntu-ports/ xenial-backports main multiverse restricted universe
deb http://mirrors.ustc.edu.cn/ubuntu-ports/ xenial-proposed main multiverse restricted universe
deb http://mirrors.ustc.edu.cn/ubuntu-ports/ xenial-security main multiverse restricted universe
deb http://mirrors.ustc.edu.cn/ubuntu-ports/ xenial-updates main multiverse restricted universe
deb-src http://mirrors.ustc.edu.cn/ubuntu-ports/ xenial main multiverse restricted universe
deb-src http://mirrors.ustc.edu.cn/ubuntu-ports/ xenial-backports main multiverse restricted universe
deb-src http://mirrors.ustc.edu.cn/ubuntu-ports/ xenial-proposed main multiverse restricted universe
deb-src http://mirrors.ustc.edu.cn/ubuntu-ports/ xenial-security main multiverse restricted universe
deb-src http://mirrors.ustc.edu.cn/ubuntu-ports/ xenial-updates main multiverse restricted universe
然后,编辑(或新建) 文件 $HOME/.pip/pip.conf,将python的pip源设置为国内源,pip.conf内容如下:
[global]
trusted-host =  mirrors.aliyun.com
index-url = http://mirrors.aliyun.com/pypi/simple
完成后成后,执行 sudo apt-get update更新软件包,然后再次执行 ./install.sh 安装脚本安装即可。
5 演示程序的操作说明
演示程序在安装后会在开机时自动运行,并默认显示 日期与时间 画面。
NanoHat OLED配件上的三个按键功能如下:
K1 -> 显示日期时间;
K2 -> 显示开发板的运行状态,例如 IP地址, 负载, 存储状态,CPU温度等信息;
K3 -> 关机操作,并不会立即关机,而是先弹出询问画面,在询问画面的状态下,用 K1 切换 Yes和No选项,K2进行确认;

