Template:S5Pxx18Android
Contents
[hide]1 Work with Android
1.1 Work with 4G Module EC20 under Android5
1.1.1 Hardware Setup
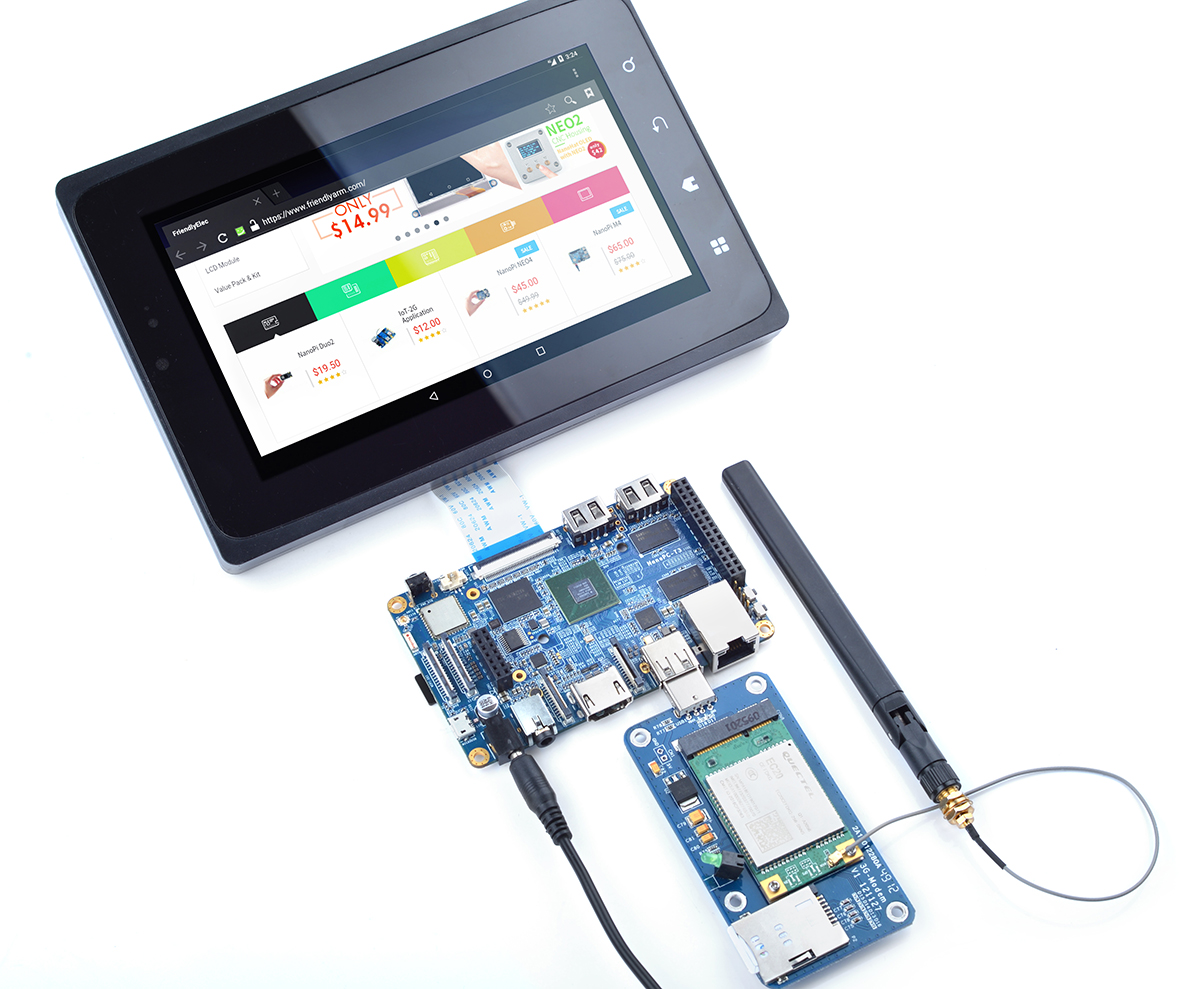
Connect an EC20 module to a USB to miniPCIe board and connect the board to an ARM board's USB Host. Here is a hardware setup:

Power on the board and you will be able to surf the internet with the 4G module like using an Android phone.
1.2 Modify the Android boot Logo
Replace the logo.bmp:
/opt/FriendlyARM/smart4418/android/device/friendly-arm/nanopi3/boot/logo.bmp
/opt/FriendlyARM/smart4418/android/device/friendly-arm/nanopi2/boot/logo.bmp
Replace the bootanimation.zip:
/opt/FriendlyARM/smart4418/android/device/friendly-arm/nanopi3/bootanimation.zip
/opt/FriendlyARM/smart4418/android/device/friendly-arm/nanopi2/bootanimation.zip
Re-compile android.
1.3 Use fastboot command to flash android firmware
Enter the uboot command line mode on the serial terminal when powering on, and then enter the following command:
fastboot 0For S5P4418:
fastboot flash partmap partmap.txt
fastboot flash 2ndboot bl1-mmcboot.bin
fastboot flash fip-loader loader-mmc.img
fastboot flash fip-secure bl_mon.img
fastboot flash fip-nonsecure bootloader.img
fastboot flash boot boot.img
fastboot flash system system.img
fastboot flash cache cache.img
fastboot flash userdata userdata.img
For S5P6818:
fastboot flash partmap partmap.txt
fastboot flash 2ndboot bl1-mmcboot.bin
fastboot flash fip-loader fip-loader.img
fastboot flash fip-secure fip-secure.img
fastboot flash fip-nonsecure fip-nonsecure.img
fastboot flash boot boot.img
fastboot flash system system.img
fastboot flash cache cache.img
fastboot flash userdata userdata.img
1.4 Android Keys
Android 5:
vendor/friendly-arm/nanopi3/security/
Android 7:
build/target/product/security/
1.5 Optimizing HDMI Performance on Android 7
1.5.1 Note
By default, the driver initializes two framebuffers, one for the primary LCD display and the other for HDMI. If your project specifically requires the use of HDMI and not the LCD, you can follow the steps outlined in this chapter to make modifications. After making these changes, HDMI will be configured as the primary display, resulting in the initialization of only one framebuffer. This optimization conserves resources and leads to corresponding improvements in UI performance and boot speed.
The content of this chapter is applicable exclusively to S5P6818 running Android 7. For S5P4418, the modification process is similar, with adjustments needed in the corresponding files.
1.5.2 Modify the kernel
You need to modify the kernel Device Tree Source (DTS) to disable the dp_drm_lvds node, as shown below:
--- a/arch/arm64/boot/dts/nexell/s5p6818-nanopi3-common.dtsi
+++ b/arch/arm64/boot/dts/nexell/s5p6818-nanopi3-common.dtsi
@@ -810,6 +810,7 @@
                        plane-names = "video", "rgb", "primary";
                };
                port@1 {
+                       status = "disabled";
                        reg = <1>;
                        back_color = < 0x0 >;
                        color_key = < 0x0 >;
@@ -820,7 +821,7 @@

 &dp_drm_lvds {
        remote-endpoint = <&lcd_panel>;
-       status = "ok";
+       status = "disabled";

        display-timing {
                clock-frequency = <50000000>;
After compilation, you will obtain a new arch/arm64/boot/dts/nexell/s5p6818-nanopi3-rev*.dtb file.
During the testing phase, you can directly update it to the board using adb with the following command:
adb root; adb wait-for-device; adb shell mkdir /storage/sdcard1/; adb
shell mount -t ext4 /dev/block/mmcblk0p1 /storage/sdcard1/
adb push arch/arm64/boot/dts/nexell/s5p6818-nanopi3-rev*.dtb /storage/sdcard1/
For a complete firmware update, you will need to replace the files in the device/friendlyelec/nanopi3/boot directory of the Android 7 source code.
1.5.3 Modify env.conf
To modify the device/friendlyelec/nanopi3/boot/env.conf file and add a line
lcdtype HDMI1080P60
This mode needs to match the mode detected by Android 7 after startup; otherwise, it may result in a prolonged black screen state or even no display output. In such cases, you may need to manually set it in the U-Boot command-line environment:
setenv lcdtype HDMI1080P60; saveenv; reset
1.5.4 Modify system.prop
To modify the device/friendlyelec/nanopi3/system.prop file in Android 7
ro.sf.lcd_density=240Alternatively, you can adjust the system property or experiment with different values that you deem more appropriate. You can also use the following command to change the display density under the serial or adb environment and observe if the effect is suitable:
adb shell wm density 2401.5.5 Compiling Android
Follow the instructions in the wiki to compile Android 7 and conduct testing. If you encounter any exceptions, please carefully review the preceding steps.