Template:BurnAndroidToEMMC-Allwinner
From FriendlyELEC WiKi
1 Flash to eMMC
1.1 Install Android to eMMC from TF Card
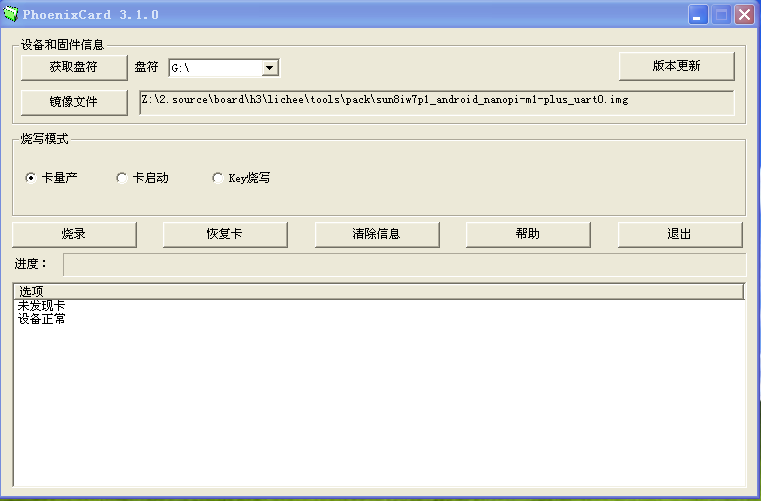
- Extract an Android image file and the flashing utility PhoenixCard_V310.rar, insert a TF card(at least 8G) to a windows PC and run PhoenixCard as administrator. On the PhoenixCard Window select your TF card's device and your wanted Android image file, set the mode to "卡量产(factory production)" and click on "烧录(Flash)" to start flashing the Android image to TF card.

(In the screenshot an Android image file for the NanoPi M1 Plus was selected. You need to select a correct image file for your board.)
- After flashing is done, the TF card has the ability to burn the Android system to eMMC. Take out the TF card and insert it to your board's TF card slot. Connect your board to an HDMI monitor, power on your board(note:you need a 5V/2A power adapter) and you will see a green process bar on the HDMI monitor. After flashing is done take out the TF card and reboot your board and it will be rebooted from eMMC.