Matrix - 3-Axis Digital Accelerometer
Contents
[hide]1 Introduction
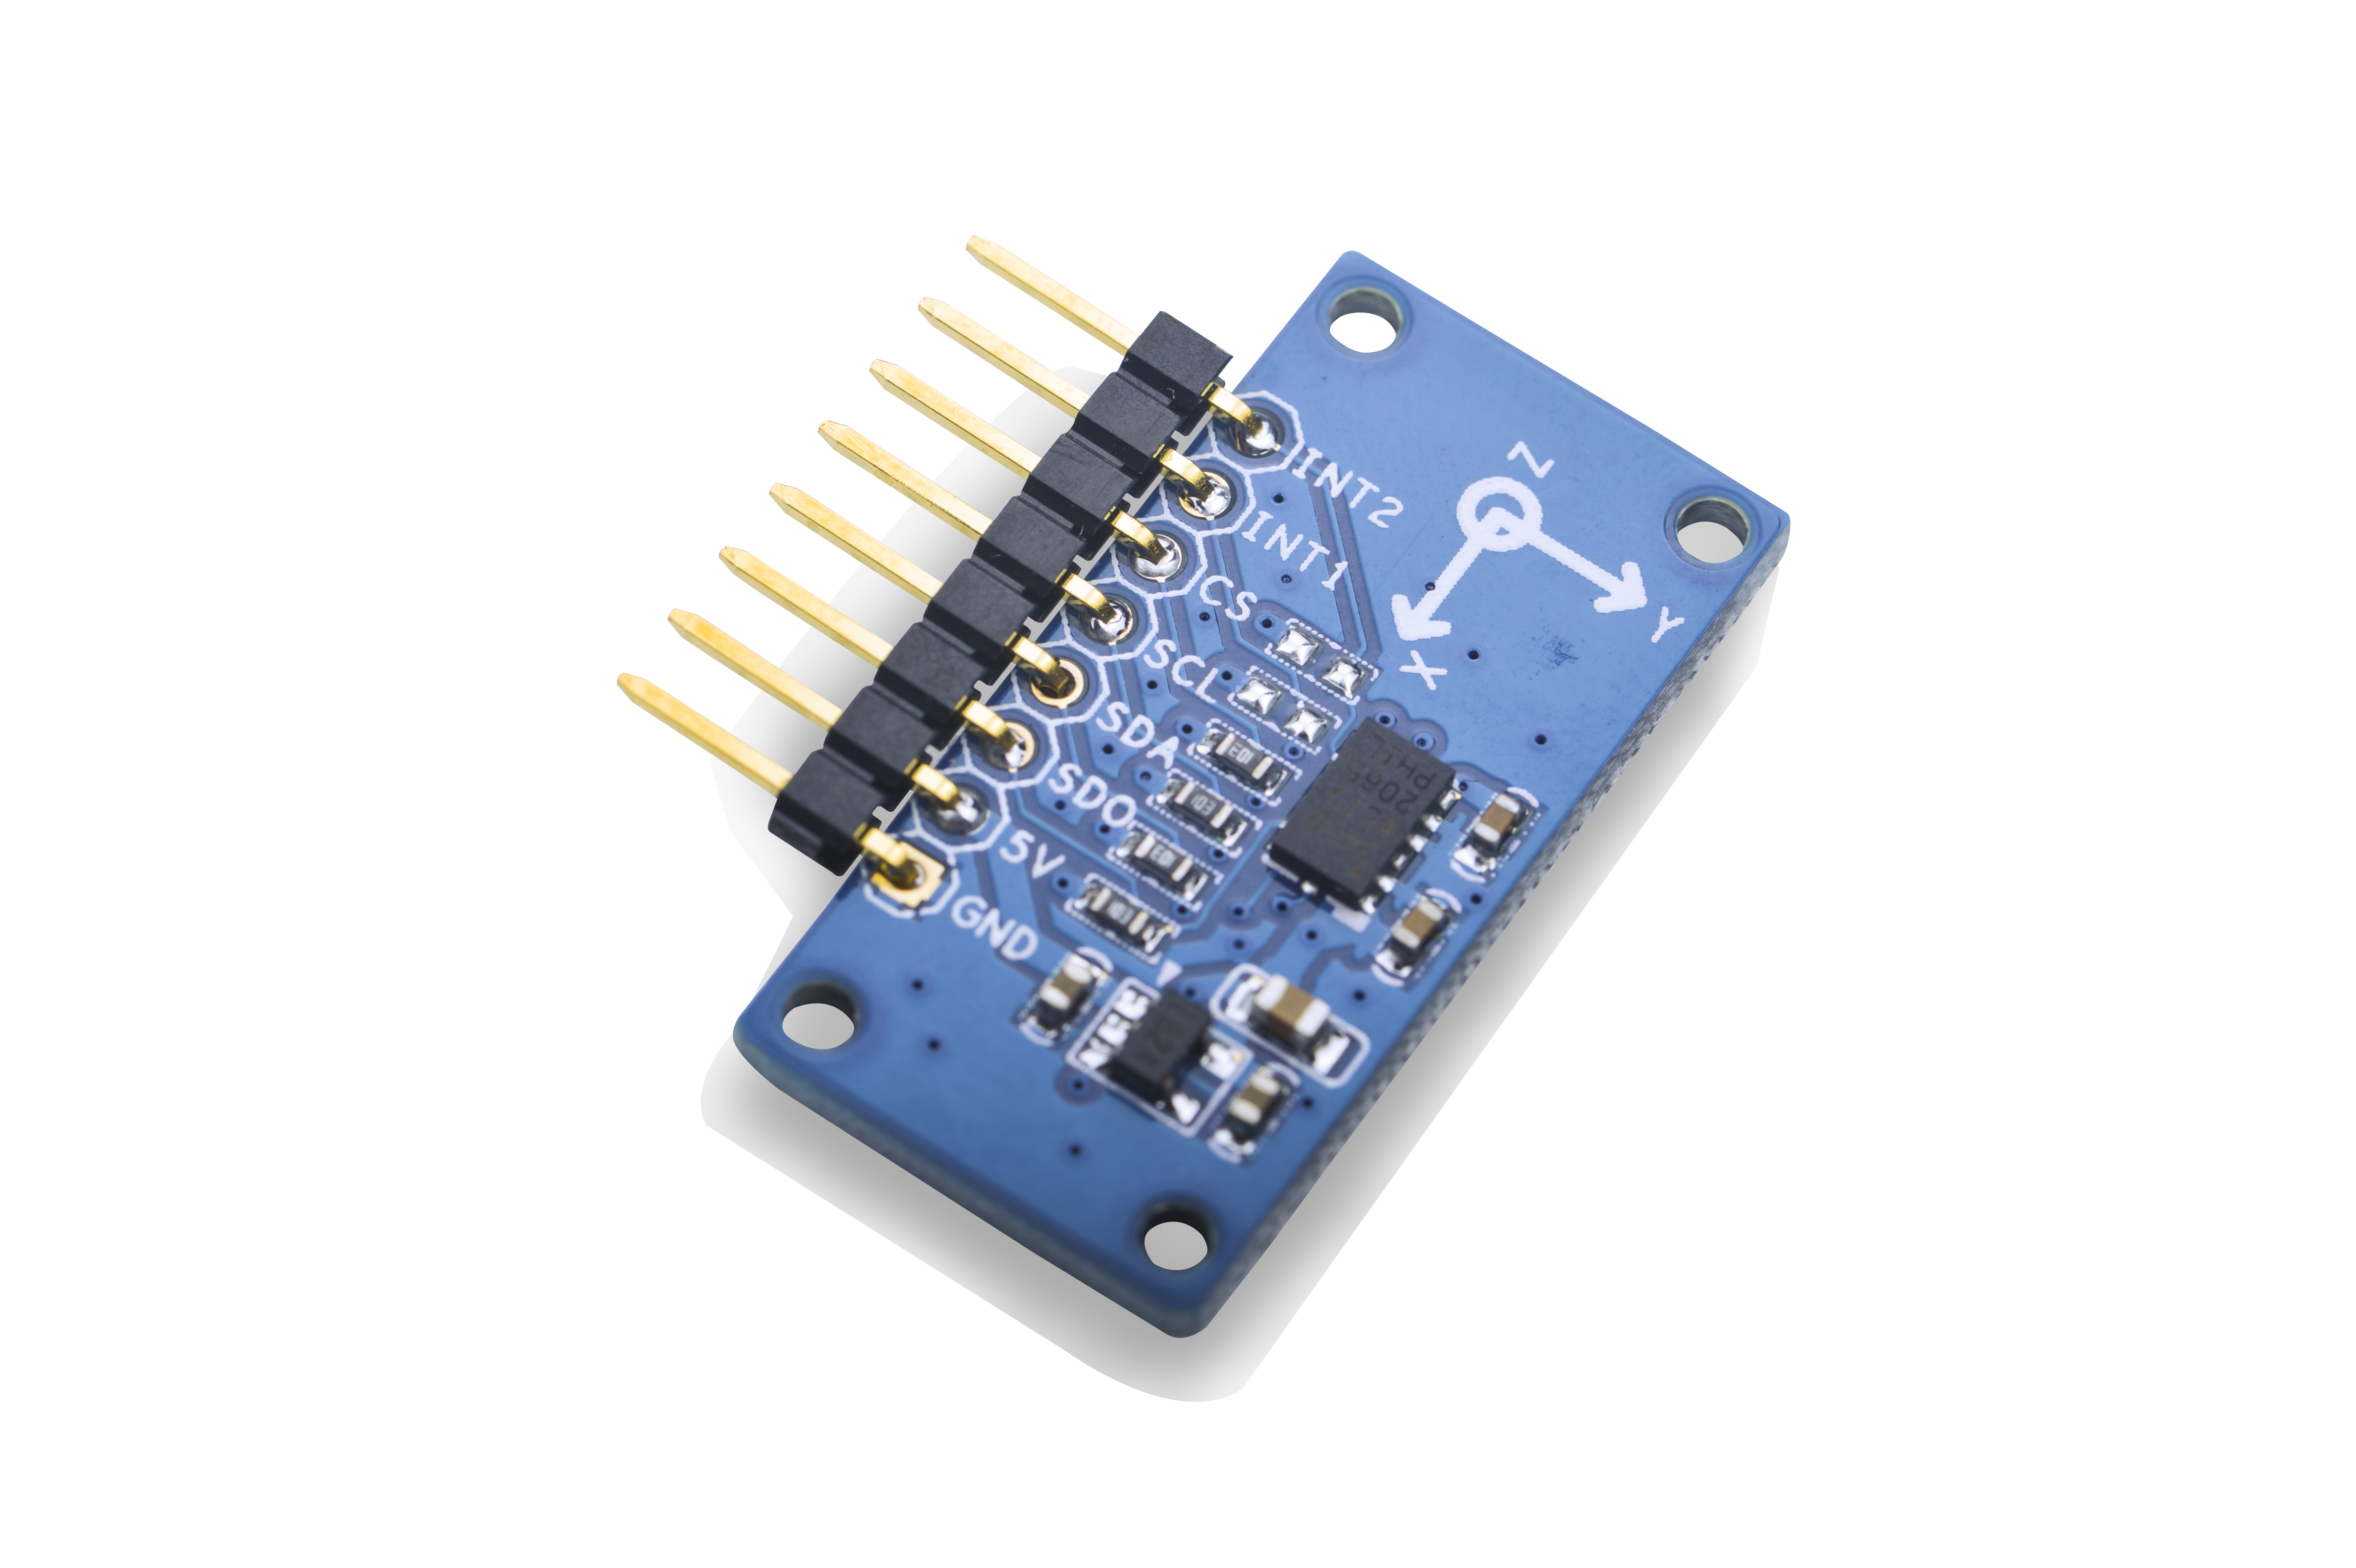
- This module measures the static acceleration of gravity in three axis x, y and z resulting from motion or shock.
- Its digital interface is IIC or SPI.
- It is integrated with an ADXL345 chip with high resolution (13-bit) measurement at ±2g, ±4g, ±8g and ±16g.
- The module is powered by 5V and converts 5V to 3.3V to ADXL345.
2 Features
- I2C, 3.3V
- 13-bit, up to +-16g
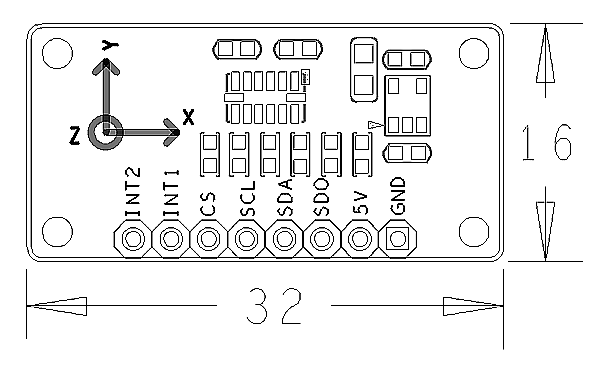
- 2.54mm spacing pin interface
- PCB dimension(mm): 16 x 32
- Pin Spec:
| Pin | Comment |
| INT2 | Interrupt |
| INT1 | Interrupt |
| CS | Enable |
| SCL | I2C SCL |
| SDA | I2C SDA |
| SDO | Set Slave Address |
| 5V | Power 5V |
| GND | Ground |
3 General Description
- The ADXL345 is a small, thin, ultralow power, 3-axis accelerometer with high resolution (13-bit) measurement at up to ±16 g. Digital output data is formatted as 16-bit twos complement and is acces-sible through either a SPI (3- or 4-wire) or I2C digital interface.
- The ADXL345 is well suited for mobile device applications. It measures the static acceleration of gravity in tilt-sensing appli-cations, as well as dynamic acceleration resulting from motion or shock. Its high resolution (3.9 mg/LSB) enables measurement of inclination changes less than 1.0°.
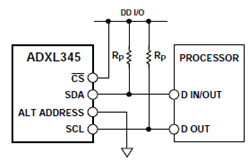
- 由于这里使用的是I2C通信方式,所以只简单的介绍I2C的工作原理,具体时序的实现可自行去查看芯片手册。ADXL345遵循UM1024 I2C-总线规格,它支持标准的数据传输模式(100KHz),并且支持快速传输模式(400KHz),采用I2C模式,需要把CS引脚上拉,I2C引脚无连接时,默认模式不存在。
- The module's I2C connection is as follows:
4 Download Matrix Source Code
Matrix family members' code samples are open source which are maintained at: git://github.com/friendlyarm/matrix.git
In this warehouse each branch represents an ARM board that this matrix member can work with
- matrix-nanopi includes code samples for Matrix members that can work with the NanoPi;
- matrix-tiny4412 includes code samples for Matrix members that can work with the Tiny4412;
- matrix-raspberrypi includes code samples for Matrix members that can work with the RaspberryPi;
Here are the steps for installing git on a PC running Ubuntu14.04
$ sudo apt-get install git
Clone Matrix code warehouse
$ git clone git://github.com/friendlyarm/matrix.git
If this is a success a matrix directory will be generated, which will contain all available Matrix code samples.
5 Connect to NanoPi
5.1 Preparations
You need to install a Debian on the NanoPi and have a PC which has an appropriate cross compiler ready. For details you can refer to wiki:NanoPi
5.2 Hardware Connection
Please refer to the following diagrams to connect "Matrix-3_Axis_Digital_Accelerometer" to the NanoPi
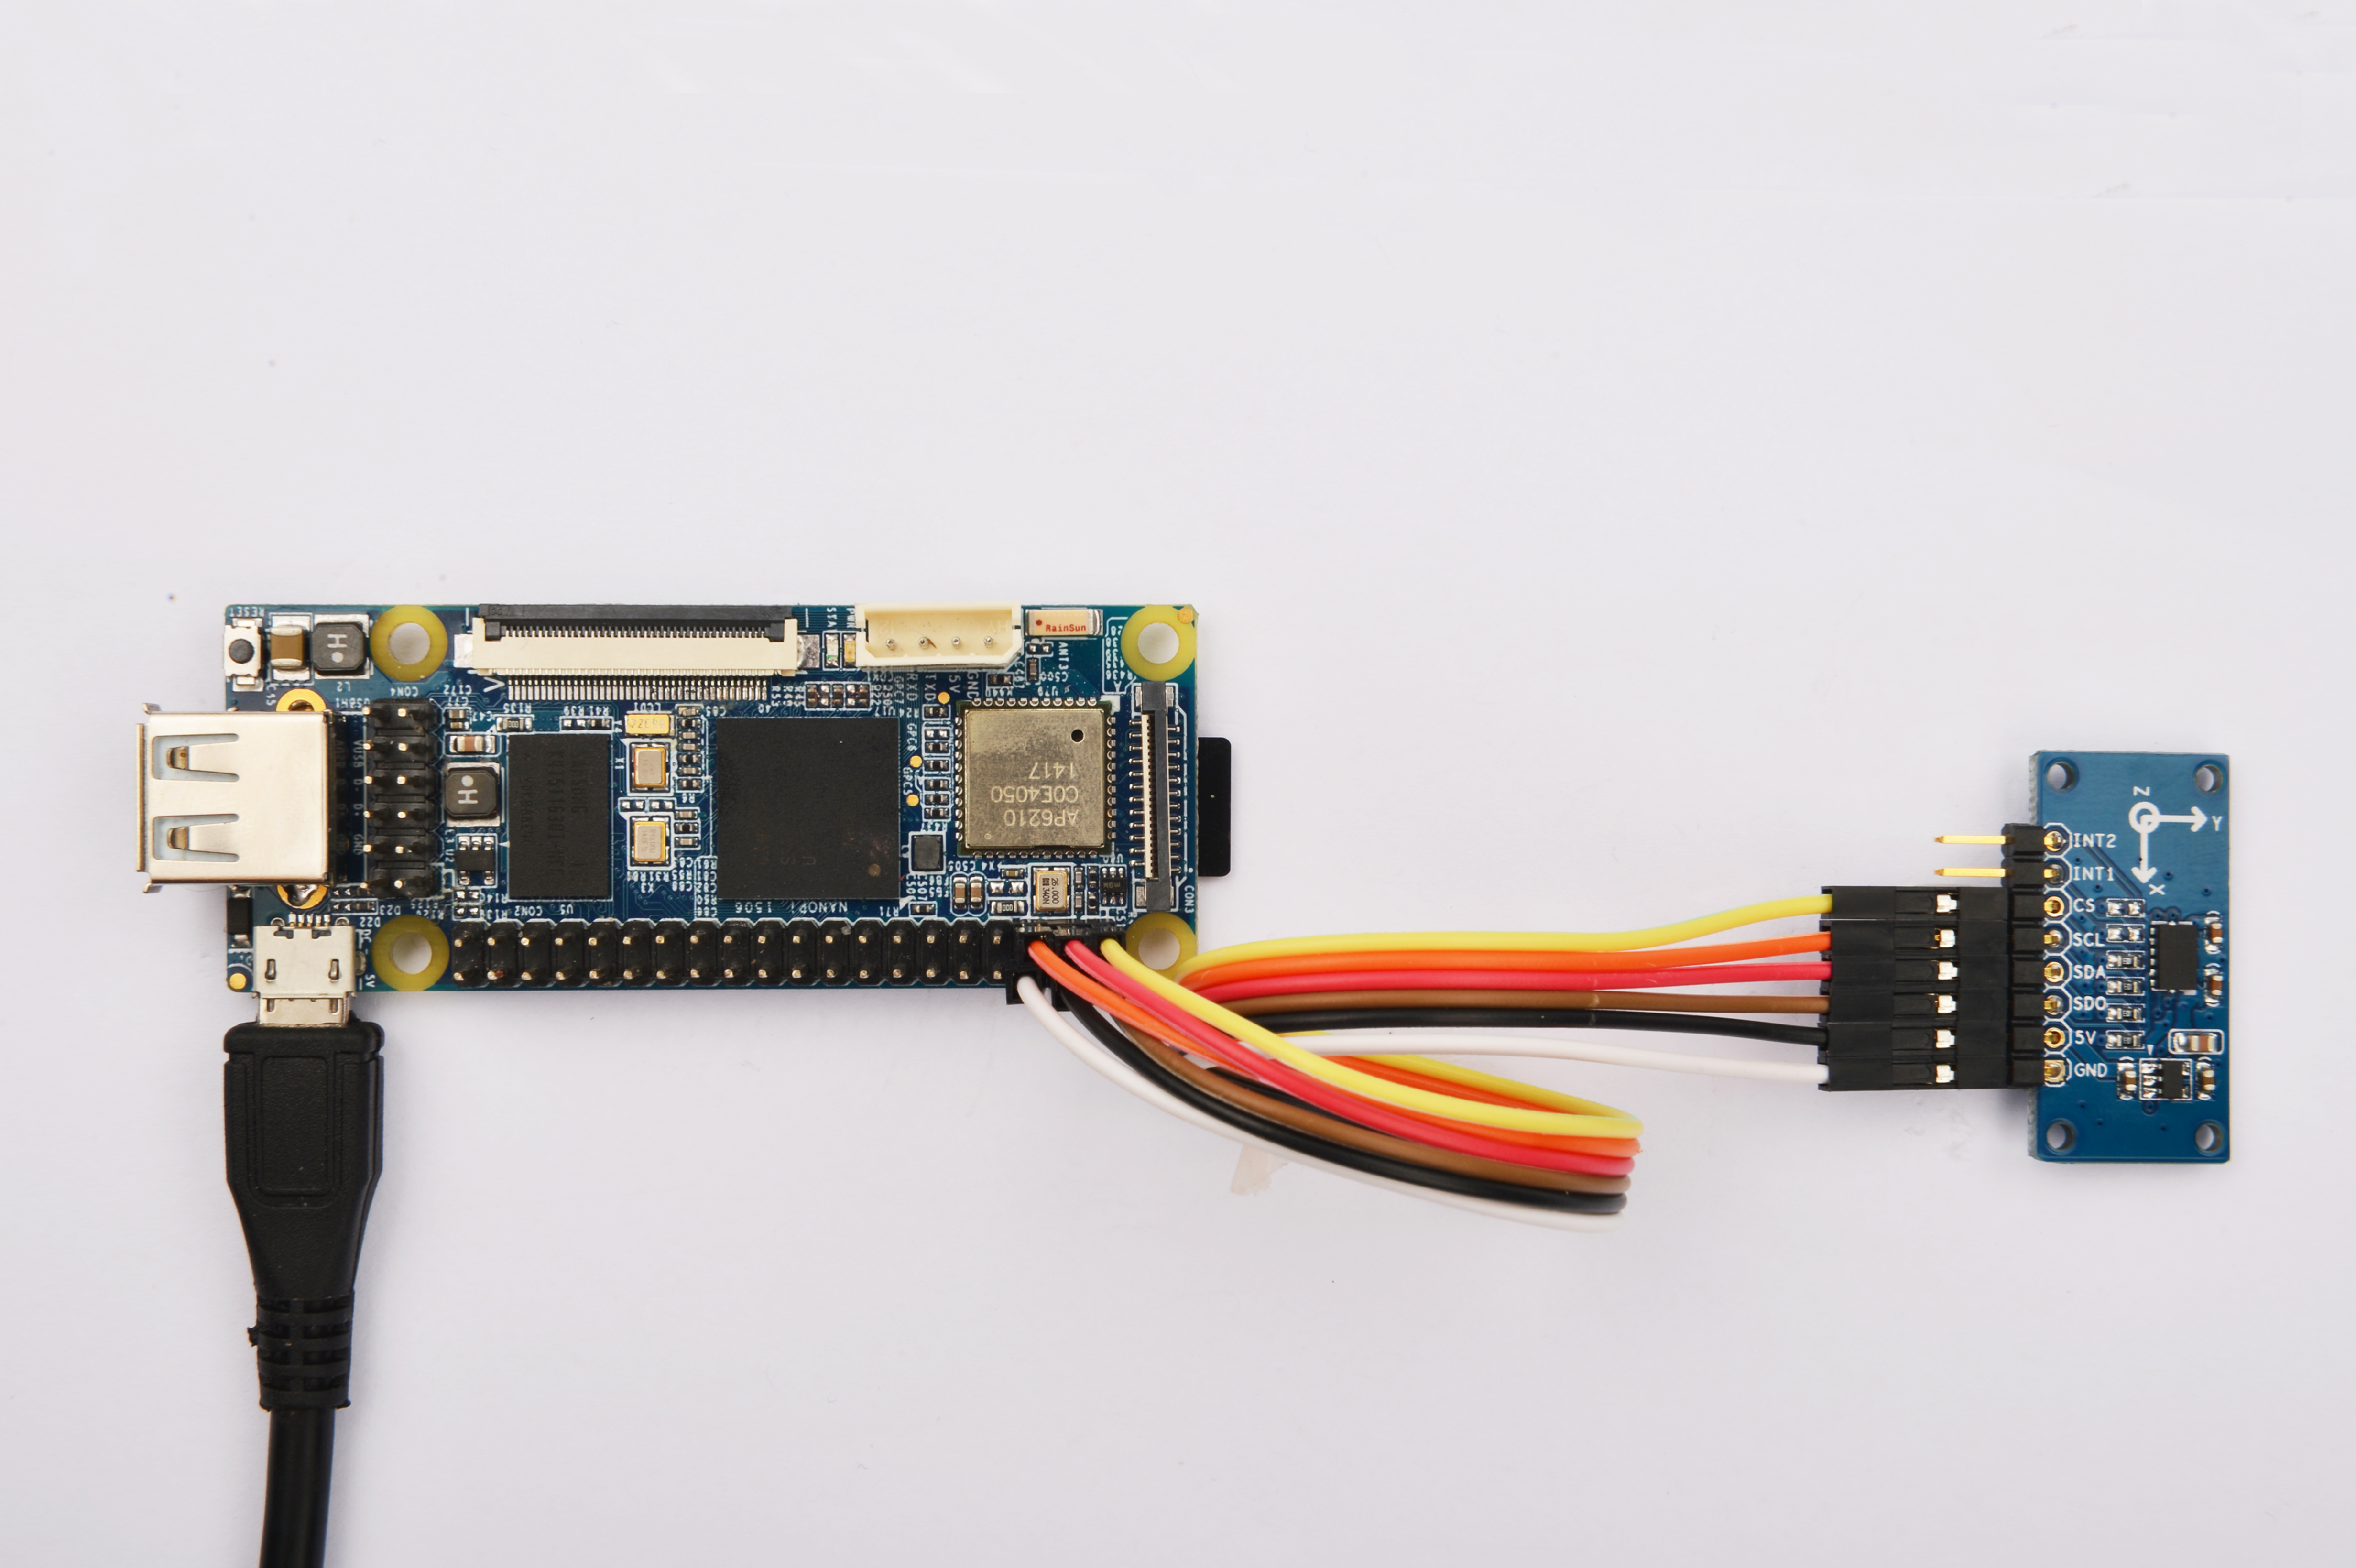
Connection Details:
| Matrix-3_Axis_Digital_Accelerometer | NanoPi |
| INT2 | Floating |
| INT1 | Floating |
| CS | Pin1 |
| SCL | Pin5 |
| SDA | Pin3 |
| SDO | Pin2 |
| 5V | Pin4 |
| GND | Pin6 |
5.3 Compile Test Program
Please login the Matrix git and enter the matrix-nanopi branch
$ cd matrix
$ git checkout matrix-nanopi
Compile the Matrix code
$ make CROSS_COMPILE=arm-linux- clean
$ make CROSS_COMPILE=arm-linux-
$ make CROSS_COMPILE=arm-linux- install
Note: please make sure to install the cross compiler "arm-linux-gcc-4.4.3" on your PC, which is used to compile files for the NanoPi-Debian.
Generated library files are under the "install/lib" directory. Applications are under the "install/usr/bin" directory. The test program for the "Matrix-3_Axis_Digital_Accelerometer" module is "matrix-3_axis_digital_accelerometer".
5.4 Run Test Program
Please copy the library files and test program to the NanoPi
$ cp install/usr/bin/* nanopi_rootfs/usr/bin/
$ cp install/lib/* nanopi_rootfs/lib/ -d
Power on the NanoPi and run the following command in Debian's terminal
Note: this module is not plug and play therefore before running the module please make sure it is connected to a NanoPi.
$ matrix-3_axis_digital_accelerometer
5.5 Code Sample
int main(int argc, char ** argv)
{
    char position[BUF_SIZE];
    memset(position, 0, BUF_SIZE);

    if (adxl34xRead(position) > 0) {
        printf("Get position: %s", position);
    } else {
        printf("Fail to get position\n");
    }
    return 0;
}
6 Connect to Tiny4412
6.1 Preparations
Please refer to the Tiny4412's user's manual to install a UbuntuCore on the Tiny4412 and install an appropriate cross compiler on a PC.
Note: only the Tiny4412SDK-1506 carrier board can work with this module.
6.2 Hardware Connection
Please refer to the following diagrams to connect the Matrix-3_Axis_Digital_Accelerometer to the Tiny4412
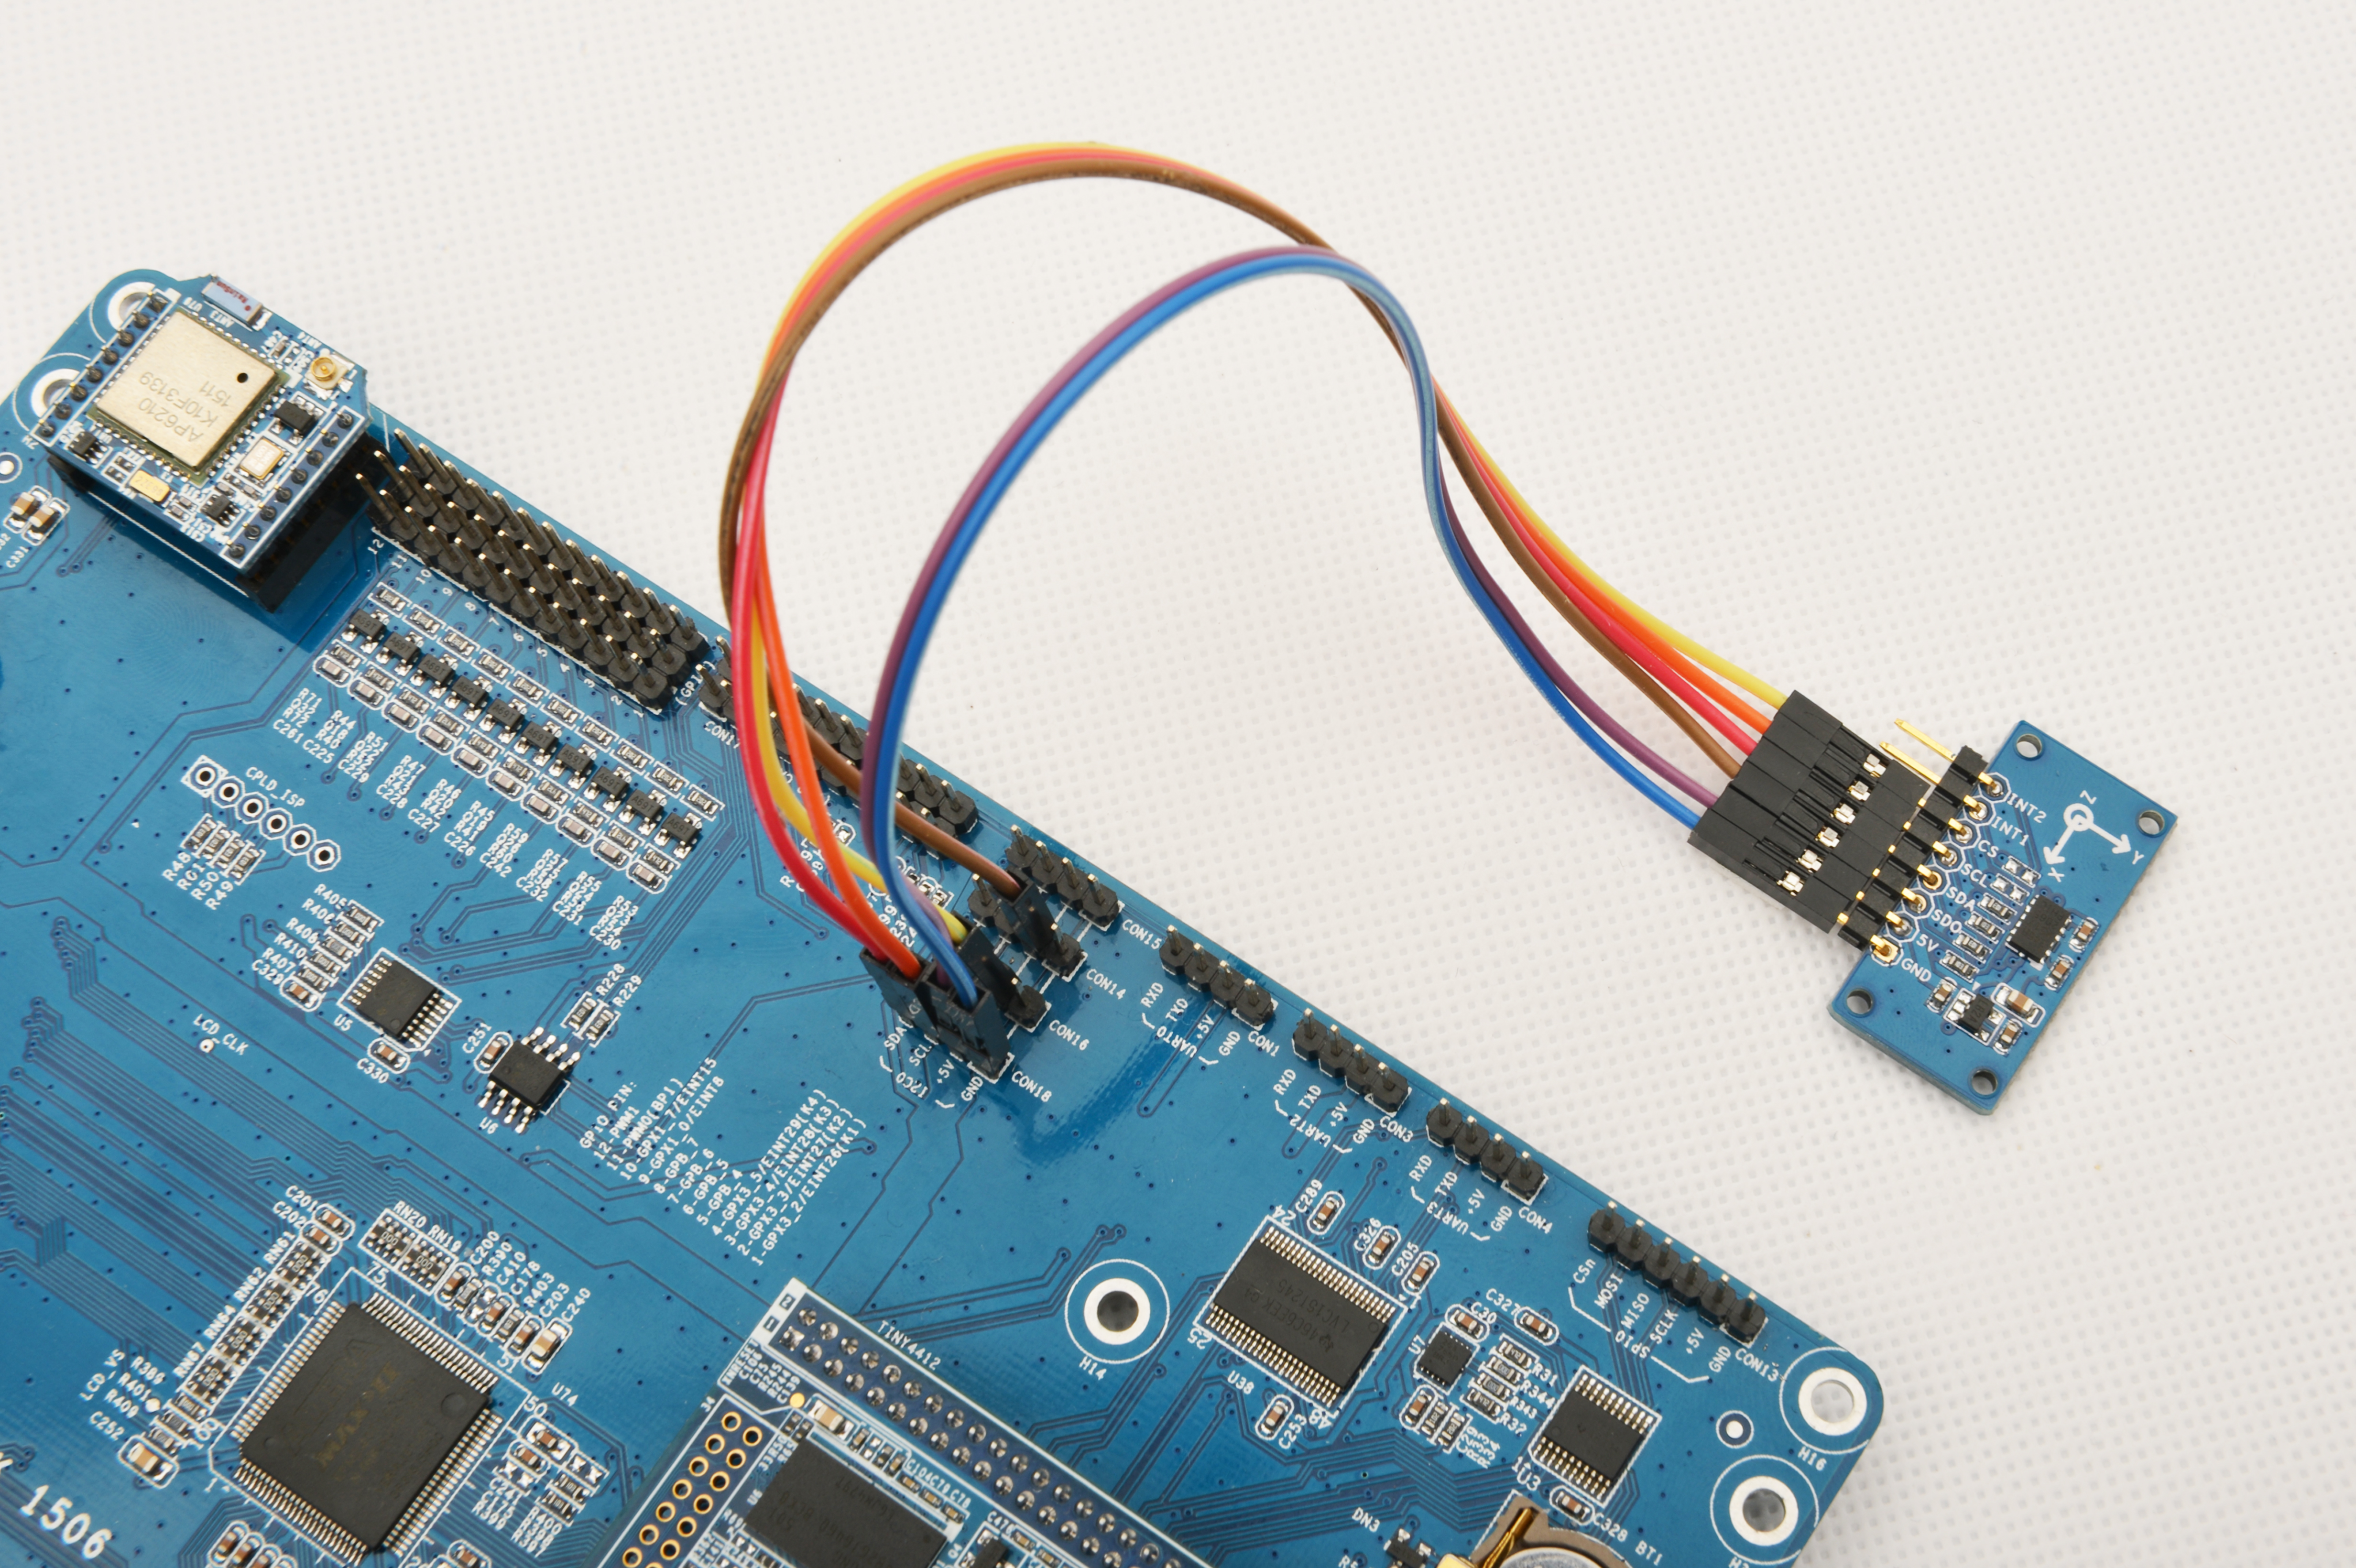
Connection Details:
| Matrix-3_Axis_Digital_Accelerometer | Tiny4412 |
| INT2 | Floating |
| INT1 | Floating |
| CS | CON16 5V |
| SCL | CON18 SCL |
| SDA | CON18 SDA |
| SDO | CON14 5V |
| 5V | CON18 5V |
| GND | CON18 GND |
6.3 Compile Test Program
Please login the Matrix git and enter the matrix-tiny4412 branch
$ cd matrix
$ git checkout matrix-tiny4412
Compile the Matrix code
$ make CROSS_COMPILE=arm-linux-gnueabihf- clean
$ make CROSS_COMPILE=arm-linux-gnueabihf-
$ make CROSS_COMPILE=arm-linux-gnueabihf- install
Note: please make sure to install the cross compiler "arm-linux-gnueabihf-gcc-4.7.3" on your PC, which is used to compile files for the Tiny4412-UbuntuCore.
Generated library files are under the "install/lib" directory. Applications are under the "install/usr/bin" directory. The test program for the "Matrix-3_Axis_Digital_Accelerometer" module is "matrix-3_axis_digital_accelerometer".
6.4 Run Test Program
Please copy the library files and test program to the Tiny4412
$ cp install/usr/bin/* tiny4412_rootfs/usr/bin/
$ cp install/lib/* tiny4412_rootfs/lib/ -d
Power on the Tiny4412 and run the following command in UbuntuCore's terminal
Note: this module is not plug and play therefore before running the module please make sure it is connected to a Tiny4412.
$ matrix-3_axis_digital_accelerometer
6.5 Code Sample
int main(int argc, char ** argv)
{
    char position[BUF_SIZE];
    memset(position, 0, BUF_SIZE);

    if (adxl34xRead(position) > 0) {
        printf("Get position: %s", position);
    } else {
        printf("Fail to get position\n");
    }
    return 0;
}
7 Connect to RaspberryPi
8 Connect to Arduino
9 Resources
