Template:RK3399-Lubuntu-Using-NVME-SSD
Contents
1 Connect NVME SSD High Speed Hard Disk to T4
Connect a NVME SSD hard disk to NanoPC-T4's M.2 interface, initialize and automatically mount the SSD by running the following commands. Before proceed turn off your T4 and connect an SSD to your T4. Power on your T4 and open a command line utility(go to top left of the GUI and enter System Tools -> LXTerminal) or SSH to your T4.
We suggest you switch to "root" by running the following command:
su -The password for "root" is "fa".
1.1 Detection of SSD
root@FriendlyELEC:~# cat /proc/partitions
major minor  #blocks  name
   1        0       4096 ram0
 259        0  125034840 nvme0n1
If there is a nvme0n1 device node it means an SSD is recognized by T4.
1.2 Partition of SSD
To mount an SSD under Linux we re-partition it as one section by running the following command:
(echo o; echo n; echo p; echo 1; echo ""; echo ""; echo w; echo q) | fdisk /dev/nvme0n1
If you want to re-partition it to multiple sections you can run "fdisk /dev/nvme0n1". For more detail about this command refer to the fdisk's manual.
1.3 Format Section to EXT4
After an SSD is successfully partitioned you can check its sections by running "cat /proc/partitions". The image provided treats a PCIe nvme device's sections as an eMMC's sections you will find that an SSD has some small sections.
We can check the "blocks" column and the biggest section is available for users. The /dev/nvme0n1p7 section is used to store data:
root@FriendlyELEC:~# cat /proc/partitions
major minor  #blocks  name
   1        0       4096 ram0
 259        0  125034840 nvme0n1
 259        1       4096 nvme0n1p1
 259        2       4096 nvme0n1p2
 259        3       4096 nvme0n1p3
 259        4      12288 nvme0n1p4
 259        5      32768 nvme0n1p5
 259        6      32768 nvme0n1p6
 259        7  124932440 nvme0n1p7
The following command formats a section to ext4:
mkfs.ext4 /dev/nvme0n1p7
1.4 Auto Mount SSD on System Startup
Before we mount an SSD's section you need to know its Block ID. You can check it by running "blkid":
blkid /dev/nvme0n1p7
/dev/nvme0n1p7: UUID="13fb682e-ef40-4c71-b98b-3d17403e1205" TYPE=“ext4"
Add a "Block ID" to "/etc/fstab" and here is what it looks like
UUID=<Block ID> /media/nvme ext4 defaults 0 0
You need to replace <Block ID> with the UUID obtained by running "blkid". To mount the SSD in our example we made the "/etc/fstab" file as follows:
UUID=13fb682e-ef40-4c71-b98b-3d17403e1205 /media/nvme ext4 defaults 0 0
We want to mount an SSD to "/media/nvme" but this directory doesn't exist. Therefore we create it and change its access right by running the following commands:
mkdir /media/nvme
chmod 777 /media/nvme
Run "mount" to check if the SSD is mounted successfully:
mount /media/nvme
You can reboot your T4 to check if your SSD will be automatically mounted:
poweroff
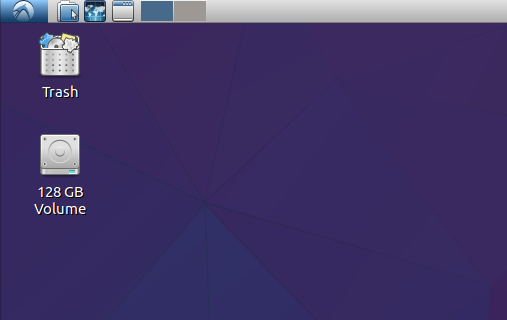
Reboot your T4, if you can see the following screen your SSD is mounted successfully:

1.5 SSD Read & Write
You can test SSD read and write speed. In our test we used a LITEON T10 120GB SSD. Different SSDs may have different results.
Write to SSD:
# dd if=/dev/zero of=/media/nvme/deleteme.dat bs=32M count=128
128+0 records in
128+0 records out
4294967296 bytes (4.3 GB, 4.0 GiB) copied, 12.5671 s, 342 MB/s
Read from SSD:
# dd if=/media/nvme/deleteme.dat of=/dev/zero bs=32M count=128
128+0 records in
128+0 records out
4294967296 bytes (4.3 GB, 4.0 GiB) copied, 6.72943 s, 638 MB/s