Difference between revisions of "SOM-RK3399"
From FriendlyELEC WiKi
(→Layout) |
|||
| Line 52: | Line 52: | ||
===Board Dimension=== | ===Board Dimension=== | ||
| − | |||
| − | |||
| − | |||
| − | |||
| − | |||
| − | |||
| − | |||
| − | |||
| − | |||
| − | |||
| − | |||
| − | |||
| − | |||
| − | |||
| − | |||
| − | |||
| − | |||
| − | |||
| − | |||
| − | |||
| − | |||
| − | |||
| − | |||
| − | |||
| − | |||
| − | |||
| − | |||
| − | |||
| − | |||
| − | |||
| − | |||
| − | |||
| − | |||
| − | |||
| − | |||
| − | |||
| − | |||
| − | |||
| − | |||
| − | |||
| − | |||
| − | |||
| − | |||
| − | |||
| − | |||
| − | |||
| − | |||
| − | |||
| − | |||
| − | |||
| − | |||
| − | |||
| − | |||
| − | |||
| − | |||
| − | |||
| − | |||
| − | |||
| − | |||
| − | |||
| − | |||
| − | |||
| − | |||
| − | |||
| − | |||
| − | |||
| − | |||
| − | |||
| − | |||
| − | |||
| − | |||
| − | |||
| − | |||
| − | |||
| − | |||
| − | |||
| − | |||
| − | |||
| − | |||
| − | |||
==Link to Rockchip Resources== | ==Link to Rockchip Resources== | ||
| Line 142: | Line 62: | ||
*Schematic: [http://wiki.friendlyarm.com/wiki/images/e/e0/NanoPC-T4-1902-Schematic.pdf NanoPC-T4-1902-Schematic.pdf] | *Schematic: [http://wiki.friendlyarm.com/wiki/images/e/e0/NanoPC-T4-1902-Schematic.pdf NanoPC-T4-1902-Schematic.pdf] | ||
*PCB CAD File:[http://wiki.friendlyarm.com/wiki/images/b/bc/NanoPC-T4_1802_Drawing%28dxf%29.zip NanoPC-T4_1802_Drawing(dxf).zip] | *PCB CAD File:[http://wiki.friendlyarm.com/wiki/images/b/bc/NanoPC-T4_1802_Drawing%28dxf%29.zip NanoPC-T4_1802_Drawing(dxf).zip] | ||
| − | |||
| − | |||
| − | |||
Revision as of 09:30, 22 May 2019
Contents
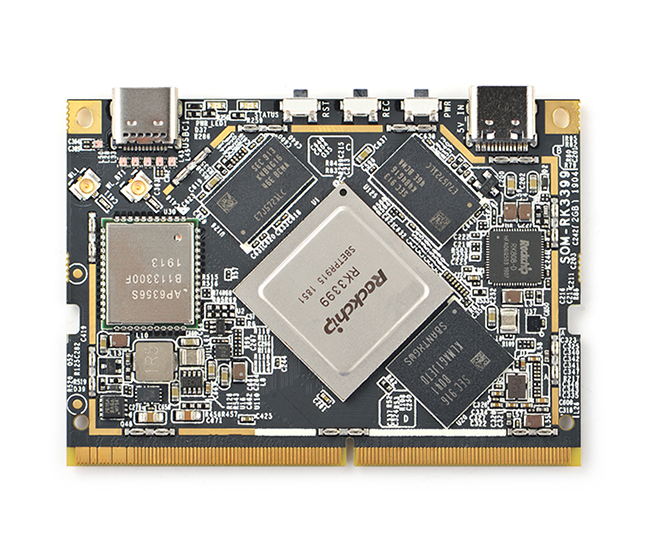
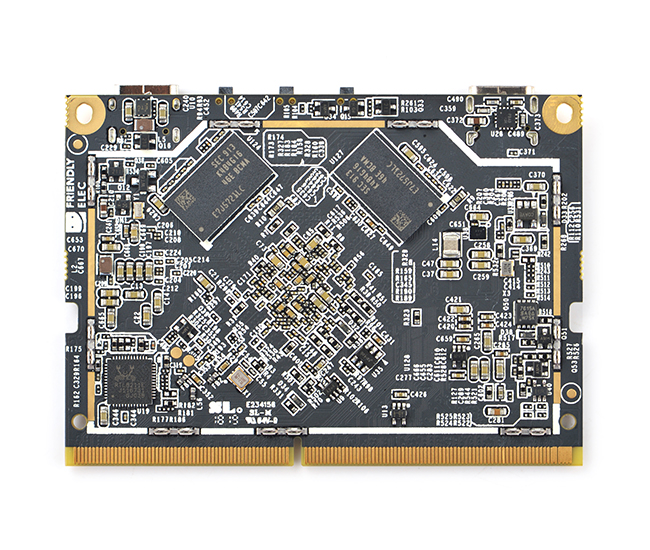
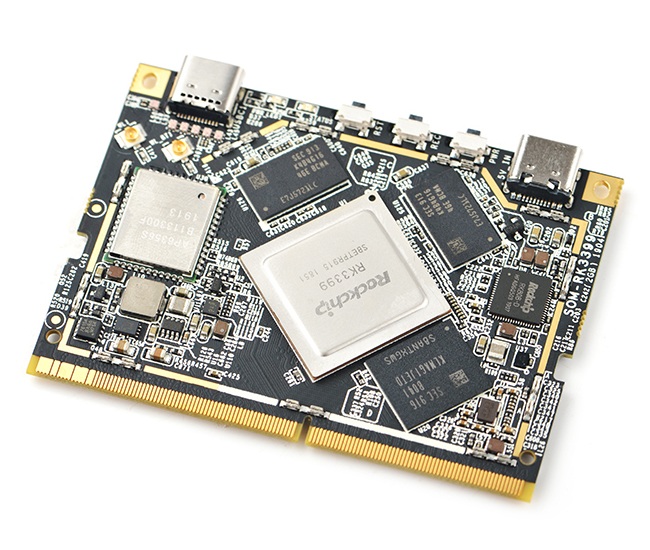
1 Introduction
2 Hardware Spec
- SoC: Rockchip RK3399
- CPU: big.LITTLE,Dual-Core Cortex-A72(up to 2.0GHz) + Quad-Core Cortex-A53(up to 1.5GHz)
- GPU: Mali-T864 GPU,supports OpenGL ES1.1/2.0/3.0/3.1, OpenVG1.1, OpenCL, DX11, and AFBC
- VPU: 4K VP9 and 4K 10bits H265/H264 60fps decoding, Dual VOP, etc
- PMU: RK808-D PMIC, cooperated with independent DC/DC, enabling DVFS, solfware power-down, RTC wake-up, system sleep mode
- RAM: Dual-Channel 2GB DDR3
- Flash: 16GB eMMC 5.1 Flash
- Ethernet: Native Gigabit Ethernet
- Wi-Fi/BT: 802.11a/b/g/n/ac, Bluetooth 4.1, Wi-Fi and Bluetooth combo module, dual antenna interface
- Video Input: one or two 4-Lane MIPI-CSI, dual ISP, up to 13MPix/s,supports simultaneous input of dual camera data
- Video output
- HDMI: HDMI 2.0a, supports 4K@60Hz,HDCP 1.4/2.2
- DP on Type-C: DisplayPort 1.2 Alt Mode on USB Type-C
- LCD Interface: one eDP 1.3(4-Lane,10.8Gbps), one or two 4-Lane MIPI-DSI
- USB
- USB 2.0: 2 independent native USB 2.0 Host
- USB 3.0: 1 native USB 3.0 Host
- USB Type-C: Supports USB3.0 Type-C and DisplayPort 1.2 Alt Mode on USB Type-C
- PCIe: PCIe x4, compatible with PCIe 2.1, Dual operation mode;
- SDIO/MMC: 1x SDIO/MMC for SD Card
- GPIOs, I2S, I2C, PWM, UART, SPI, ADCs
- 2 X 1.8V I2C, 1 x 3V I2C
- 1 x 3V UART/SPI
- 2 x PWM
- 1 x IR-RX
- 1 x SPDIF_TX
- 1 x 1.8V I2S,
- 6 x 1.8V GPIOs, 8 x 3V GPIOs
- ADC: 3 x 1.8V ADC inputs
- Debug: one Debug UART, 3V level, 1500000bps
- Keys: PowerKey, Reset, Recovery
- LED: 1 x power LED and 1 x GPIO Controlled LED
- Power supply: DC 5V~12V
- PCB: 8 Layer, 50 mm x 69.6 mm
- Ambient Operating Temperature: -20℃ to 70℃
3 Software Features
4 Diagram, Layout and Dimension
4.1 Layout
- 260 Pin Spec
4.2 Board Dimension
5 Link to Rockchip Resources
- Link to Rockchip's resources: https://gitlab.com/friendlyelec/rk3399-nougat/tree/nanopc-t4-nougat/RKDocs
- RK3399 datasheet V1.6
- RK3399TRM V1.4
6 Schematic, PCB CAD File
- Schematic: NanoPC-T4-1802-Schematic.pdf
- Schematic: NanoPC-T4-1902-Schematic.pdf
- PCB CAD File:NanoPC-T4_1802_Drawing(dxf).zip


