Difference between revisions of "Matrix - RTC"
(→Introduction) |
|||
| Line 3: | Line 3: | ||
==Introduction== | ==Introduction== | ||
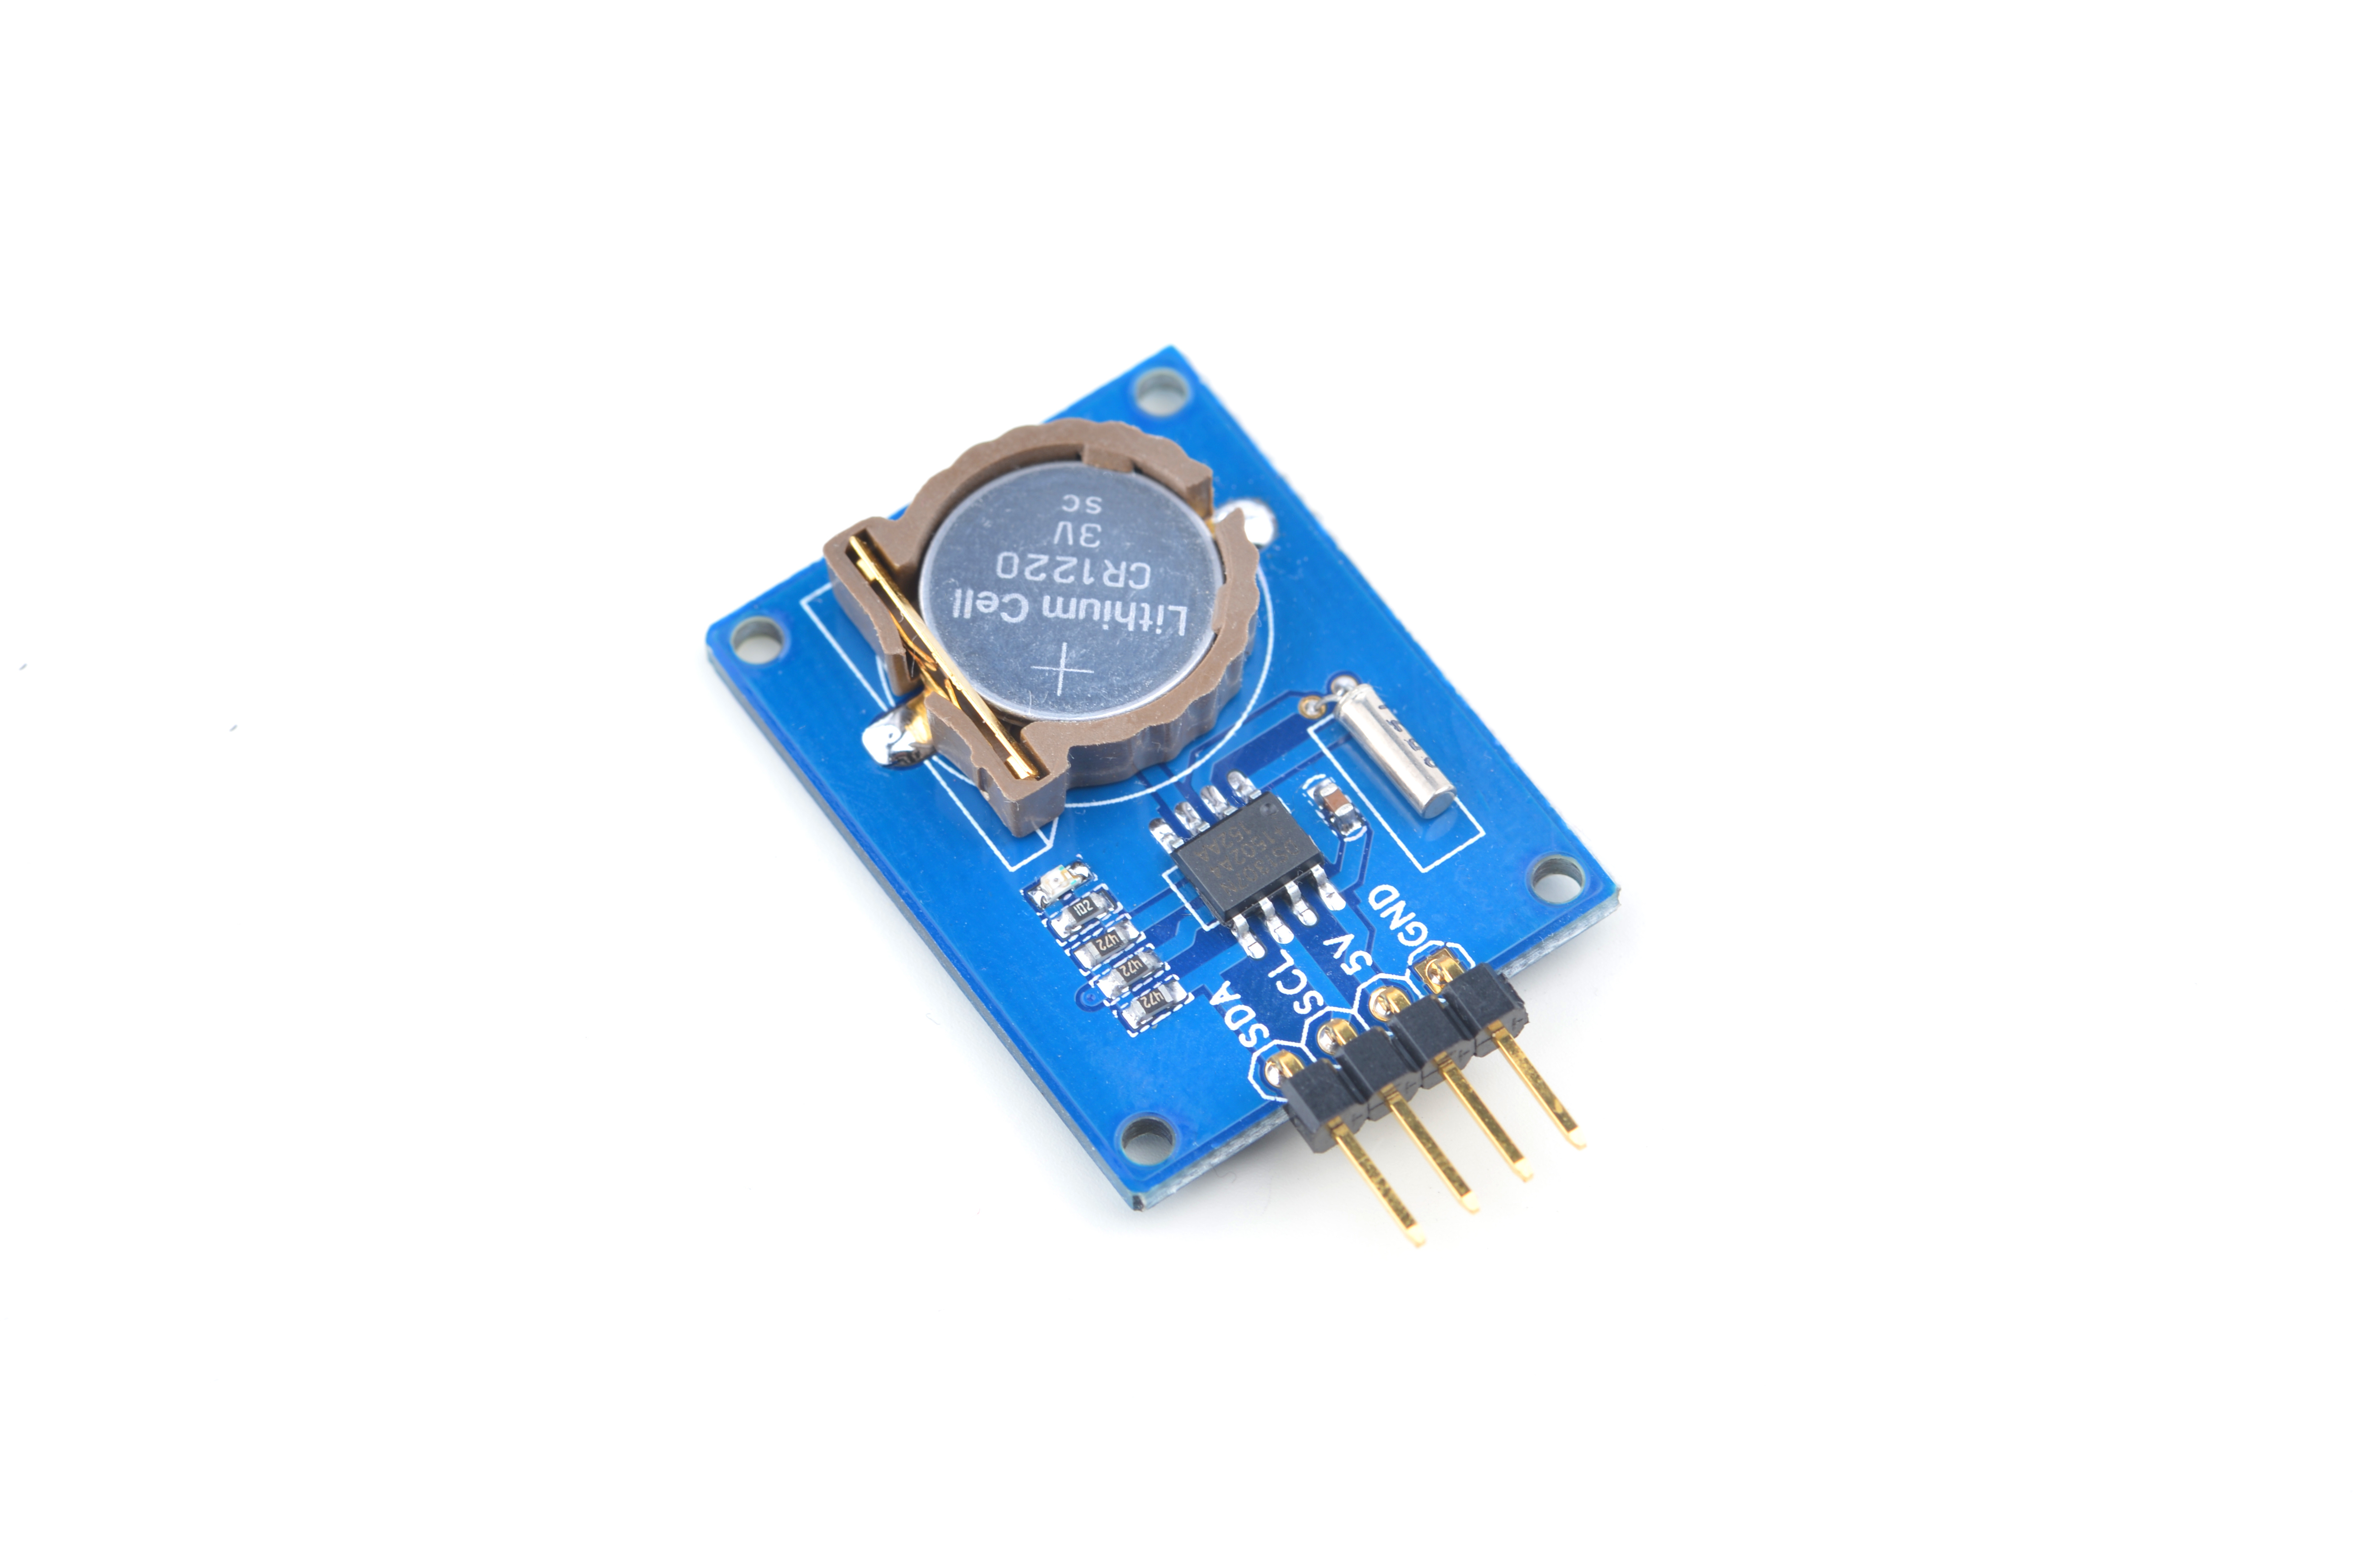
[[File:Matrix-RTC.png|thumb|]] | [[File:Matrix-RTC.png|thumb|]] | ||
| − | * | + | * |
| − | + | ||
| − | + | ||
| − | + | ||
==Features== | ==Features== | ||
Revision as of 03:07, 8 October 2015
Contents
1 Introduction
2 Features
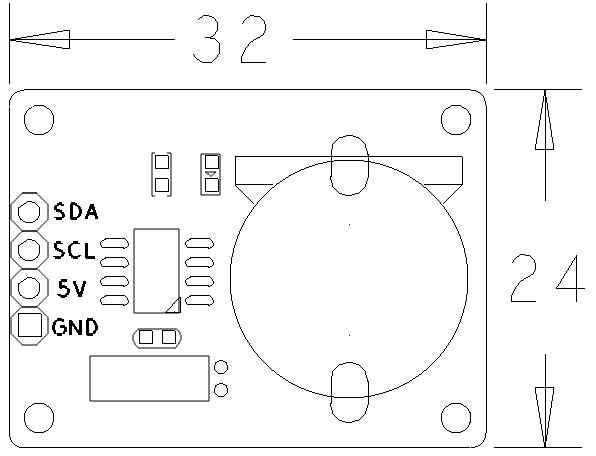
- Pin Description:
| Pin | Description |
| SDA | I2C SDA |
| SCL | I2C SCL |
| 5V | Supply Voltage 5V |
| GND | Ground |
3 Basic Device Operation
4 Download Matrix Source Code
All the matrix modules' code samples are open source. They are maintained on GitHub - git://github.com/friendlyarm/matrix.git
Each branch in this hub contains the matrix modules' code samples for a board that the matrix modules can work with.
- The nanopi branch contains the matrix modules' code samples for the NanoPi
- the tiny4412 branch contains the matrix modules' code samples for the Tiny4412
- the raspberrypi branch contains the matrix modules' code samples for the RaspberryPi
Please follow the steps below to get the source code:
Install the git utility on a PC running Ubuntu14.04
$ sudo apt-get install git
Clone the matrix code from GitHub
$ git clone git://github.com/friendlyarm/matrix.git
If this is successful a "matrix" directory will be generated, which will contain all the matrix modules' code samples.
5 Connect to NanoPi
5.1 Preparations
Please install a Debian on a NanoPi and an appropriate cross compiler on a PC. Please refer to wiki:NanoPi
Compile a NanoPi kernel. Note: please use the kernel's source code from the nanopi-v4.1.y-matrix branch.
$ git clone https://github.com/friendlyarm/linux-4.x.y.git
$ cd linux-4.x.y
$ git checkout nanopi-v4.1.y-matrix
$ make nanopi_defconfig
$ touch .scmversion
$ make
5.2 Hardware Connection
Please refer to the following connection diagram to connect the Matrix-RTC to the NanoPi
Matrix-RTC_nanopi
连接说明:
| Matrix-RTC_nanopi | NanoPi |
| SDA | Pin3 |
| SCL | Pin5 |
| 5V | Pin4 |
| GND | Pin6 |
5.3 Compile Test Program
Please login the matrix hub and enter the nanopi branch
$ cd matrix
$ git checkout nanopi
Compile the matrix code
$ make CROSS_COMPILE=arm-linux- clean
$ make CROSS_COMPILE=arm-linux-
$ make CROSS_COMPILE=arm-linux- install
Note: please make sure to install the cross compiler "arm-linux-gcc-4.4.3" on your PC, which is used to compile files for the NanoPi-Debian.
Generated library files are under the "install/lib" directory. Applications are under the "install/usr/bin" directory. The test program for the "Matrix-RTC" module is "matrix-rtc".
5.4 Run Test Program
Please copy the library files and test program to the NanoPi
$ cp install/usr/bin/* nanopi_rootfs/usr/bin/
$ cp install/lib/* nanopi_rootfs/lib/ -d
Power on the NanoPi and run the following command in Debian's terminal to load the driver
$ modprobe rtc-ds1307Run the test program
Note: this module is not plug and play therefore before running the module please make sure it is connected to a NanoPi.
$ matrix-rtc5.5 Code Sample
static const char default_rtc[] = "/dev/rtc0";
static const char default_date_time[] = "2015 9 15 1 1 1";
int main(int argc, char **argv)
{
    int fd, retval;
    struct rtc_time rtc_tm;
    const char *rtc = default_rtc;
    const char *date_time = default_date_time;

    switch (argc) {
    case 3:
        rtc = argv[1];
        date_time = argv[2];
        break;
    case 1:
        break;
    default:
        fprintf(stderr, "usage:  rtctest [rtcdev] [year mon day hour min sec]\n");
        return 1;
    }

    fd = open(rtc, O_RDONLY);

    if (fd ==  -1) {
        perror(rtc);
        exit(errno);
    }
    fprintf(stderr, "RTC Driver Test Example.\n");

    sscanf(date_time, "%d %d %d %d %d %d",
            &rtc_tm.tm_year,
            &rtc_tm.tm_mon,
            &rtc_tm.tm_mday,
            &rtc_tm.tm_hour,
            &rtc_tm.tm_min,
            &rtc_tm.tm_sec);
    rtc_tm.tm_year -= 1900;
    rtc_tm.tm_mon -= 1;
    retval = ioctl(fd, RTC_SET_TIME, &rtc_tm);
    if (retval == -1) {
        perror("RTC_SET_TIME ioctl");
        exit(errno);
    }

    fprintf(stderr, "Set RTC date/time is %d-%d-%d, %02d:%02d:%02d.\n",
        rtc_tm.tm_mon + 1, rtc_tm.tm_mday, rtc_tm.tm_year + 1900,
        rtc_tm.tm_hour, rtc_tm.tm_min, rtc_tm.tm_sec);

    /* Read the RTC time/date */
    retval = ioctl(fd, RTC_RD_TIME, &rtc_tm);
    if (retval == -1) {
        perror("RTC_RD_TIME ioctl");
        exit(errno);
    }

    fprintf(stderr, "Read RTC date/time is %d-%d-%d, %02d:%02d:%02d.\n",
        rtc_tm.tm_mon + 1, rtc_tm.tm_mday, rtc_tm.tm_year + 1900,
        rtc_tm.tm_hour, rtc_tm.tm_min, rtc_tm.tm_sec);

    fprintf(stderr, "Test complete\n");
    close(fd);
    return 0;
}
6 Connect to Tiny4412
6.1 Preparations
Please refer to the Tiny4412's user's manual to install a UbuntuCore on the Tiny4412 and install an appropriate cross compiler on a PC.
Note: only the Tiny4412SDK-1506 carrier board can work with this module.
6.2 Hardware Connection
Please refer to the following diagram to connect the Matrix-RTC to the Tiny4412
Matrix-RTC_tiny4412
Connection Details:
| Matrix-RTC | Tiny4412 |
| SDA | CON18 SDA |
| SCL | CON18 SCL |
| 5V | CON18 5V |
| GND | CON18 GND |
6.3 Compile Test Program
Please login the Matrix hub and enter the matrix-tiny4412 branch
$ cd matrix
$ git checkout tiny4412
Compile the Matrix code
$ make CROSS_COMPILE=arm-linux-gnueabihf- clean
$ make CROSS_COMPILE=arm-linux-gnueabihf-
$ make CROSS_COMPILE=arm-linux-gnueabihf- install
Note: please make sure to install the cross compiler "arm-linux-gnueabihf-gcc-4.7.3" on your PC, which is used to compile files for the Tiny4412-UbuntuCore.
Generated library files are under the "install/lib" directory. Applications are under the "install/usr/bin" directory. The test program for the "Matrix-RTC" module is "matrix-rtc".
6.4 Run Test Program
Please copy the library files and test program to the Tiny4412
$ cp install/usr/bin/* tiny4412_rootfs/usr/bin/
$ cp install/lib/* tiny4412_rootfs/lib/ -d
Power on the Tiny4412 and run the following command in UbuntuCore's terminal to load the driver.
$ modprobe bmp085-i2cRun the test program
Note: this module is not plug and play therefore before running the module please make sure it is connected to a Tiny4412.
$ matrix-rtc6.5 Code Sample
static const char default_rtc[] = "/dev/rtc0";
static const char default_date_time[] = "2015 9 15 1 1 1";
int main(int argc, char **argv)
{
    int fd, retval;
    struct rtc_time rtc_tm;
    const char *rtc = default_rtc;
    const char *date_time = default_date_time;

    switch (argc) {
    case 3:
        rtc = argv[1];
        date_time = argv[2];
        break;
    case 1:
        break;
    default:
        fprintf(stderr, "usage:  rtctest [rtcdev] [year mon day hour min sec]\n");
        return 1;
    }

    fd = open(rtc, O_RDONLY);

    if (fd ==  -1) {
        perror(rtc);
        exit(errno);
    }
    fprintf(stderr, "RTC Driver Test Example.\n");

    sscanf(date_time, "%d %d %d %d %d %d",
            &rtc_tm.tm_year,
            &rtc_tm.tm_mon,
            &rtc_tm.tm_mday,
            &rtc_tm.tm_hour,
            &rtc_tm.tm_min,
            &rtc_tm.tm_sec);
    rtc_tm.tm_year -= 1900;
    rtc_tm.tm_mon -= 1;
    retval = ioctl(fd, RTC_SET_TIME, &rtc_tm);
    if (retval == -1) {
        perror("RTC_SET_TIME ioctl");
        exit(errno);
    }

    fprintf(stderr, "Set RTC date/time is %d-%d-%d, %02d:%02d:%02d.\n",
        rtc_tm.tm_mon + 1, rtc_tm.tm_mday, rtc_tm.tm_year + 1900,
        rtc_tm.tm_hour, rtc_tm.tm_min, rtc_tm.tm_sec);

    /* Read the RTC time/date */
    retval = ioctl(fd, RTC_RD_TIME, &rtc_tm);
    if (retval == -1) {
        perror("RTC_RD_TIME ioctl");
        exit(errno);
    }

    fprintf(stderr, "Read RTC date/time is %d-%d-%d, %02d:%02d:%02d.\n",
        rtc_tm.tm_mon + 1, rtc_tm.tm_mday, rtc_tm.tm_year + 1900,
        rtc_tm.tm_hour, rtc_tm.tm_min, rtc_tm.tm_sec);

    fprintf(stderr, "Test complete\n");
    close(fd);
    return 0;
}

