Matrix - I2C LCD1602 Keypad
Contents
1 Introduction
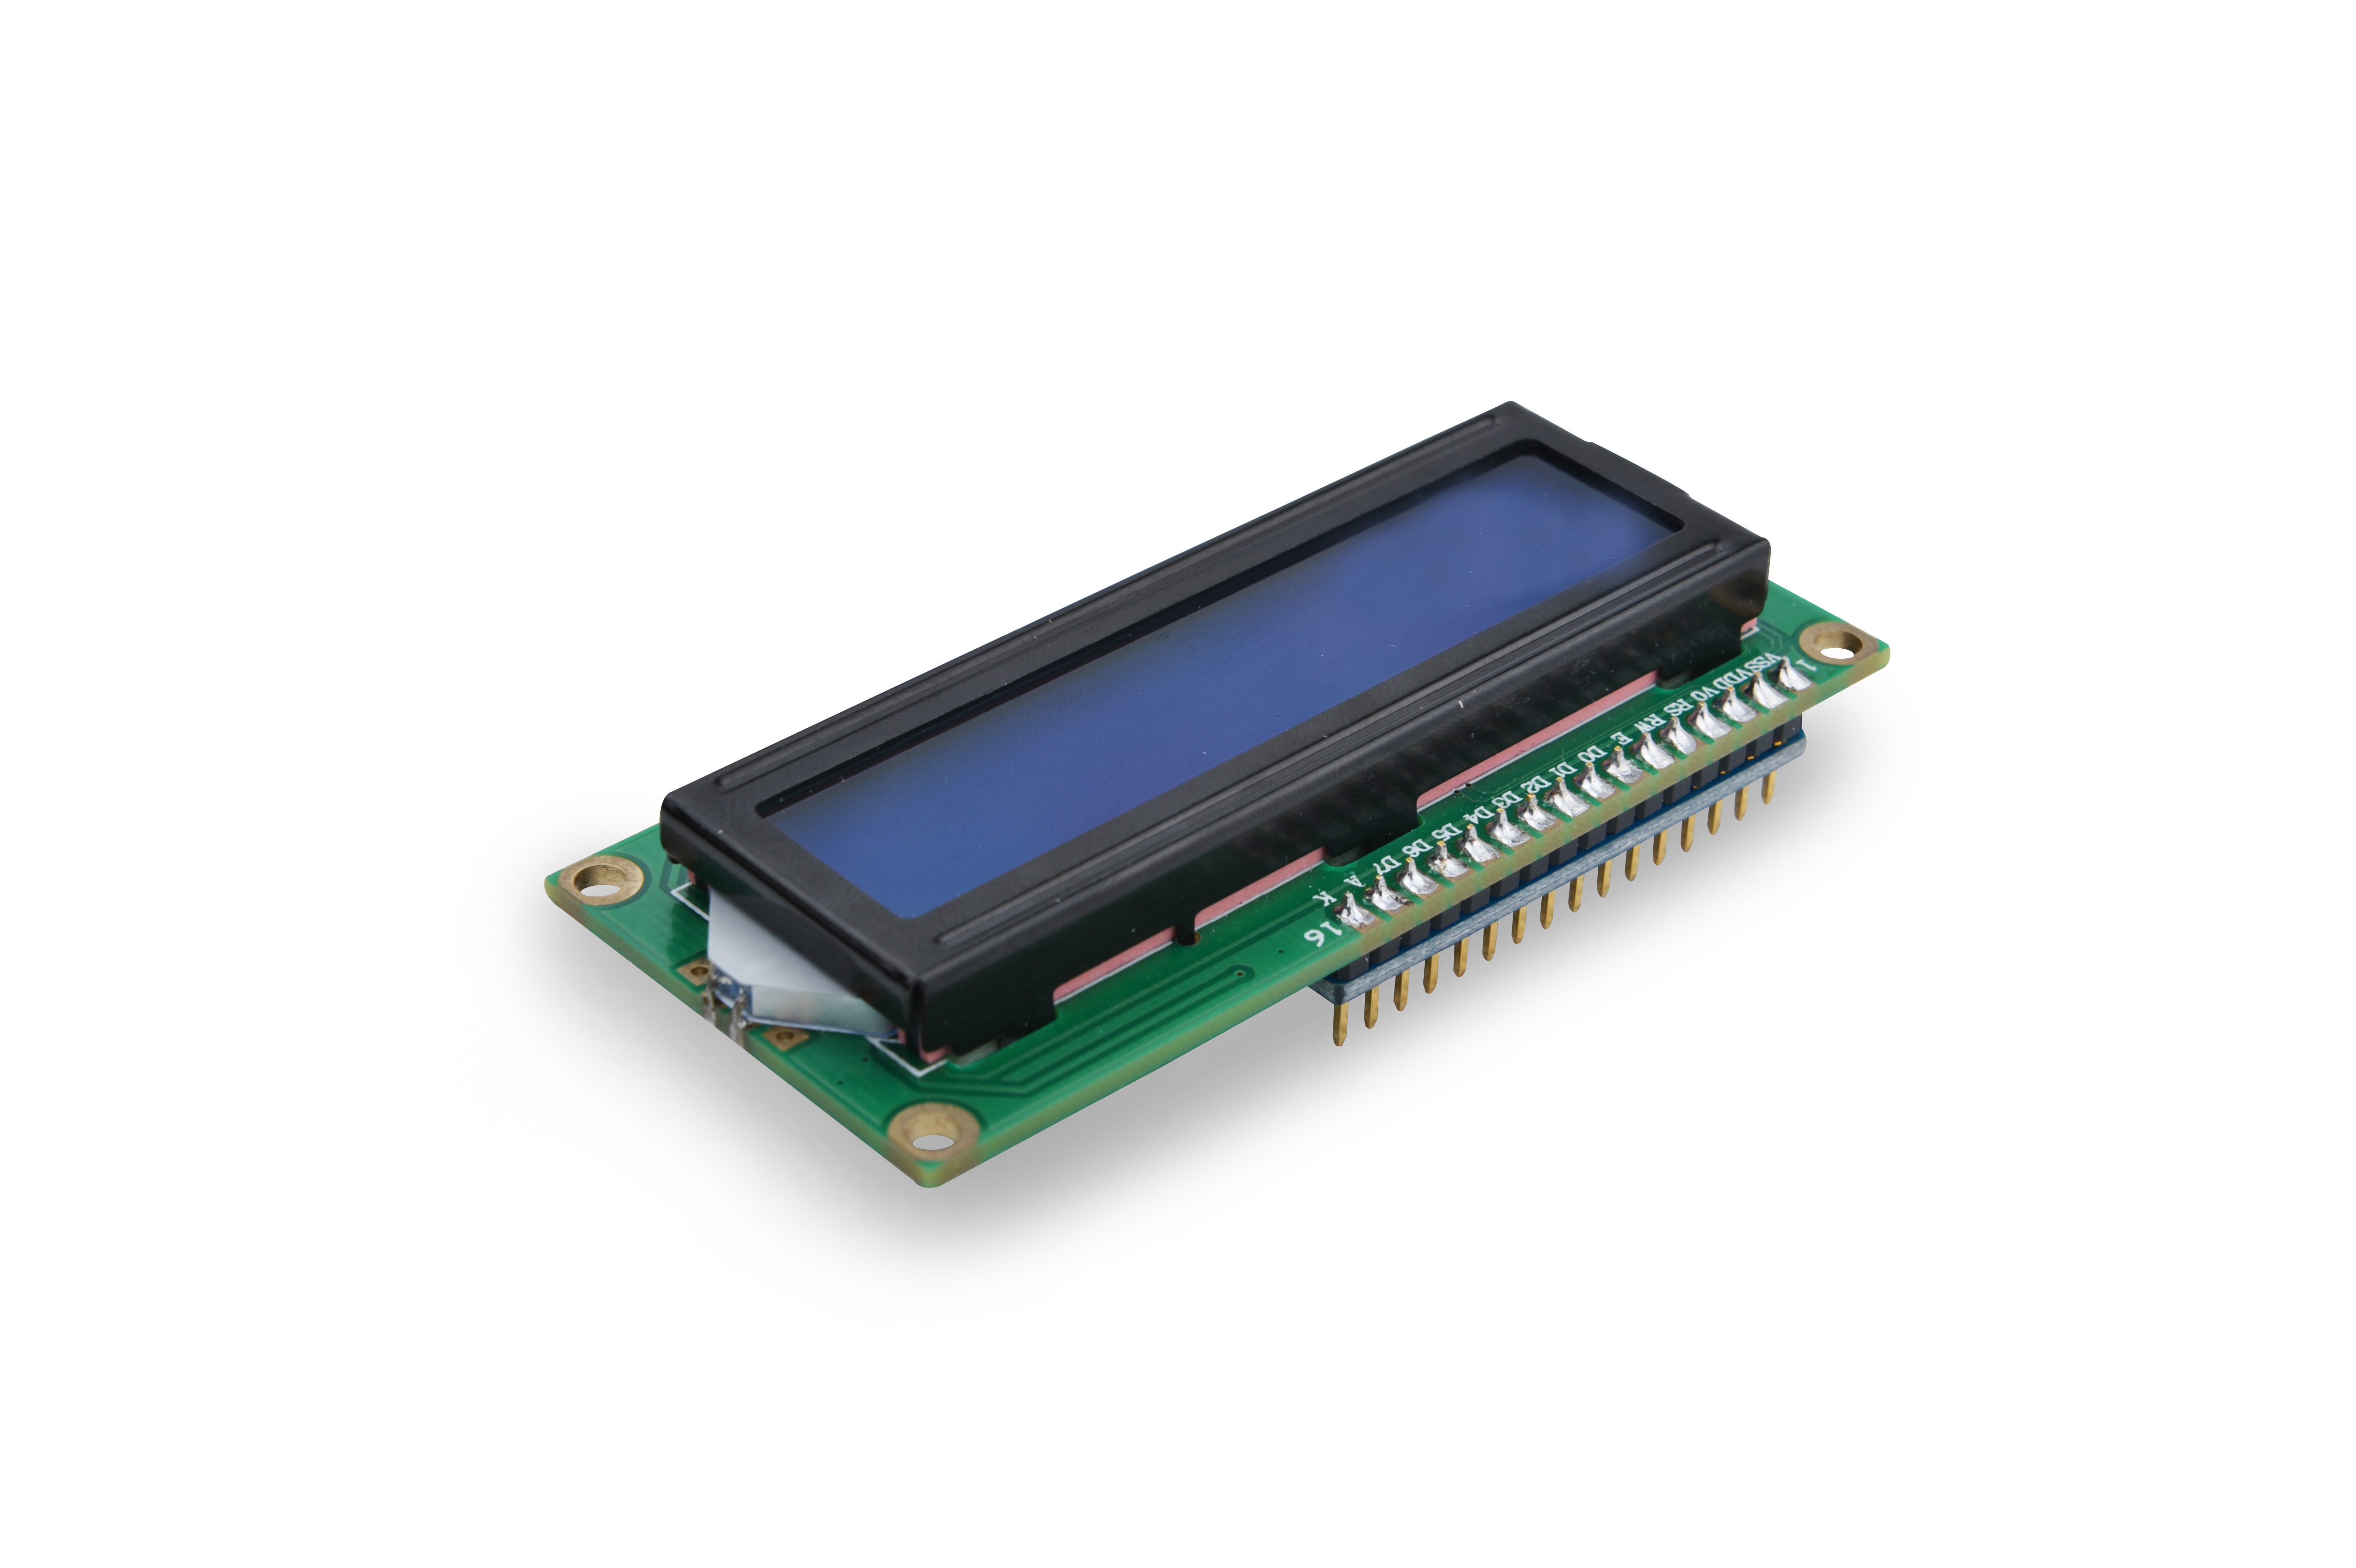
- The Matrix-I2C_LCD1602_Keypad module is an easy-to-use display module based on the LCD1602.
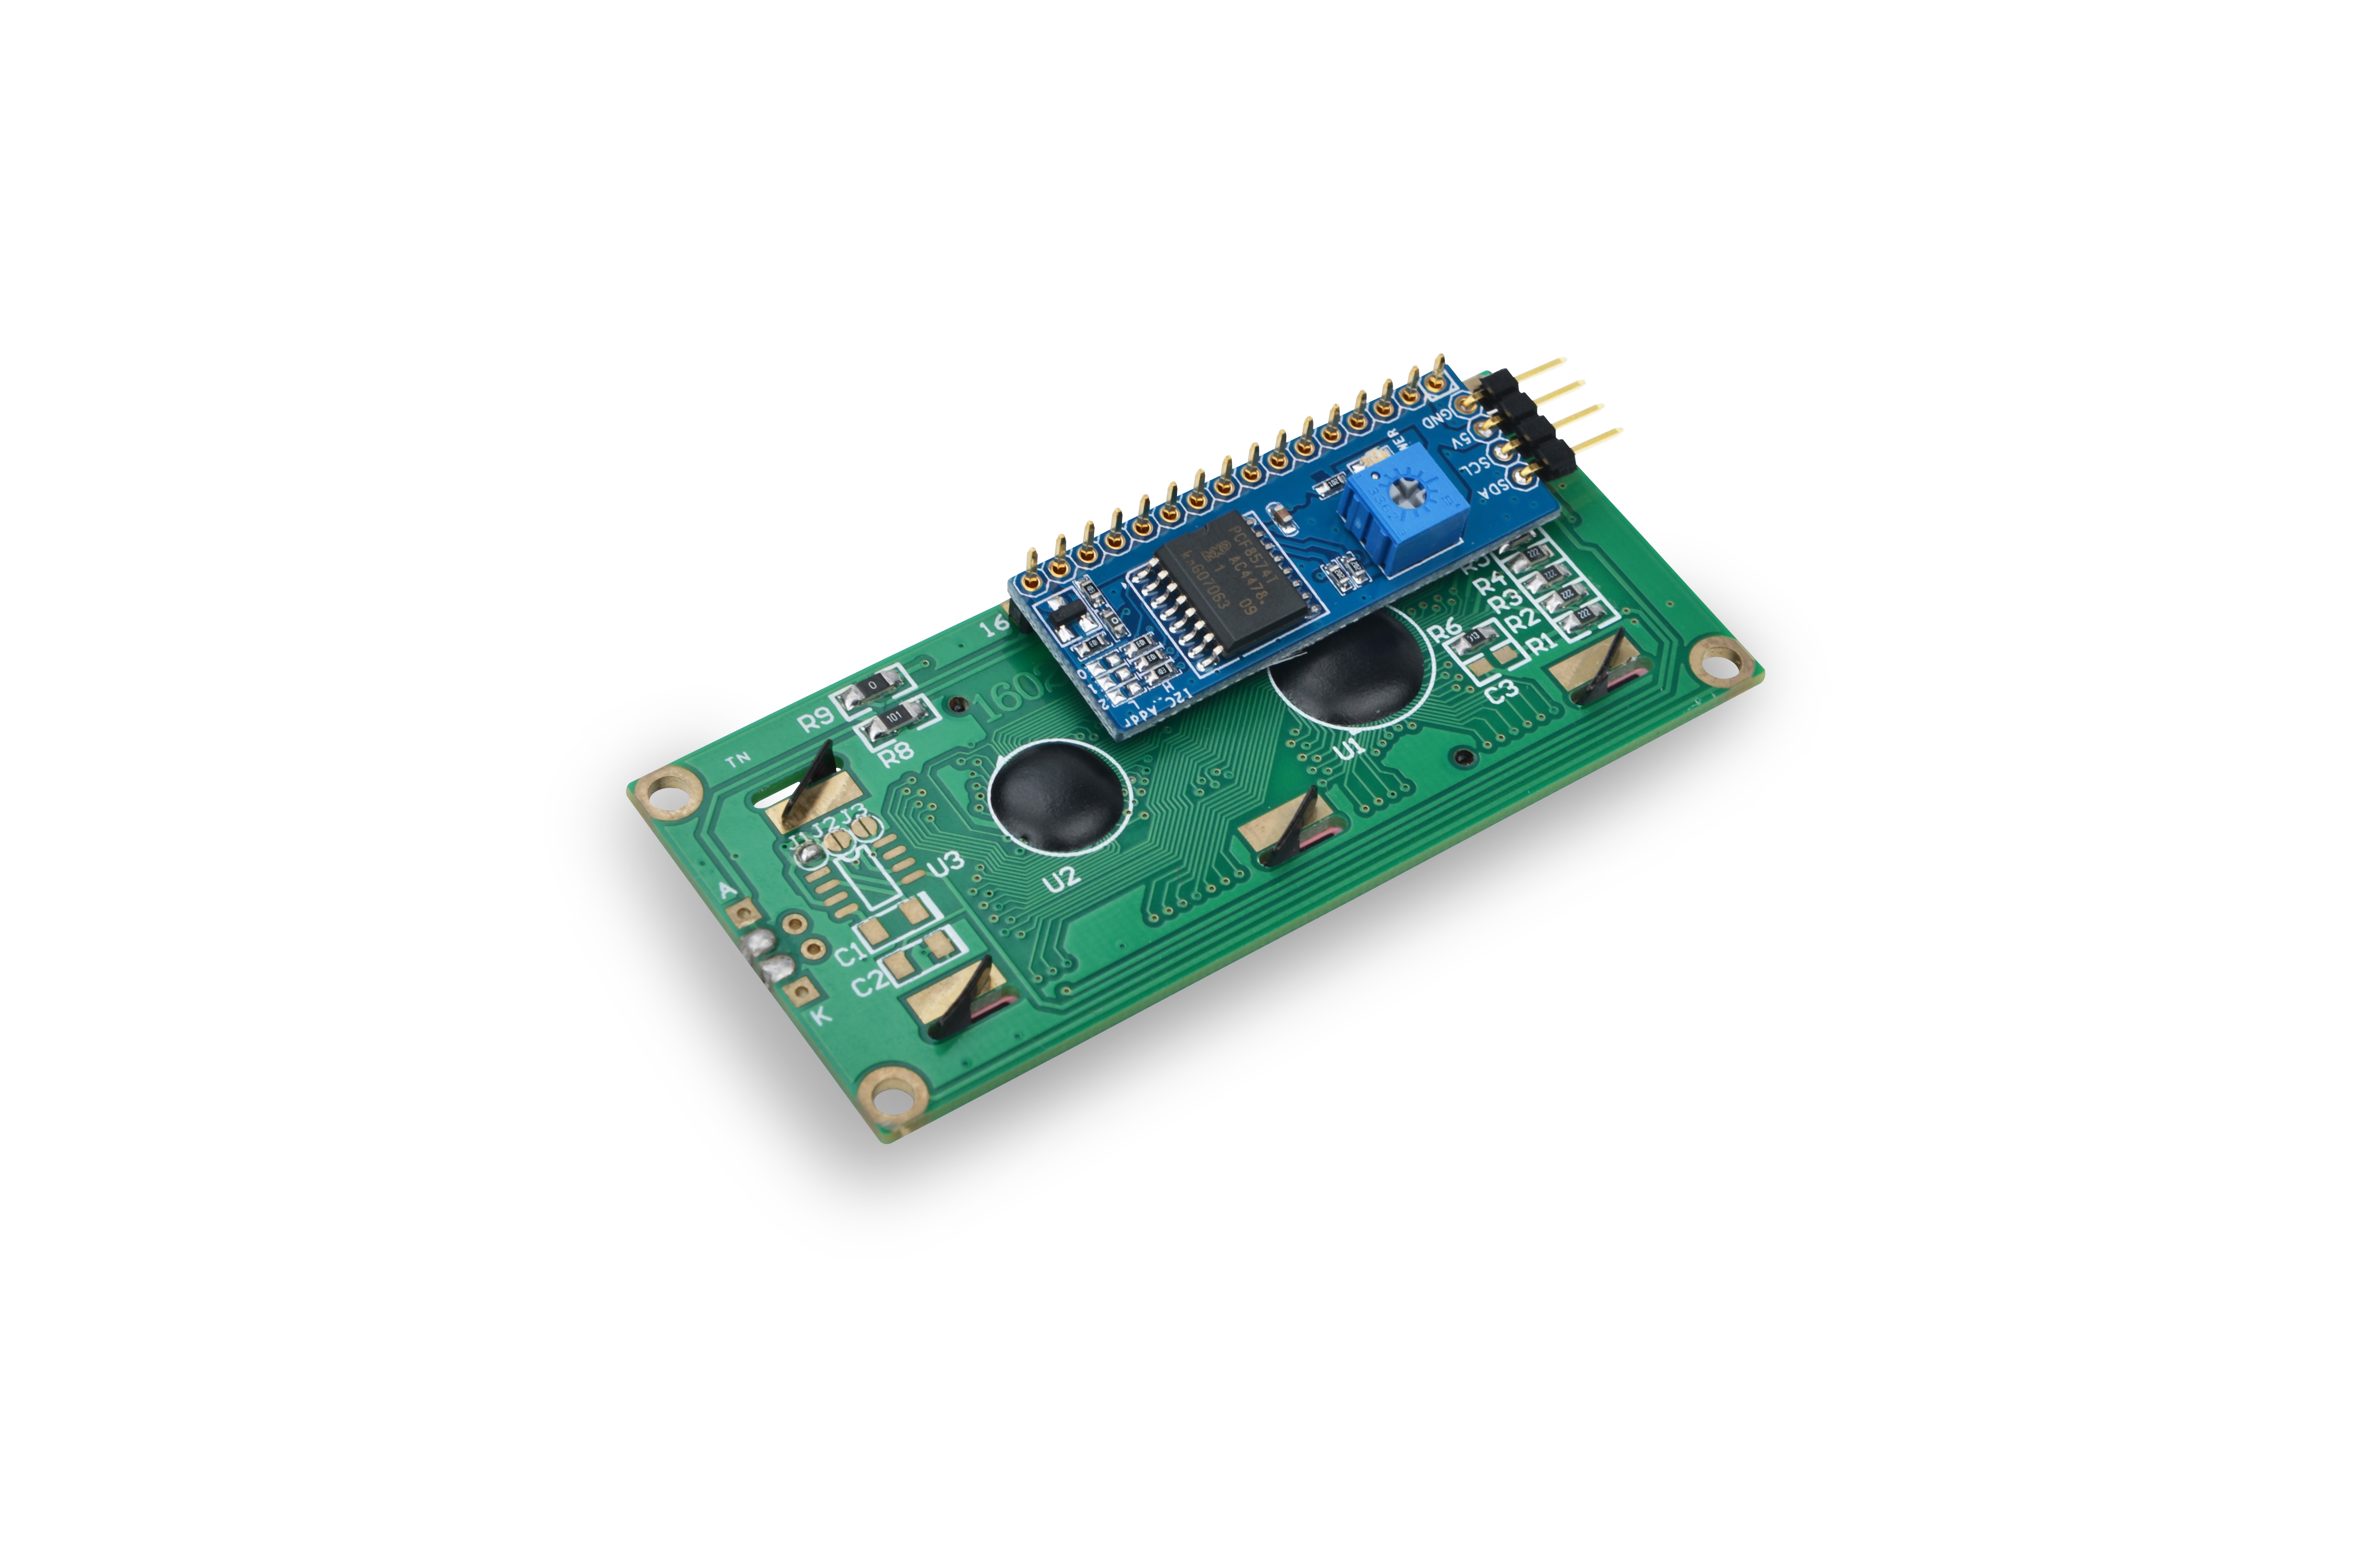
- This module integrates the LCD1602 and the MCP23017 module. It has five programmable keys which allow users to control the LCD1602's display and external devices connected to the module.
- It has a potentiometer to adjust the LCD's back light.
- The LCD1602 can display up to 16x2 characters. It has a parallel interface. You can control it via two I2C channels.
- The MCP23017 has a 16-bit remote bidirectional I/O port, high speed I2C interface, three hardware address pins which make it able to connect up to eight devices. It communicates through I2C interface and converts input to parallel signals to the LCD1602.
2 Features
- I2C interface, LCD display and backlight control
- 2.54mm spacing pin
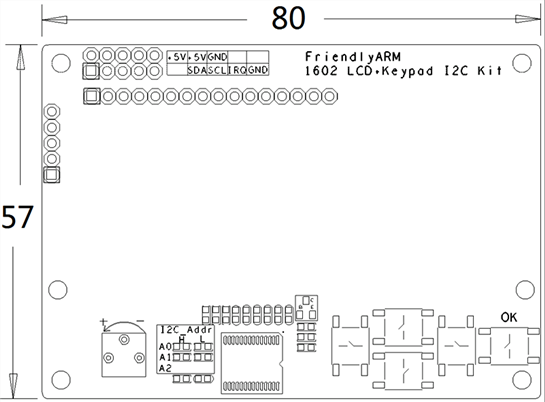
- I2C PCB dimension (mm): 57 x 80
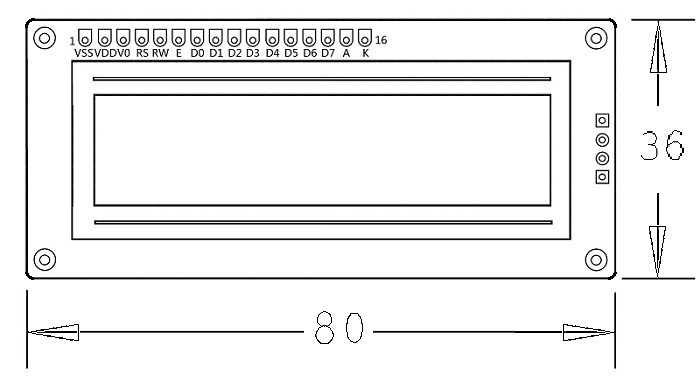
- LCD1602 PCB dimension (mm): 36 x 80
- Pin Spec:
| Pin | Comment |
| IRQ | BUTTON IRQ |
| SDA | I2C SDA |
| SCL | I2C SCL |
| 5V | Power 5V |
| GND | Ground |
3 General Description
3.1 MCP23017
- The MCP23017 has a 16-bit remote bidirectional I/O port, high speed I2C interface. These I/O can be configured to inputs and outputs. Each input/output data is saved in its register. It has three hardware address pins which make it able to connect up to eight devices. In addition it has two configurable interrupts INTA and INTB.
- I2C 写操作包括控制字节和寄存器地址序列,该序列后面跟随来自系统主器件的8 位数据和来自MCP23017 的应答(ACK)。该操作以主系统生成的停止(P)或重新启动(SR)条件结束。
- I2C读操作包括控制字节序列,该序列后跟R/W位置1(R/W = 1)的另一个控制字节(包括启动条件和ACK)。MCP23017 随后会发送被寻址寄存器中包含的数据。该序列以系统主器件生成停止或重新启动条件结束。
- I2C 顺序写入/ 读取对于顺序操作(读操作或写操作),在完成数据传送后,系统主器件将发送地址指针指向的下一字节,而不是发送停止或重新启动条件。该序列以系统主器件发送停止或重新启动条件结束。MCP23017 地址指针在到达最后一个寄存器地址后,将返回到地址0。
3.2 LCD1602工作原理
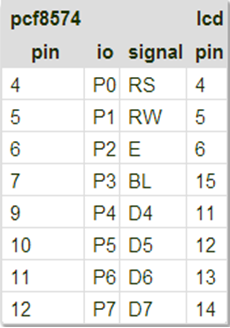
- 由模块的原理图可以看出PCF8574模块的输出引脚P0-P7与LCD模块的引脚连接如下图:
- RS为指令/数据控制位,RW为读/写控制位,E为使能位(边沿触发),BL为背光灯控制位,D4-D7为数据位。
- 由于LCD用到四个数据位,因此只能使用4线来驱动。通过指令表我们可以对LCD进行写指令设置LCD的工作转态,但这里的指令/数据(DB7-DB0)是八位的,而LCD却是4线驱动,因此每次写指令/数据时是先写高四位(DB7-DB4),再写低四位(DB3-DB0)。
- 注意:LCD内置了192个常用字模,存放在CGROM,所以我们在显示字符A时可以直接写入“A”,此外LCD还有8个允许用户自定义的字符产生的RAM,称为CGRAM,这里由于没有涉及到所以不介绍,有兴趣的用户可以去了解一下。
4 下载Matrix源码
Matrix配件相关的代码是完全开源的,统一由一个仓库进行管理:git://github.com/friendlyarm/matrix.git
该仓库里不同的分支代表着Matrix配件所支持的不同开发板。
- nanopi分支包含了Matrix对NanoPi的支持;
- tiny4412分支包含了Matrix对Tiny4412的支持;
- raspberrypi分支包含了Matrix对RaspberryPi的支持;
在主机PC上安装git,以Ubuntu14.04为例
$ sudo apt-get install git
克隆Matrix配件代码仓库
$ git clone git://github.com/friendlyarm/matrix.git
克隆完成后会得到一个matrix目录,里面存放着所有Matrix配件的代码。
5 与NanoPi连接使用
5.1 准备工作
在NanoPi上运行Debian系统,然后在主机PC上安装并使用相应的编译器。参考wiki:NanoPi
注意:必须使用nanopi-v4.1.y-matrix分支编译出来的内核。
下载NanoPi内核源代码并编译
$ git clone https://github.com/friendlyarm/linux-4.x.y.git
$ cd linux-4.x.y
$ git checkout nanopi-v4.1.y-matrix
$ make nanopi_defconfig
$ touch .scmversion
$ make
5.2 硬件连接
参考下图连接模块Matrix-I2C_LCD1602_Keypad和NanoPi
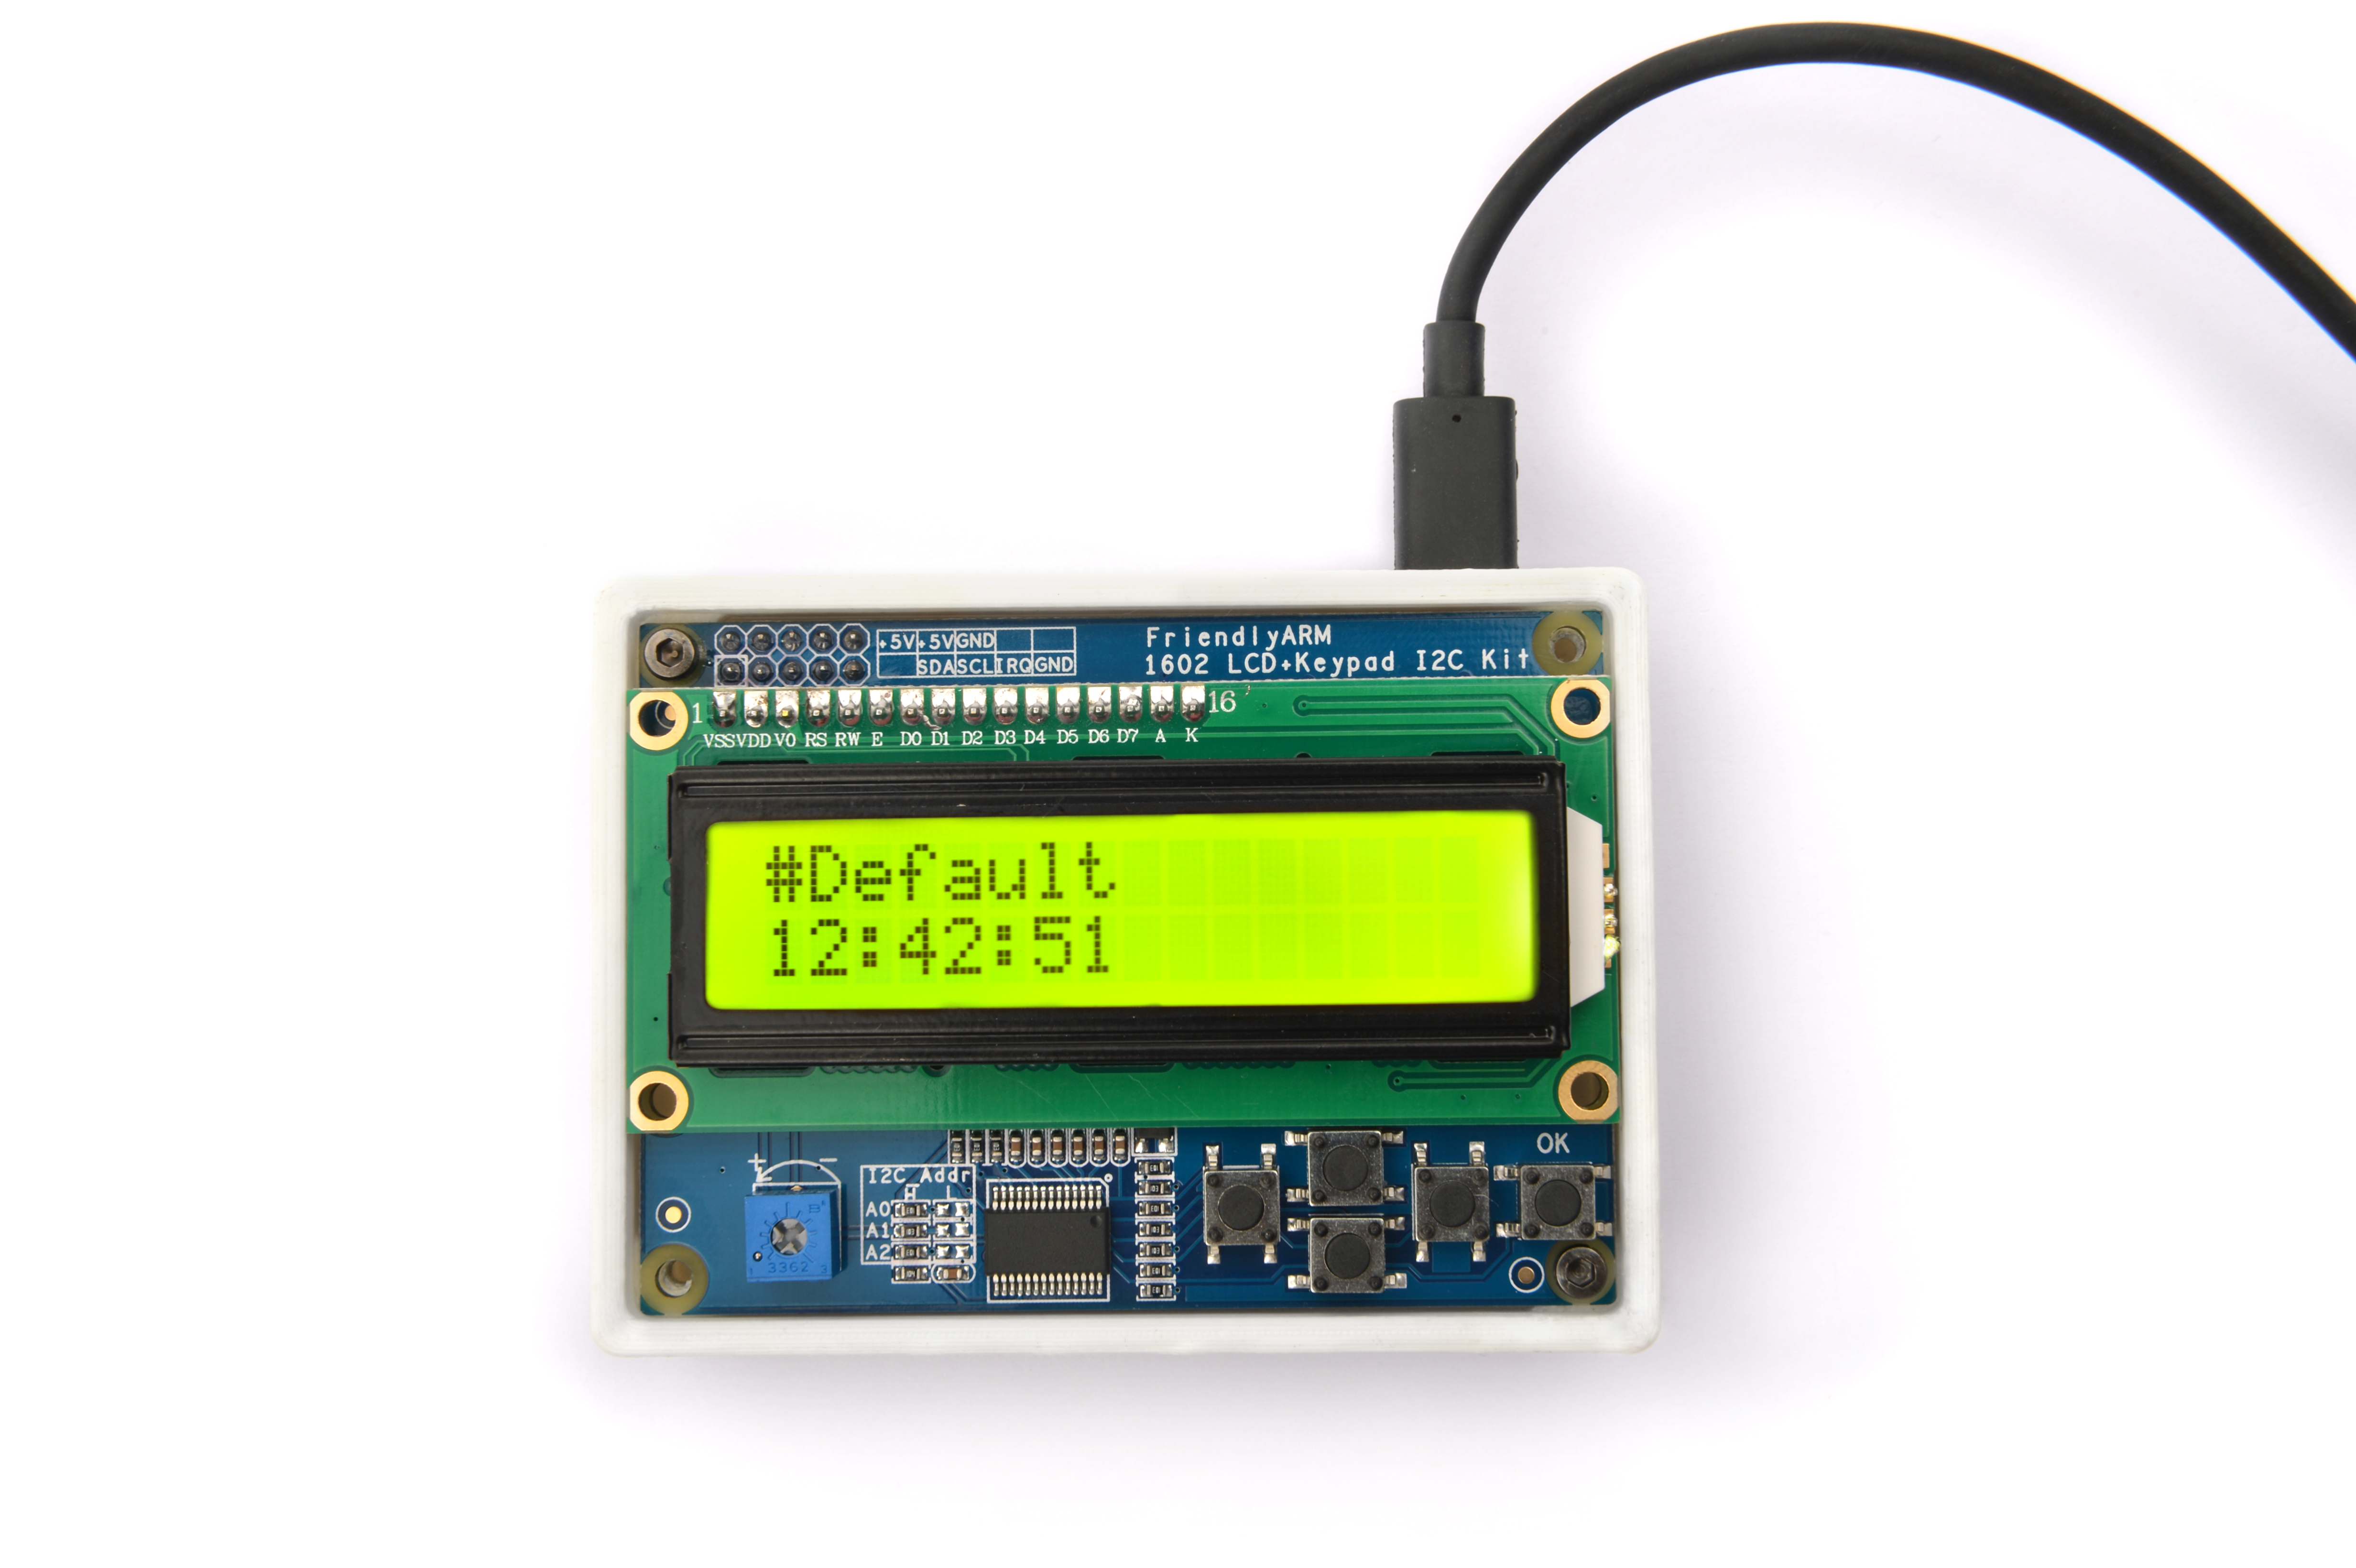
连接说明:
| Matrix-I2C_LCD1602_Keypad | NanoPi |
| SDA | Pin3 |
| SCL | Pin5 |
| 5V | Pin4 |
| GND | Pin6 |
5.3 编译测试程序
进入Matrix代码仓库,切换到nanopi分支
$ cd matrix
$ git checkout nanopi
编译Matrix配件代码
$ make CROSS_COMPILE=arm-linux- clean
$ make CROSS_COMPILE=arm-linux-
$ make CROSS_COMPILE=arm-linux- install
注意:请确保你的主机PC当前使用的交叉编译器为NanoPi-Debian配套的arm-linux-gcc.4.4.3。
编译出来的库文件位于install/lib目录下,而测试程序则位于install/usr/bin目录下,模块Matrix-I2C_LCD1602_Keypad对应的测试程序为matrix-i2c_lcd1602_keypad。
5.4 运行测试程序
拷贝库文件和测试程序到NanoPi的文件系统上
$ cp install/usr/bin/* nanopi_rootfs/usr/bin/
$ cp install/lib/* nanopi_rootfs/lib/ -d
然后启动NanoPi,在Debian的shell终端中执行如下命令运行模块Matrix-I2C_LCD1602_Keypad的测试程序
注意:此模块并不支持热插拔,启动系统前需要确保硬件正常连接。
$ matrix-i2c_lcd1602_keypad5.5 代码展示
int main(int argc, char ** argv) { int devFD; int keyValue = 0; int showDefault = 1; int needClear = 1; time_t lt; char curTime[TIME_STR_BUFSIZE]; char preTime[TIME_STR_BUFSIZE]; int hostNameLen = 0; if ((devFD = LCD1602KeyInit()) == -1) { printf("Fail to init LCD1602\n"); return -1; } LCD1602KeyClear(devFD); printf("waiting key press...\n"); while (1) { keyValue = LCD1602GetKey(devFD); switch (keyValue) { // F1 case 0x1e: showDefault = 0; LCD1602KeyClear(devFD); LCD1602KeyDispStr(devFD, 0, 0, "#F1-IP address"); showIP(devFD, "usb0"); break; // F2 case 0x1d: showDefault = 0; LCD1602KeyClear(devFD); LCD1602KeyDispStr(devFD, 0, 0, "#F2-Your favor"); LCD1602KeyDispStr(devFD, 0, 1, "Come add it"); break; // F3 case 0x1b: showDefault = 0; LCD1602KeyClear(devFD); LCD1602KeyDispStr(devFD, 0, 0, "#F3-Your idea"); LCD1602KeyDispStr(devFD, 0, 1, "Come show it"); break; // F4 case 0x17: showDefault = 0; LCD1602KeyClear(devFD); LCD1602KeyDispStr(devFD, 0, 0, "#F4-About"); LCD1602KeyDispStr(devFD, 0, 1, "by FriendlyARM"); break; // F5 case 0xf: showDefault = 1; break; } if (showDefault == 1) { if (needClear) { LCD1602KeyClear(devFD); LCD1602KeyDispStr(devFD, 0, 0, "#Default"); needClear = 0; } memset(curTime, 0, TIME_STR_BUFSIZE); lt = time(NULL); strncpy(curTime, ctime(<) + 11, 8); if(strcmp(curTime, preTime)) { printf("time:%s\n", curTime); LCD1602KeyDispStr(devFD, 0, 1, curTime); } memset(preTime, 0, TIME_STR_BUFSIZE); strcpy(preTime, curTime); } else { needClear = 1; usleep(1000); } } printf("quit reading key press\n"); LCD1602KeyDeInit(devFD); return 0; }
6 与Tiny4412连接使用
6.1 准备工作
参考Tiny4412光盘里的《友善之臂Ubuntu使用手册》,在Tiny4412上运行UbuntuCore系统,然后在主机PC上安装并使用相应的编译器。
注意:只能使用Tiny4412SDK-1506的底板。
6.2 硬件连接
参考下图连接模块Matrix-I2C_LCD1602_Keypad和Tiny4412
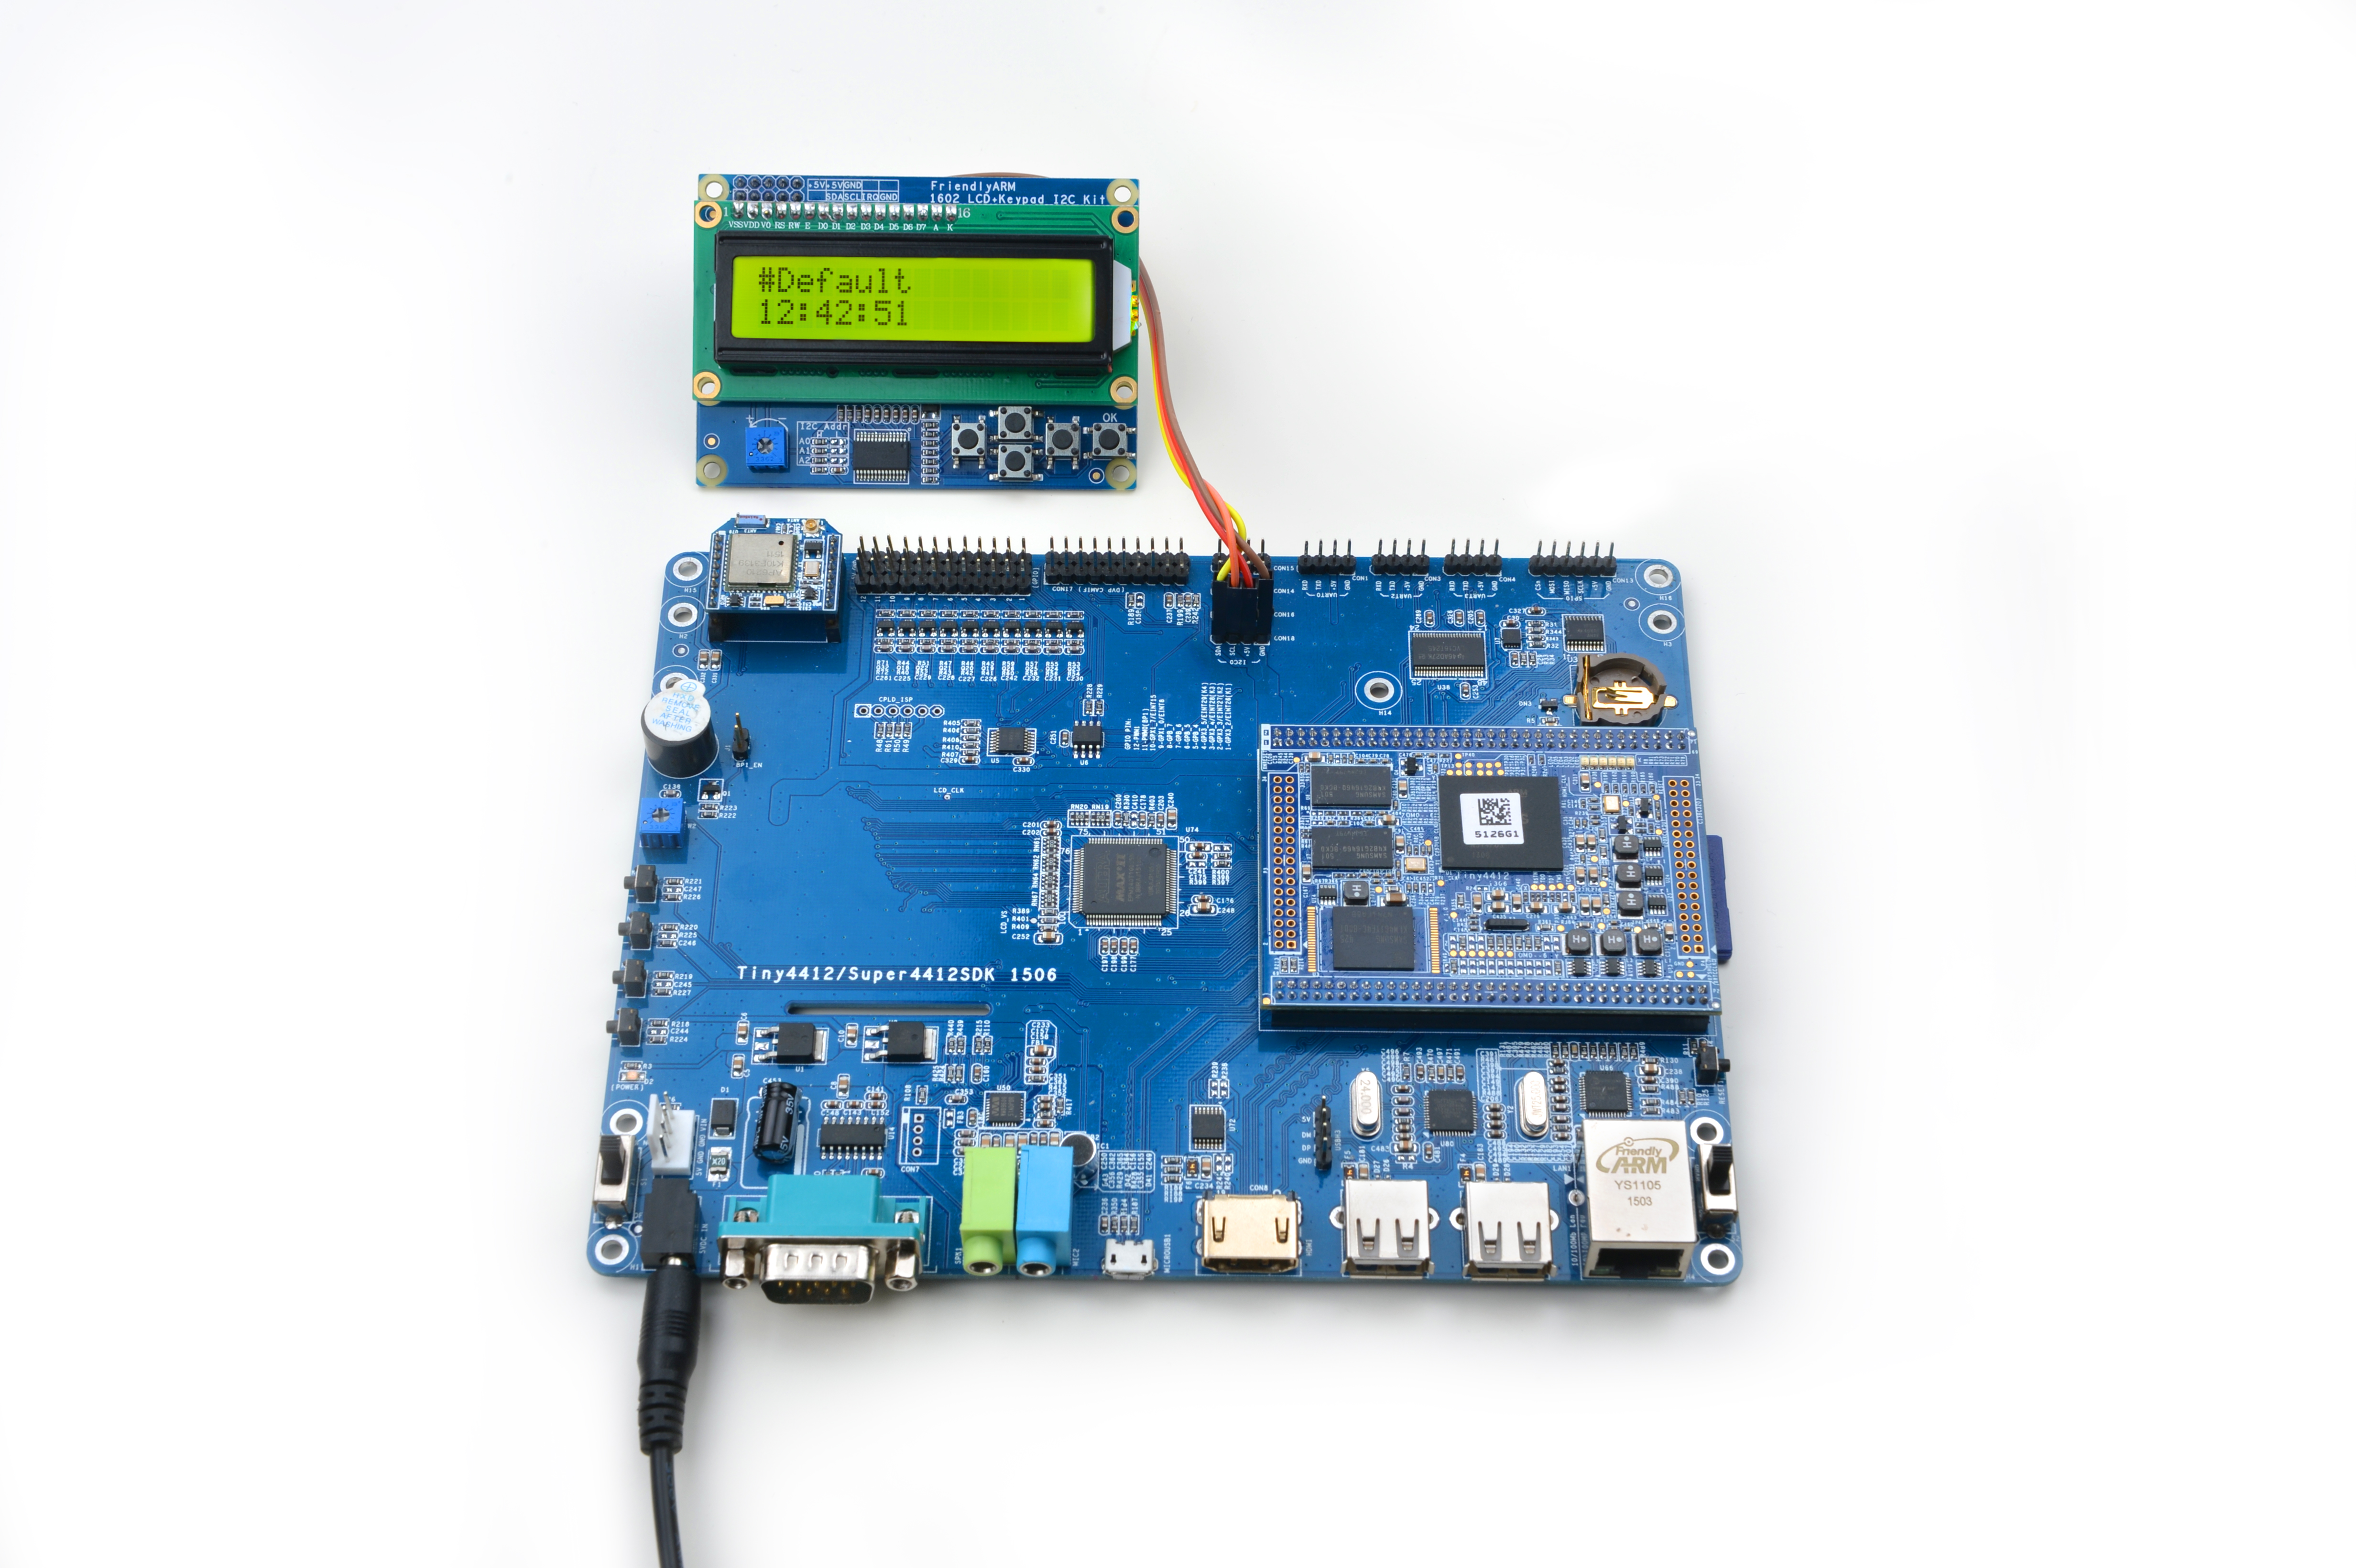
连接说明:
| Matrix-I2C_LCD1602_Keypad | Tiny4412 |
6.3 编译测试程序
进入Matrix代码仓库,切换到tiny4412分支
$ cd matrix
$ git checkout tiny4412
编译Matrix配件代码
$ make CROSS_COMPILE=arm-linux-gnueabihf- clean
$ make CROSS_COMPILE=arm-linux-gnueabihf-
$ make CROSS_COMPILE=arm-linux-gnueabihf- install
注意:请确保你的主机PC当前使用的交叉编译器为Tiny4412-UbuntuCore配套的arm-linux-gnueabihf-gcc-4.7.3。
编译出来的库文件位于install/lib目录下,而测试程序则位于install/usr/bin目录下,模块Matrix-I2C_LCD1602_Keypad对应的测试程序为matrix-i2c_lcd1602_keypad。
6.4 运行测试程序
拷贝库文件和测试程序到Tiny4412的UbuntuCore的文件系统上
$ cp install/usr/bin/* tiny4412_rootfs/usr/bin/
$ cp install/lib/* tiny4412_rootfs/lib/ -d
然后启动Tiny4412,在UbuntuCore的shell终端中执行如下命令运行模块Matrix-I2C_LCD1602_Keypad的测试程序
注意:此模块并不支持热插拔,启动系统前需要确保硬件正常连接。
$ matrix-i2c_lcd1602_keypad6.5 代码展示
int main(int argc, char ** argv) { int devFD; int keyValue = 0; int showDefault = 1; int needClear = 1; time_t lt; char curTime[TIME_STR_BUFSIZE]; char preTime[TIME_STR_BUFSIZE]; int hostNameLen = 0; if ((devFD = LCD1602KeyInit()) == -1) { printf("Fail to init LCD1602\n"); return -1; } LCD1602KeyClear(devFD); printf("waiting key press...\n"); while (1) { keyValue = LCD1602GetKey(devFD); switch (keyValue) { // F1 case 0x1e: showDefault = 0; LCD1602KeyClear(devFD); LCD1602KeyDispStr(devFD, 0, 0, "#F1-IP address"); showIP(devFD, "usb0"); break; // F2 case 0x1d: showDefault = 0; LCD1602KeyClear(devFD); LCD1602KeyDispStr(devFD, 0, 0, "#F2-Your favor"); LCD1602KeyDispStr(devFD, 0, 1, "Come add it"); break; // F3 case 0x1b: showDefault = 0; LCD1602KeyClear(devFD); LCD1602KeyDispStr(devFD, 0, 0, "#F3-Your idea"); LCD1602KeyDispStr(devFD, 0, 1, "Come show it"); break; // F4 case 0x17: showDefault = 0; LCD1602KeyClear(devFD); LCD1602KeyDispStr(devFD, 0, 0, "#F4-About"); LCD1602KeyDispStr(devFD, 0, 1, "by FriendlyARM"); break; // F5 case 0xf: showDefault = 1; break; } if (showDefault == 1) { if (needClear) { LCD1602KeyClear(devFD); LCD1602KeyDispStr(devFD, 0, 0, "#Default"); needClear = 0; } memset(curTime, 0, TIME_STR_BUFSIZE); lt = time(NULL); strncpy(curTime, ctime(<) + 11, 8); if(strcmp(curTime, preTime)) { printf("time:%s\n", curTime); LCD1602KeyDispStr(devFD, 0, 1, curTime); } memset(preTime, 0, TIME_STR_BUFSIZE); strcpy(preTime, curTime); } else { needClear = 1; usleep(1000); } } printf("quit reading key press\n"); LCD1602KeyDeInit(devFD); return 0; }
