Difference between revisions of "BakeBit - JoyStick"
| (8 intermediate revisions by the same user not shown) | |||
| Line 3: | Line 3: | ||
==Introduction== | ==Introduction== | ||
[[File:BakeBit - JoyStick.jpg|thumb|JoyStick]] | [[File:BakeBit - JoyStick.jpg|thumb|JoyStick]] | ||
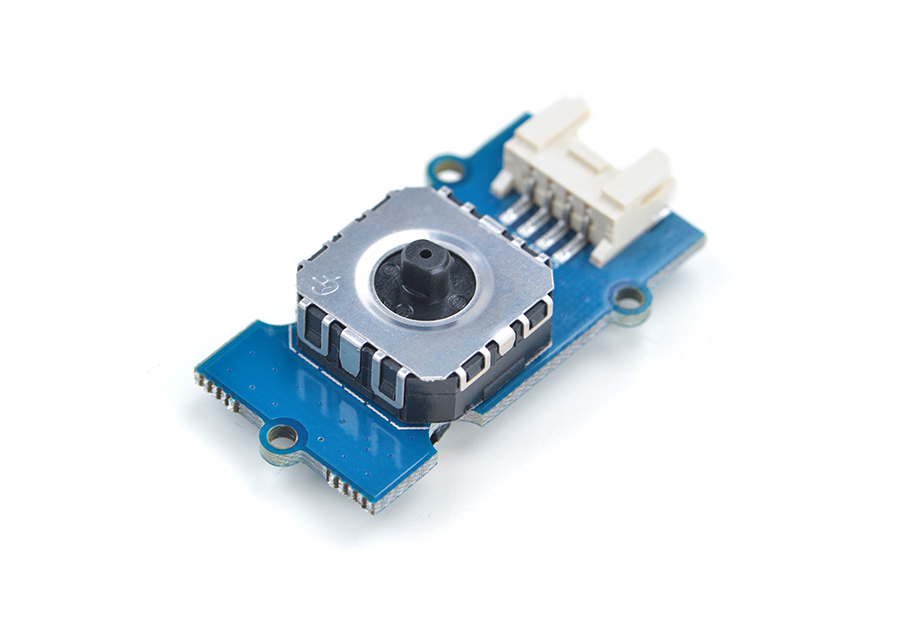
| − | *BakeBit - | + | * The BakeBit - JoyStick is a joystick module. It consists of two Sliding rheostats. Its positional states can be measured as X and Y axis values as the calibrated resistance of the two potentiometers. |
| − | + | ||
| − | == | + | ==Hardware Spec== |
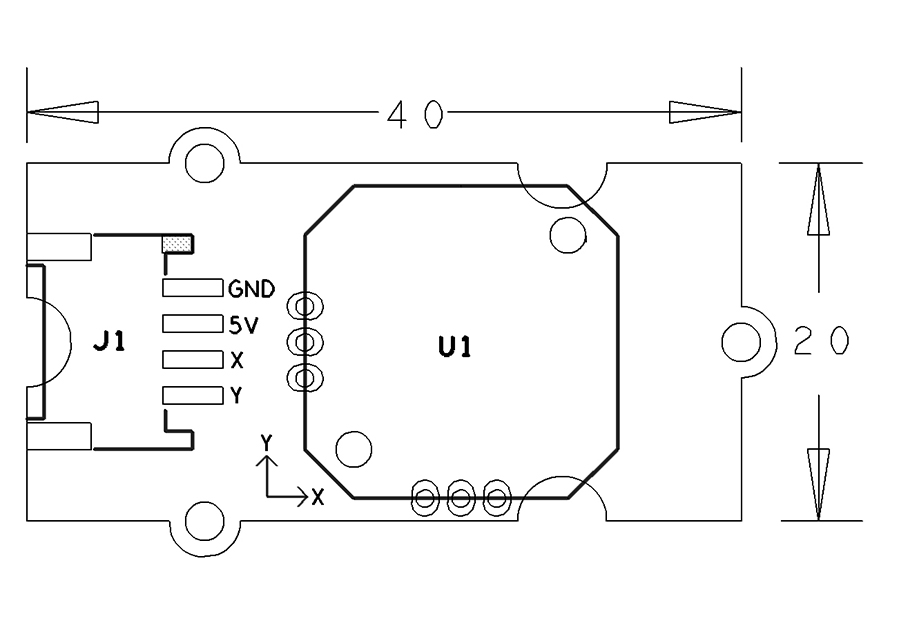
| − | * | + | * Standard 2.0mm pitch 4-Pin BakeBit Interface |
| − | * | + | * Analog Output |
| − | * | + | * PCB dimension(mm): 24 * 42 |
[[File:BakeBit - JoyStick_PCB.png | frameless|350px|BakeBit - JoyStick]] | [[File:BakeBit - JoyStick_PCB.png | frameless|350px|BakeBit - JoyStick]] | ||
| − | * | + | * Pin Description: |
{| class="wikitable" | {| class="wikitable" | ||
|- | |- | ||
| − | | | + | |Pin || Description |
|- | |- | ||
| − | |GND || | + | |GND || Ground |
|- | |- | ||
| − | |5V || | + | |5V || 5V Supply Voltage |
|- | |- | ||
| − | |X || | + | |X || X Axis Output |
|- | |- | ||
| − | |Y || | + | |Y || Y Axis Output |
|} | |} | ||
| − | |||
| − | + | == Code Sample: UI Control via Joystick == | |
| − | + | ||
| − | === | + | By running this code sample you will see a simple configuration window and you can use the joystick to navigate and change a configuration item’s setting.<br /> |
| − | + | A [[BakeBit - OLED 128x64]] module is needed in this test case. | |
| + | |||
| + | === Hardware Connection === | ||
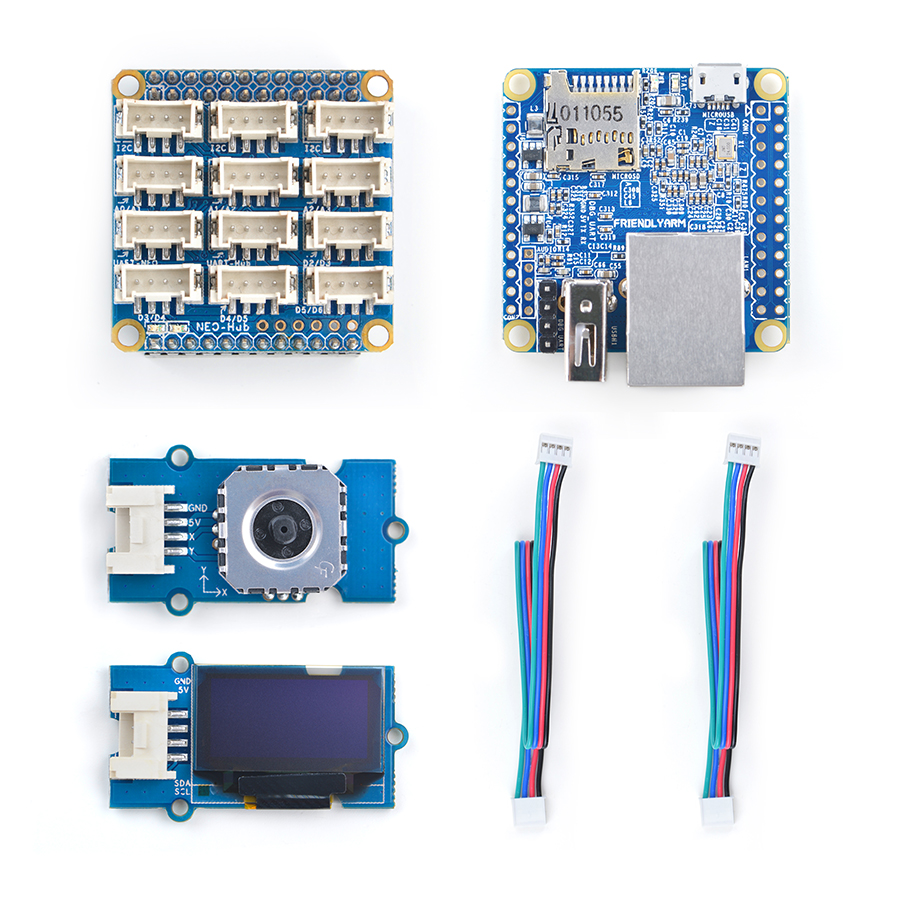
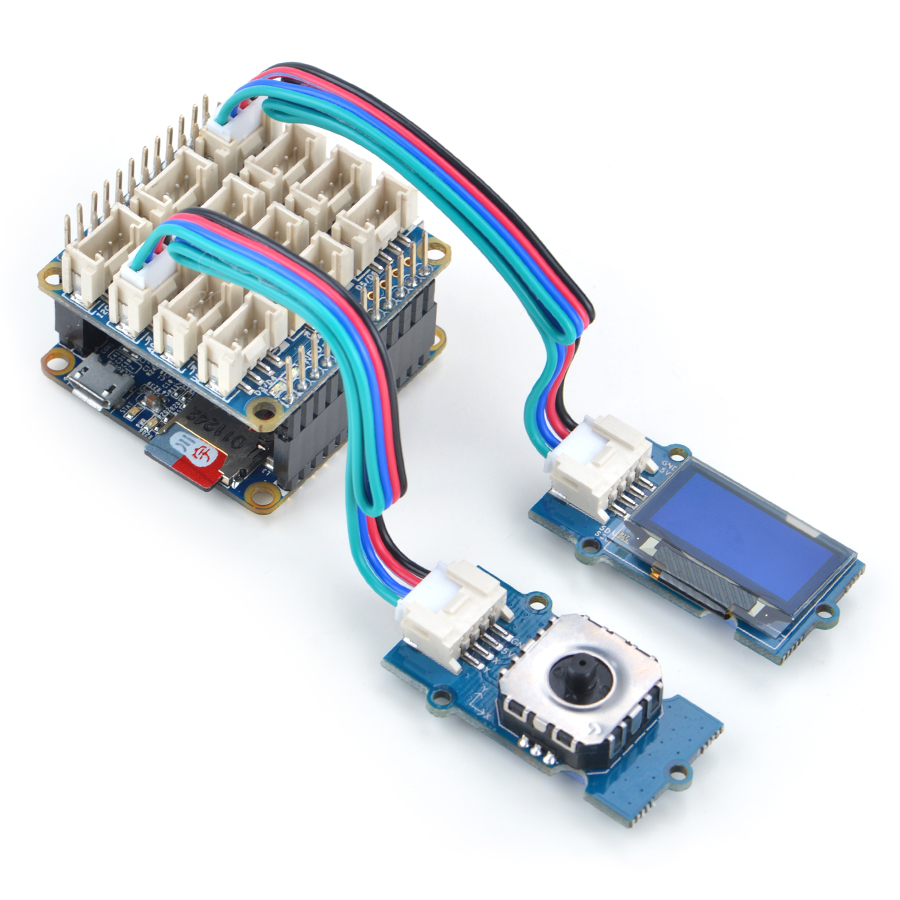
| + | Connect the joystick module to the NanoHat Hub's A0 and the OLED module to the NanoHat Hub's I2C interface: | ||
::{| class="wikitable" | ::{| class="wikitable" | ||
| Line 38: | Line 38: | ||
|} | |} | ||
| − | === | + | === Source Code === |
<syntaxhighlight lang="python"> | <syntaxhighlight lang="python"> | ||
| Line 145: | Line 145: | ||
[https://github.com/friendlyarm/BakeBit/blob/master/Software/Python/bakebit_prj_UIControl_via_Joystick.py Github] | [https://github.com/friendlyarm/BakeBit/blob/master/Software/Python/bakebit_prj_UIControl_via_Joystick.py Github] | ||
| − | === | + | === Run Code Sample === |
| − | + | Before you run the code sample you need to follow the steps in [http://wiki.friendlyarm.com/bakebit bakebit tutorial] to install the BakeBit package.<br /> | |
| − | + | Enter the "BakeBit/Software/Python" directory and run the "bakebit_prj_UIControl_via_Joystick.py" program: | |
<syntaxhighlight lang="bash"> | <syntaxhighlight lang="bash"> | ||
cd ~/BakeBit/Software/Python | cd ~/BakeBit/Software/Python | ||
| Line 154: | Line 154: | ||
</syntaxhighlight> | </syntaxhighlight> | ||
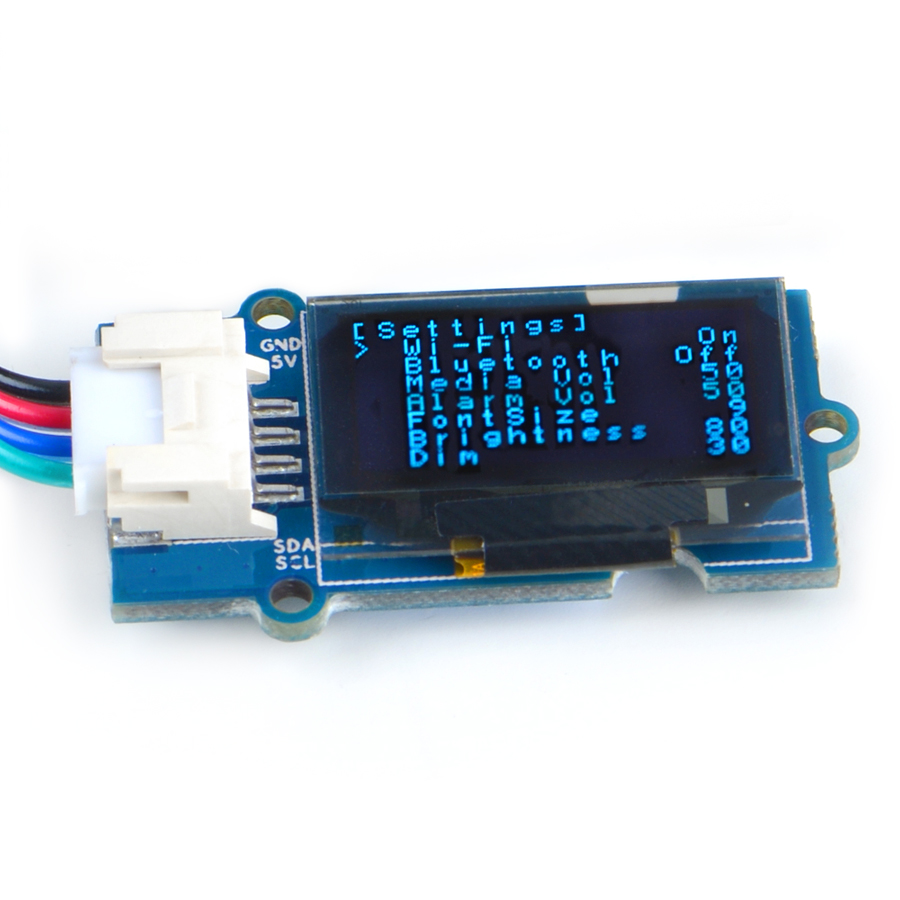
| − | === | + | === Observation === |
| − | + | When the program runs a simple configuration window will be presented on the OLED. When you move the joystick up or down the cursor will move up or down to a configuration item. When you move the joystick left or right the item’s setting will be changed accordingly.<br /> | |
[[File:UI Control via Joystick-Result.jpg |frameless|300px]] | [[File:UI Control via Joystick-Result.jpg |frameless|300px]] | ||
| − | == | + | ==Resources== |
*[Schematic]([http://wiki.friendlyarm.com/wiki/images/6/67/10-SCHEMATIC_JoyStick.pdf BakeBit - JoyStick.pdf]) | *[Schematic]([http://wiki.friendlyarm.com/wiki/images/6/67/10-SCHEMATIC_JoyStick.pdf BakeBit - JoyStick.pdf]) | ||
| − | *[BakeBit | + | *[BakeBit Github Project Page](https://github.com/friendlyarm/BakeBit) |
| − | *[BakeBit Starter | + | *[BakeBit Starter Kit User's Manual](http://wiki.friendlyarm.com/bakebit/bakebit_starter_kit_manual_en.pdf) |
| + | |||
| + | ==Update Log== | ||
| + | ===December-15-2016=== | ||
| + | * Released English version | ||
| + | |||
| + | ===Jan-19-2017=== | ||
| + | * Renamed "NEO-Hub" to "NanoHat-Hub" | ||
| + | |||
| + | ===Jan-20-2017=== | ||
| + | * Renamed "NanoHat-Hub" to "NanoHat Hub" | ||
Latest revision as of 08:21, 20 January 2017
Contents
1 Introduction
- The BakeBit - JoyStick is a joystick module. It consists of two Sliding rheostats. Its positional states can be measured as X and Y axis values as the calibrated resistance of the two potentiometers.
2 Hardware Spec
- Standard 2.0mm pitch 4-Pin BakeBit Interface
- Analog Output
- PCB dimension(mm): 24 * 42
- Pin Description:
| Pin | Description |
| GND | Ground |
| 5V | 5V Supply Voltage |
| X | X Axis Output |
| Y | Y Axis Output |
3 Code Sample: UI Control via Joystick
By running this code sample you will see a simple configuration window and you can use the joystick to navigate and change a configuration item’s setting.
A BakeBit - OLED 128x64 module is needed in this test case.
3.1 Hardware Connection
Connect the joystick module to the NanoHat Hub's A0 and the OLED module to the NanoHat Hub's I2C interface:
3.2 Source Code
import bakebit_128_64_oled as oled
import bakebit
import time


oled.init()                  #initialze SEEED OLED display
oled.clearDisplay()          #clear the screen and set start position to top left corner
oled.setNormalDisplay()      #Set display to normal mode (i.e non-inverse mode)
oled.setPageMode()           #Set addressing mode to Page Mode

# Uses two pins - one for the X axis and one for the Y axis
# This configuration means you are using port A0
xPin = 0
yPin = 1
bakebit.pinMode(xPin,"INPUT")
bakebit.pinMode(yPin,"INPUT")

texts = ["Wi-Fi"
    , "Bluetooth"
    , "Media Vol"
    , "Alarm Vol"
    , "FontSize"
    , "Brightness"
    , "Dim" ]

values = [True
    , False
    , 50
    , 50
    , 9
    , 80
    , 30 ]

opIndex = 0
m = int(1024.0/5)
while True:
    try:
        # Get X/Y coordinates
        x = bakebit.analogRead(xPin)
        y = bakebit.analogRead(yPin)

        oled.setTextXY(0,0)
        oled.putString("[Settings]")

        if x<m:
            # left
            print("left")
            if type(values[opIndex]) is int:
                values[opIndex]=values[opIndex]-1
                if values[opIndex]<0:
                    values[opIndex] = 0
            elif type(values[opIndex]) is bool:
                values[opIndex] = not values[opIndex]

        elif x>(1024-m):
            # right
            print("right")
            if type(values[opIndex]) is int:
                values[opIndex]=values[opIndex]+1
                if values[opIndex]>999:
                    values[opIndex] = 999
            elif type(values[opIndex]) is bool:
                values[opIndex] = not values[opIndex]
        elif y<m:
			opIndex = opIndex - 1
        elif y>(1024-m):
			opIndex = opIndex + 1
        elif opIndex<0:
			opIndex=6
        elif opIndex>6:
			opIndex=0

        for i in range(7):
            oled.setTextXY(0,i+1)
            valueStr = ""
            if type(values[i]) is int:
                valueStr = str(values[i])
            elif type(values[i]) is bool:
                if values[i]:
                    valueStr = "On"
                else:
                    valueStr = "Off"
            for j in range(3-len(valueStr)):
                valueStr = " " + valueStr

            title = texts[i]
            if len(title) > 10:
                title = title[:10]

            for j in range(10-len(title)):
                title = title + " "

            if opIndex == i:
                oled.putString("> " + title + " " + valueStr)
            else:
                oled.putString("  " + title + " " + valueStr)
    	print("x =", x, " y =", y, " opIndex=", opIndex)

    except IOError:
        print ("Error")
3.3 Run Code Sample
Before you run the code sample you need to follow the steps in bakebit tutorial to install the BakeBit package.
Enter the "BakeBit/Software/Python" directory and run the "bakebit_prj_UIControl_via_Joystick.py" program:
cd ~/BakeBit/Software/Python
sudo python bakebit_prj_UIControl_via_Joystick.py
3.4 Observation
When the program runs a simple configuration window will be presented on the OLED. When you move the joystick up or down the cursor will move up or down to a configuration item. When you move the joystick left or right the item’s setting will be changed accordingly.
4 Resources
- [Schematic](BakeBit - JoyStick.pdf)
- [BakeBit Github Project Page](https://github.com/friendlyarm/BakeBit)
- [BakeBit Starter Kit User's Manual](http://wiki.friendlyarm.com/bakebit/bakebit_starter_kit_manual_en.pdf)
5 Update Log
5.1 December-15-2016
- Released English version
5.2 Jan-19-2017
- Renamed "NEO-Hub" to "NanoHat-Hub"
5.3 Jan-20-2017
- Renamed "NanoHat-Hub" to "NanoHat Hub"
