Difference between revisions of "BakeBit - Button/zh"
From FriendlyELEC WiKi
(→硬件连接) |
(→硬件连接) |
||
| Line 25: | Line 25: | ||
|SIG || 信号 | |SIG || 信号 | ||
|} | |} | ||
| − | ==硬件连接== | + | == 示例程序:Button And Buzzer == |
| + | |||
| + | 本示例需要配合蜂鸣器使用,当按下按键时,蜂鸣器会响起,松开按键时,蜂鸣器停止。 | ||
| + | |||
| + | === 硬件连接 === | ||
简单的将 蜂鸣器 模块插入 D3接口,将 按键 插入 D4 接口,如下面这样: | 简单的将 蜂鸣器 模块插入 D3接口,将 按键 插入 D4 接口,如下面这样: | ||
| Line 33: | Line 37: | ||
|- | |- | ||
|} | |} | ||
| + | |||
| + | === 示例源代码 === | ||
| + | |||
| + | <syntaxhighlight lang="python"> | ||
| + | import bakebit | ||
| + | import time | ||
| + | # Connect the BakeBit Ultrasonic Ranger to digital port D4 | ||
| + | # SIG,NC,VCC,GND | ||
| + | ultrasonic_ranger = 4 | ||
| + | |||
| + | # Connect the BakeBit LED to digital port D3 | ||
| + | led = 3 | ||
| + | |||
| + | bakebit.pinMode(led,"OUTPUT") | ||
| + | light = 0 | ||
| + | |||
| + | while True: | ||
| + | try: | ||
| + | # Read distance value from Ultrasonic | ||
| + | distance = bakebit.ultrasonicRead(ultrasonic_ranger) | ||
| + | print(distance) | ||
| + | if distance > 0: | ||
| + | if distance<10: | ||
| + | if light == 0: | ||
| + | print("\ton") | ||
| + | bakebit.digitalWrite(led,1) | ||
| + | light = 1 | ||
| + | else: | ||
| + | if light == 1: | ||
| + | print("\toff") | ||
| + | bakebit.digitalWrite(led,0) | ||
| + | light = 0 | ||
| + | time.sleep(.2) | ||
| + | |||
| + | except KeyboardInterrupt: | ||
| + | bakebit.digitalWrite(led,0) | ||
| + | break | ||
| + | |||
| + | except TypeError: | ||
| + | print ("Error") | ||
| + | except IOError: | ||
| + | print ("Error") | ||
| + | </syntaxhighlight> | ||
| + | |||
| + | |||
| + | === 运行示例 === | ||
| + | |||
| + | 假设你已经参考[http://wiki.friendlyarm.com/bakebit bakebit教程]安装了BakeBit源代码,<br /> | ||
| + | 要运行示例程序,可以在开发板上进入 BakeBit/Software/Python目录,运行bakebit_prj_Button_And_Buzzer.py: | ||
| + | <syntaxhighlight lang="bash"> | ||
| + | cd ~/BakeBit/Software/Python | ||
| + | sudo python bakebit_prj_Button_And_Buzzer.py | ||
| + | </syntaxhighlight> | ||
==示例程序== | ==示例程序== | ||
Revision as of 09:13, 25 November 2016
1 介绍

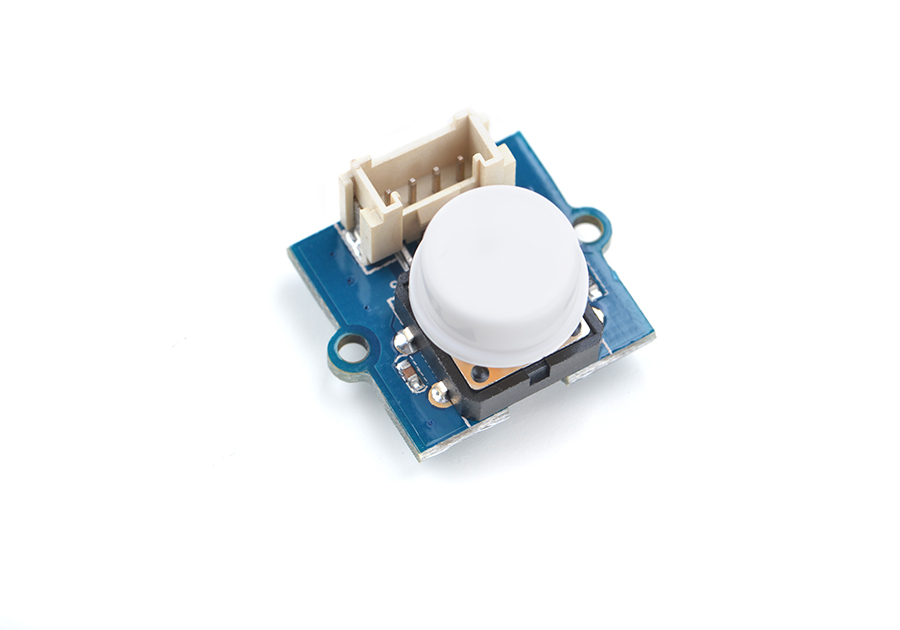
- BakeBit - Button是一个瞬时(非自锁)按钮开关模块,用于检测按键事件,按钮被释放后自动恢复到常态。
- 在按钮未被按下时模块输出高电平,按钮被按下后输出低电平。
2 特性
- 使用标准的2.0mm 4 Pin BakeBit接口
- 数字信号输出
- PCB尺寸(mm):20x24

- 引脚说明:
| 名称 | 描述 |
| GND | 地 |
| 5V | 电源5V |
| NC | 空 |
| SIG | 信号 |
3 示例程序:Button And Buzzer
本示例需要配合蜂鸣器使用,当按下按键时,蜂鸣器会响起,松开按键时,蜂鸣器停止。
3.1 硬件连接
简单的将 蜂鸣器 模块插入 D3接口,将 按键 插入 D4 接口,如下面这样:
BakeBit-Button
3.2 示例源代码
import bakebit
import time
# Connect the BakeBit Ultrasonic Ranger to digital port D4
# SIG,NC,VCC,GND
ultrasonic_ranger = 4

# Connect the BakeBit LED to digital port D3
led = 3

bakebit.pinMode(led,"OUTPUT")
light = 0

while True:
    try:
        # Read distance value from Ultrasonic
	distance = bakebit.ultrasonicRead(ultrasonic_ranger)
        print(distance)
	if distance > 0:
		if distance<10:
			if light == 0:
				print("\ton")
				bakebit.digitalWrite(led,1)
				light = 1
		else:
			if light == 1:
				print("\toff")
				bakebit.digitalWrite(led,0)
				light = 0
	time.sleep(.2)

    except KeyboardInterrupt:
	bakebit.digitalWrite(led,0)
        break

    except TypeError:
        print ("Error")
    except IOError:
        print ("Error")
3.3 运行示例
假设你已经参考bakebit教程安装了BakeBit源代码,
要运行示例程序,可以在开发板上进入 BakeBit/Software/Python目录,运行bakebit_prj_Button_And_Buzzer.py:
cd ~/BakeBit/Software/Python
sudo python bakebit_prj_Button_And_Buzzer.py
4 示例程序
下面是一个简单的BakeBit - Button模块的例子,当没有按键按下时,输出为1,当有按键按下时,输出为0.
import time
import bakebit

# Connect the BakeBit Button to digital port D3
# SIG,NC,VCC,GND
button = 3

bakebit.pinMode(button,"INPUT")

while True:
    try:
        print(bakebit.digitalRead(button))
        time.sleep(.5)

    except IOError:
        print ("Error")
运行结果如下: BakeBit - Button_nanopi_NEO
5 相关资料
- [Schematic](BakeBit - Button.pdf)