Matrix - Compact Kit B
Contents
[hide]1 Introduction
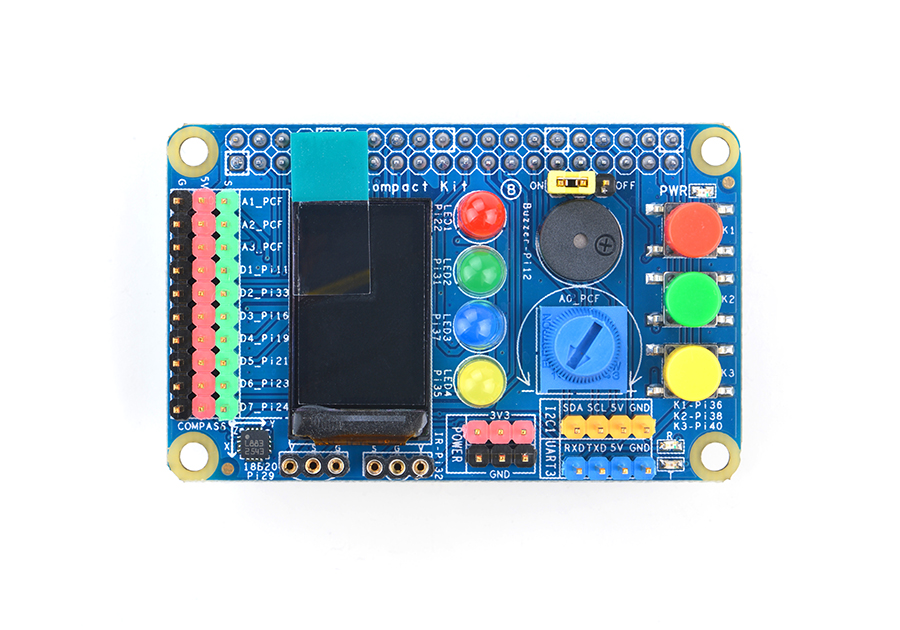
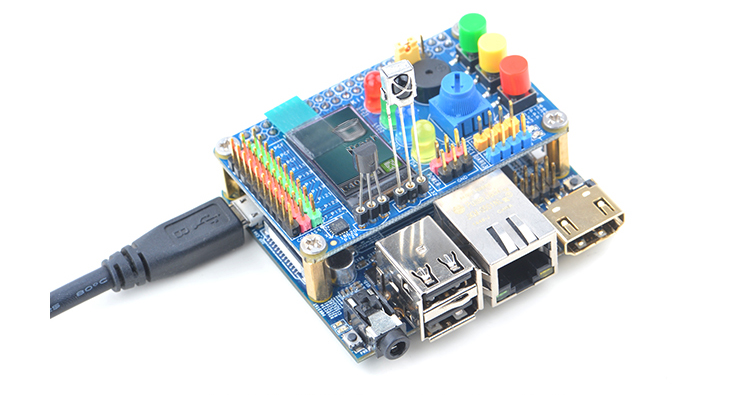
- The Matrix Compact Kit B is a FriendlyARM developed compact board with various hardware resources, interfaces and ports. It contains user keys, LEDs, buzzer, ADC, compass, temperature sensor, IR receiver and TFT interface. It works with FriendlyARM's NanoPi 2 Fire and NanoPi M2 via its 40 pin male connector and is compatible with Raspberry Pi and Arduino boards. In addition you can connect various devices to its IO pin-header.
2 Features
Matrix - Compact Kit B contains the following components:
- 0.9 TFT LCD
- 3 x Switch
- 4 x 5mm LED
- Buzzer
- ADC
- Potentiometer
- 40pin Female Connector
- 4pin pin-header – I2C
- 4pin pin-header – UART
- 3pin double pin-header – 3.3V and GND
- 18B20 Temperature Sensor
- IR Receiver
- 10 x 3pin pin-header – 3 x AIO & 7 x DIO (two can be configured to PWM and four can be configured to SPI)
- Compass
3 Dimensional Diagram and Pin Description
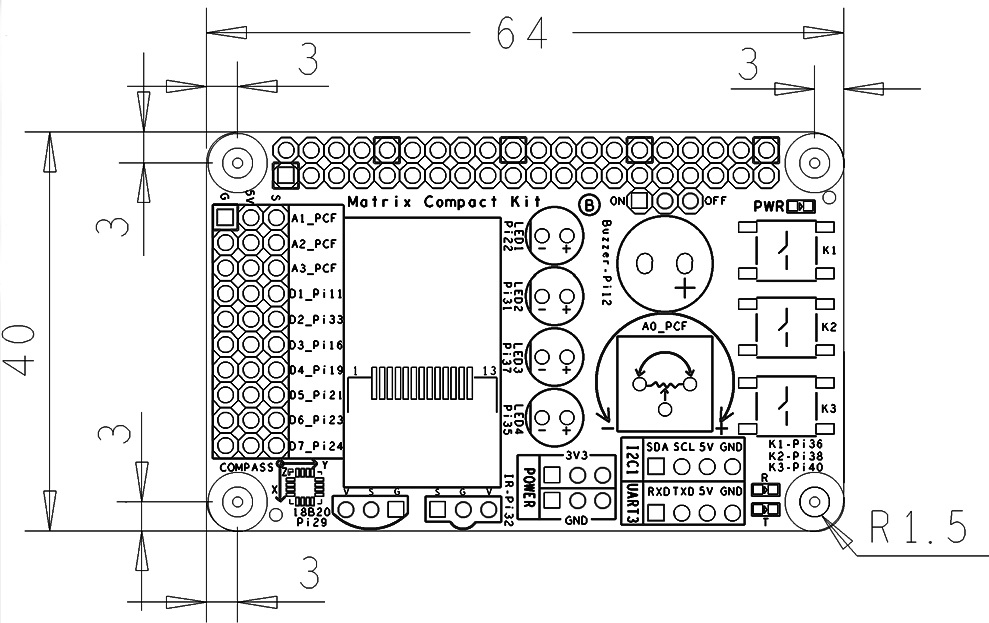
- PCB Dimension(mm):64 x 40
- 40 pin female connector's pin description
Pin# Name Pin# Name 1 SYS_3.3V 2 VDD_5V 3 I2C0_SDA 4 VDD_5V 5 I2C0_SCL 6 DGND 7 GPIOD8/PPM 8 UART3_TXD/GPIOD21 9 DGND 10 UART3_RXD/GPIOD17 11 UART4_TX/GPIOB29 12 GPIOD1/PWM0 13 GPIOB30 14 DGND 15 GPIOB31 16 GPIOC14/PWM2 17 SYS_3.3V 18 GPIOB27 19 SPI0_MOSI/GPIOC31 20 DGND 21 SPI0_MISO/GPIOD0 22 UART4_RX/GPIOB28 23 SPI0_CLK/GPIOC29 24 SPI0_CS/GPIOC30 25 DGND 26 GPIOB26 27 I2C1_SDA 28 I2C1_SCL 29 GPIOC8 30 DGND 31 GPIOC7 32 GPIOC28 33 GPIOC13/PWM1 34 DGND 35 SPI2_MISO/GPIOC11 36 SPI2_CS/GPIOC10 37 AliveGPIO3 38 SPI2_MOSI/GPIOC12 39 DGND 40 SPI2_CLK/GPIOC9
- 30 pin header's pin description
Pin# Name Pin# Name Pin# Name 1 GND 2 VDD_5V 3 A1_PCF 4 GND 5 VDD_5V 6 A2_PCF 7 GND 8 VDD_5V 9 A3_PCF 10 GND 11 VDD_5V 12 D1_Pi11 13 GND 14 VDD_5V 15 D2_Pi33 16 GND 17 VDD_5V 18 D3_Pi16 19 GND 20 VDD_5V 21 D4_Pi19 22 GND 23 VDD_5V 24 D5_Pi21 25 GND 26 VDD_5V 27 D6_Pi23 28 GND 29 VDD_5V 30 D7_Pi24
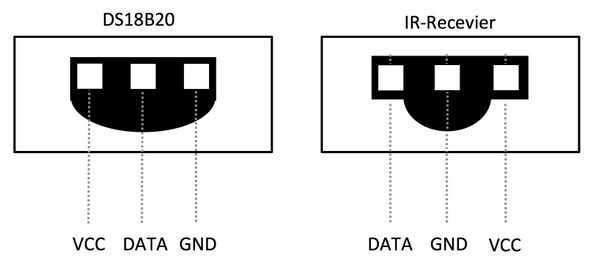
- DS18B20 and IR receiver's pin description
Module Pin# Name Pin# Name Pin# Name 18B20 1 VDD_5V 2 DATA 3 GND IR Receiver 1 DATA 2 GND 3 VDD_5V
4 Applications
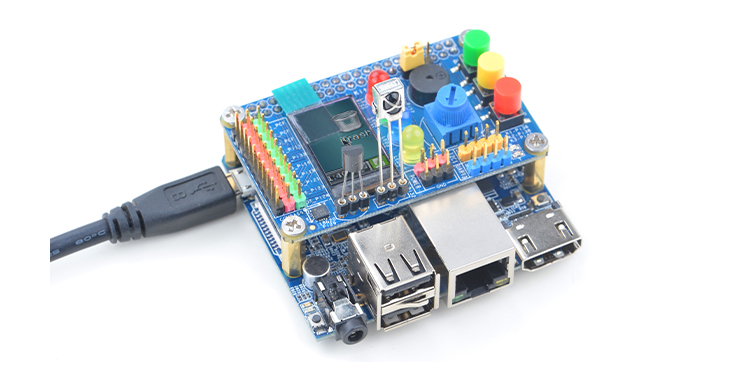
4.1 Connect to NanoPi M1
Refer to the following connection diagram to connect the module to the NanoPi M1:
4.2 Connect to NanoPi M2 / NanoPi 2 Fire
Refer to the following connection diagram to connect the module to the NanoPi M2/ NanoPi 2 Fire:
5 Compile & Run Test Program
Boot your ARM board with Debian and copy the matrix code:
$ apt-get update && apt-get install git
$ git clone https://github.com/friendlyarm/matrix.git
If your cloning is done successfully a "matrix" directory will be generated.
Compile and install Matrix:
$ cd matrix
$ make && make install
Run test program:
$ matrix-compact_kitNote: this module is not plug and play therefore before running the module please make sure it is connected to an ARM board.
Here is what you should observe:
LED blinking 1
LED blinking 2
Button:  1 1 1
The channel0 value is 2070
The angle is 336.3
Pwm start
Pwm stop
Run Qt program to test the TFT LCD:
cd matrix/demo/nanopi-status
./build.sh
./run.sh /dev/fb-st7735s
The program will present the system's basic information. Here is what you expect to observe:

6 Code Sample
This Matrix code sample can work with all the ARM boards mentioned in this module's wiki. The name of this code sample is "matrix-compact_kit". Here is its source code:
int main(int argc, char ** argv)
{
    int board;

    if ((board = boardInit()) < 0) {
        printf("Fail to init board\n");
        return -1;
    }
    testLED(board);
    readButton();
    readADC();
    readCompass();
    testPWM(board);
    // readTemp();
    // testIR();

    return 0;
}
For more details about this APIs called in this code sample refer to Matrix API reference manual
7 Resources
- [Schematic](Matrix - Compact Kit B-Schematic.pdf)
- [0.9'LCD datasheet](Matrix - Compact Kit B-0.9'LCD datasheet.pdf)
8 Update Log
8.1 May-23-2016
- Released English version
8.2 June-19-2016
- Re-organized and simplified wiki
