Template:FriendlyWrt19
Contents
[hide]- 1 Work with FriendlyWrt
1 Work with FriendlyWrt
1.1 Introduction to FriendlyWrt
FriendlyWrt is a customized system made by FriendlyElec based on an OpenWrt distribution. It is open source and well suitable for developing IoT applications, NAS applications, smart home gateways etc.
1.2 Account & Password
By default the password is NULL. You can set a password for root for web and SSH login.
1.3 Network Connection
Use a network cable to connect {{{1}}}'s WAN to a master router and the board will get an IP address via DHCP. Login into the router and check {{{1}}}'s IP address.
1.4 Login FriendlyWrt
Type {{{1}}}'s IP address or http://friendlywrt/ in a browser's address bar and enter to open FriendlyWrt's administration page or you can login into FriendlyWrt's administration page via SSH.
By default, the IP address of the LAN port is 192.168.2.1, and the WAN will dynamically obtain the IP address from your main router.
1.5 Install Software Packages
1.5.1 Update Package List
Before install software packages update the package list:
$ opkg update
1.5.2 List Available Packages
$ opkg list
1.5.3 List Installed Packages
$ opkg list-installed
1.5.4 Install Packages
$ opkg install <package names>
1.5.5 Remove Packages
$ opkg remove <package names>
1.6 Work with USB WiFi Device
1.6.1 Check USB WiFi Device with Command Line Utility
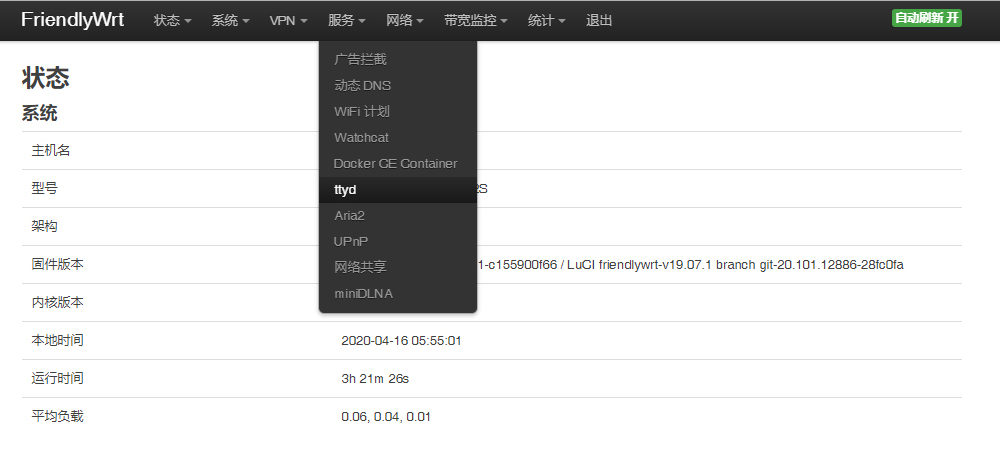
(1) Click on "service>ttyd" to start the command line utility
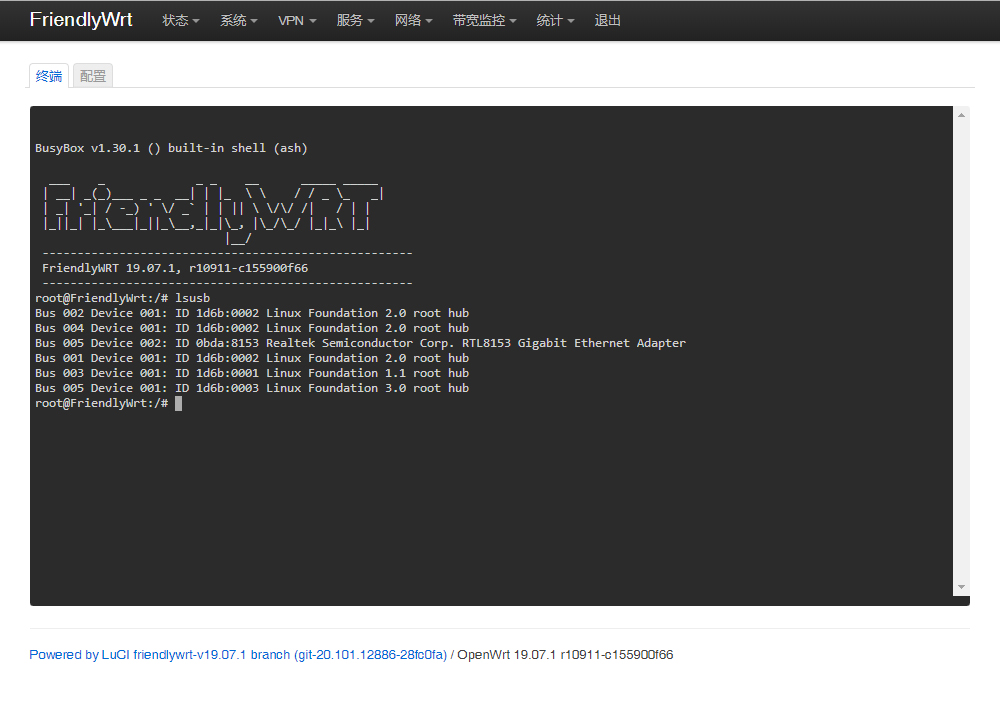
(2) Make sure no USB devices are connected to your board and run the following command to check if any USB devices are connected or not
lsusb
(3) Connect a USB WiFi device to the board and run the command again
lsusb
You will see a new device is detected. In our test the device's ID was 0BDA:C811
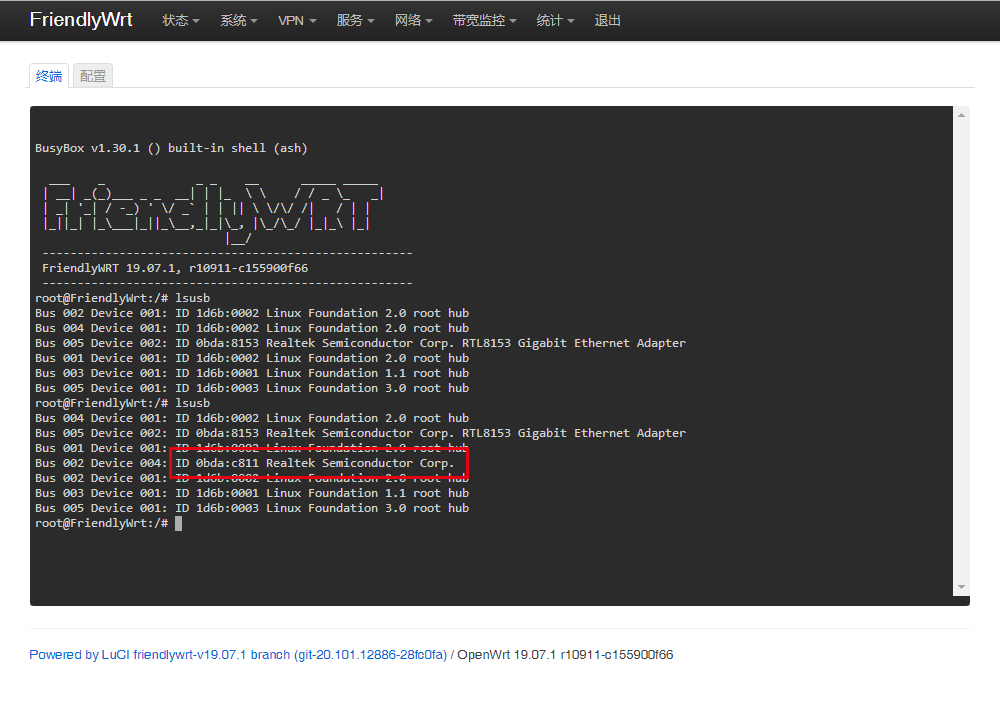
(4) Type your device's ID (in our case it was "0BDA:C811" or "VID_0BDA&PID_C811") in a search engine and you may find a device that matches the ID. In our case the device we got was Realtek 8811CU.
1.6.2 Configure a USB WiFi Device as AP
(1) Connect a USB WiFi device to the NanoPi R2S. We recommend you to use the following devices which we have tested with FriendlyElec's rk3328-sd-friendlywrt-5.4-20200514.img file
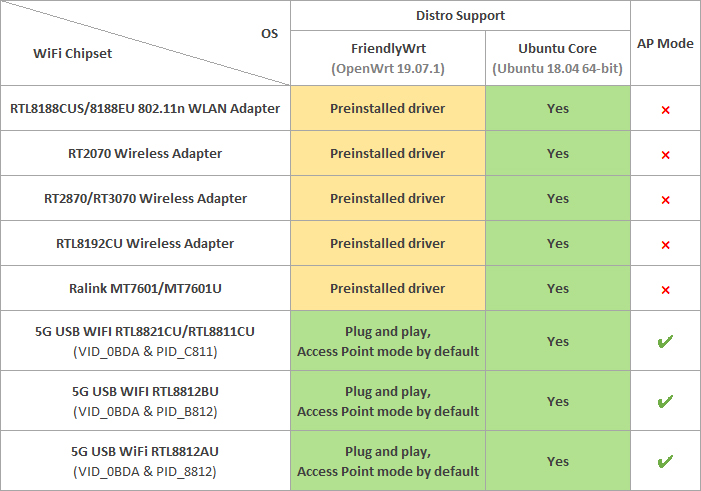
Note: devices that match these VID&PIDs would most likely work.
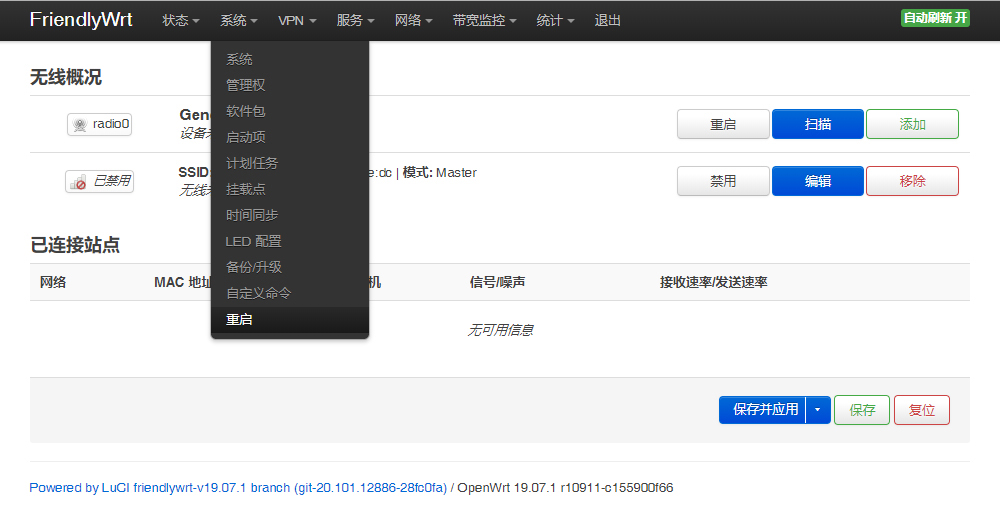
(2) Click on "System>Reboot/Restart" and reboot your NanoPi R2S

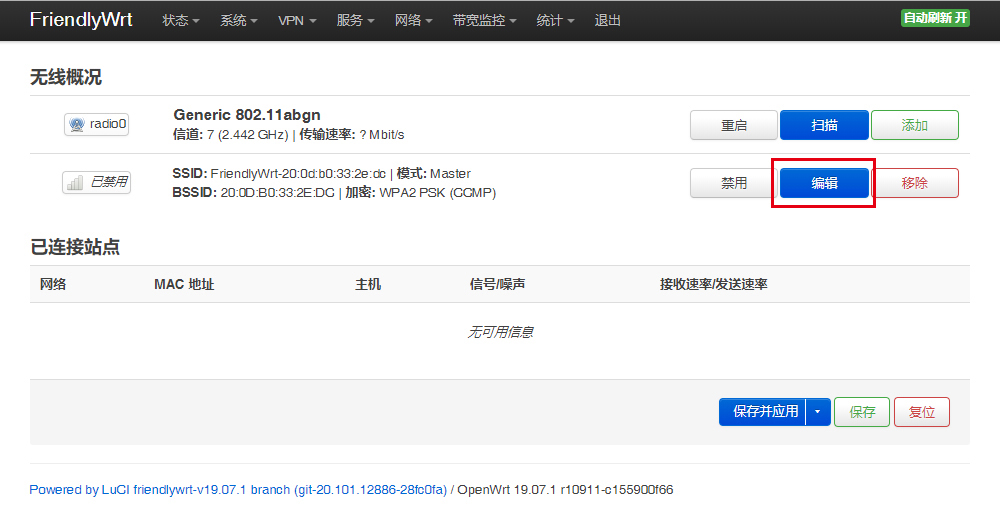
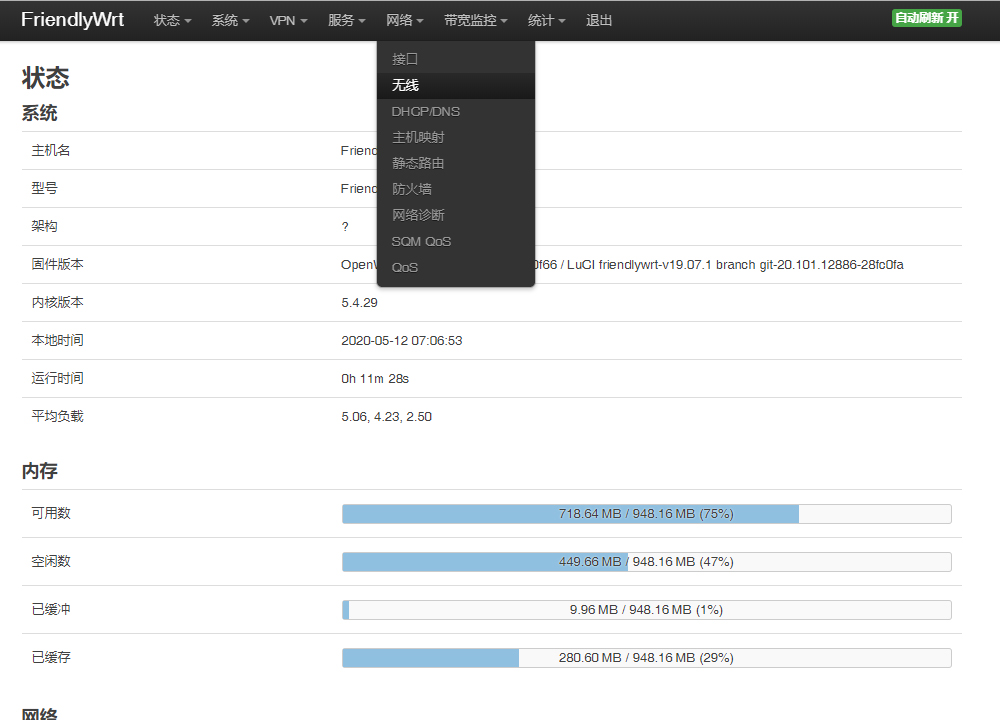
(3) Click on "Network>Wireless" to enter the WiFi configuration page
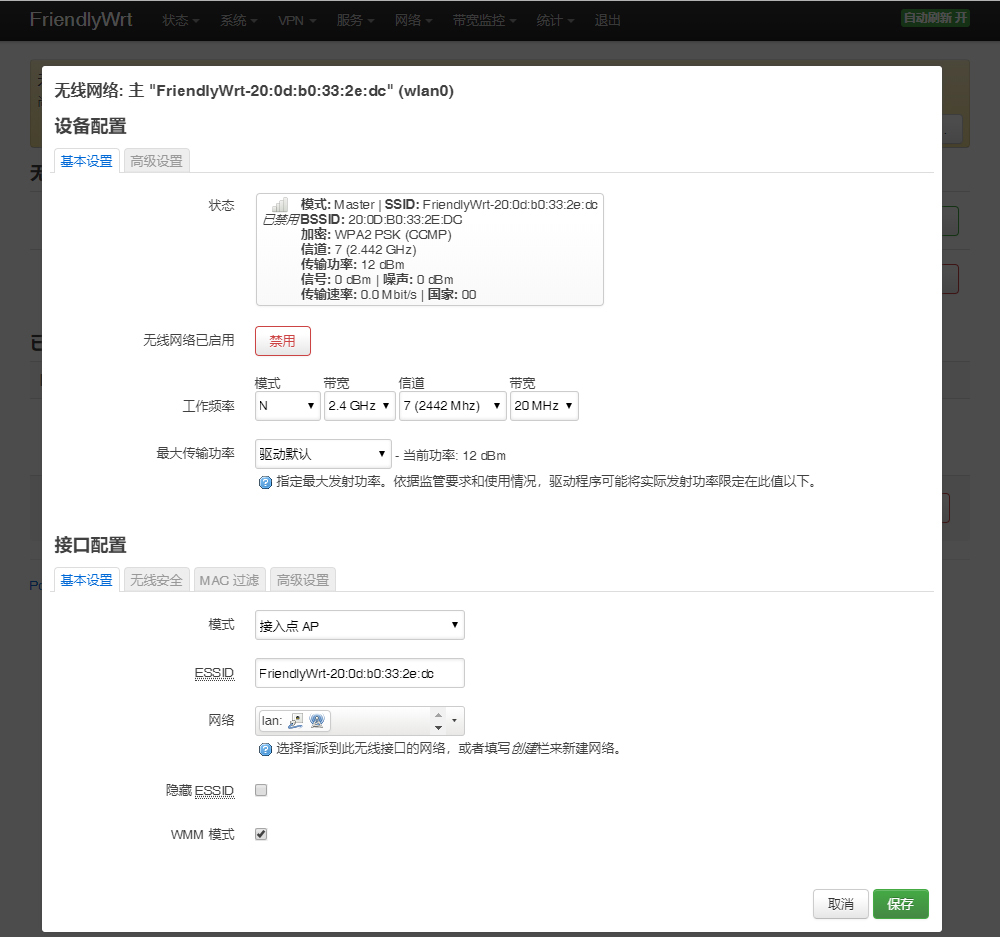
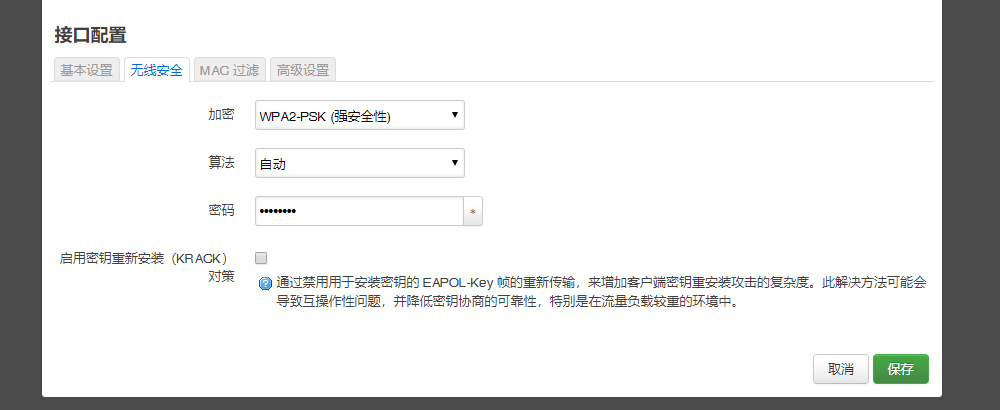
(5) 在“接口配置”中可设置WiFi 模式和SSID等,然后点击到“无线安全”项可修改加密方式和WiFi密码,默认密码为password,设置完成后点击“保存”
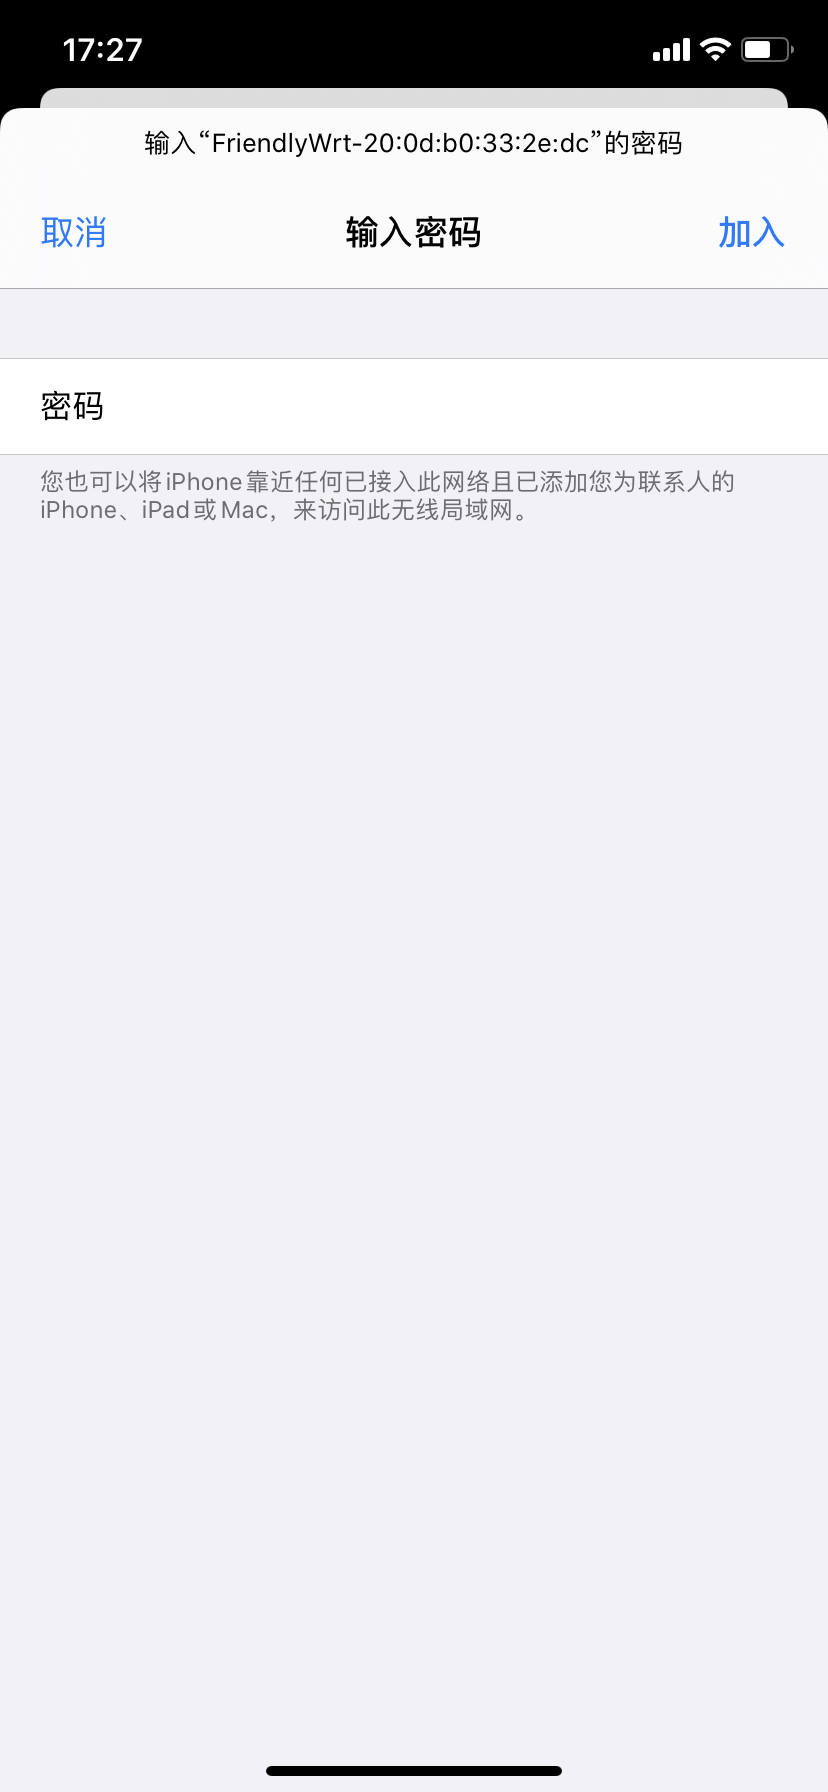
(4) 配置完成后使用手机端或电脑端搜索对应SSID的WiFi即可
1.7 Work with Docker Applications
1.7.1 Work with Docker: Install JellyBin
mkdir -p /jellyfin/config
mkdir -p /jellyfin/videos
docker run --restart=always -d -p 8096:8096 -v /jellyfin/config:/config -v /jellyfin/videos:/videos jellyfin/jellyfin:10.1.0-arm64 -name myjellyfin
After installation, visit port 8096 and here is what you would find:

1.7.2 Work with Docker: Install Personal Nextcloud
mkdir /nextcloud -p
docker run -d -p 8888:80  --name nextcloud  -v /nextcloud/:/var/www/html/ --restart=always --privileged=true  arm64v8/nextcloud
After installtion, visit port 8888.
1.8 Enable Swap Partition
Run the following commands in a commandline utility and reboot:
/etc/enable-swap.sh
reboot
1.9 Mount smbfs
mount -t cifs //192.168.1.10/shared /movie -o username=xxx,password=yyy,file_mode=0644
1.10 Compile u-boot,kernel or friendlywrt
- Refer to:
