Android Thing: Android Hardware Programming
Contents
1 Introduction
FriendlyThings is an Android SDK developed by FriendlyElec to access hardware. Users can use it to access various hardware resources Uart, SPI, I2C, GPIO etc on a FriendlyElec ARM board under Android. This SDK is based on Android-NDK. Users can use it to develop popular IoT applications without directly interacting with drivers.
2 Quick Start
2.1 Step 1: Include libfriendlyarm-things.so in APP
Clone the following library locally:
git clone https://github.com/friendlyarm/friendlythings-sdk
Copy all the files under the libs directory to your working directory and create a "com/friendlyarm" directory in your Android project's src directory, copy the whole "java/FriendlyThings" to your newly created "com/friendlyarm" directory. The whole project directory will look like this(Note:AndroidStudio's project may be a little bit different):
YourProject/
├── AndroidManifest.xml
├── libs
│   ├── arm64-v8a
│   │   └── libfriendlyarm-things.so
│   └── armeabi
│       └── libfriendlyarm-things.so
├── src
│   └── com
│       └── friendlyarm
│           ├── FriendlyThings
│           │   ├── BoardType.java
│           │   ├── FileCtlEnum.java
│           │   ├── GPIOEnum.java
│           │   ├── HardwareControler.java
│           │   ├── SPIEnum.java
│           │   ├── SPI.java
│           │   └── WatchDogEnum.java
Import the following components and the major APIs are included in the HardwareControler.java file:
import com.friendlyarm.FriendlyThings.HardwareControler;
import com.friendlyarm.FriendlyThings.SPIEnum;
import com.friendlyarm.FriendlyThings.GPIOEnum;
import com.friendlyarm.FriendlyThings.FileCtlEnum;
import com.friendlyarm.FriendlyThings.BoardType;
2.2 Step 2: Give APP System Right
Your app needs the system right to access hardware resources;
Give your app the system right by making changes in the AndroidManifest.xml file and the Android.mk file;
It is better to include your app in your Android source code and compile them together. If your app is not compiled together with your Android source code you have to go through tedious steps to compile your app and sign your app to give it the system right.
2.2.1 Modify AndroidManifest.xml
Add the following line in the manifest node in the AndroidManifest.xml file:
android:sharedUserId="android.uid.system"
2.2.2 Modify Android.mk
Create an Android.mk file(the simplest way is to copy a sample Android.mk file), modify the Android.mk file by adding a line LOCAL_CERTIFICATE := platform :
LOCAL_PATH:= $(call my-dir)
include $(CLEAR_VARS)

LOCAL_SRC_FILES := $(call all-subdir-java-files)

LOCAL_PACKAGE_NAME := Project Name

LOCAL_CERTIFICATE := platform
LOCAL_MODULE_TAGS := optional
LOCAL_CFLAGS := -lfriendlyarm-hardware

include $(BUILD_PACKAGE)
2.3 Final Step: Compile Your APP Together with Android Source Code
Go to Android source code's root directory and run "setenv.sh" to export environmental variables, enter your app's directory and run "mm" to compile:
For example: compile the GPIO_LED_Demo on RK3399:
cd rk3399-android-8.1
. setenv.sh
cd vendor/friendlyelec/apps/GPIO_LED_Demo
mm
2.4 Sample project in Android Studio
https://github.com/friendlyarm/AndroidStudio-GPIODemo
3 Code Samples
- Here is a github address for code samples: https://github.com/friendlyarm/AndroidHardwareAccess
4 Compile & Deploy Andorid Code (SerialPortDemo)
4.1 Step 1. Import source code in eclipse (SerialPortDemo)
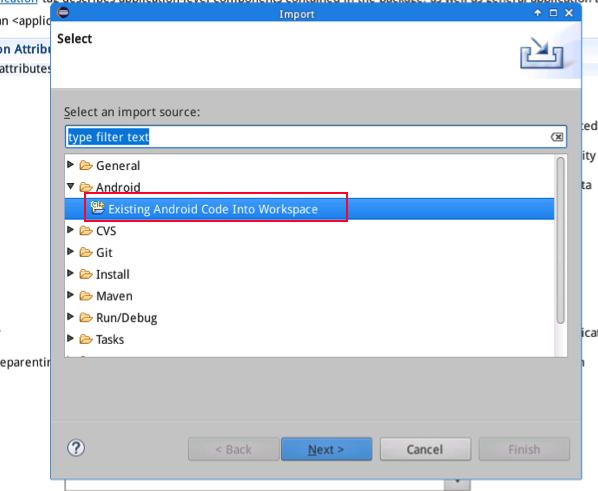
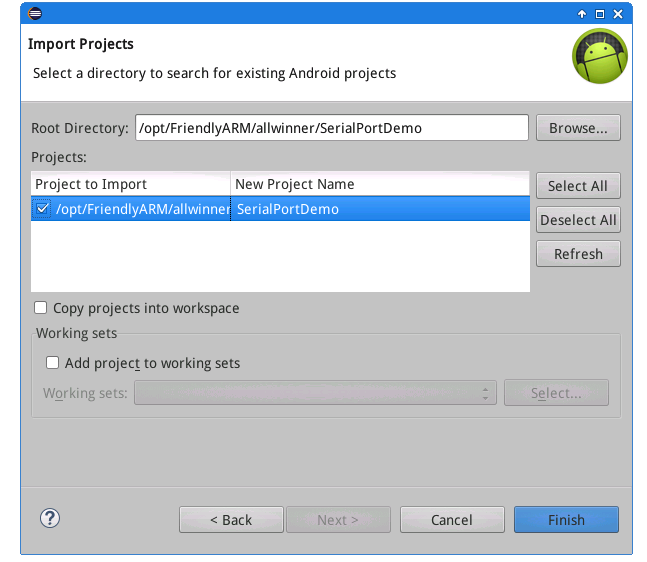
Start eclipse, click on "Import" on its main window's File menu and then select "Existing Android Code Into Workspace" to import your source code
We name this project as "SerialPortDemo"
4.2 Step 2. Edit source code
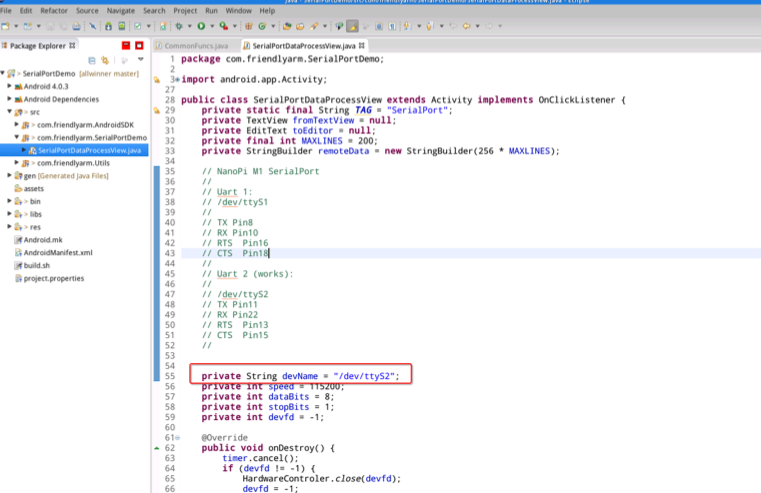
The names of serial devices this DEMO accesses are listed in this file: src/com/friendlyarm/SerialPortDemo/SerialPortDataProcessView.java
Make changes according to your devices' names:
4.2.1 Serial Device Names under Multiple Platforms
- Allwinner H3/H5 Based Boards (NanoPi M1/NanoPi M1 Plus etc)
UART1-> /dev/ttyS1
UART2 -> /dev/ttyS2
UART3 -> /dev/ttyS3 (Only applies to NanoPi M1, NanoPi K1 and NanoPi K1 Plus)
- S5P4418 Based Boards (NanoPi Fire2A/NanoPi M2A/NanoPi S2/NanoPC-T2 etc)
UART1 -> /dev/ttyAMA1 [Note 1]
UART2 -> /dev/ttyAMA2 [Note 1]
UART3 -> /dev/ttyAMA3
UART4 -> /dev/ttyAMA4
- S5P6818 Based Boards (NanoPi M3/NanoPC-T3 etc)
UART1 -> /dev/ttySAC1 [Note 1]
UART2 -> /dev/ttySAC2 [Note 1]
UART3 -> /dev/ttySAC3
UART4 -> /dev/ttySAC4
Note 1: only applies to specific boards, you need to check if a board has that serial device populated.
4.3 Step 3. Compile DEMO's source code and export apk file
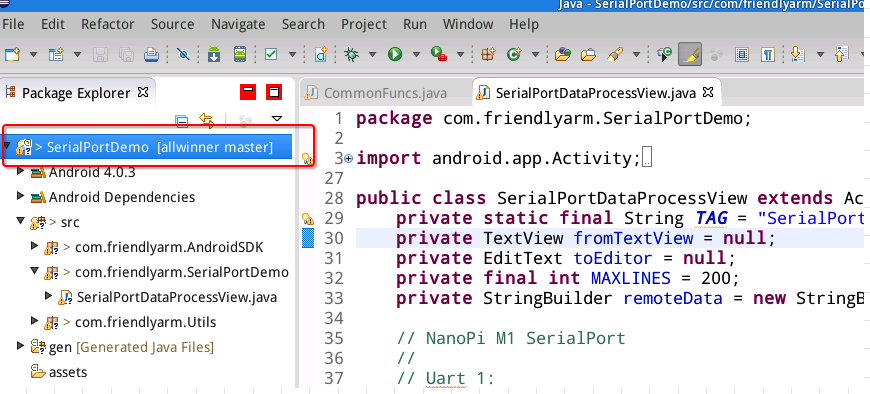
On "Package Explorer" check your project's name:
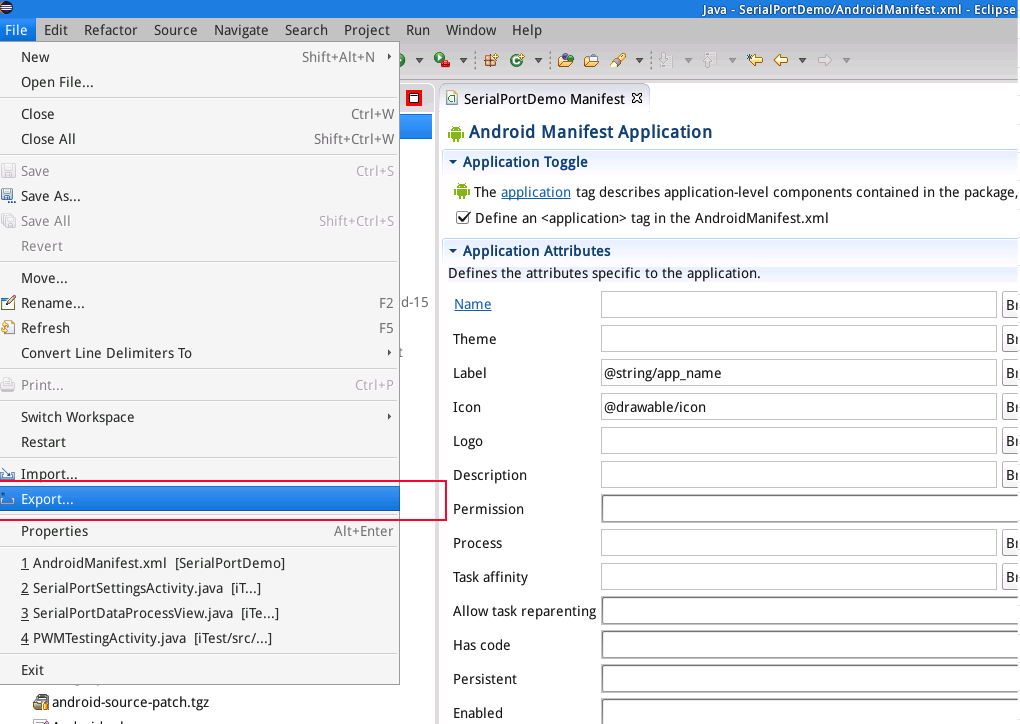
On eclipse's main menu select "File" and then "Export...":
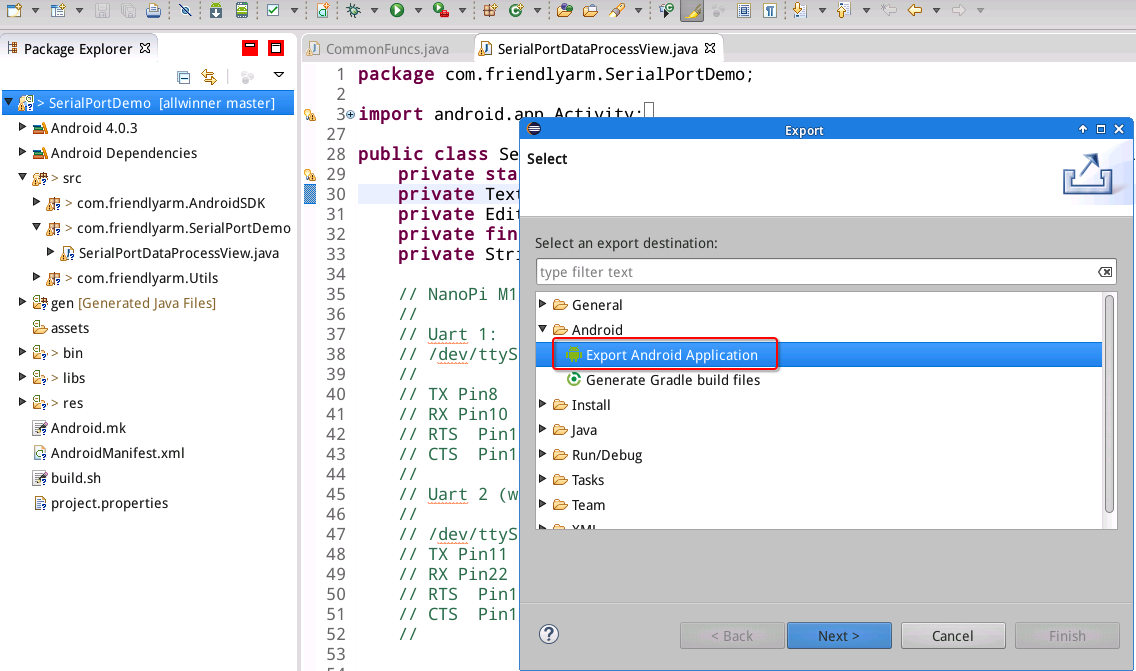
Select "Export Android Application":
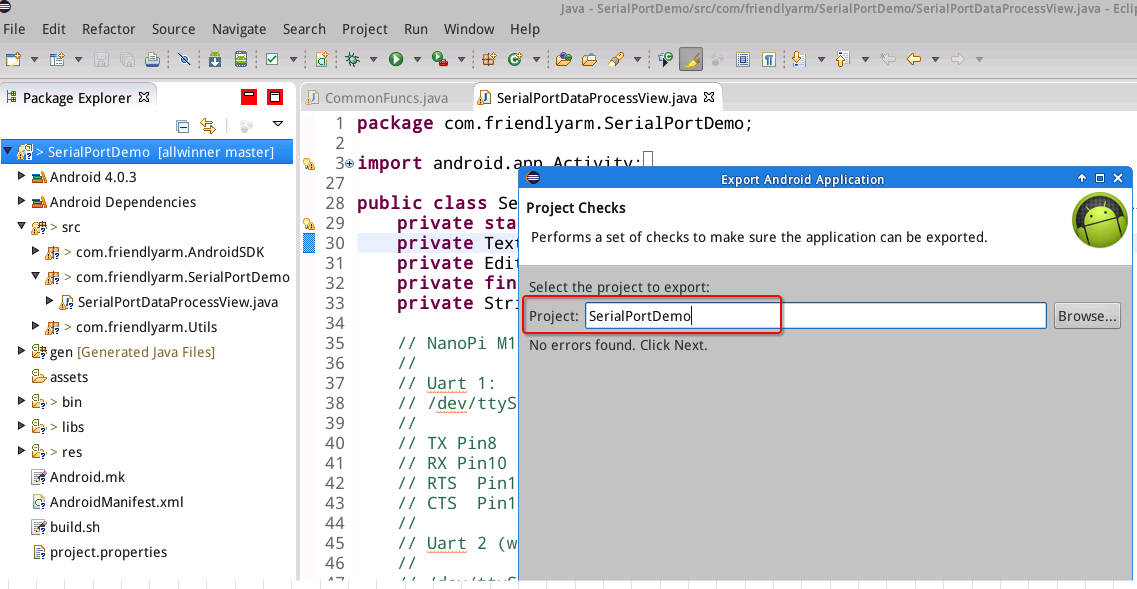
Select "SerialPortDemo":
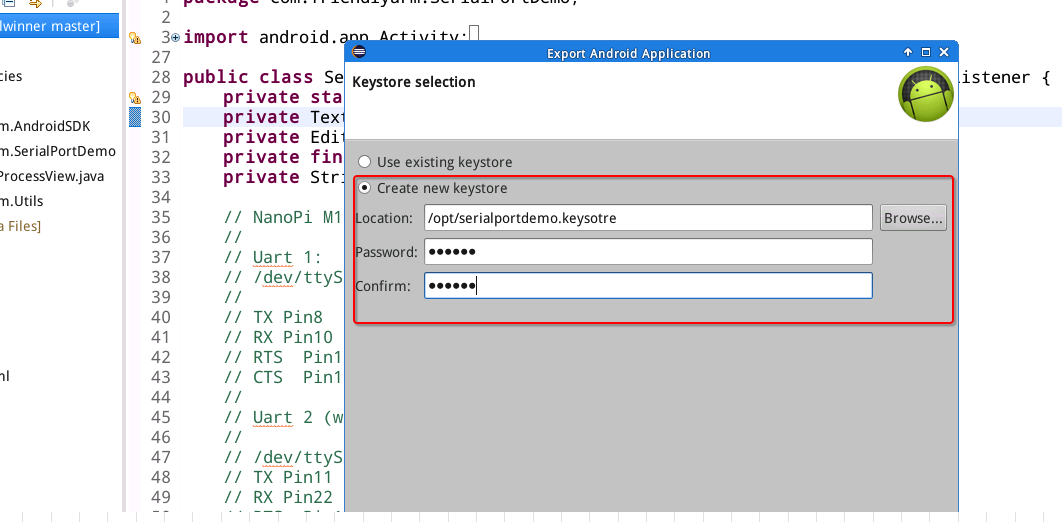
Eclipse requires you to create a new keystore or select an existing keysotre in this step. In this case we selected "Create new keystore", set a path to store the key and created its password and then clicked on "next":
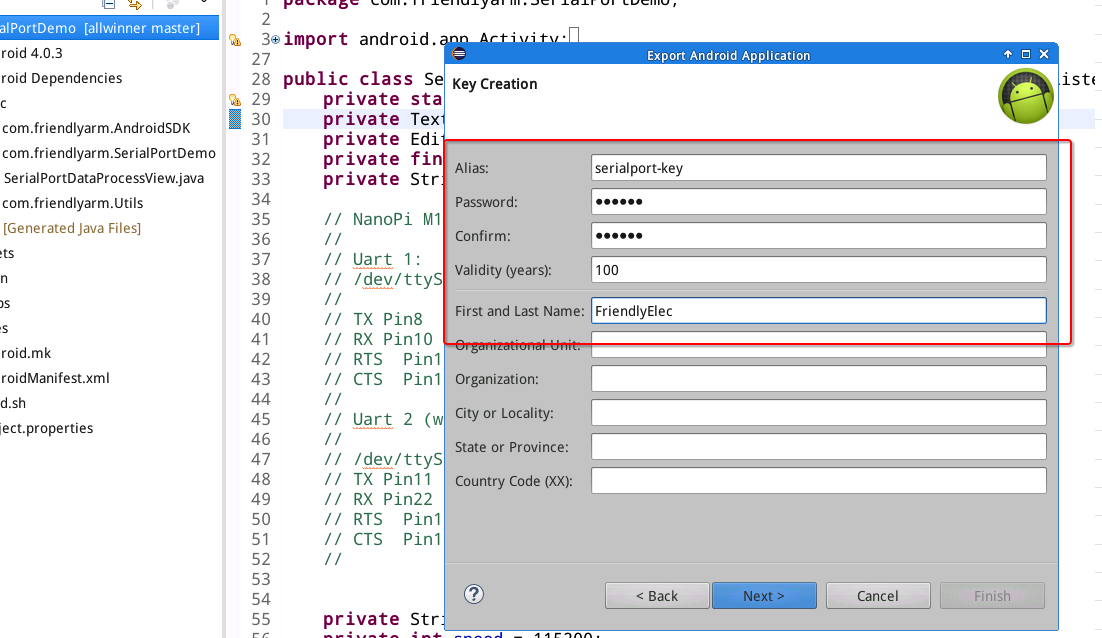
Refer to the following screenshot to fill more information and click on "next":
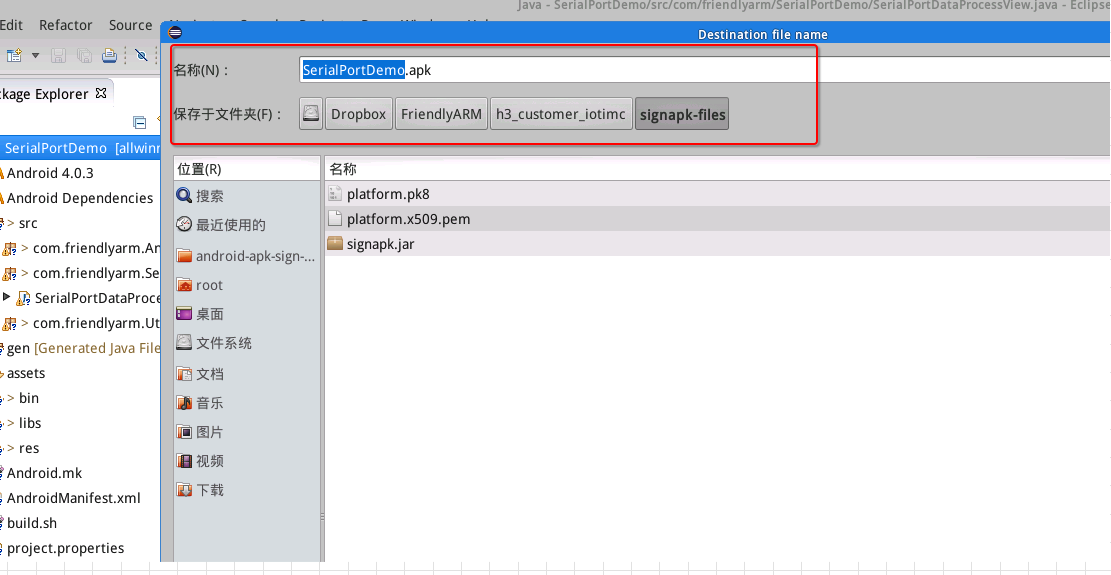
Select a path to store your APK file. In this case we set it to a "signapk-files" directory:
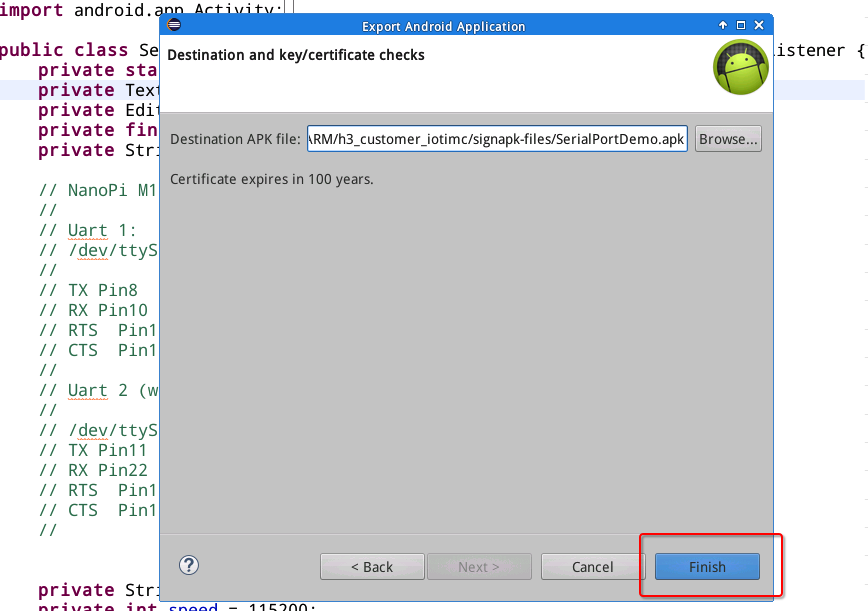
Click on "Finish" to export an APK file.
4.4 Step 4. Give APK New Signature
For a program to access a hardware device that program needs to have "system" right therefore you need to give your APK a new signature.
Enter the signapk-files directory and give your APK a new signature:
cd signapk-files/
java -jar ./signapk.jar platform.x509.pem platform.pk8 ./SerialPortDemo.apk SerialPortDemo-Signed.apk
The "signapk.jar", "platform.x509.pem" and "platform.pk8" files are available under the "android-platform-key-files" directory.
4.5 Step 5 Run & Debug
5.1) Install APK. Connect your board to a host PC with a microUSB cable and run adb commands to install your "SerialPortDemo-Signed.apk":
adb install SerialPortDemo-Signed.apk5.2) Debug: After SerialPortDemo is started run the following command in "adb shell":
ps -Z
Check this com.friendlyarm.SerialPortDemo" process. If its right is as follows that means this application already has "system" right:
u:r:system_app:s0 system 1610 112 com.friendlyarm.SerialPortDemo
This case is for Android 4. If you do it under Android 5 it will be as follows. Although some details are slightly different it means the application has "system" right as well:
u:r:platform_app:s0 u0_a60 1905 138 com.friendlyarm.SerialPortDemo
If your application doesn't have "system" right it will fail to open a device.
5 Resources
- Code Samples: https://github.com/friendlyarm/AndroidHardwareAccess
- Guide to API in Chinese: https://github.com/friendlyarm/AndroidHardwareAccess/blob/master/友善电子Android硬件开发指南.pdf
6 Update Log
6.1 March-2-2017
- Released English version
6.2 Dec-19-2017
- Added section 5
