DietPi
1 Introduction to DietPi
DietPi is a highly customized light-weighted Debian OS. It is developed and maintained by a third party. DietPi is a good choice for experienced developers and Linux fans. For those that are not familiar with it we suggest you use a ROM released at its official site. If you have any issues or questions you can go to DietPi's forum or its github site for help.
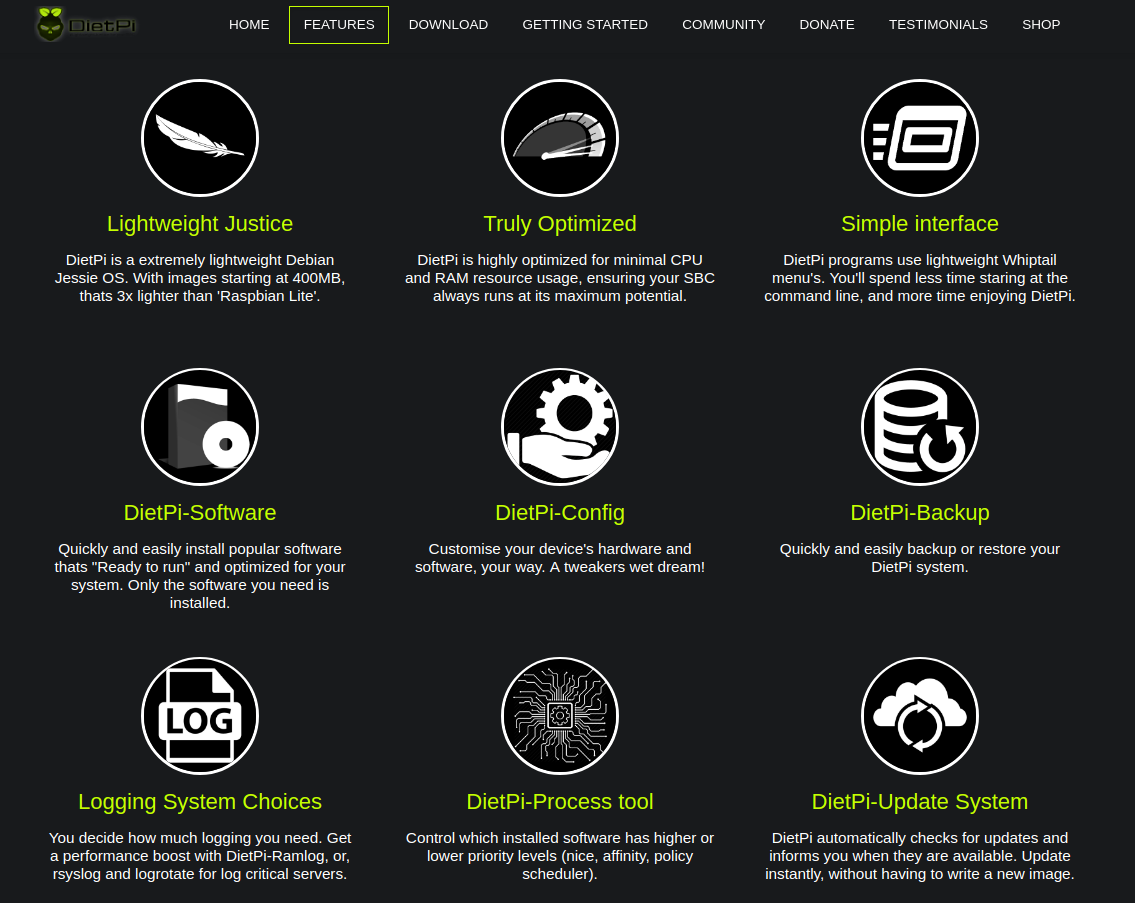
DietPi has the following features:
1. Light-weighted. ROM size is less than 500M
2. Highly optimized. CPU and RAM usage is small
3. Contains various utilities and provides user-friendly services
4. DietPi-Software: a good tool for installing packages
5. DietPi-Config: a good tool for system configuration
6. DietPi-Backup: a good tool for system backup and restoration
For more details you can refer to DietPi's official site
2 Install DietPi
2.1 Download Image Files
DietPi image files are developed and maintained by the DietPi team. Its official site is DietPi download link,DietPi is being ported to more FriendlyElec's boards. So far the following boards already work with DietPi:
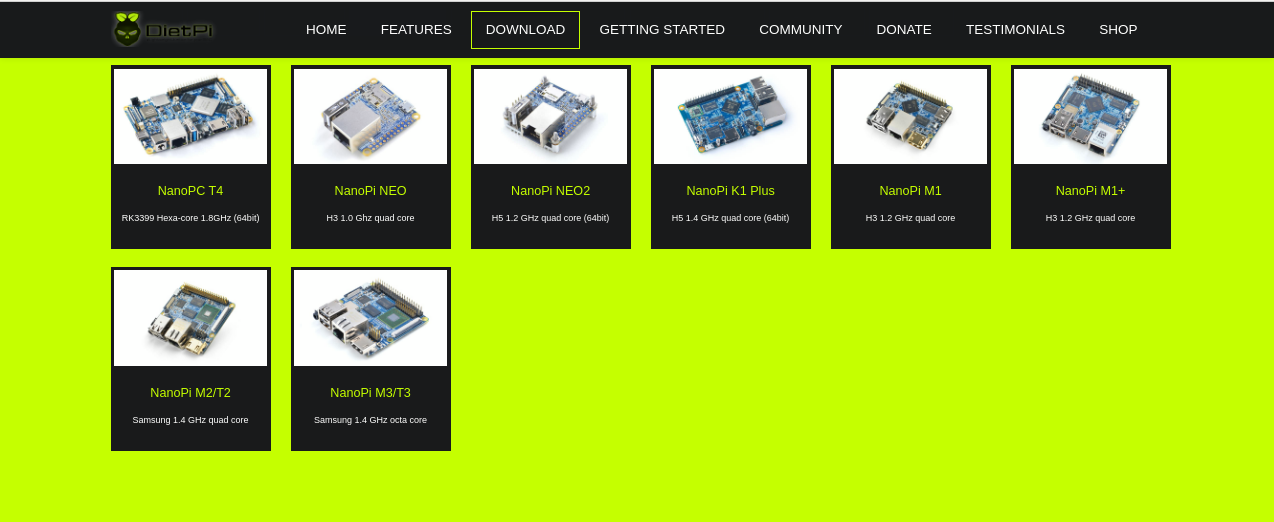
If you like DietPi and wish to join its development and maintenance youu can check its github site:DietPi Github and forum DietPi forum, and help make DietPi work with more FriendlyElec's boards.
Alternatively you can download DietPi's image files from FriendlyElec's DVD and the image files are under the DVD's "/unoffcial-ROMs" directory. The image files are obtained from its official site and changed a little bit by FriendlyElec. The changes FriendlyElec made to the image files are to include the latest system files such as Bootloader/Kernel/DTB/Modules. If you cannot find a DietPi image file from FriendlyElec's DVD it means the board the DVD is associated with may not work with DietPi. If you directly download image files from DietPi's official site you need to check whether or not the image files have the latest Bootloader/Kernel/DTB/Modules. If these files are not the latest you need to update the image with the latest files.
2.2 Flash DietPi
The method to flash a DietPi image is the same as the method to flash a FriendlyElec image to a FriendlyElec board:
Extract an image file and the win32diskimager.rar utility under a Windows PC system. Insert a TF card (at least 4G) to the PC, run the win32diskimager utility as administrator, select the TF card drive and your wanted file and click on "Write" to start flashing.
2.3 Configure dietpi.txt
After a DietPi image is flashed to an SD card that SD card will have two sections:boot and rootfs. The boot section contains system files, a "dietpi" directory and a dietpi.txt file. The "dietpi" directory contains all DietPi related scripts. This directory and the files in it are generated and used for initializing system when DietPi is booted for the first time. The dietpi.txt is the configuration file DietPi uses to configure a system. We suggest you read this file carefully.
2.3.1 Networking Options
# Enable/disable Ethernet and WiFi. When both are enabled WiFi will be activated first.
AUTO_SETUP_NET_ETHERNET_ENABLED=1
AUTO_SETUP_NET_WIFI_ENABLED=0

# Set WiFi hotspot SSID and password
AUTO_SETUP_NET_WIFI_SSID=MySuperDooperWiFi
AUTO_SETUP_NET_WIFI_KEY=0123456789
# available | WPA-PSK / WPA-EAP / NONE | WEP=No longer supported
AUTO_SETUP_NET_WIFI_KEYMGR=WPA-PSK

# Set hostname
AUTO_SETUP_NET_HOSTNAME=DietPi

# Set Ethernet speed
# 0=automatic speed | 10 = 10mbit, 100 = 100mbit etc
AUTO_SETUP_NET_ETH_FORCE_SPEED=0
2.3.2 Misc Options
# swap size
# 0=Disabled | 1=auto (2GB-RAM = size) | 2+=manual
AUTO_SETUP_SWAPFILE_SIZE=1
# swap directory
AUTO_SETUP_SWAPFILE_LOCATION=/var/swap
2.3.3 Software Automation Options
# Install software automatically
AUTO_SETUP_AUTOMATED=0

# Global passwords including passwords for root, dietpi, MySQL, Transmission and etc
AUTO_SETUP_GLOBAL_PASSWORD=dietpi

# SSH server
#		0=none
#		-1=dropbear
#		-2=opensshserver
AUTO_SETUP_SSH_SERVER_INDEX=-1

# Log
#		0=none/manual
#		-1=ramlog 1h clear
#		-2=ramlog 1h save clear
#		-3=logrotate + rsyslog
AUTO_SETUP_LOGGING_INDEX=-1

# webserver
#	NB: This will get ignored, if you have manually selected any WEBSERVER_Stack.
#		0=Apache2
#		-1=Nginx
#		-2=Lighttpd
AUTO_SETUP_WEB_SERVER_INDEX=-2
2.3.4 DietPi-Config settings
# CPU strategy | ondemand | powersave | performance | conservative
CONFIG_CPU_GOVERNOR=ondemand
CONFIG_CPU_USAGE_THROTTLE_UP=50

# CPU's min and max frequencies
CONFIG_CPU_MAX_FREQ=Disabled
CONFIG_CPU_MIN_FREQ=Disabled

# Whether or not wait for network on system boot
CONFIG_BOOT_WAIT_FOR_NETWORK=1

# Enable/disable login with serial console.
CONFIG_SERIAL_CONSOLE_ENABLE=1

# Package source. You'd better choose a source accessible from your location.
CONFIG_APT_DEBIAN_MIRROR=http://ftp.cn.debian.org/debian/
The aforementioned options are only part of DietPi's features. For more details refer to the dietpi.txt file or visit DietPi's official site.
3 Work with DietPi
3.1 Boot DietPi for the First Time
DietPi 的初始化配置比较繁琐,但只要完成一次这些初始化配置后,Dietpi 还是值得资深爱好者去使用的。
首先,必须连接好网线,DietPi 的初始化操作要求必须能连接上网络。
第一次运行 DietPi 系统时,DietPi 会扩展rootfs分区,扩展完成后会重启系统。重启系统后,会根据dietpi.txt里的配置进行进行一系列的初始化操作,如果在dietpi.txt里设置了CONFIG_SERIAL_CONSOLE_ENABLE=1,那么这一次启动系统会调用DietPi-Set_Hardware脚本使能serial-getty服务,但是要等待下一次启动系统才能使用调试串口登录。如果你不想再次重启系统,可以选择通过SSH或者在HDMI上进行登录,登录的账号和密码分别是root和dietpi。登录系统后会继续进行更多的初始化操作,我们根据提示一步步执行即可。以下截图是DietPi-V6.7在NanoPi-K1-Plus的实测初始化步骤, 不同板子不同版本的DietPi的初始化版本可能会有差异,用户只要安装具体的提示一步步进行操作即可:
运行DietPi-Software:

根据打印的log信息可以看出,其中有执行apt-get update,如果您使用的固件无法连接软件源,请自行修改dietpi.txt里的配置项CONFIG_APT_DEBIAN_MIRROR。
运行DietPi-Set_software, 设置全局密码:

运行DietPi-Set_software, 设置用户密码:

提示用户可通过ip a命令查看IP地址:

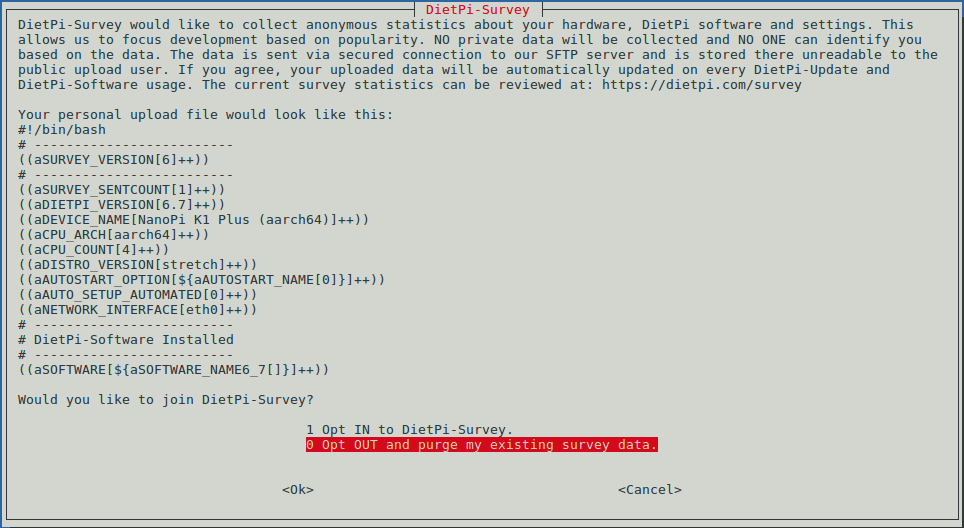
是否允许DietPi收集并上传硬件信息:
DietPi已经自动升级到最新版本:

由于DitePi系统自动了版本升级,所以又会再次重启系统,系统重启后同样会运行Dietpi-Software,并询问是否修改全局密码和用户密码后,由于DietPi的版本已经为最新版本,这时会直接进入DietPi-Software的核心界面,该界面允许用户选择自己想要安装的软件:
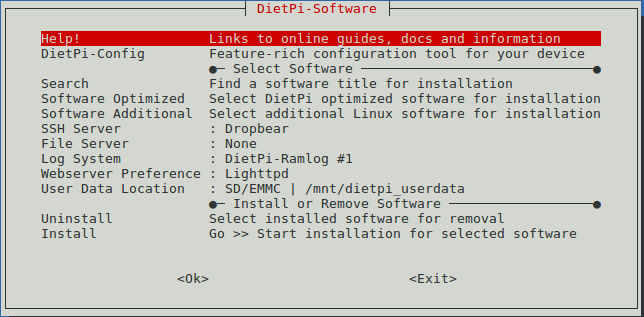
我们使用默认设置,不再安装额外的软件,直接选择Install,并且选择OK,表示使用DietPi的纯净版最小系统:

此时会再次重启系统,这次才真正地完成了DietPi的初始化设置。
3.2 DietPi实用脚本简介
Dietpi系统提供了大量的实用脚本,所有脚本的源码均位于/rootfs/Dietpi目录,这里选择一些核心的脚本进行功能性的描述,这些描述都是基于NanoPi-K1-Plus + DietPi-V6.10,具体的脚本里的各个功能并没有在其他平台上经过准确的测试和验证,用户需自行测试和使用,如果遇到了问题,请向DietPi的官方github和论坛进行意见反馈。
3.2.1 DietPi-Launcher
我们可以通过dietpi-launcher来统一地使用这些脚本工具,在命令行终端运行该工具:
$ dietpi-launcher同理,下列DietPi提供的下列脚本也可以在命令行终端单独运行:
dietpi-autostart      dietpi-cleaner        dietpi-drive_manager  dietpi-letsencrypt    dietpi-process_tool   dietpi-survey
dietpi-backup         dietpi-config         dietpi-justboom       dietpi-logclear       dietpi-services       dietpi-sync
dietpi-bugreport      dietpi-cron           dietpi-launcher       dietpi-morsecode      dietpi-software       dietpi-update
3.2.2 DietPi-Software

在Software Optimized里有大量常见的软件,预先配置好、开箱即用。
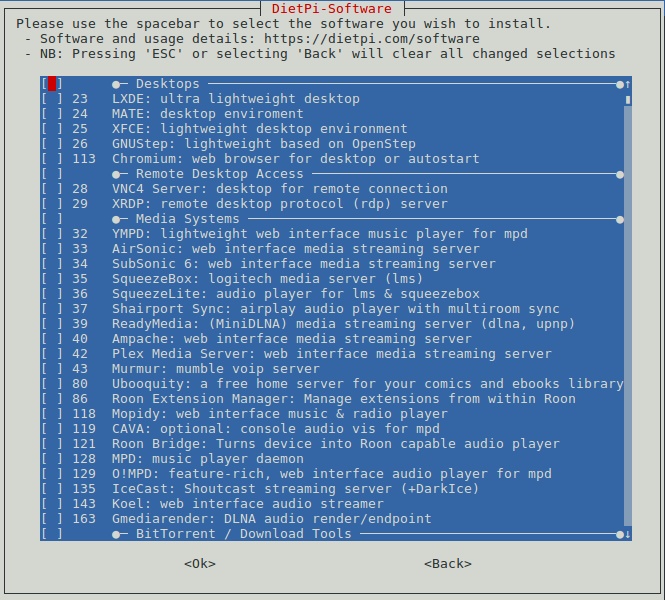
选择您需要的软件,然后选择“Go >> Start installation for selected software”开始安装。
3.2.3 DietPi-Config
提供各种软硬件配置和功能:

本维基编写时,部分开发板硬件相关的功能并没有实现好,但是仍然有许多通用的软件功能可以使用。
- Display Options
外观显示相关的设置,例如分辨率,LED的设置。
- Audio Options
选择系统默认使用的声卡设备。
- Performance Options
设置CPU的性能,例如CPU的分配策略,最大最小频率。
- Advanced Options
设置swap文件的大小,是否使能: 网络时间同步、蓝牙、调试串口。
- Language/Regional Options
设置语言和时区。
- Security Options
设置hostname和password。
- Network Options: Adapters
设置有线和无线网络,是否使用代理。
- Network Options: Misc
设置是否apt软件源、ntp软件源等。
- AutoStart Options
设置开机登录或者运行指定软件,可单独运行DietPi-AutoStart来进入该界面。
- Tools
测试系统性能和稳定性的工具, 调用Benchmarks和stress工具。
3.2.4 DietPi-Cron

将你想要定时运行的脚本放到/etc/cron.daily/目录下,然后通过该工具设置定时运行的时间。
3.2.5 DietPi-Drive_Manager

管理各种存储器,例如SD卡,emmc,U盘。提供格式化设备、选择设备的挂载点、挂载网络设备等功能。
3.2.6 DietPi-Update
3.2.7 DietPi-Backup

支持备份和还原文件系统,默认生成的备份文件位于/mnt/dietpi-backup。
3.2.8 DietPi-Cleaner

清理文件系统,允许选择需要清理的组件(例如apt软件包,log文件等),运行模拟执行清理操作以防止误删除。
