Difference between revisions of "Matrix - Temperature and Humidity Sensor"
(→硬件连接) |
|||
| Line 36: | Line 36: | ||
| − | == | + | ==Applications== |
| − | === | + | ===Connect to NanoPi M1=== |
| − | + | Refer to the following connection diagram to connect the module to the NanoPi M1:<br> | |
[[File:Matrix-Temperature_and_Humidity_Sensor_nanopi_m1.jpg|frameless|600px|Matrix-Temperature_and_Humidity_Sensor_nanopi_m1]] | [[File:Matrix-Temperature_and_Humidity_Sensor_nanopi_m1.jpg|frameless|600px|Matrix-Temperature_and_Humidity_Sensor_nanopi_m1]] | ||
| − | + | Connection Details: | |
{| class="wikitable" | {| class="wikitable" | ||
|- | |- | ||
| Line 53: | Line 53: | ||
|} | |} | ||
| − | === | + | ===Connect to NanoPi 2=== |
| − | + | Refer to the following connection diagram to connect the module to the NanoPi 2:<br> | |
[[File:Matrix-Temperature_and_Humidity_Sensor_nanopi_2.jpg|frameless|600px|Matrix-Temperature_and_Humidity_Sensor_nanopi_2]] | [[File:Matrix-Temperature_and_Humidity_Sensor_nanopi_2.jpg|frameless|600px|Matrix-Temperature_and_Humidity_Sensor_nanopi_2]] | ||
| − | + | Connection Details: | |
{| class="wikitable" | {| class="wikitable" | ||
|- | |- | ||
| Line 69: | Line 69: | ||
|} | |} | ||
| − | === | + | ===Connect to NanoPi M2 / NanoPi 2 Fire=== |
| − | NanoPi | + | Refer to the following connection diagram to connect the module to the NanoPi M2/ NanoPi 2 Fire:<br> |
| − | + | ||
[[File:Matrix-Temperature_and_Humidity_Sensor_nanopi_m2.jpg|frameless|600px|Matrix-Temperature_and_Humidity_Sensor_nanopi_m2]] | [[File:Matrix-Temperature_and_Humidity_Sensor_nanopi_m2.jpg|frameless|600px|Matrix-Temperature_and_Humidity_Sensor_nanopi_m2]] | ||
| − | + | Connection Details: | |
{| class="wikitable" | {| class="wikitable" | ||
|- | |- | ||
| Line 86: | Line 85: | ||
|} | |} | ||
| − | === | + | ===Connect to NanoPC-T2=== |
| − | + | Refer to the following connection diagram to connect the module to the NanoPC-T2:<br> | |
[[File:Matrix-Temperature_and_Humidity_Sensor_NanoPC-T2.jpg|frameless|600px|Matrix-Temperature_and_Humidity_Sensor_NanoPC-T2]] | [[File:Matrix-Temperature_and_Humidity_Sensor_NanoPC-T2.jpg|frameless|600px|Matrix-Temperature_and_Humidity_Sensor_NanoPC-T2]] | ||
| − | + | Connection Details: | |
{| class="wikitable" | {| class="wikitable" | ||
|- | |- | ||
Revision as of 15:21, 24 June 2016
Contents
1 Introduction
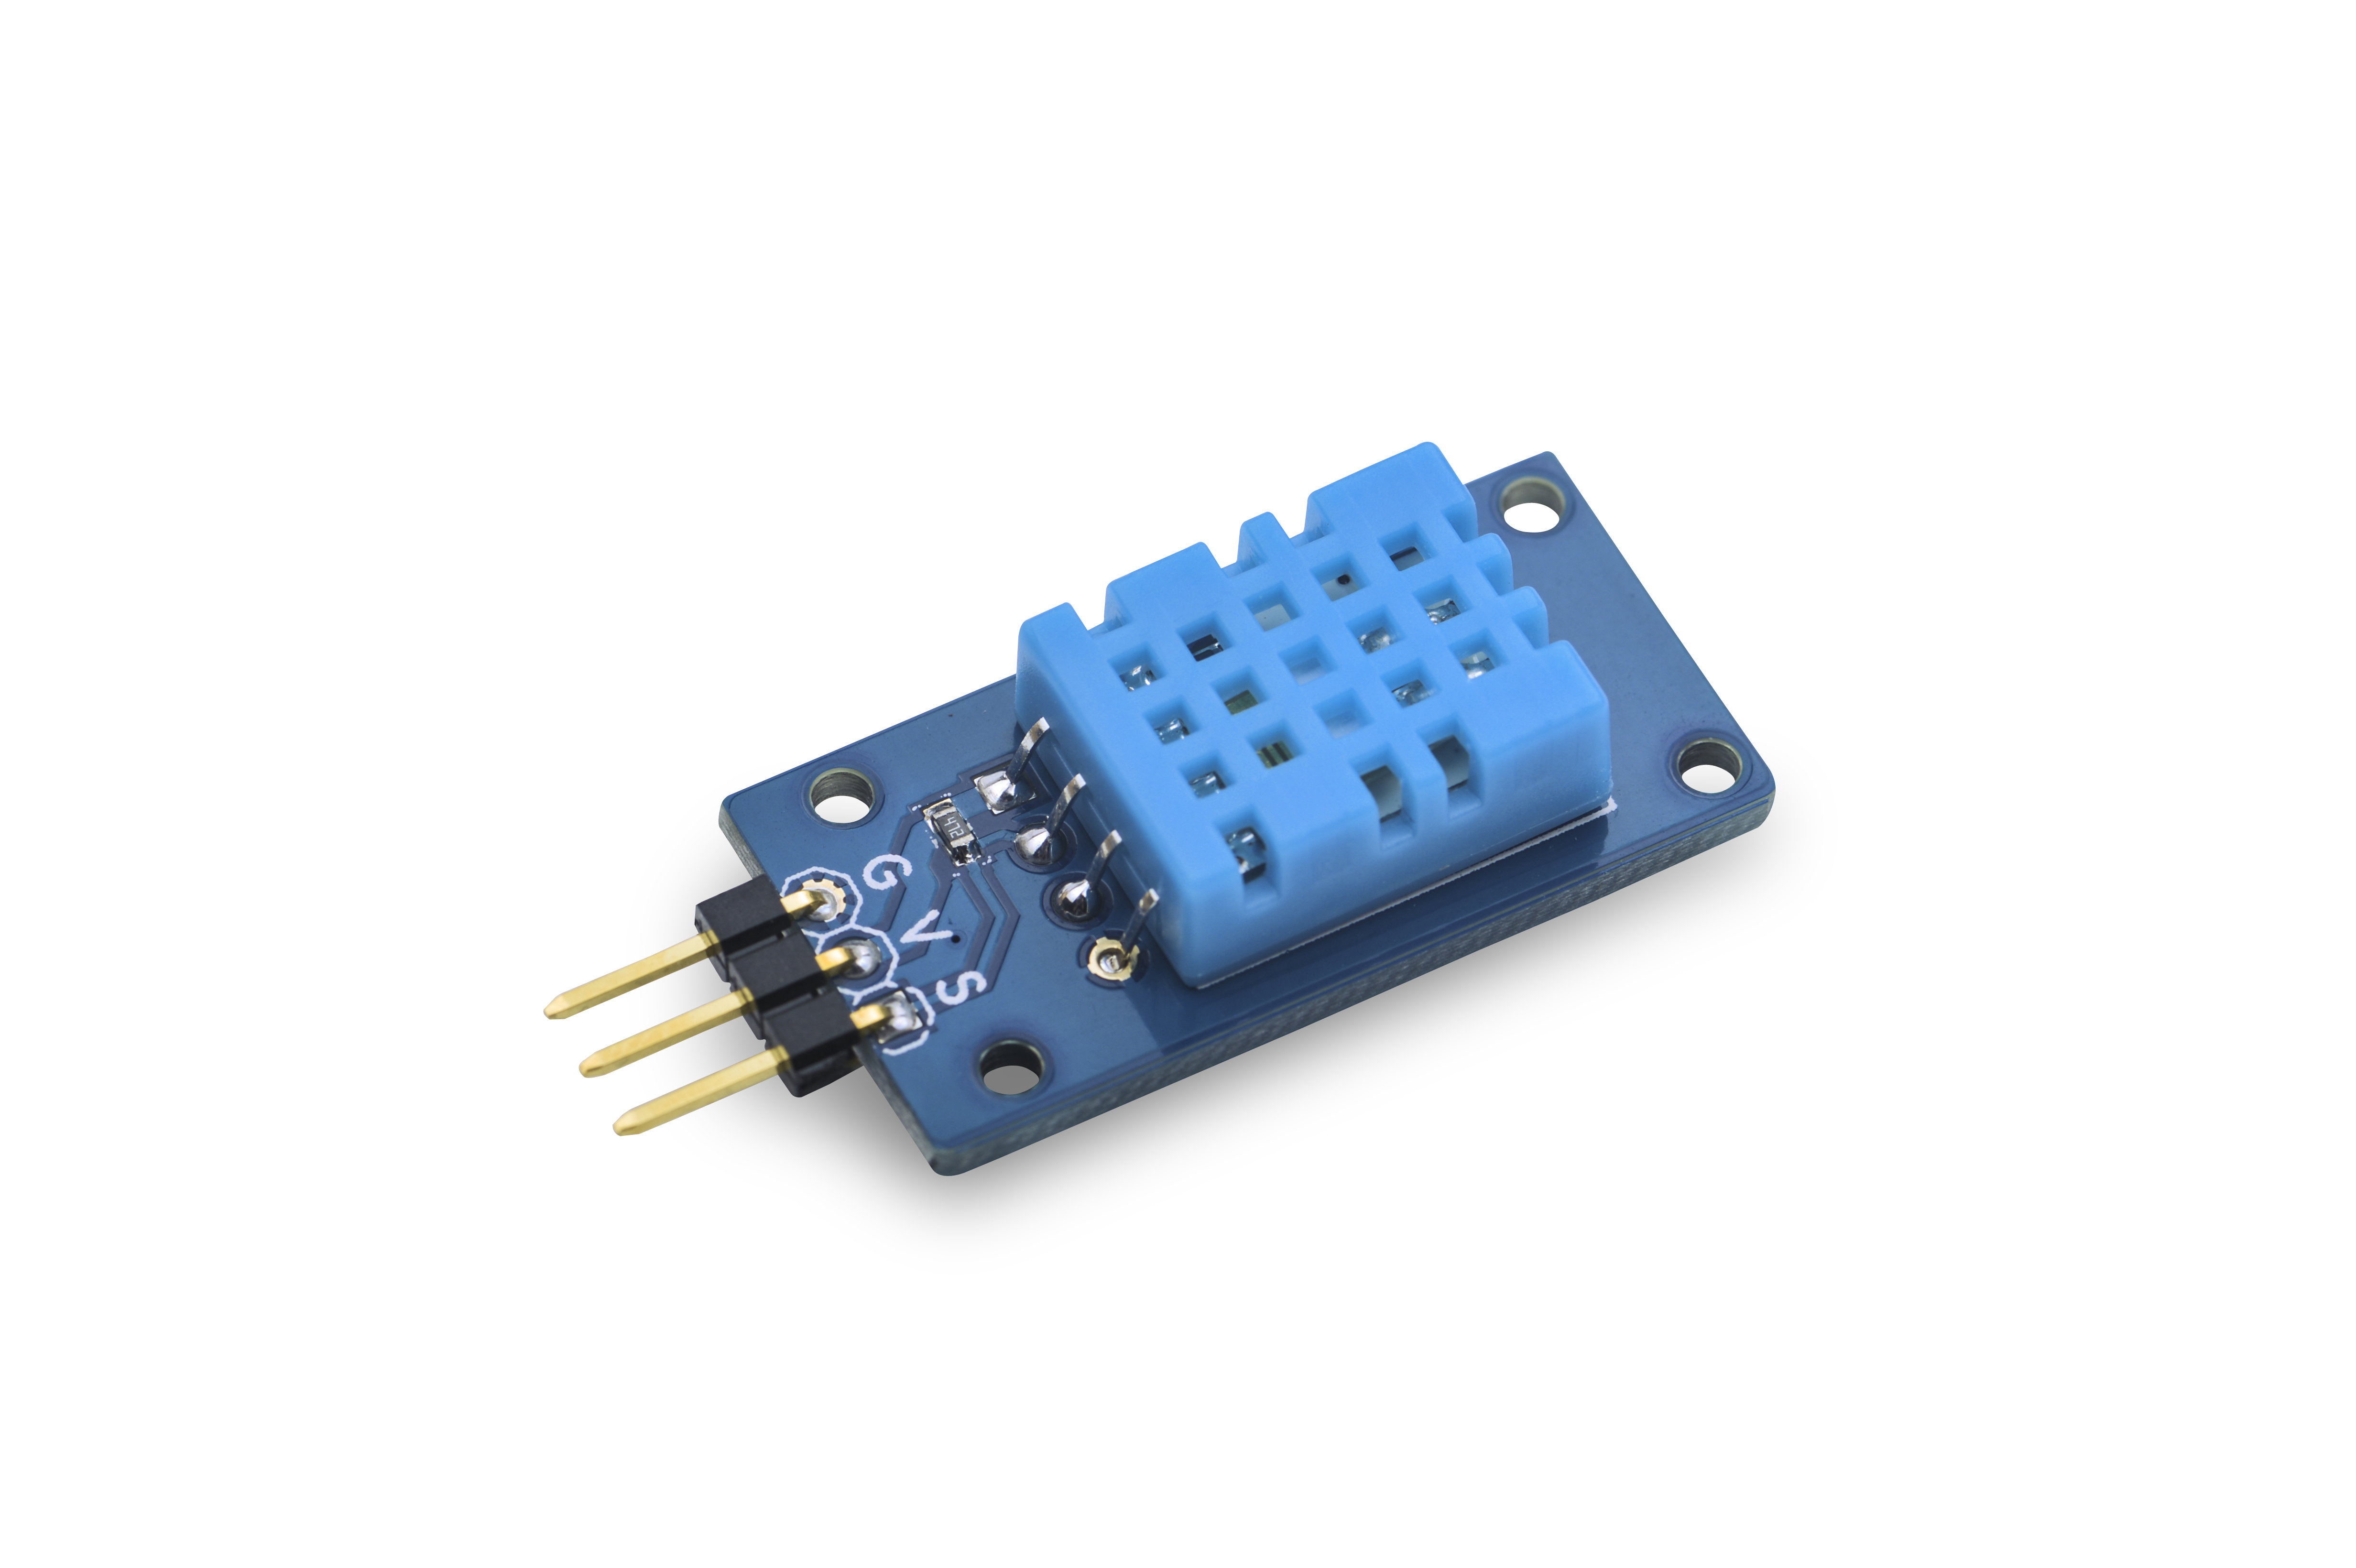
- The Matrix-Temperature_and_Humidity_Sensor module is used to detect temperature and humidity.
- It utilizes the DHT11 temperature and humidity sensor. Its humidity range is 20% - 80% and the accuracy is 5%. Its temperature range is 0℃ - 50℃ and the accuracy is ±2℃.
2 Features
- Humidity range: 20 - 80%RH, Temperature range 0 ~ 50℃
- Accuracy of humidity: +-5%RH, accuracy of temperature: +-2℃
- One wire communication
- 2.54 mm spacing pin
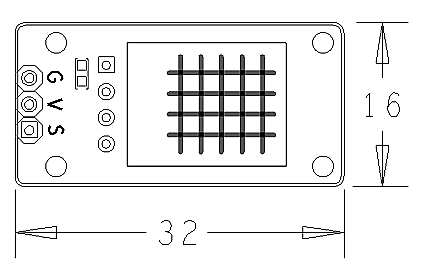
- PCB dimension (mm): 16 x 32
Pin Description:
| Pin | Description |
| S | GPIO |
| V | Supply Voltage 5V |
| G | Ground |
3 Basic Device Operation
The DHT11 module uses a simplified single-bus serial communication. DATA controls communication and synchronization between the microprocessor and DHT11. A data transfer takes 4ms. The data format contains an integer part and a decimal part. The basic operation is as follows:
- a transmission of 40 data, the high first-out
- data format: 8bit humidity integer data + 8bit the Humidity decimal data
- 8bit temperature integer data + 8bit fractional temperature data
- 8 bit parity bit
- If a transmission is successful the “8bit humidity integer data + 8bit humidity decimal data +8 bit temperature integer data + 8bit temperature fractional data” 8bit checksum is equal to the results of the last eight.
- After the user host (MCU) sends a signal DHT11 is converted from low-power mode to high-speed mode, until the host begins to signal the end. Then DHT11 sends a response signal to send 40bit data, and trigger a letter collection. If DHT11 doesn't receive a signal from the host it will not begin a letter collection. After the letter collection is done DHT11 will turn to low power mode.
4 Applications
4.1 Connect to NanoPi M1
Refer to the following connection diagram to connect the module to the NanoPi M1:
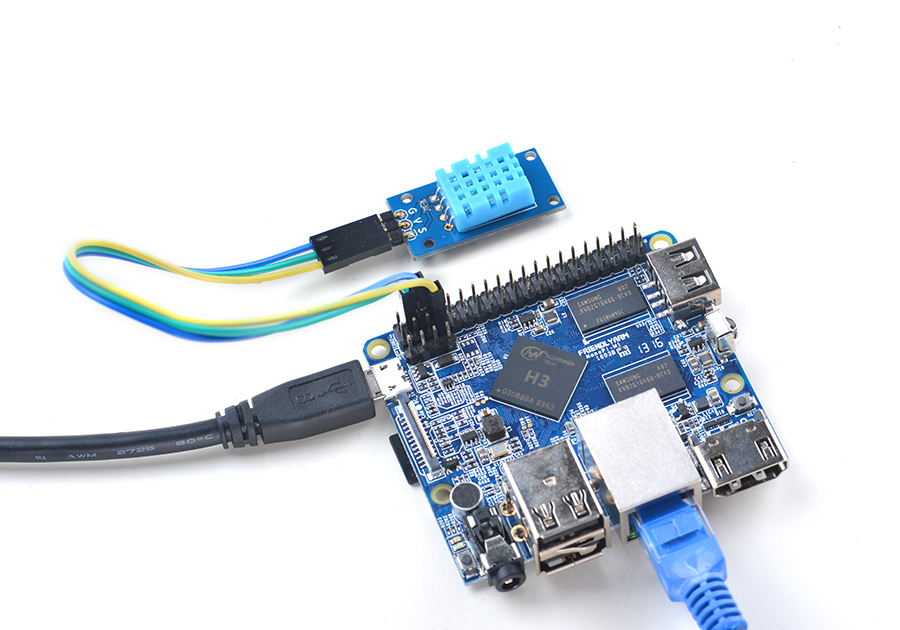
Connection Details:
| Matrix-Temperature_and_Humidity_Sensor | NanoPi M1 |
| S | Pin7 |
| V | Pin4 |
| G | Pin6 |
4.2 Connect to NanoPi 2
Refer to the following connection diagram to connect the module to the NanoPi 2:
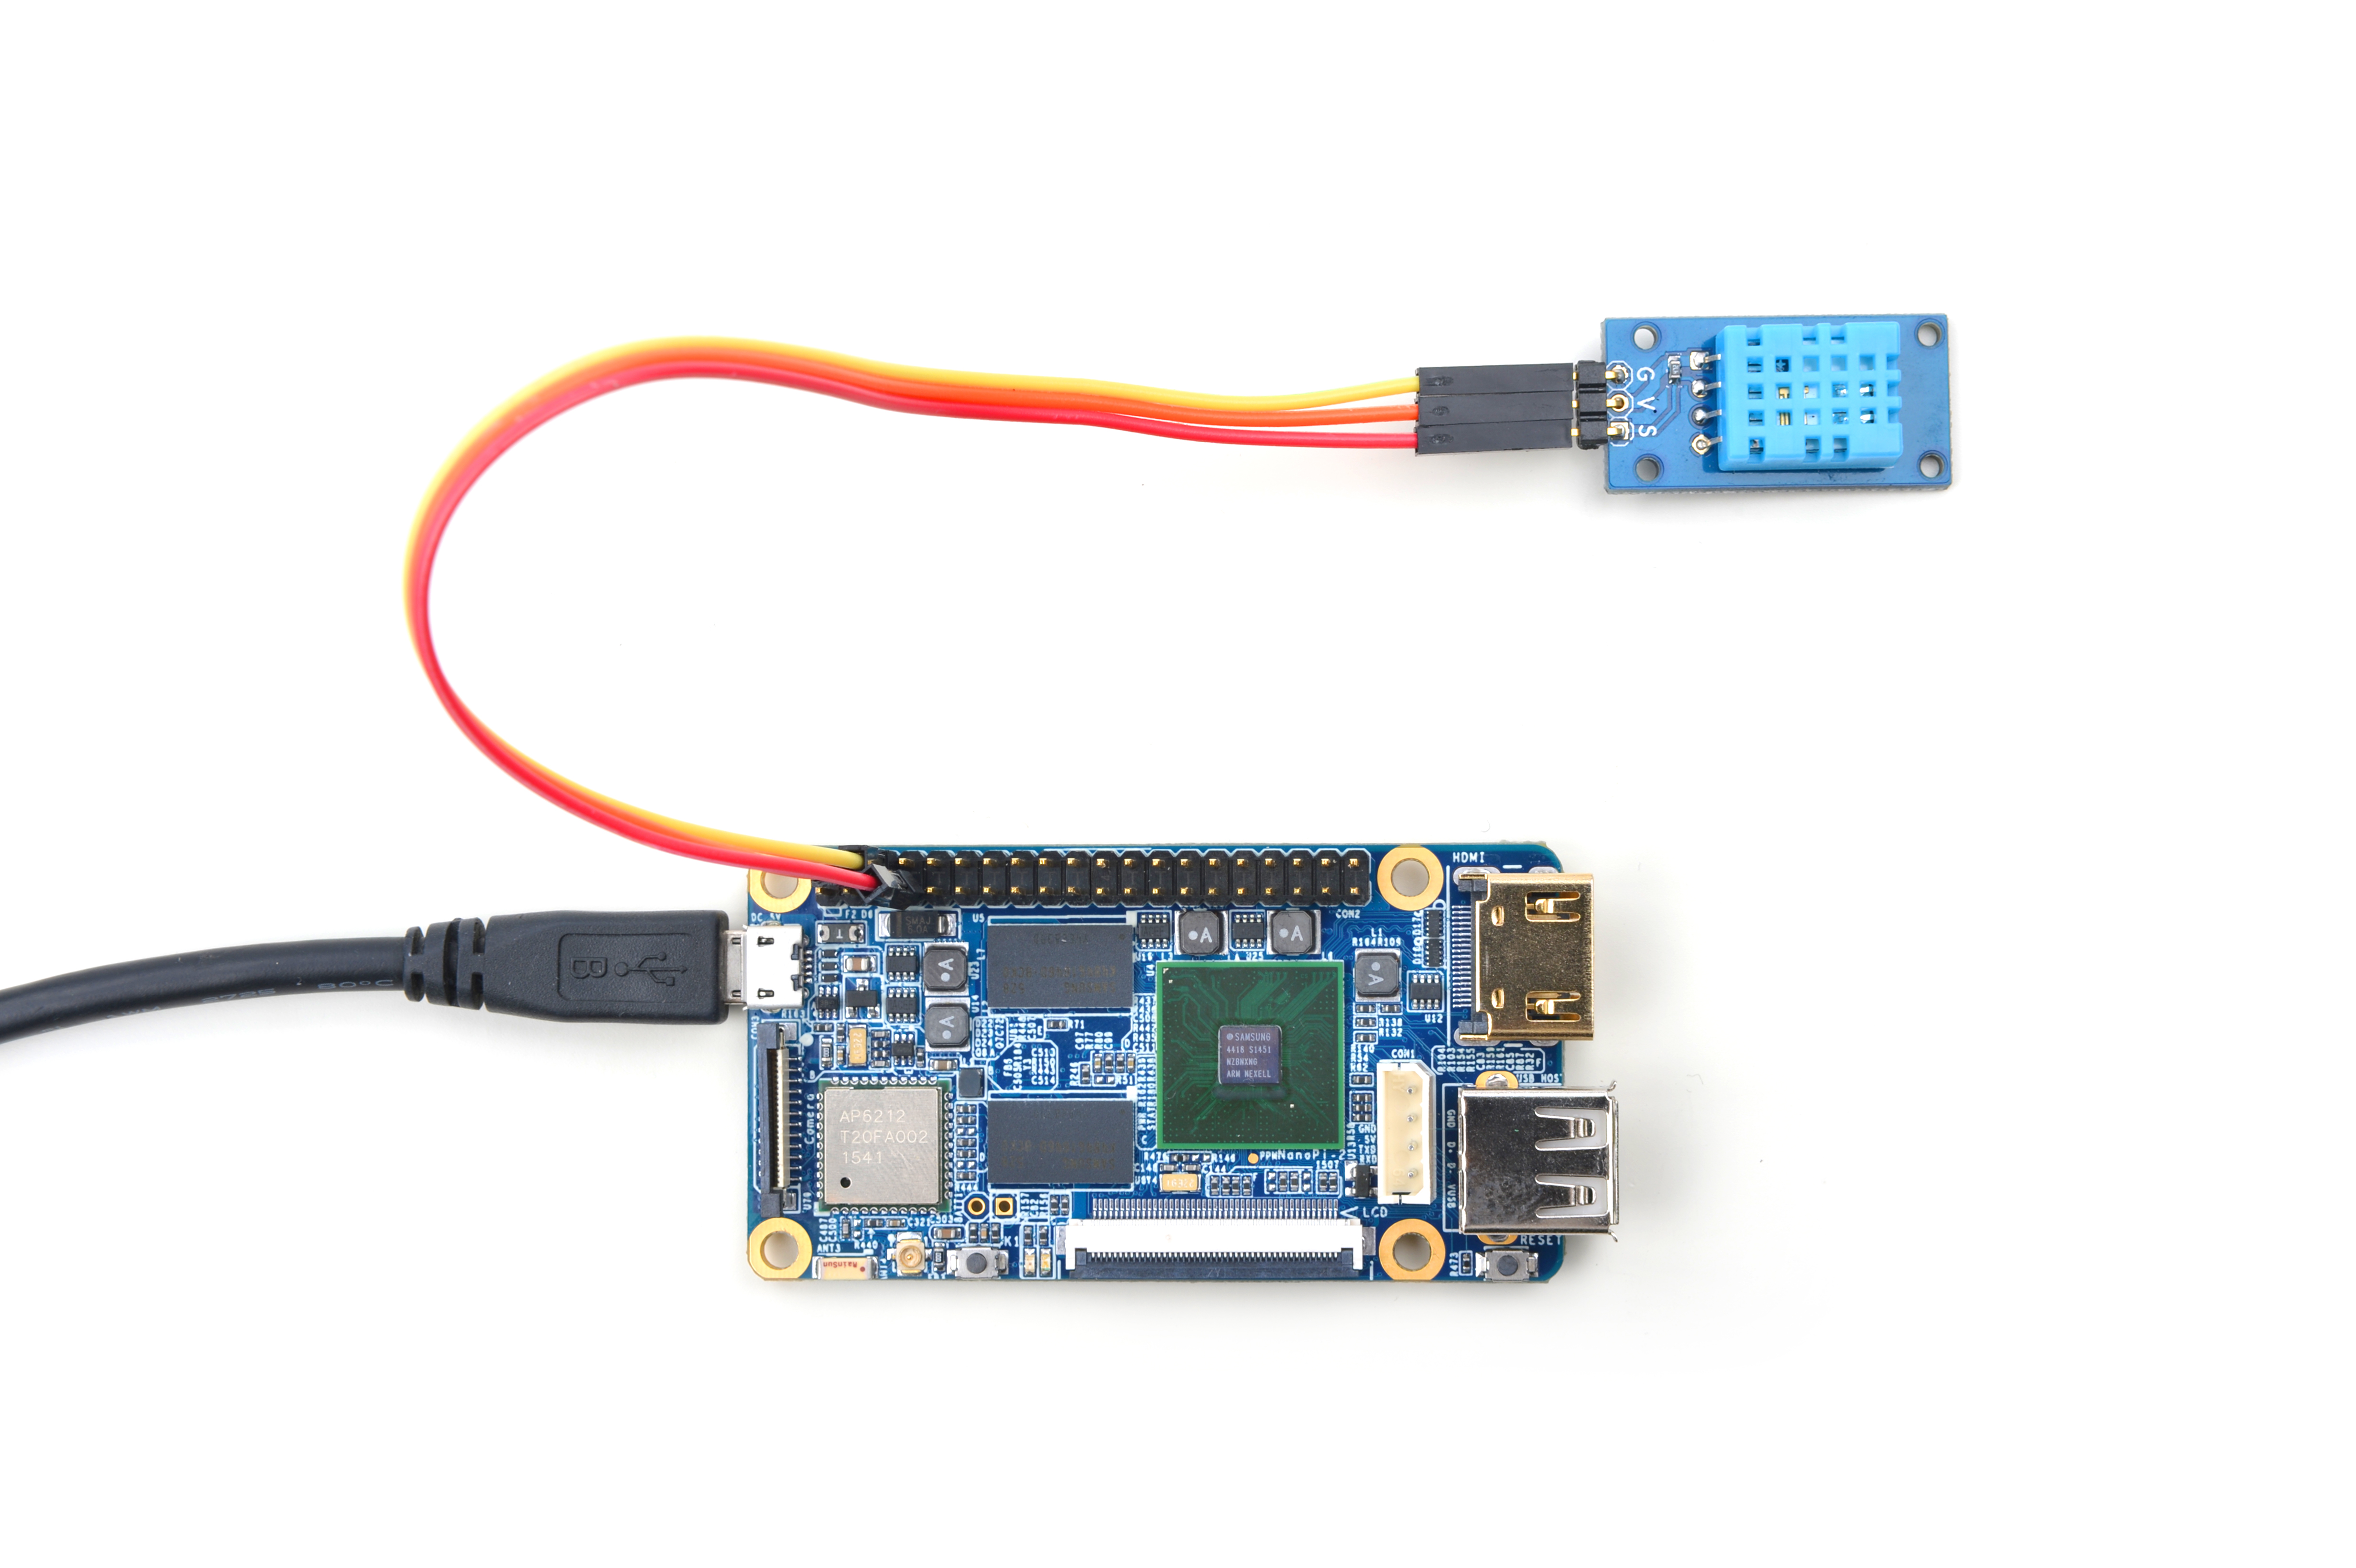
Connection Details:
| Matrix-Temperature_and_Humidity_Sensor | NanoPi 2 |
| S | Pin7 |
| V | Pin4 |
| G | Pin6 |
4.3 Connect to NanoPi M2 / NanoPi 2 Fire
Refer to the following connection diagram to connect the module to the NanoPi M2/ NanoPi 2 Fire:
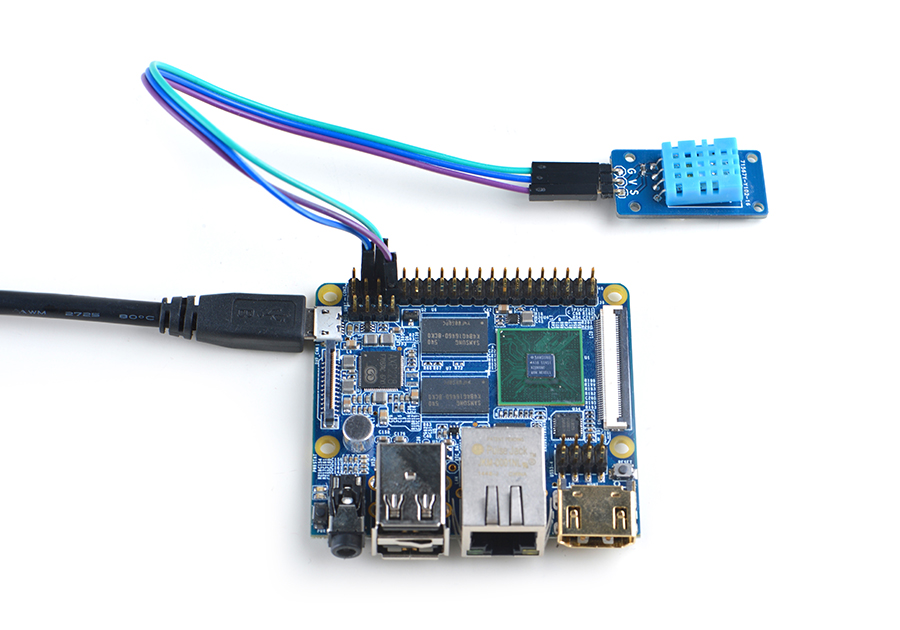
Connection Details:
| Matrix-Temperature_and_Humidity_Sensor | NanoPi M2 |
| S | Pin7 |
| V | Pin4 |
| G | Pin6 |
4.4 Connect to NanoPC-T2
Refer to the following connection diagram to connect the module to the NanoPC-T2:
Matrix-Temperature_and_Humidity_Sensor_NanoPC-T2
Connection Details:
| Matrix-Temperature_and_Humidity_Sensor | NanoPC-T2 |
| S | Pin15 |
| V | Pin29 |
| G | Pin30 |
5 编译运行测试程序
启动开发板并运行Debian系统,进入系统后克隆Matrix代码仓库:
$ apt-get update && apt-get install git
$ git clone https://github.com/friendlyarm/matrix.git
克隆完成后会得到一个名为matrix的目录。
编译并安装Matrix:
$ cd matrix
$ make && make install
运行测试程序:
$ matrix-temp_humidity注意:此模块并不支持热插拔,启动系统前需要确保硬件连接正确。
运行效果如下:
The humidity is 35000
The temperature is 26000
成功读取温湿度值。
6 代码说明
所有的开发板都共用一套Matrix代码,本模块的测试示例代码为matrix-temperature_and_humidity_sensor,内容如下:
int main(int argc, char ** argv)
{
    int ret = -1;
    int dhtTemp=0, dhtHdty=0, board;
    char modStr[BUF_SIZE];
    int pin = GPIO_PIN(7);

    if ((board = boardInit()) < 0) {
        printf("Fail to init board\n");
        return -1;
    }
    if (board == BOARD_NANOPI_T2)
        pin = GPIO_PIN(15);

    sprintf(modStr, "modprobe %s gpio=%d", DRIVER_MODULE, pintoGPIO(pin));
    system(modStr);
    if ((ret = dht11Read(DHT_HUMIDITY, &dhtHdty)) != -1) {
        printf("The humidity is %d\n", dhtHdty);
    } else {
        printf("Faided to get humidity\n");
    }
    if ((ret = dht11Read(DHT_TEMP, &dhtTemp)) != -1) {
        printf("The temperature is %d\n", dhtTemp);
    } else {
        printf("Faided to get temperature\n");
    }
    system("rmmod "DRIVER_MODULE);
    return ret;
}
API说明参考维基:Matrix API reference manual
7 Resources
8 Update Log
8.1 Feb-23-2016
- Added the description for "NanoPi 2 branch" in Section 4
- Added Section 5: Connect to NanoPi 2
