Difference between revisions of "Matrix - IR Receiver"
(→与NanoPi 2连接使用) |
|||
| Line 50: | Line 50: | ||
If this is successful a "matrix" directory will be generated, which will contain all the matrix modules' code samples. | If this is successful a "matrix" directory will be generated, which will contain all the matrix modules' code samples. | ||
| − | == | + | ==Connect to NanoPi 2== |
| − | === | + | ===Hardware Connection=== |
| − | + | Please refer to the following connection diagram to connect the Matrix-IR_Receiver to the NanoPi 2:<br> | |
[[File:Matrix-IR_Receiver_nanopi_2.jpg|frameless|600px|Matrix-IR_Receiver_nanopi_2]] | [[File:Matrix-IR_Receiver_nanopi_2.jpg|frameless|600px|Matrix-IR_Receiver_nanopi_2]] | ||
| − | + | Connection Details: | |
{| class="wikitable" | {| class="wikitable" | ||
|- | |- | ||
| Line 67: | Line 67: | ||
|} | |} | ||
| − | === | + | ===Compile Test Program=== |
| − | + | Please login the matrix hub and enter the nanopi2 branch | |
<syntaxhighlight lang="bash"> | <syntaxhighlight lang="bash"> | ||
$ cd matrix | $ cd matrix | ||
| Line 74: | Line 74: | ||
</syntaxhighlight> | </syntaxhighlight> | ||
| − | + | Compile the Matrix code | |
<syntaxhighlight lang="bash"> | <syntaxhighlight lang="bash"> | ||
$ make CROSS_COMPILE=arm-linux- clean | $ make CROSS_COMPILE=arm-linux- clean | ||
| Line 80: | Line 80: | ||
$ make CROSS_COMPILE=arm-linux- install | $ make CROSS_COMPILE=arm-linux- install | ||
</syntaxhighlight> | </syntaxhighlight> | ||
| − | + | Note: please make sure to install the cross compiler "arm-linux-gcc-4.9.3" on your PC, which is used to compile files for the NanoPi 2.<br> | |
| − | + | Generated library files are under the "install/lib" directory. The test program is under the "install/usr/bin" directory. The modules are under the "modules" directory.<br> | |
| − | === | + | ===Run Test Program=== |
| − | + | Please insert a TF card which is flashed with Debian to a Linux host and mount its boot and rootfs sections.<br> | |
| − | + | We assume the rootfs is mounted to /media/rootfs then please run the following commands to copy the module, library and test program to the card<br> | |
<syntaxhighlight lang="bash"> | <syntaxhighlight lang="bash"> | ||
$ cp modules /media/rootfs/ -r | $ cp modules /media/rootfs/ -r | ||
| Line 92: | Line 92: | ||
</syntaxhighlight> | </syntaxhighlight> | ||
| − | + | Insert this TF card to your NanoPi 2, power on and run the following commands to load the driver<br> | |
<syntaxhighlight lang="bash"> | <syntaxhighlight lang="bash"> | ||
$ cd /modules | $ cd /modules | ||
$ insmod matrix_ir_recv.ko | $ insmod matrix_ir_recv.ko | ||
</syntaxhighlight> | </syntaxhighlight> | ||
| − | + | If the driver is successfully loaded a device node will be generated under /dev/input/. In our test case the node was event1.<br> | |
| − | + | There is an open source utility "input-utils" which can be used to read the event device's data. Here is how it works:<br> | |
<syntaxhighlight lang="bash"> | <syntaxhighlight lang="bash"> | ||
$ apt-get install input-utils | $ apt-get install input-utils | ||
$ input-events 1 | $ input-events 1 | ||
</syntaxhighlight> | </syntaxhighlight> | ||
| − | + | 1 stands for device node "event1"<br> | |
| − | + | You can use a regular remote control to send signals to it. Here is what you expect to observe:<br> | |
[[File:matrix-ir_receiver_result.png|frameless|600px|matrix-ir_receiver_result]] | [[File:matrix-ir_receiver_result.png|frameless|600px|matrix-ir_receiver_result]] | ||
| − | |||
==与NanoPi连接使用== | ==与NanoPi连接使用== | ||
Revision as of 11:02, 25 December 2015
Contents
1 Introduction
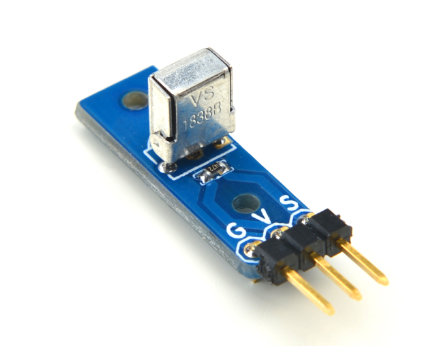
- Matrix-IR Receiver是38KHz红外接收模块,主要器件是一个红外接收头,可接收标准38KHz调制的遥控器信号,并放大和滤波输出,通过MCU编程,即可实现对遥控器信号的解码操作。
- 接收范围:12-13米
2 Features
- GPIO control, 3.3/5V
- Small
- 2.54mm spacing pin header
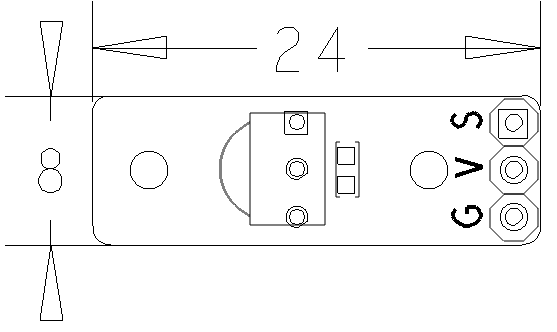
- PCB Dimension(mm): 8 x 24
- Pin Description:
| Pin | Description |
| S | GPIO |
| V | Supply Voltage 5V |
| G | Ground |
3 Basic Device Operation
- 红外接收头内部包括红外监测二极管、放大器、限副器、带通滤波器、积分电路、比较器等。红外监测二极管检测到红外信号,然后把信号送到放大器和限幅器,限幅器把脉冲幅度控制在一定的水平,而不论红外发射器和接收器的距离远近。交流信号进入带通滤波器(带通滤波器可以通过30khz到60khz的负载波),再通过解调电路和积分电路进入比较器,比较器输出高低电平,还原出发射端的信号波形。
- 注意:输出的高低电平和发射端是反相的,这样的目的是为了提高接收的灵敏度。
4 Download Matrix Source Code
All the matrix modules' code samples are open source. They are maintained on GitHub: git://github.com/friendlyarm/matrix.git
Each branch in this hub contains the matrix modules' code samples for a board that the matrix modules can work with.
- The matrix-nanopi branch contains the matrix modules' code samples for the NanoPi
- The matrix-nanopi2 branch contains the matrix modules' code samples for the NanoPi 2
- The matrix-tiny4412 branch contains the matrix modules' code samples for the Tiny4412;
- The matrix-raspberrypi branch contains the matrix modules' code samples for the RaspberryPi;
Please follow the steps below to get the source code:
Install the git utility on a PC running Ubuntu14.04
$ sudo apt-get install git
Clone the matrix code from GitHub
$ git clone git://github.com/friendlyarm/matrix.git
If this is successful a "matrix" directory will be generated, which will contain all the matrix modules' code samples.
5 Connect to NanoPi 2
5.1 Hardware Connection
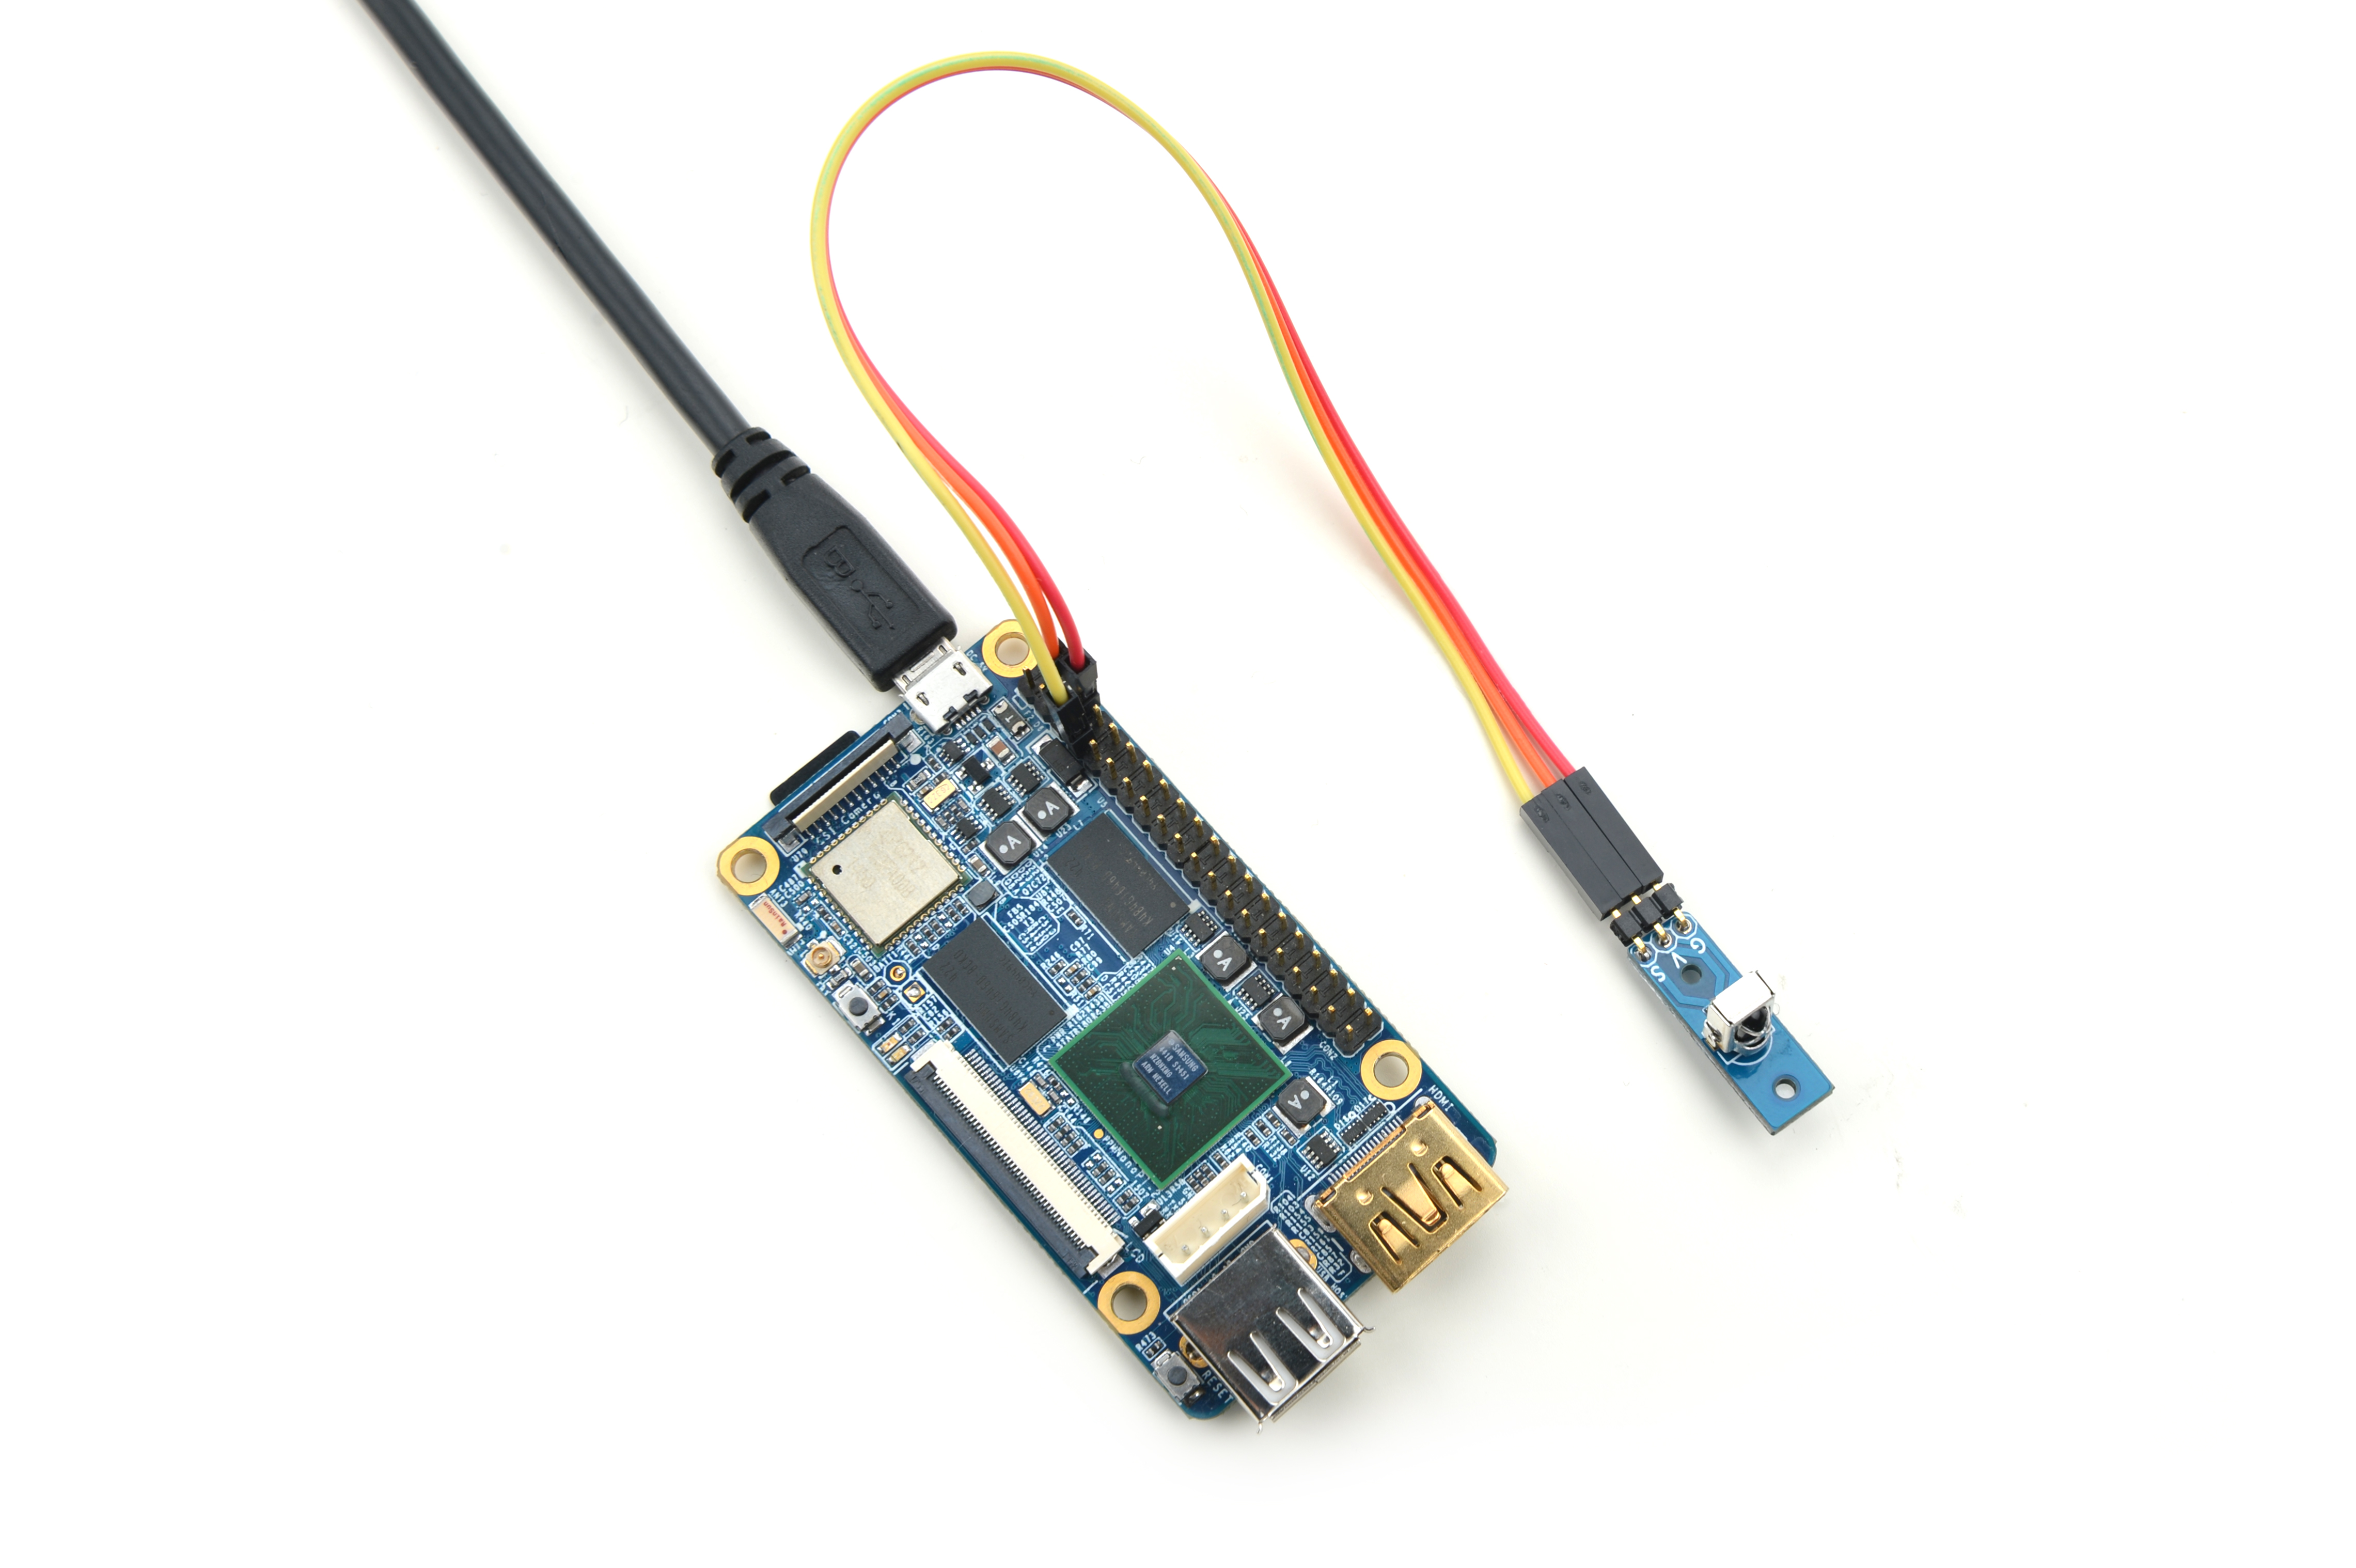
Please refer to the following connection diagram to connect the Matrix-IR_Receiver to the NanoPi 2:

Connection Details:
| Matrix-IR_Receiver | NanoPi 2 |
| S | Pin7 |
| V | Pin4 |
| G | Pin6 |
5.2 Compile Test Program
Please login the matrix hub and enter the nanopi2 branch
$ cd matrix
$ git checkout nanopi2
Compile the Matrix code
$ make CROSS_COMPILE=arm-linux- clean
$ make CROSS_COMPILE=arm-linux-
$ make CROSS_COMPILE=arm-linux- install
Note: please make sure to install the cross compiler "arm-linux-gcc-4.9.3" on your PC, which is used to compile files for the NanoPi 2.
Generated library files are under the "install/lib" directory. The test program is under the "install/usr/bin" directory. The modules are under the "modules" directory.
5.3 Run Test Program
Please insert a TF card which is flashed with Debian to a Linux host and mount its boot and rootfs sections.
We assume the rootfs is mounted to /media/rootfs then please run the following commands to copy the module, library and test program to the card
$ cp modules /media/rootfs/ -r
$ cp install/lib/* /media/rootfs/lib/ -d
$ cp install/usr/bin/* /media/rootfs/usr/bin/
Insert this TF card to your NanoPi 2, power on and run the following commands to load the driver
$ cd /modules
$ insmod matrix_ir_recv.ko
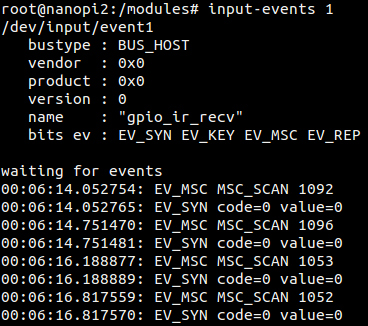
If the driver is successfully loaded a device node will be generated under /dev/input/. In our test case the node was event1.
There is an open source utility "input-utils" which can be used to read the event device's data. Here is how it works:
$ apt-get install input-utils
$ input-events 1
1 stands for device node "event1"
You can use a regular remote control to send signals to it. Here is what you expect to observe:


