Difference between revisions of "DietPi"
(updated by API) |
|||
| Line 109: | Line 109: | ||
=Work with DietPi= | =Work with DietPi= | ||
==Boot DietPi for the First Time== | ==Boot DietPi for the First Time== | ||
| − | DietPi's initialization is a complicated process. However after it is initialized it will be easy to use.<br> | + | DietPi's initialization is a complicated process. However after it is initialized it will be easy to use. 另外,DietPi系统可能会错误识别H3/H5的具体的开发板型号,但这并不会影响系统正常运行,只要CPU型号的识别是正确的即可.<br> |
Firstly you need to connect your board to the internet since initialization needs to work with the internet<br> | Firstly you need to connect your board to the internet since initialization needs to work with the internet<br> | ||
On the very first boot DietPi will extend the rootfs section. After this is done DietPi will be rebooted and initialized based on the settings specified in the dietpi.txt file. For example if CONFIG_SERIAL_CONSOLE_ENABLE=1 DietPi will call the "DietPi-Set_Hardware" script to activate the serial-getty service and login with serial console will be enabled on next system boot. If you don't want your system to be rebooted you can login with SSH and the username is "root" and password is "dietpi". Here is a screenshot showing how DietPi-V6.7 is doing initialization on NanoPi-K1-Plus. Initialization may differ for different boards:<br> | On the very first boot DietPi will extend the rootfs section. After this is done DietPi will be rebooted and initialized based on the settings specified in the dietpi.txt file. For example if CONFIG_SERIAL_CONSOLE_ENABLE=1 DietPi will call the "DietPi-Set_Hardware" script to activate the serial-getty service and login with serial console will be enabled on next system boot. If you don't want your system to be rebooted you can login with SSH and the username is "root" and password is "dietpi". Here is a screenshot showing how DietPi-V6.7 is doing initialization on NanoPi-K1-Plus. Initialization may differ for different boards:<br> | ||
Revision as of 08:38, 11 July 2018
Contents
1 Introduction to DietPi
DietPi is a highly customized light-weighted Debian OS. It is developed and maintained by a third party. DietPi is a good choice for experienced developers and Linux fans. For those that are not familiar with it we suggest you use a ROM released at its official site. If you have any issues or questions you can go to DietPi's forum or its github site for help.
DietPi has the following features:
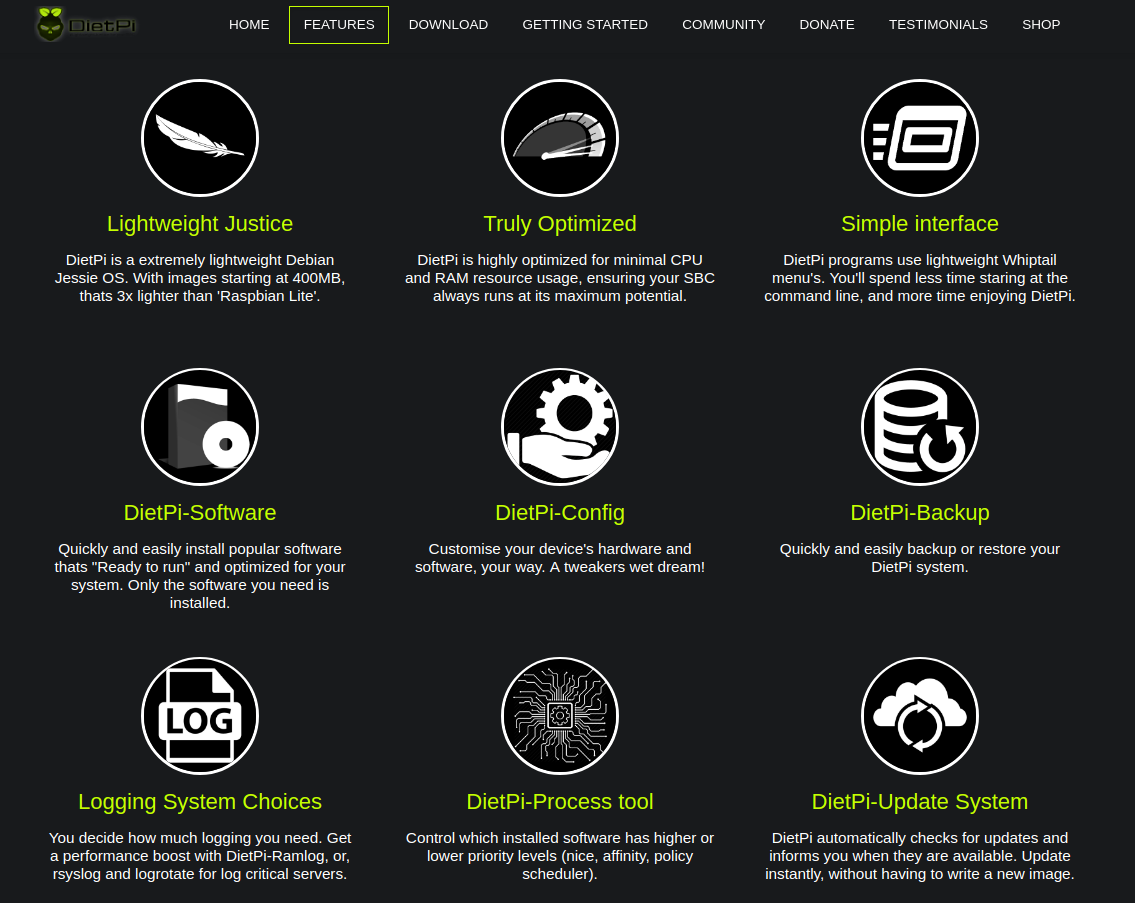
1. Light-weighted. ROM size is less than 500M
2. Highly optimized. CPU and RAM usage is small
3. Contains various utilities and provides user-friendly services
4. DietPi-Software: a good tool for installing packages
5. DietPi-Config: a good tool for system configuration
6. DietPi-Backup: a good tool for system backup and restoration
For more details you can refer to DietPi's official site
2 Install DietPi
2.1 Download Image Files
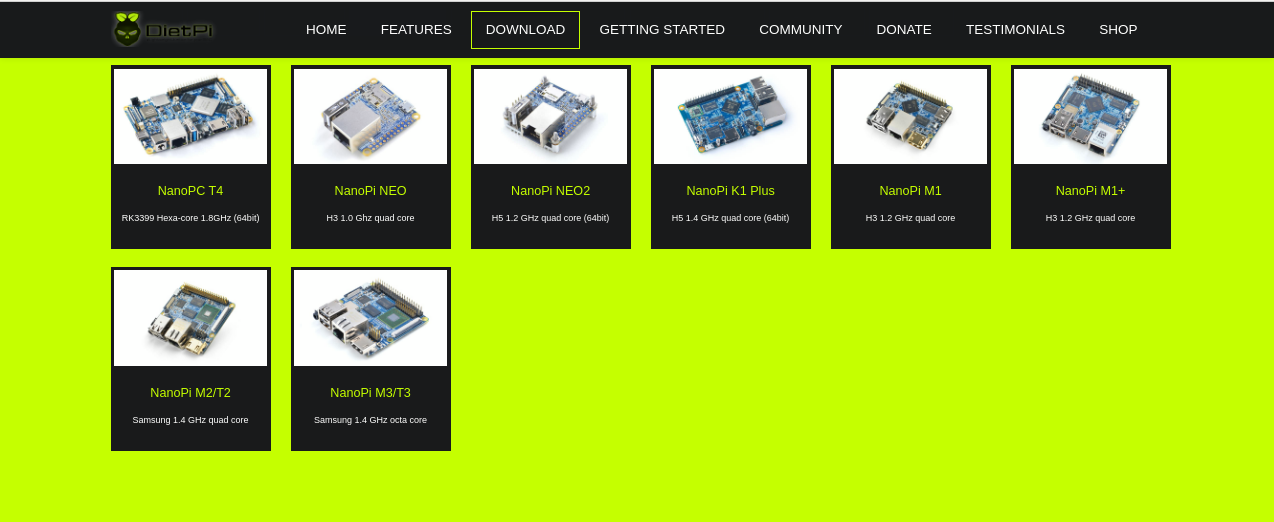
DietPi image files are developed and maintained by the DietPi team. Its official site is DietPi download link,DietPi is being ported to more FriendlyElec's boards. So far the following boards already work with DietPi:
If you like DietPi and wish to join its development and maintenance youu can check its github site:DietPi Github and forum DietPi forum, and help make DietPi work with more FriendlyElec's boards.
Alternatively you can download DietPi's image files from FriendlyElec's DVD and the image files are under the DVD's "/unoffcial-ROMs" directory. The image files are obtained from its official site and changed a little bit by FriendlyElec. The changes FriendlyElec made to the image files are to include the latest system files such as Bootloader/Kernel/DTB/Modules. If you cannot find a DietPi image file from FriendlyElec's DVD it means the board the DVD is associated with may not work with DietPi. If you directly download image files from DietPi's official site you need to check whether or not the image files have the latest Bootloader/Kernel/DTB/Modules. If these files are not the latest you need to update the image with the latest files.
2.2 Flash DietPi
The method to flash a DietPi image is the same as the method to flash a FriendlyElec image to a FriendlyElec board:
Extract an image file and the win32diskimager.rar utility under a Windows PC system. Insert a TF card (at least 4G) to the PC, run the win32diskimager utility as administrator, select the TF card drive and your wanted file and click on "Write" to start flashing.
2.3 Configure dietpi.txt
After a DietPi image is flashed to an SD card that SD card will have two sections:boot and rootfs. The boot section contains system files, a "dietpi" directory and a dietpi.txt file. The "dietpi" directory contains all DietPi related scripts. This directory and the files in it are generated and used for initializing system when DietPi is booted for the first time. The dietpi.txt is the configuration file DietPi uses to configure a system. We suggest you read this file carefully.
2.3.1 Networking Options
# Enable/disable Ethernet and WiFi. When both are enabled WiFi will be activated first.
AUTO_SETUP_NET_ETHERNET_ENABLED=1
AUTO_SETUP_NET_WIFI_ENABLED=0

# Set WiFi hotspot SSID and password
AUTO_SETUP_NET_WIFI_SSID=MySuperDooperWiFi
AUTO_SETUP_NET_WIFI_KEY=0123456789
# available | WPA-PSK / WPA-EAP / NONE | WEP=No longer supported
AUTO_SETUP_NET_WIFI_KEYMGR=WPA-PSK

# Set hostname
AUTO_SETUP_NET_HOSTNAME=DietPi

# Set Ethernet speed
# 0=automatic speed | 10 = 10mbit, 100 = 100mbit etc
AUTO_SETUP_NET_ETH_FORCE_SPEED=0
2.3.2 Misc Options
# swap size
# 0=Disabled | 1=auto (2GB-RAM = size) | 2+=manual
AUTO_SETUP_SWAPFILE_SIZE=1
# swap directory
AUTO_SETUP_SWAPFILE_LOCATION=/var/swap
2.3.3 Software Automation Options
# Install software automatically
AUTO_SETUP_AUTOMATED=0

# Global passwords including passwords for root, dietpi, MySQL, Transmission and etc
AUTO_SETUP_GLOBAL_PASSWORD=dietpi

# SSH server
#		0=none
#		-1=dropbear
#		-2=opensshserver
AUTO_SETUP_SSH_SERVER_INDEX=-1

# Log
#		0=none/manual
#		-1=ramlog 1h clear
#		-2=ramlog 1h save clear
#		-3=logrotate + rsyslog
AUTO_SETUP_LOGGING_INDEX=-1

# webserver
#	NB: This will get ignored, if you have manually selected any WEBSERVER_Stack.
#		0=Apache2
#		-1=Nginx
#		-2=Lighttpd
AUTO_SETUP_WEB_SERVER_INDEX=-2
2.3.4 DietPi-Config settings
# CPU strategy | ondemand | powersave | performance | conservative
CONFIG_CPU_GOVERNOR=ondemand
CONFIG_CPU_USAGE_THROTTLE_UP=50

# CPU's min and max frequencies
CONFIG_CPU_MAX_FREQ=Disabled
CONFIG_CPU_MIN_FREQ=Disabled

# Whether or not wait for network on system boot
CONFIG_BOOT_WAIT_FOR_NETWORK=1

# Enable/disable login with serial console.
CONFIG_SERIAL_CONSOLE_ENABLE=1

# Package source. You'd better choose a source accessible from your location.
CONFIG_APT_DEBIAN_MIRROR=http://ftp.cn.debian.org/debian/
The aforementioned options are only part of DietPi's features. For more details refer to the dietpi.txt file or visit DietPi's official site.
3 Work with DietPi
3.1 Boot DietPi for the First Time
DietPi's initialization is a complicated process. However after it is initialized it will be easy to use. 另外,DietPi系统可能会错误识别H3/H5的具体的开发板型号,但这并不会影响系统正常运行,只要CPU型号的识别是正确的即可.
Firstly you need to connect your board to the internet since initialization needs to work with the internet
On the very first boot DietPi will extend the rootfs section. After this is done DietPi will be rebooted and initialized based on the settings specified in the dietpi.txt file. For example if CONFIG_SERIAL_CONSOLE_ENABLE=1 DietPi will call the "DietPi-Set_Hardware" script to activate the serial-getty service and login with serial console will be enabled on next system boot. If you don't want your system to be rebooted you can login with SSH and the username is "root" and password is "dietpi". Here is a screenshot showing how DietPi-V6.7 is doing initialization on NanoPi-K1-Plus. Initialization may differ for different boards:
运行DietPi-Software:

Based on the system log we can see that "apt-get update" was executed. If your board isn't connected to the internet you need to reset the CONFIG_APT_DEBIAN_MIRROR option in the dietpi.txt file.
Run DietPi-Set_software to set global passwords:

Run DietPi-Set_software to set passwords:

Prompt users to check IP with the "ip a" command:

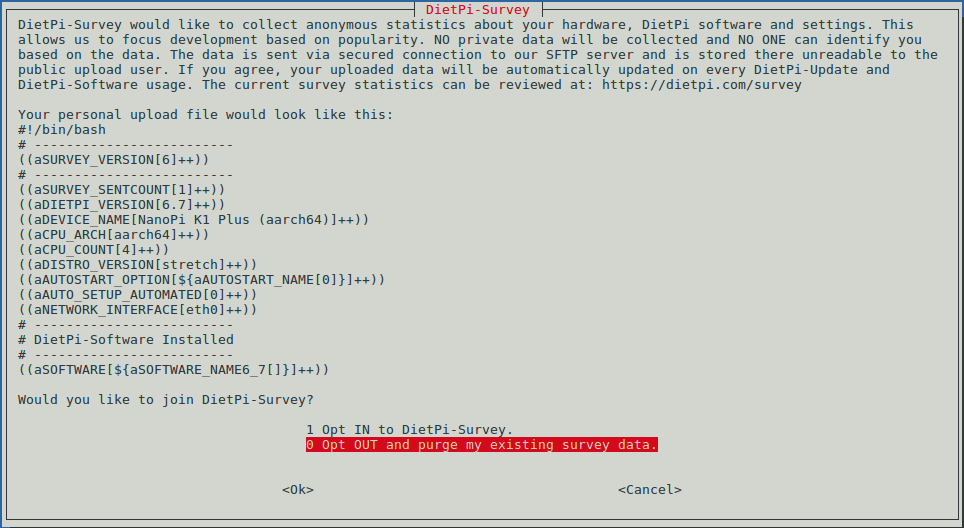
Whether or not allow DietPi to collect and upload hardware information:
DietPi is upgraded to the latest version:

After DitePi automatically upgrades itself it will reboot. After reboot it will run Dietpi-Software again and ask you whether or not to change global and user passwords and then go to DietPi-Software's main window on which you can select packages you want to install:
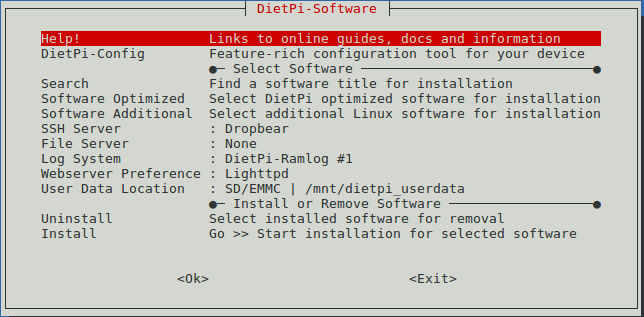
We used the default settings and clicked on "Install" and "OK" to proceed:

DietPi will reboot and after reboot initialization will be completed.
3.2 Introduction to DietPi Scripts
Dietpi has a lot of useful scripts. Their source code is under the "/rootfs/Dietpi" directory. We listed some important scripts here and they have been tested with NanoPi-K1-Plus + DietPi-V6.10.
3.2.1 DietPi-Launcher
We can use "dietpi-launcher" to run these scripts. You can run the "dietpi-launcher" on a commandline utility:
$ dietpi-launcherHere is what you expect to see:
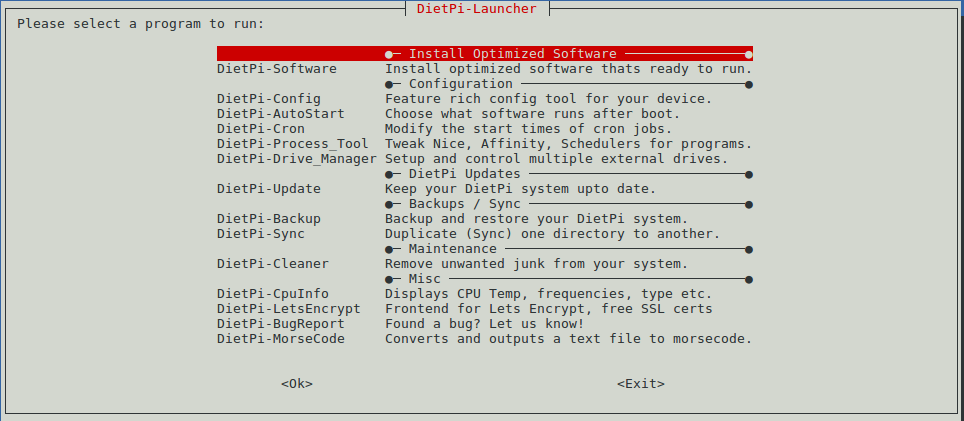
The following scripts can be run on a commandline utility too:
dietpi-autostart      dietpi-cleaner        dietpi-drive_manager  dietpi-letsencrypt    dietpi-process_tool   dietpi-survey
dietpi-backup         dietpi-config         dietpi-justboom       dietpi-logclear       dietpi-services       dietpi-sync
dietpi-bugreport      dietpi-cron           dietpi-launcher       dietpi-morsecode      dietpi-software       dietpi-update
3.2.2 DietPi-Software

"Software Optimized" has a lot of useful and out-of-box software utilities.
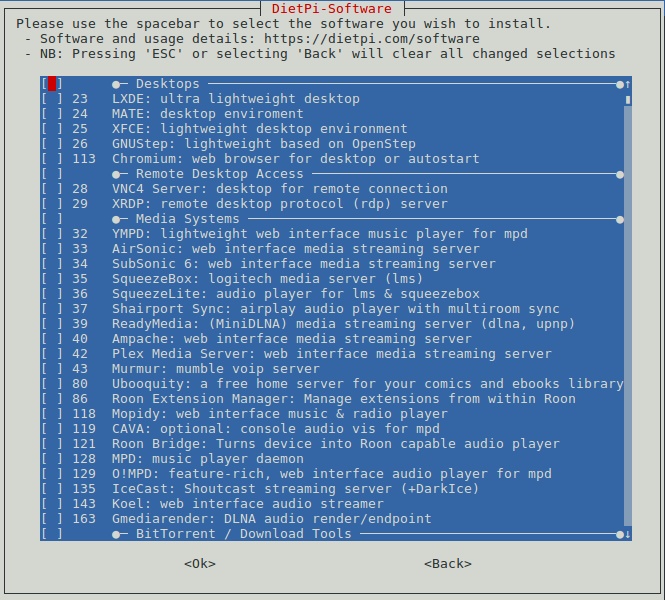
Select the utilities you need and proceed with "Go >> Start installation for selected software".
3.2.3 DietPi-Config
This script is used to configure hardware and software settings:

Some hardware configurations might still be under development.
- Display Options
Display related settings such as resolution, LED setting and etc.
- Audio Options
It specifies system's audio device
- Performance Options
It specifies CPU's options such as strategy, min and max frequencies and etc.
- Advanced Options
It specifies swap size, enable or disable, network time sync, Bluetooth, serial port and etc.
- Language/Regional Options
It specifies language and timezone
- Security Options
It specifies hostname and password
- Network Options: Adapters
It specifies Ethernet, WiFi, proxy and etc.
- Network Options: Misc
It specifies apt and ntp source and etc.
- AutoStart Options
It specifies auto-run programs. You can do it by running "DietPi-AutoStart" too.
- Tools
Tools for testing system performance and reliability by utilizing "Benchmarks" and "stress" utilities.
3.2.4 DietPi-Cron

Put the scripts you want to run at a specific time under the "/etc/cron.daily/" directory and set the time with this tool
3.2.5 DietPi-Drive_Manager

Manage storage devices such as SD card, emmc, USB drive and etc. You can format these devices and mount these devices with this tool.
3.2.6 DietPi-Update

Upgraded DietPi as simple as "one-click".
3.2.7 DietPi-Backup

System backup and restoration. Backup files are under the "/mnt/dietpi-backup" directory.
3.2.8 DietPi-Cleaner

Clean file system. It allows users to select components to be removed(such as apt, log and etc).
3.2.9 DietPi-CpuInfo

Display CPU frequency, temperature and etc.
3.2.10 DietPi-BugReport
3.3 Update Log
3.3.1 July-6-2018
- Released English version
