Difference between revisions of "NanoPi Duo"
(→Schematics & Datasheets) |
(→Access GPIO Pins/Wirings with WiringNP) |
||
| Line 281: | Line 281: | ||
The wiringPi library was initially developed by Gordon Henderson in C. It contains libraries to access GPIO, I2C, SPI, UART, PWM and etc. The wiringPi library contains various libraries, header files and a commandline utility:gpio. The gpio utility can be used to read and write GPIO pins.<br> | The wiringPi library was initially developed by Gordon Henderson in C. It contains libraries to access GPIO, I2C, SPI, UART, PWM and etc. The wiringPi library contains various libraries, header files and a commandline utility:gpio. The gpio utility can be used to read and write GPIO pins.<br> | ||
FriendlyElec integrated this utility in Duo's system allowing users to easily access GPIO pins. For more details refer to WiringNP [[WiringNP:_WiringPi_for_NanoPi_NEO/NEO2|WiringNP]]<br /> | FriendlyElec integrated this utility in Duo's system allowing users to easily access GPIO pins. For more details refer to WiringNP [[WiringNP:_WiringPi_for_NanoPi_NEO/NEO2|WiringNP]]<br /> | ||
| + | |||
| + | ===Boot System from SSD=== | ||
| + | A NanoPi-Duo can be booted from the SSD on a [[Mini Shield for NanoPi Duo]]. Booting OS from an SSD has the following benefits:<br /> | ||
| + | 1) faster read/write;<br /> | ||
| + | 2) much longer life time than a TF card;<br /> | ||
| + | 3) more reliable than booting from a TF card;<br /> | ||
| + | <br /> | ||
| + | You can install an OS to SSD by using the npi-config utility. Here are the steps to follow:<br /> | ||
| + | <syntaxhighlight lang="bash"> | ||
| + | sudo npi-config | ||
| + | </syntaxhighlight> | ||
| + | Enter the "Boot Options" menu, go to "Boot device" and you will see two options:<br /> | ||
| + | 1) D1 Hard drive<br /> | ||
| + | 2) D2 TF card<br /> | ||
| + | Select "D1 Hard drive" and proceed with its prompts.<br /> | ||
| + | Select "D2 TF card" to boot OS from a TF card.<br /><br /> | ||
| + | If your npi-config doesn't have a "Boot device" menu it might be that your npi-config is out of date and you can update it by selecting "Update" in the menu.<br /> | ||
==Make Your Own Ubuntu-Core with Qt-Embedded== | ==Make Your Own Ubuntu-Core with Qt-Embedded== | ||
Revision as of 09:41, 9 November 2017
Contents
[hide]- 1 Introduction
- 2 Hardware Spec
- 3 Software Features
- 4 Diagram, Layout and Dimension
- 5 Get Started
- 6 Work with Ubuntu-Core with Qt-Embedded
- 6.1 Run Ubuntu-Core with Qt-Embedded
- 6.2 Extend TF Card's rootfs Section
- 6.3 Work with npi-config Utility
- 6.4 Ethernet Connection
- 6.5 Wireless Connection
- 6.6 Login via SSH
- 6.7 Connect NanoPi Duo to USB Camera(FA-CAM202)
- 6.8 Check CPU's Working Temperature
- 6.9 Check System Information with Rpi-Monitor
- 6.10 Access GPIO Pins/Wirings with WiringNP
- 6.11 Boot System from SSD
- 7 Make Your Own Ubuntu-Core with Qt-Embedded
- 8 Connect External Modules to Duo
- 9 3D Printing Files
- 10 Resources
- 11 Update Log
1 Introduction
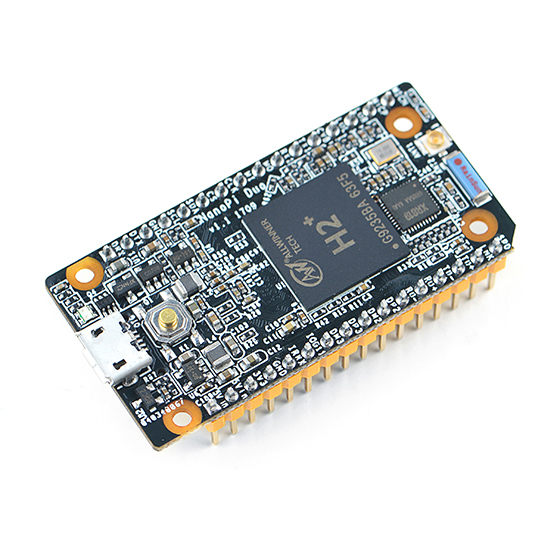
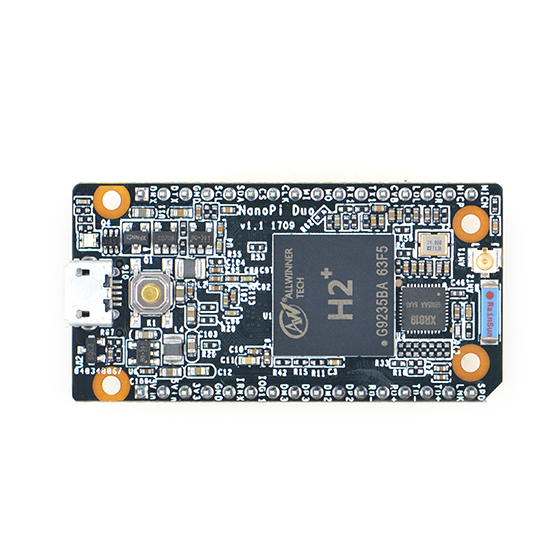
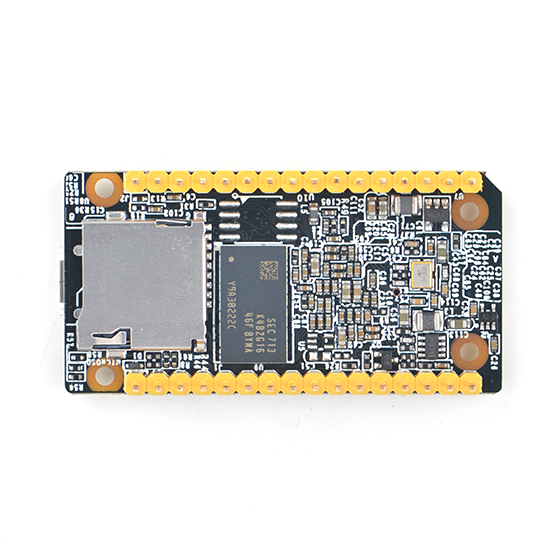
- The NanoPi Duo is designed and developed by FriendlyElec for makers, hobbyists and professionals. It is small, just 50 x 25.4 mm. It uses Allwinner’s Cortex-A7 H2+ SoC. It has 256M/512M DDR3 RAM and an onboard WiFi module. A UbuntuCore image is ready for it.
- On such a small board rich interfaces such as Ethernet, USB, SPI, UART, I2C, PWM, IR and audio are exposed. It is powered from a MicroUSB port and boots OS from a MicroSD card.
- Popular libraries and utilities: WiringPi, RPi.GPIO and Python are ported to the NanoPi Duo’s system and they all are open source. The NanoPi Duo perfectly suits various light-weight IoT applications.
2 Hardware Spec
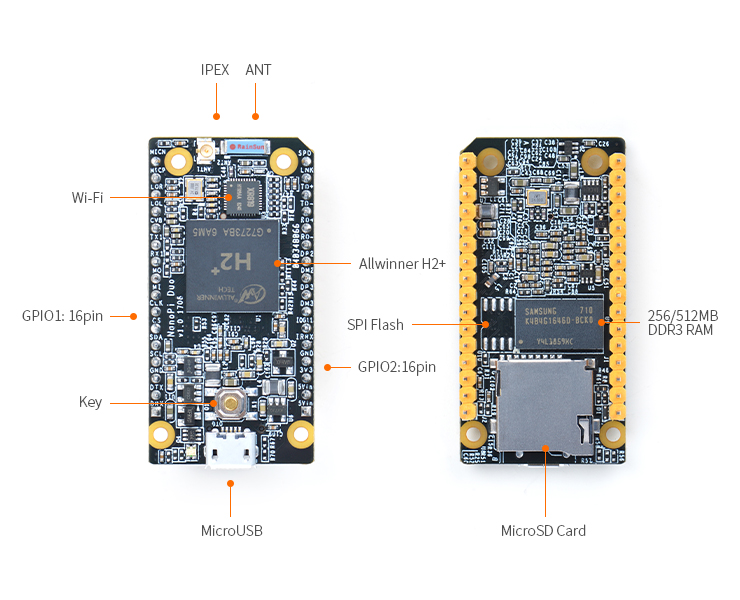
- CPU: Allwinner H2+, Quad-core Cortex-A7
- DDR3 RAM: 256MB/512MB
- Connectivity: 10/100M Ethernet
- Wifi:XR819
- USB Host: 2.54mm pin x2, exposed in 2.54mm pitch pin header
- MicroSD Slot x 1
- MicroUSB: OTG and power input
- Debug Serial Interface: exposed in 2.54mm pitch pin header
- Audio input/output Interface: exposed in 2.54mm pitch pin header
- GPIO: 2.54mm spacing 12pin x2. It includes UART, SPI, I2C, IO etc
- PCB Dimension: 25.4 x 50mm
- Power Supply: DC 5V/2A
- Temperature measuring range: -40℃ to 80℃
- OS/Software: U-boot,Linux Kernel 4.11.2 (mainline) , Ubuntu 16.04.2 LTS (Xenial)
- Weight: xxg(With Pin-headers)
3 Software Features
3.1 uboot
- uboot
3.2 Ubuntu 16.04
- mainline kernel: Linux-4.11.2
- Ubuntu 16.04.2
- rpi-monitor: check system status and information
- npi-config: system configuration utility for setting passwords, language, timezone, hostname, SSH and auto-login, and enabling/disabling i2c, spi, serial and PWM
- software utility: wiringNP to access GPIO pins
- software utility: RPi.GPIO_NP to access GPIO pins
- networkmanager: manage networks
- system log output from serial port
- nano editor
- welcome window with basic system information and status
- auto-login with user account "pi" with access to npi-config
- sudoers include "fa"
- on first system boot file system will be automatically extended.
- supports file system auto check and repair on system boot.
- supports audio recording and playing with 3.5mm audio jack
- supports USB Host and 100M Ethernet
- fixed MAC address
4 Diagram, Layout and Dimension
4.1 Layout
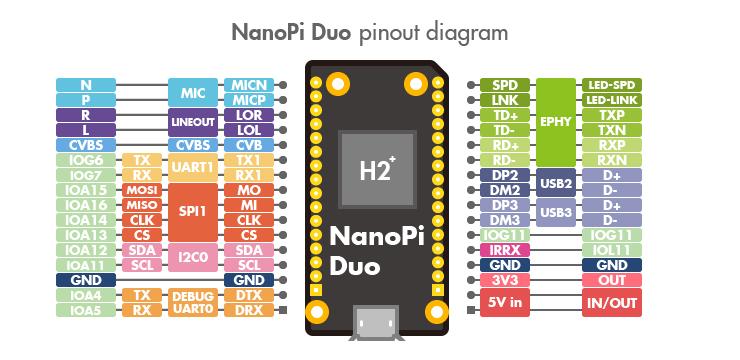
- GPIO Pin Description
Pin silk screen Name Linux gpio Pin silk screen Name Linux gpio MICN MIC_N SPD EPHY-LED-SPD MICP MIC_P LNK EPHY-LED-LINK LOR LINEOUT_R TD+ EPHY-TXP LOL LINEOUT_L TD- EPHY-TXN CVB CVBS RD+ EPHY-RXP TX1 UART1_TX/GPIOG6 198 RD- EPHY-RXN RX1 UART1_RX/GPIOG7 199 DP2 USB-DP2 MO UART3_RTS/SPI1_MOSI/GPIOA15 15 DM2 USB-DM2 MI UART3_CTS/SPI1_MISO/GPIOA16 16 DP3 USB-DP3 CLK UART3_RX/SPI1_CLK/GPIOA14 14 DM3 USB-DM3 CS UART3_TX/SPI1_CS/GPIOA13 13 IOG11 GPIOG11 203 SDA I2C0_SDA/GPIOA12 12 IRRX GPIOL11/IR-RX 363 SCL I2C0_SCL/GPIOA11 11 GND GND GND GND 3V3 SYS_3.3V DTX DEBUG_TX(UART_TXD0)/GPIOA4 4 5Vin VDD_5V DRX DEBUG_RX(UART_RXD0)/GPIOA5/PWM0 5 5Vin VDD_5V
- Note:
- SYS_3.3V: 3.3V power output
- VDD_5V: 5V power input/output. When the external device’s voltage is greater than the MicroUSB's voltage the external device is powering the board,
otherwise the board powers the external device. The input range is 4.7V ~ 5.6V
- All pins are 3.3V, output current is 5mA
- For more details refer to the document NanoPi Duo Schematic
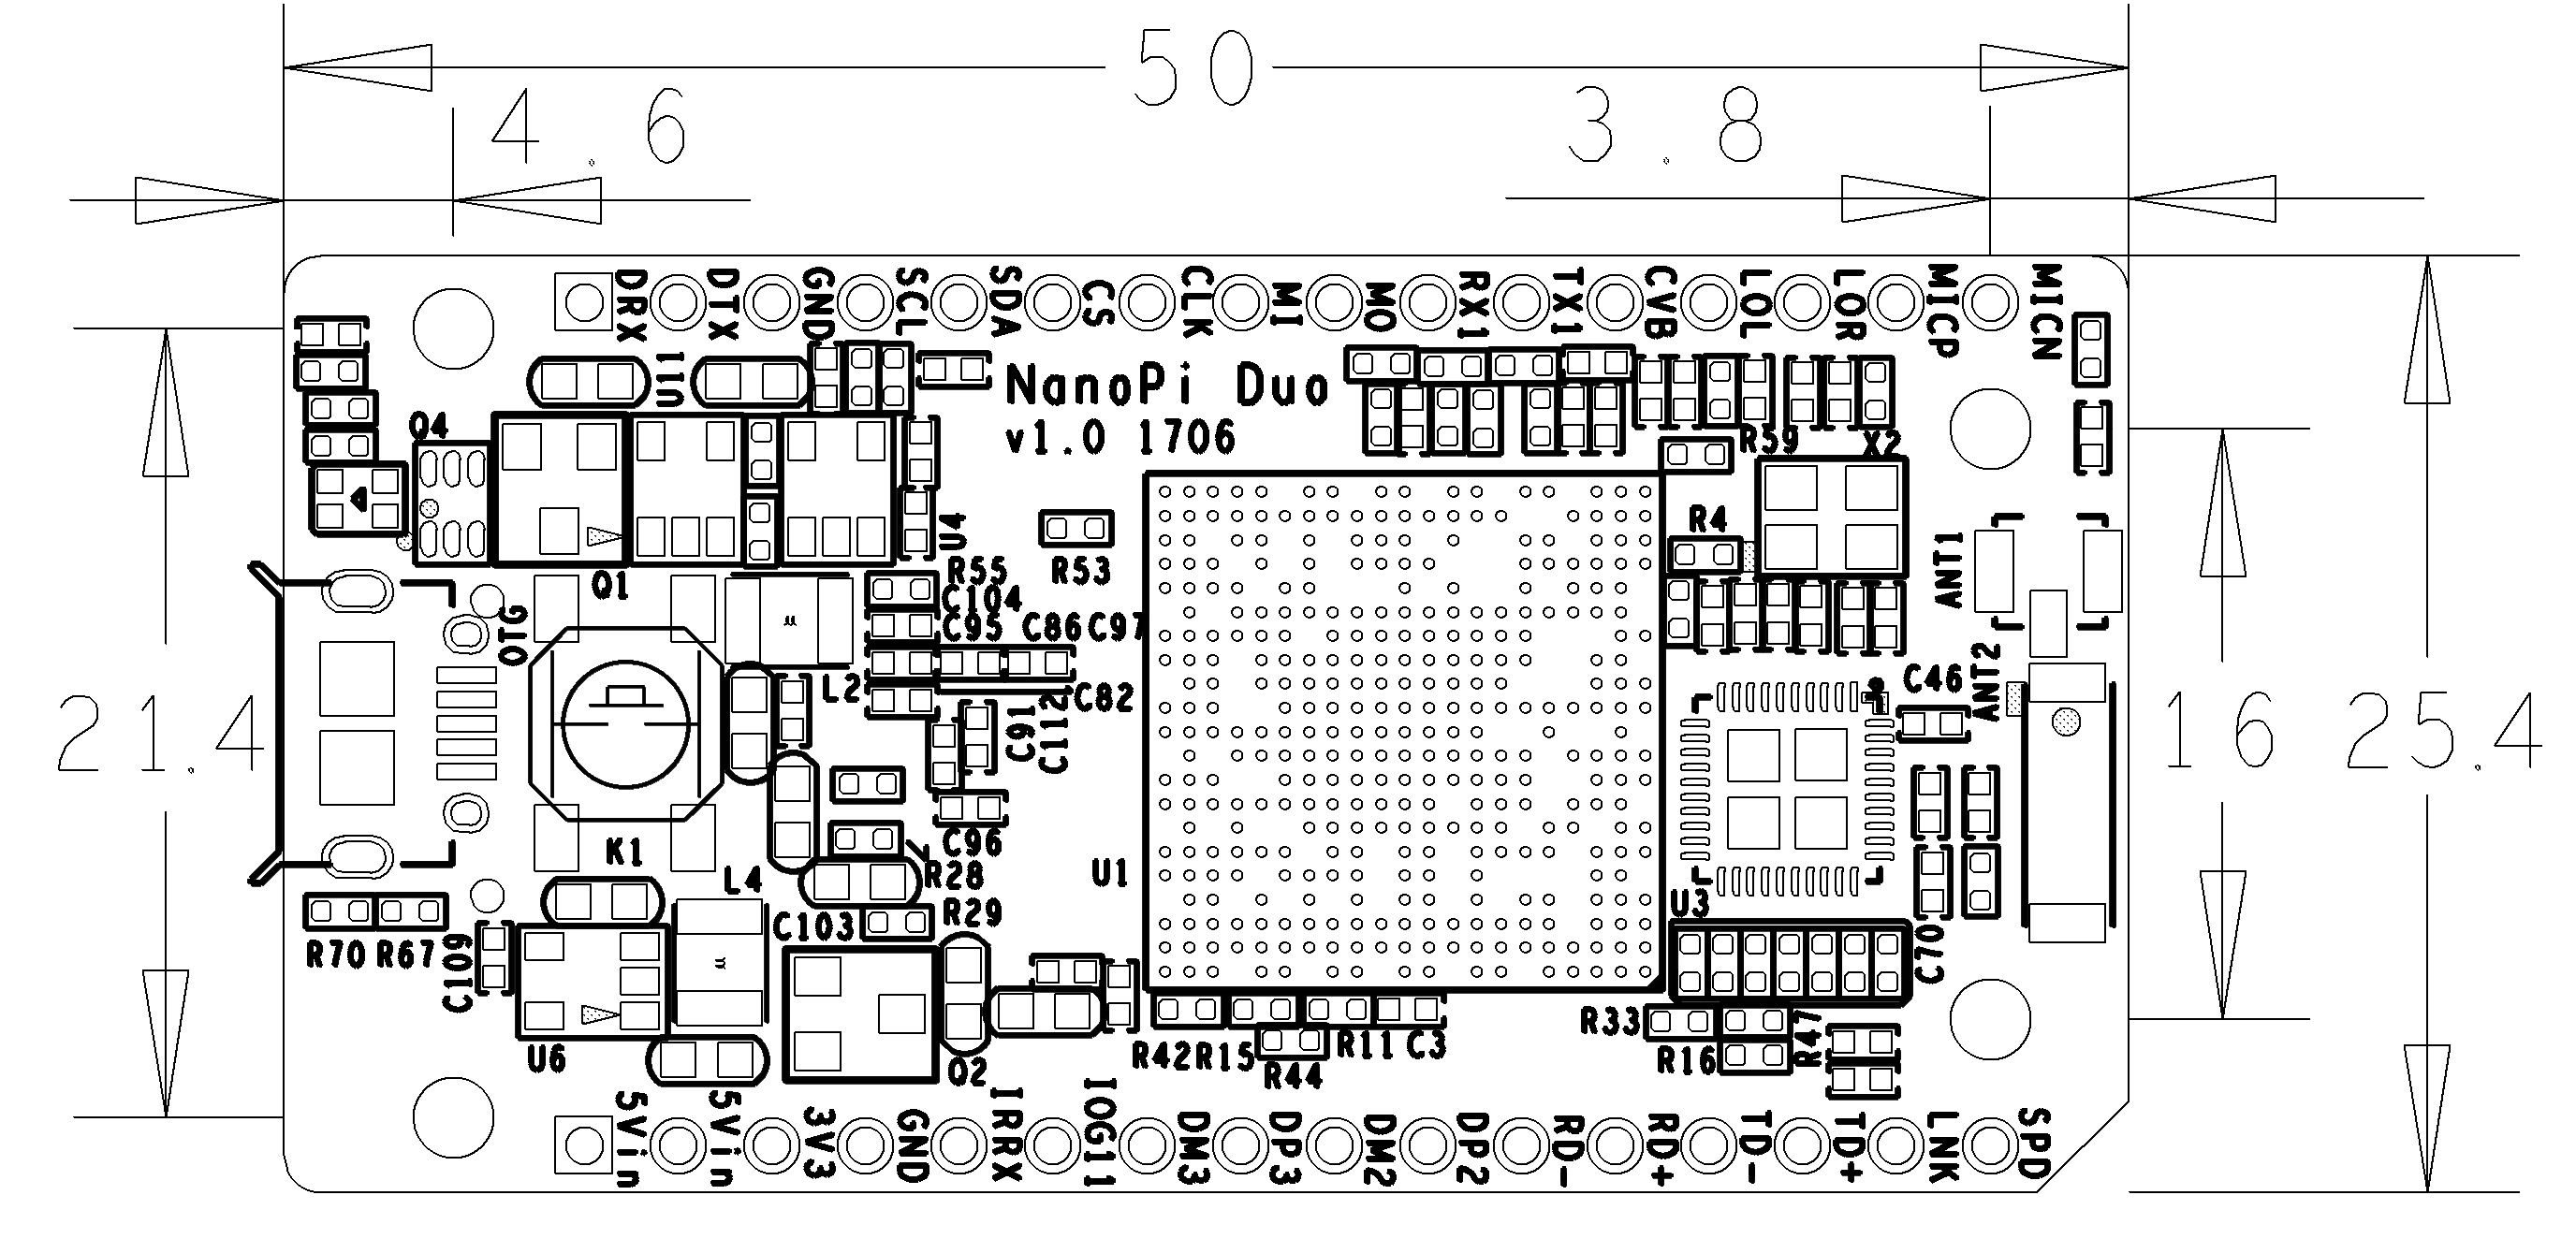
4.2 Dimensional Diagram
- For more details refer to the document NanoPi_Duo_v1.0_1706 pcb file in dxf format
5 Get Started
5.1 Essentials You Need
Before starting to use your NanoPi Duo get the following items ready
- NanoPi Duo
- microSD Card/TFCard: Class 10 or Above, minimum 8GB SDHC
- microUSB power. A 5V/2A power is a must
- A Host computer running Ubuntu 14.04 64 bit system
- a serial communication board
5.2 TF Cards We Tested
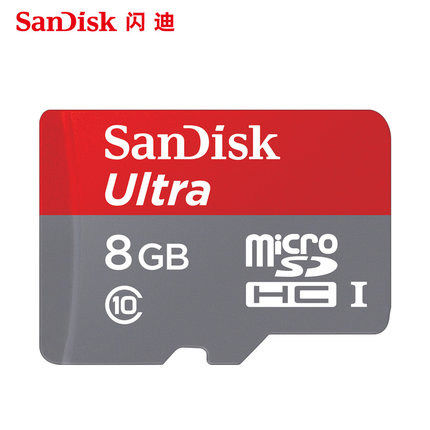
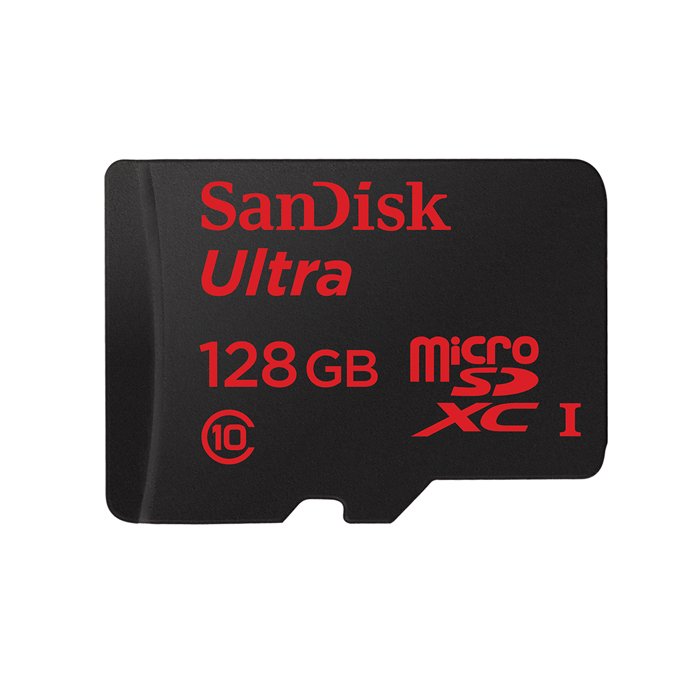
To make your NanoPi Duo boot and run fast we highly recommend you use a Class10 8GB SDHC TF card or better. The following cards are what we used in all our test cases presented here:
- SanDisk TF 8G Class10 Micro/SD TF card:
- SanDisk TF128G MicroSDXC TF 128G Class10 48MB/S:
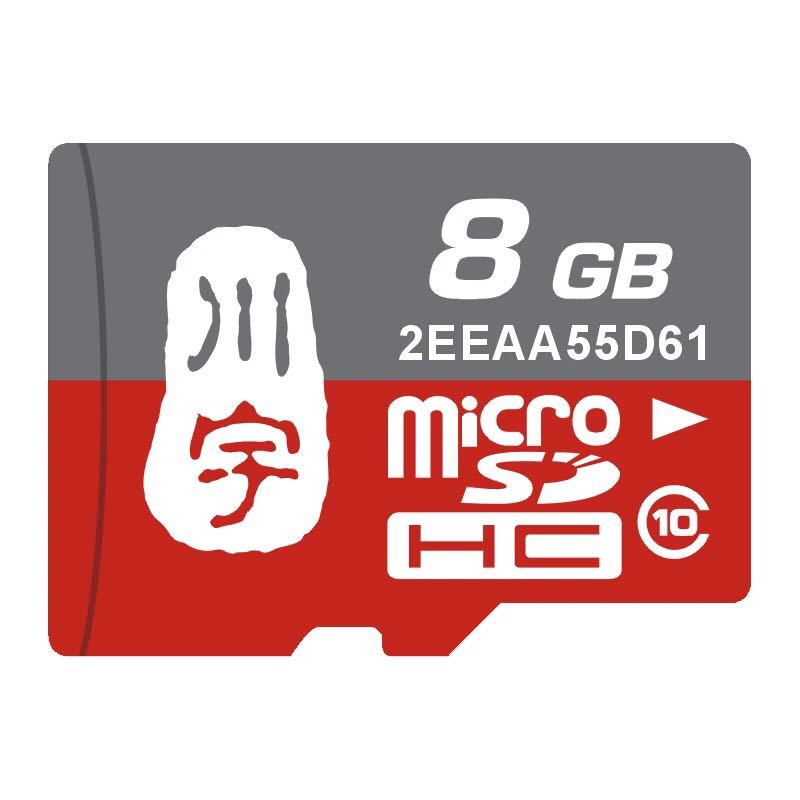
- 川宇 8G C10 High Speed class10 micro SD card:
5.3 Make an Installation TF Card
5.3.1 Download Image Files
Get the following files from here download link to download image files (under the official-ROMs directory) and the flashing utility (under the tools directory):
Image Files: nanopi-duo_ubuntu-core-xenial_4.x.y_YYYYMMDD.img.zip Ubuntu-Core with Qt-Embedded Image File, kernel:Linux-4.x.y Flash Utility: win32diskimager.rar Windows utility. Under Linux users can use "dd"
5.3.2 Make Installation MicroSD Card with Ubuntu-Core with Qt-Embedded Image
Extract an OS image and win32diskimager.rar. Insert a MicroSD card(at least 8G) into a Windows PC and run the win32diskimager utility as administrator. On the utility's main window select your TF card's drive, the wanted image file and click on "write" to start flashing the SD card till it is done. Insert this card into your Duo's MicroSD card slot and power on (with a 5V/2A power source). If the blue LED is blinking this indicates your Duo has successfully booted.
6 Work with Ubuntu-Core with Qt-Embedded
6.1 Run Ubuntu-Core with Qt-Embedded
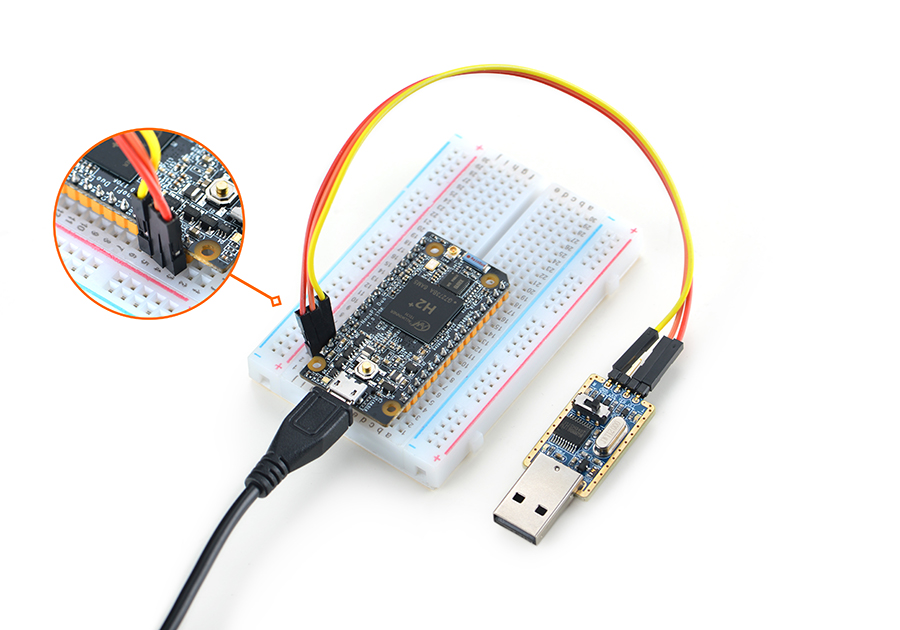
- If you want to do kernel development you need to use a serial communication board, ie a PSU-ONECOM board, which will allow you to operate the board via a serial terminal
- The NanoPi Duo can work with FriendlyElec's Mini Shield for NanoPi Duo. Here is link to the wiki site of Mini Shield for NanoPi Duo Mini Shield for NanoPi Duo. Here is a hardware setup.
Mini Shield for NanoPi Duo-Duo
- Ubuntu-Core User Accounts:
Non-root User:
   User Name: pi
   Password: pi
Root:
   User Name: root
   Password: fa
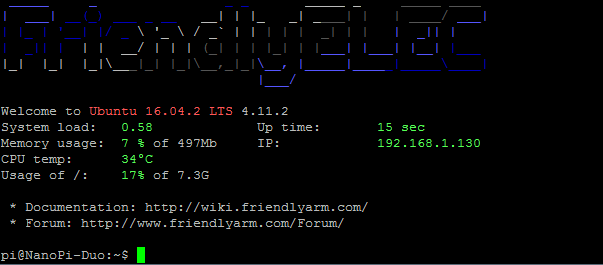
The system is automatically logged in as "pi". You can do "sudo npi-config" to disable auto login.
- Update packages:
$ sudo apt-get update
6.2 Extend TF Card's rootfs Section
When you boot OS for the first time with your image card your OS will automatically resize the file system and this process takes a relatively long time. After your OS is fully loaded you can check the file system's size by using the following command:
$ df -h
6.3 Work with npi-config Utility
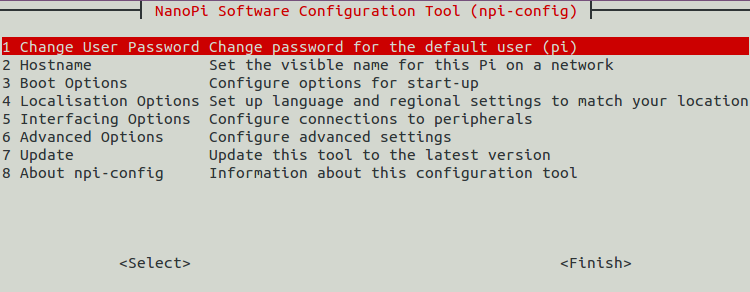
The npi-config is a system configuration utility for setting passwords, language, timezone, hostname, SSH and auto-login, and enabling/disabling i2c, spi, serial and PWM and I2S. You can start this utility by running the following command:
$ sudo npi-config
Here is the npi-config's main window:
6.4 Ethernet Connection
The Mini Shield for NanoPi Duo has an Ethernet port. If a NanoPi Duo is assembled with a Mini Shield and is connected to a network via Ethernet before it is powered on it will automatically obtain an IP after it is powered up. If it is not connected via Ethernet or its DHCP is not activated obtaining an IP will fail and system will hang on for about 15 to 60 seconds. In this case you can try obtaining an IP by using the following command:
$ dhclient eth06.5 Wireless Connection
Enable the WiFi function on Duo by running the following commands. The NanoPi Duo has an onboard Wifi antenna. It will be better to connect an external antenna to Duo.
- List network devices
$ sudo nmcli dev
Note: if a network device's status is "unmanaged" it means that device is not accessed by the NetworkManager and you need to clear the settings in " /etc/network/interfaces" and reboot your board.
- Start WiFi
$ sudo nmcli r wifi on
- Scan Nearby WiFi Hotspots
$ sudo nmcli dev wifi
- Connect to a WiFi Hotspot
$ sudo nmcli dev wifi connect "SSID" password "PASSWORD"
The "SSID" and "Password" need to be replaced with your actual SSID and password.
If a connection is successfully established your board will be automatically connected to your specified WiFi on system reboot.
For more details about the NetworkManager refer to this wiki link:Use NetworkManager to configure network settings
The NanoPi Duo supports external USB WiFi modules. Here is a list of models we tested:
Index Model 1 RTL8188CUS/8188EU 802.11n WLAN Adapter 2 RT2070 Wireless Adapter 3 RT2870/RT3070 Wireless Adapter 4 RTL8192CU Wireless Adapter 5 MI WiFi mt7601
6.6 Login via SSH
You can log into the board via SSH. In our test the IP address detected by our router was 192.168.1.230 and we ran the following command to log into the NanoPi Duo:
$ ssh root@192.168.1.230
The password is fa
6.7 Connect NanoPi Duo to USB Camera(FA-CAM202)
The NanoPi Duo works with FA-CAM202. After a NanoPi Duo is assembled with a Mini Shield for NanoPi Duo you can connect a FA-CAM202 to the Shield's USB port.
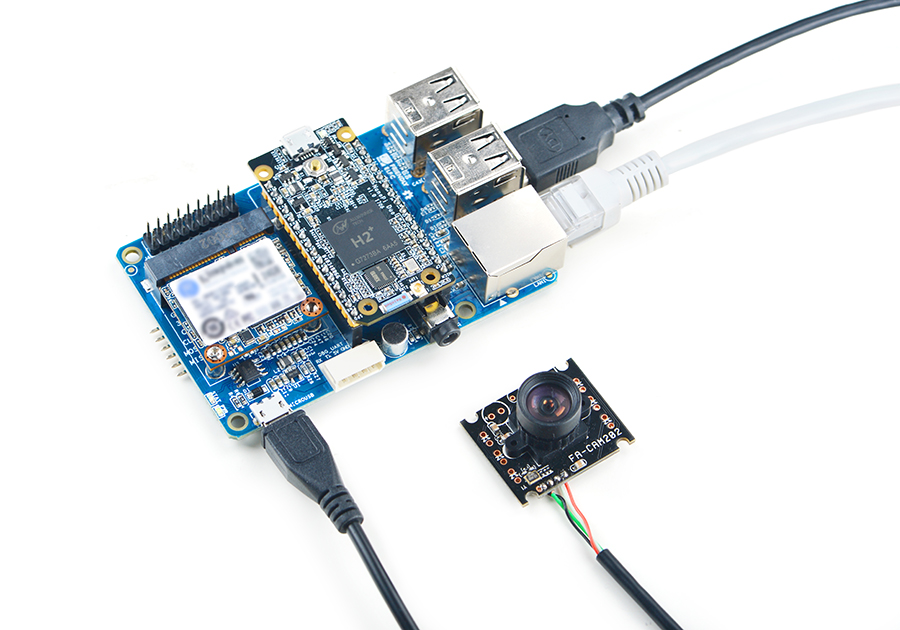
The FA-CAM202 is a 2M-pixel USB camera module. For more details refer to this wiki site:Matrix - USB_Camera(FA-CAM202).
Boot your Duo, connect Duo to the internet, log in the system as root, compile and run the mjpg-streamer utility:
$ su root
$ cd /root/mjpg-streamer
$ make
$ ./start.sh
The mjpg-streamer is an open source media server. After it is started successfully you will see the following messages:
 i: Using V4L2 device.: /dev/video0
 i: Desired Resolution: 1280 x 720
 i: Frames Per Second.: 30
 i: Format............: YUV
 i: JPEG Quality......: 90
 o: www-folder-path...: ./www/
 o: HTTP TCP port.....: 8080
 o: username:password.: disabled
 o: commands..........: enabled
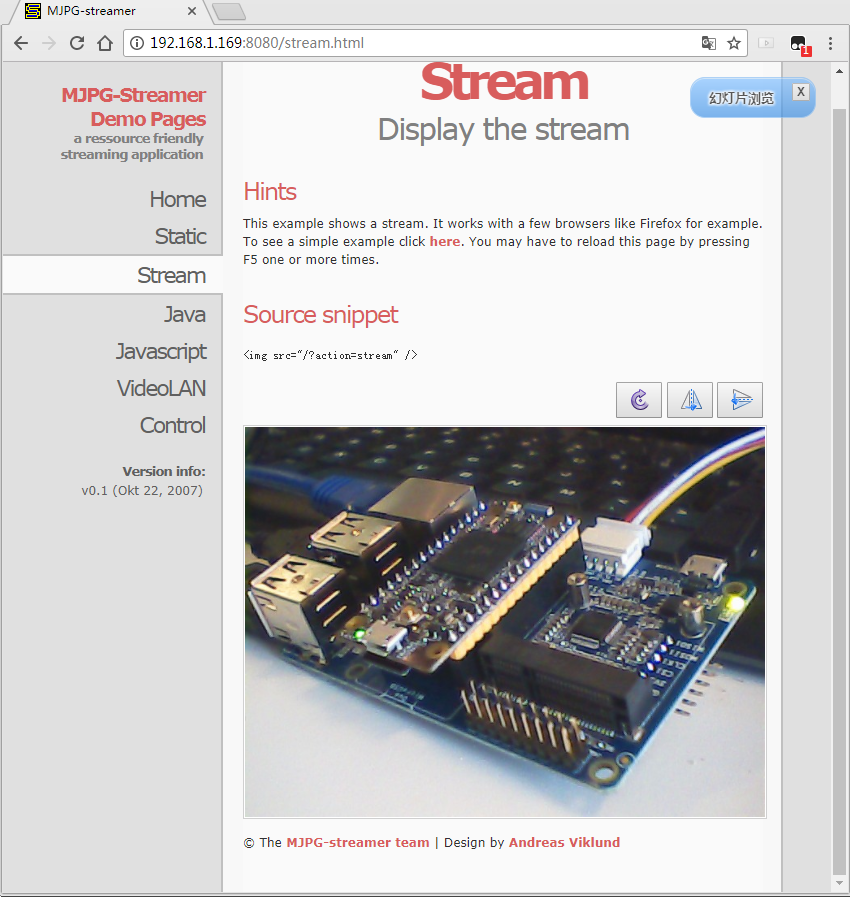
In our case our Duo's IP address was 192.168.1.169. We typed "192.168.1.169:8080" on a browser, entered and we got the following screenshot:
6.8 Check CPU's Working Temperature
Type the following command on a terminal to read the SoC's temperature and frequency:
$ cpu_freq6.9 Check System Information with Rpi-Monitor
Our Ubuntu-Core contains the Rpi-Monitor utility with which users can check system information and status.
In our case our Duo's IP was 192.168.1.230 and we typed the following IP in a browser:
192.168.1.230:8888We entered the following page:
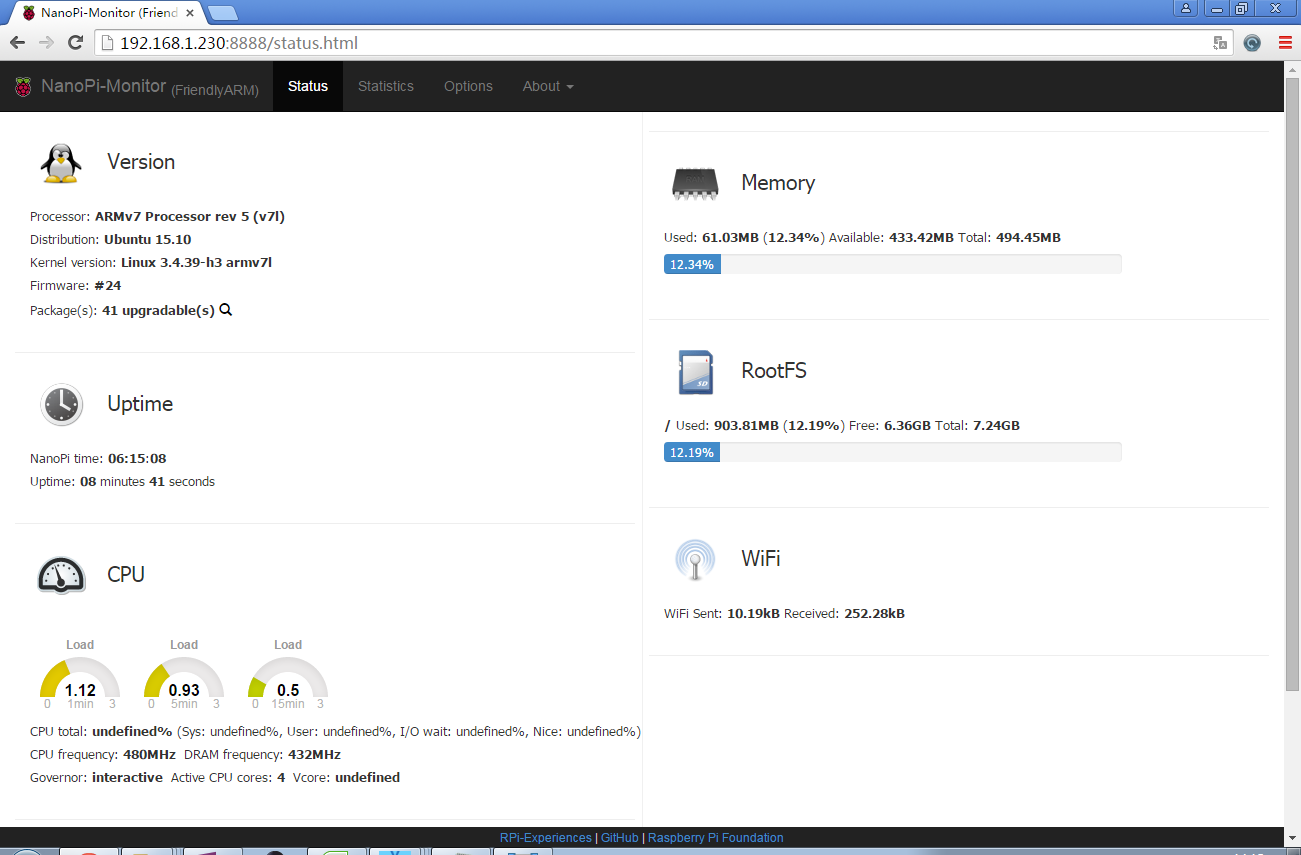
You can easily check these system information and status.
6.10 Access GPIO Pins/Wirings with WiringNP
The wiringPi library was initially developed by Gordon Henderson in C. It contains libraries to access GPIO, I2C, SPI, UART, PWM and etc. The wiringPi library contains various libraries, header files and a commandline utility:gpio. The gpio utility can be used to read and write GPIO pins.
FriendlyElec integrated this utility in Duo's system allowing users to easily access GPIO pins. For more details refer to WiringNP WiringNP
6.11 Boot System from SSD
A NanoPi-Duo can be booted from the SSD on a Mini Shield for NanoPi Duo. Booting OS from an SSD has the following benefits:
1) faster read/write;
2) much longer life time than a TF card;
3) more reliable than booting from a TF card;
You can install an OS to SSD by using the npi-config utility. Here are the steps to follow:
sudo npi-configEnter the "Boot Options" menu, go to "Boot device" and you will see two options:
1) D1 Hard drive
2) D2 TF card
Select "D1 Hard drive" and proceed with its prompts.
Select "D2 TF card" to boot OS from a TF card.
If your npi-config doesn't have a "Boot device" menu it might be that your npi-config is out of date and you can update it by selecting "Update" in the menu.
7 Make Your Own Ubuntu-Core with Qt-Embedded
7.1 Use Mainline BSP
The NanoPi Duo has support for kernel Linux-4.x.y with Ubuntu Core 16.04. For more details about how to use mainline u-boot and Linux-4.x.y refer to :Mainline U-boot & Linux
8 Connect External Modules to Duo
8.1 Connect Mini Shield for NanoPi NEO Duo to Duo
9 3D Printing Files
10 Resources
10.1 Schematics & Datasheets
- Schematics: NanoPi Duo V1.0 1706 schematic
- Dimensional Diagram: NanoPi Duo V1.0 1706 PCB Dimensional Diagram
- Datasheet:Allwinner_H2+_Datasheet
11 Update Log
11.1 July-17-2017
- Released English Version
11.2 August-12-2017
- Updated section 1
11.3 August-29-2017
- Added section 3
11.4 Sep-3-2017
- Corrected spelling and grammar errors
