Difference between revisions of "UNO Dock V2.0 for NanoPi NEO"
(→如何在UNO Dock V2.0 for NanoPi NEO上使用Arduino) |
|||
| Line 90: | Line 90: | ||
If the LED blinks it means the UNO Dock V2.0 for NanoPi NEO works! | If the LED blinks it means the UNO Dock V2.0 for NanoPi NEO works! | ||
| − | == | + | ==Setup Arduino on UNO Dock V2.0 for NanoPi NEO== |
| − | * | + | * Step 1:use a jumper in place of "UNO-UART", connect the Dock to a PC host with a USB cable and power the Dock with a 12V DC power source |
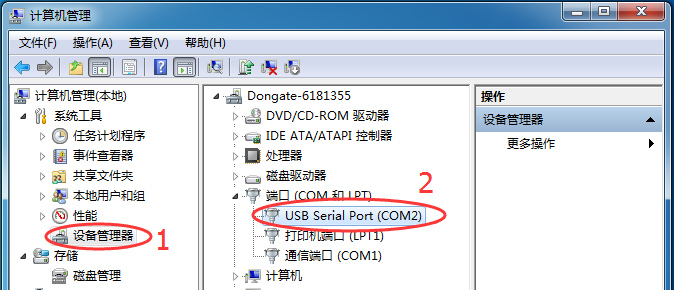
| − | * | + | * Step 2:check the device name in your PC's device manager. In our test case it was "COM2".<br /> |
[[File:Matrix - UNO Dock COM.png | frameless|500px|Matrix - UNO Dock for NanoPi COM]] | [[File:Matrix - UNO Dock COM.png | frameless|500px|Matrix - UNO Dock for NanoPi COM]] | ||
| − | * | + | * Step 3:download Arduino IDE [https://www.arduino.cc/en/Main/Software Arduino IDE Download Link] |
| − | + | Setup development environment:<br /> | |
| − | + | 1. Tools -> Board ->Arduino Nano<br /> | |
| − | [[File:Matrix - UNO Dock Arduino1.png | frameless|500px|Matrix - UNO Dock for NanoPi | + | [[File:Matrix - UNO Dock Arduino1.png | frameless|500px|Matrix - UNO Dock for NanoPi Configurations]]<br /> |
<br /> | <br /> | ||
2、选择工具->处理器->ATmega328<br /> | 2、选择工具->处理器->ATmega328<br /> | ||
Revision as of 02:53, 28 April 2017
Contents
1 Introduction
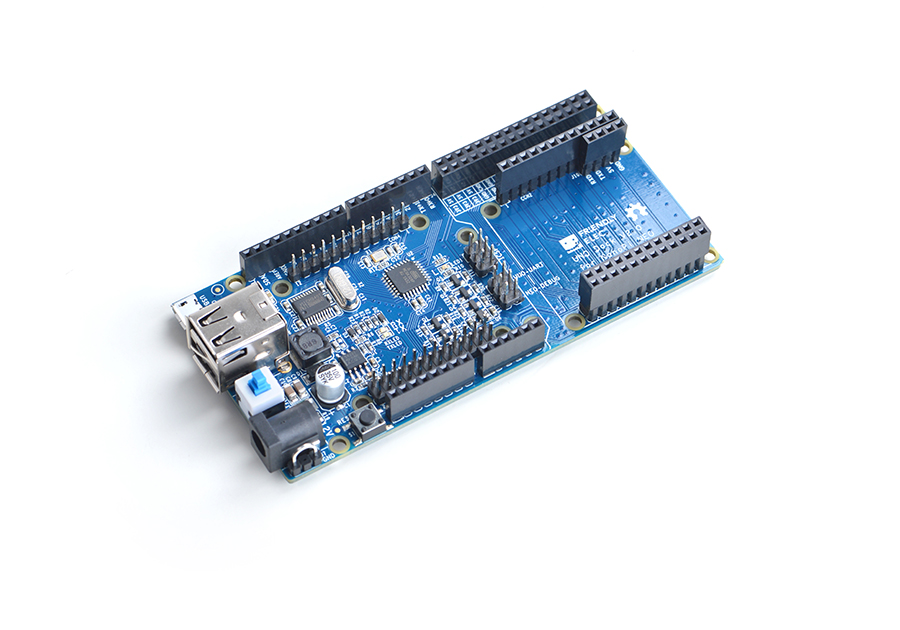
- The UNO Dock V2.0 for NanoPi NEO is a NanoHat Hub alike extension board.
- It is an Arduino board compatible with Arduino UNO and works with Arduino programs.
- The UNO Dock V2.0 communicates with NanoPi NEO/Air/NEO2 with I2C. The MEGA328P on the board acts as an interface between an external module connected to the board and the NanoPi NEO/Air/NEO2 that is mounted on the board.When a NanoPi NEO/Air/NEO2 and an Arduino module are connected to the UNO DOCK users can easily access the Arduino module from the NanoPi NEO/Air/NEO2.
- It has an onboard USB to Serial port chip which allows users to set the serial port as either Arduino serial port or NanoPi NEO/Air/NEO2's debug port with a jumper
- It has 12V power input to 5V/2A output.
- The two USB ports on the NanoPi NEO/Air/NEO2 are populated to the module
- The male connectors on the NanoPi NEO/Air/NEO2 are populated to the module and a NanoHat module can be stacked on it.
- NEO's GPIO pins are populated to the module
- NanoPi NEO/Air/NEO2 can be directly mounted on the UNO Dock V2.0.
2 Hardware Spec
- Arduino UNO supported
- Onboard USB to Serial port
- 12V power input to 5V/2A output
- Compatible with BakeBit Modules
- 2 x USB port
- NEO's connectors are populated and a NanoHat can be stacked on it
- NEO's GPIO pins are populated
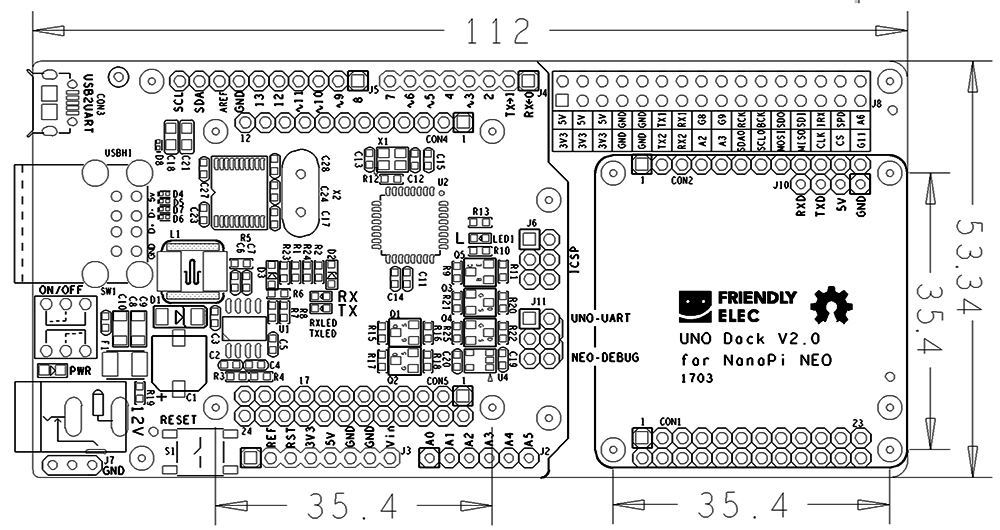
- PCB dimension(mm): 112 x 53.3
- For more details refer to: UNO Dock V2.0 for NanoPi NEO Dimension.rar
2.1 Connector Pin Description
Here is a pin description for the UNO Dock V2.0 for NanoPi NEO's connectors:
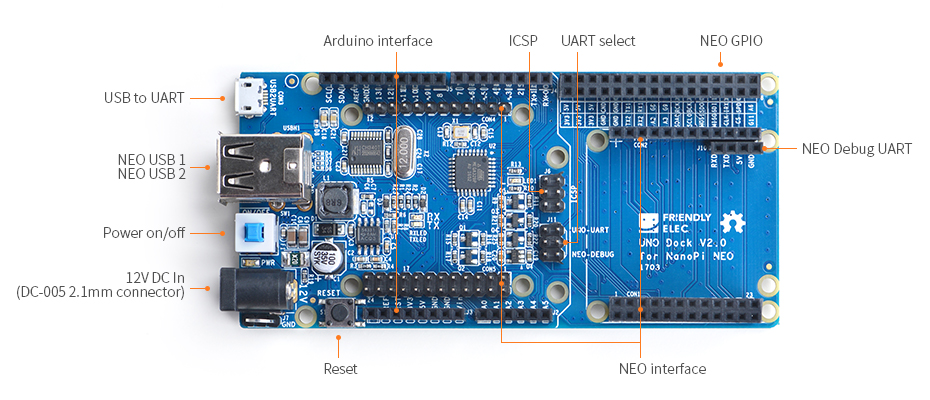
- UNO Dock V2.0 for NanoPi NEO Connector Pin Description:
| Pin | Description |
| 12V DC In | 12V Input |
| Power on/off | Power Switch |
| NEO USB 1 | Populated NanoPi NEO/Air/NEO2's USB 1 |
| NEO USB 2 | Populated NanoPi NEO/Air/NEO2's USB 2 |
| USB to URAT | USB to Serial |
| Arduino interface | Arduino Interface |
| ICSP | ICSP Interface |
| UART select | UNO UART/NEO DEBUG Mode Switch |
| NEO GPIO | NEO GPIO Female Connector |
| NEO Debug UART | Populated NanoPi NEO/Air/NEO2's Serial Debug Port |
| NEO interface | Populated NanoPi NEO/Air/NEO2's Interface |
| Reset | UNO Reset |
3 Connect UNO Dock V2.0 for NanoPi NEO to NanoPi NEO/Air/NEO2
3.1 Connect to NanoPi NEO/Air/NEO2
Currently the applicable boards are FriendlyElec's NanoPi NEO/Air/NEO2.
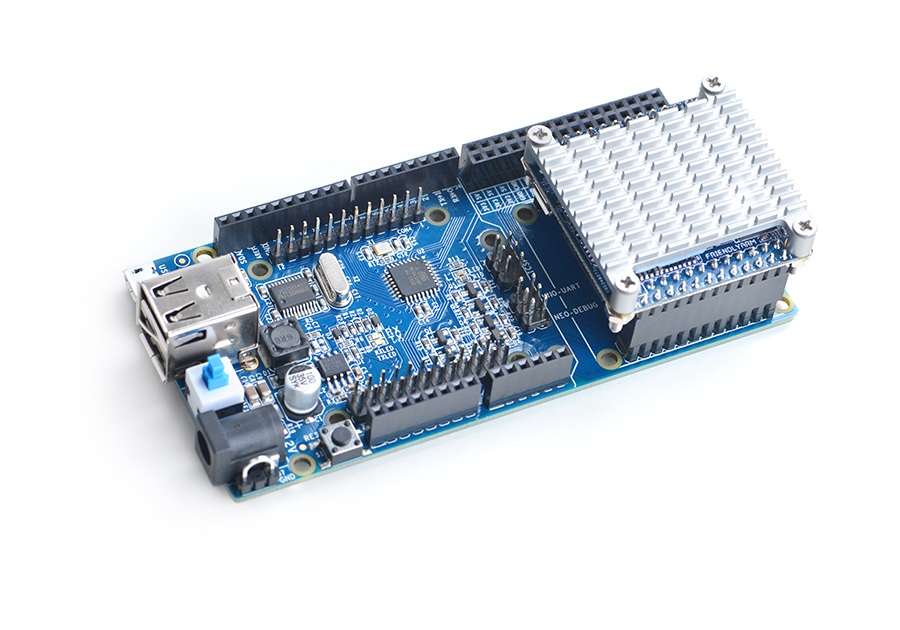
The module can be stacked on a NanoPi NEO/Air/NEO2. Here is a hardware setup:
3.2 Install BakeBit Software
- Step 1 - SSH to a master device(NanoPi NEO/Air/NEO2) via ssh and download the BakeBit code from github:
cd  ~
git clone https://github.com/friendlyarm/BakeBit.git
- Step 2 - Install BakeBit software packages by running the following commands:
cd BakeBit/Script
chmod +x install.sh
./install.sh
- Step 3 - Reboot:
reboot
- Step 4 - Test UNO Dock V2.0 for NanoPi NEO:
Connect a BakeBit LED module to a UNO Dock V2.0 for NanoPi NEO by linking the LED module's SIG pin to the Dock's D3 and run the following command:
python ~/BakeBit/Software/Python/grove_led_blink.py
If the LED blinks it means the UNO Dock V2.0 for NanoPi NEO works!
4 Setup Arduino on UNO Dock V2.0 for NanoPi NEO
- Step 1:use a jumper in place of "UNO-UART", connect the Dock to a PC host with a USB cable and power the Dock with a 12V DC power source
- Step 2:check the device name in your PC's device manager. In our test case it was "COM2".
- Step 3:download Arduino IDE Arduino IDE Download Link
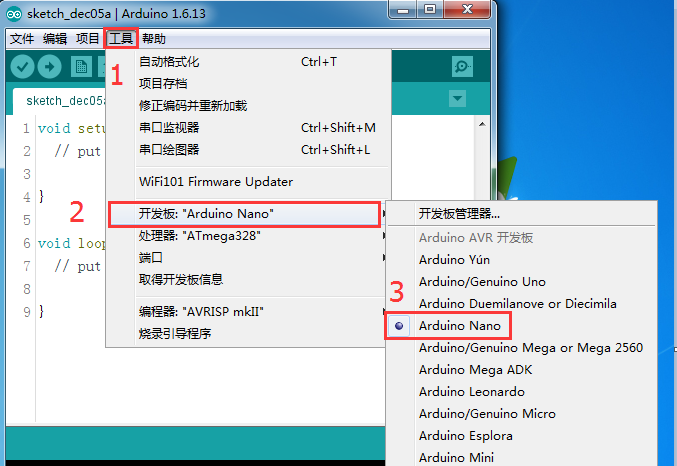
Setup development environment:
1. Tools -> Board ->Arduino Nano
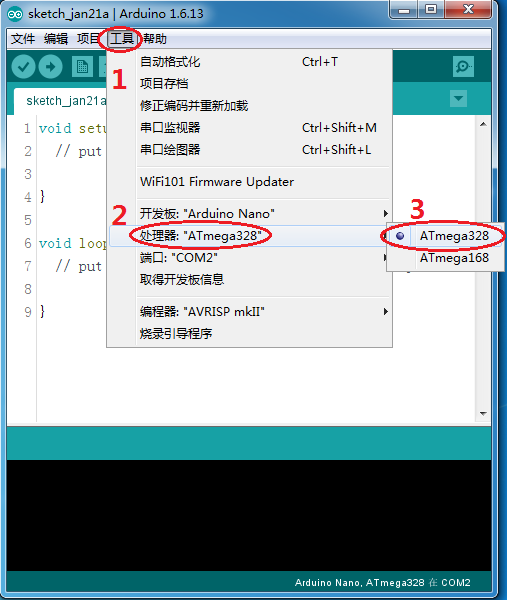
2、选择工具->处理器->ATmega328
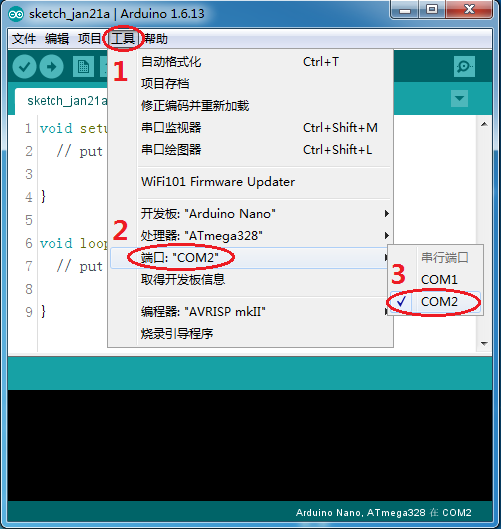
3、选择工具->端口->COM2(选择对应的计算机端口)
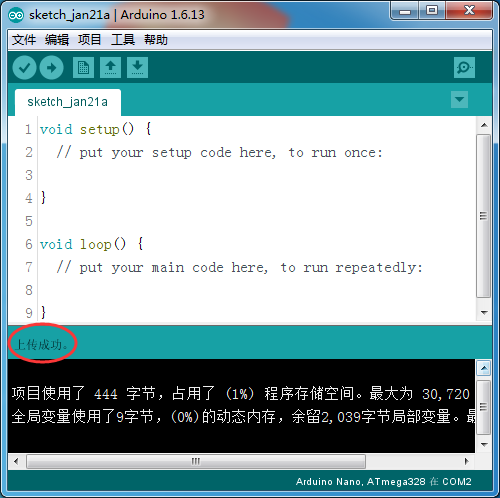
- 第四步,点击上传按钮,测试环境。
如果Arduino IDE软件提示“上传成功”,恭喜你,可以充分发挥你的想象,开始你的UNO Dock之旅了!
5 注意
使用Arduino IDE软件下载Arduino程序后,会覆盖UNO Dock V2.0 for NanoPi NEO单片机中的固件,如果此时回到NanoPi NEO/Air/NEO2上使用UNO Dock V2.0 for NanoPi NEO,需要先给UNO Dock V2.0 for NanoPi NEO下载固件,固件源码已上传到github,直接使用Arduino IDE上传即可。
固件源码下载地址
6 Resources
- [Schematic](UNO Dock V2.0 for NanoPi NEO.pdf)
- [Dimension](UNO Dock V2.0 for NanoPi NEO Dimension.rar)
