Difference between revisions of "Matrix - Photoresistor"
(→工作原理) |
(→下载Matrix源码) |
||
| Line 28: | Line 28: | ||
*The module has a photoresistor. The resistance of a photoresistor decreases with increasing incident light intensity; in other words, it exhibits photoconductivity.If incident light on a photoresistor exceeds a certain frequency, photons absorbed by the semiconductor give bound electrons enough energy to jump into the conduction band. The resulting free electrons (and their hole partners) conduct electricity, thereby lowering resistance. | *The module has a photoresistor. The resistance of a photoresistor decreases with increasing incident light intensity; in other words, it exhibits photoconductivity.If incident light on a photoresistor exceeds a certain frequency, photons absorbed by the semiconductor give bound electrons enough energy to jump into the conduction band. The resulting free electrons (and their hole partners) conduct electricity, thereby lowering resistance. | ||
| − | == | + | ==Download Matrix Source Code== |
| − | + | All the matrix modules' code samples are open source. They are maintained on GitHub: https://github.com/friendlyarm/matrix.git <br> | |
| − | + | Each branch in this hub contains the matrix modules' code samples for a board that the matrix modules can work with.<br> | |
| − | * | + | * The nanopi branch contains the matrix modules' code samples for the NanoPi |
| − | * | + | * The nanopi2 branch contains the matrix modules' code samples for the NanoPi 2 |
| − | * | + | * the tiny4412 branch contains the matrix modules' code samples for the Tiny4412 |
| − | * | + | * the raspberrypi branch contains the matrix modules' code samples for the RaspberryPi |
| − | + | Please follow the steps below to get the source code<br> | |
| + | Install the git utility on a PC running Ubuntu14.04 | ||
<syntaxhighlight lang="bash"> | <syntaxhighlight lang="bash"> | ||
$ sudo apt-get install git | $ sudo apt-get install git | ||
</syntaxhighlight> | </syntaxhighlight> | ||
| − | + | Clone the matrix code from GitHub | |
<syntaxhighlight lang="bash"> | <syntaxhighlight lang="bash"> | ||
$ git clone https://github.com/friendlyarm/matrix.git | $ git clone https://github.com/friendlyarm/matrix.git | ||
</syntaxhighlight> | </syntaxhighlight> | ||
| − | + | If this is successful a "matrix" directory will be generated, which will contain all the matrix modules' code samples. | |
==与NanoPi 2连接使用== | ==与NanoPi 2连接使用== | ||
Revision as of 10:37, 6 January 2016
Contents
1 Introduction
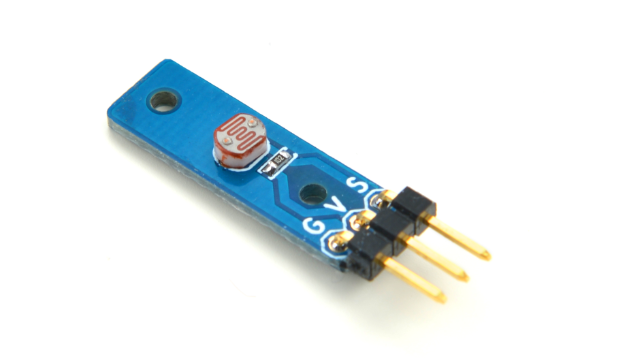
- The Matrix-Photoresistor is a photoresistor module. It has a 3 pin 2.54mm spacing pin-header of which V is supply voltage, G is ground and s is output analog signal. The output signal decreases with increasing incident light intensity. Users can convert its output analog signal to a digital signal via ADC conversion.
- Output Voltage: 0 ~ Vcc
2 Features
- GPIO 3.3/5V
- Small
- 2.54mm spacing pin-header
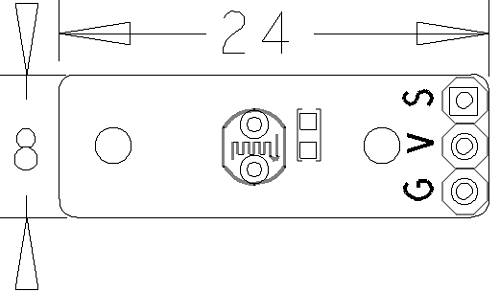
- PCB Dimension(mm): 8 x 24
- Pin Description:
| Pin | Description |
| S | Analog GPIO |
| V | Supply Voltage 5V |
| G | Ground |
3 Basic Device Operation
- The module has a photoresistor. The resistance of a photoresistor decreases with increasing incident light intensity; in other words, it exhibits photoconductivity.If incident light on a photoresistor exceeds a certain frequency, photons absorbed by the semiconductor give bound electrons enough energy to jump into the conduction band. The resulting free electrons (and their hole partners) conduct electricity, thereby lowering resistance.
4 Download Matrix Source Code
All the matrix modules' code samples are open source. They are maintained on GitHub: https://github.com/friendlyarm/matrix.git
Each branch in this hub contains the matrix modules' code samples for a board that the matrix modules can work with.
- The nanopi branch contains the matrix modules' code samples for the NanoPi
- The nanopi2 branch contains the matrix modules' code samples for the NanoPi 2
- the tiny4412 branch contains the matrix modules' code samples for the Tiny4412
- the raspberrypi branch contains the matrix modules' code samples for the RaspberryPi
Please follow the steps below to get the source code
Install the git utility on a PC running Ubuntu14.04
$ sudo apt-get install git
Clone the matrix code from GitHub
$ git clone https://github.com/friendlyarm/matrix.git
If this is successful a "matrix" directory will be generated, which will contain all the matrix modules' code samples.
5 与NanoPi 2连接使用
5.1 硬件连接
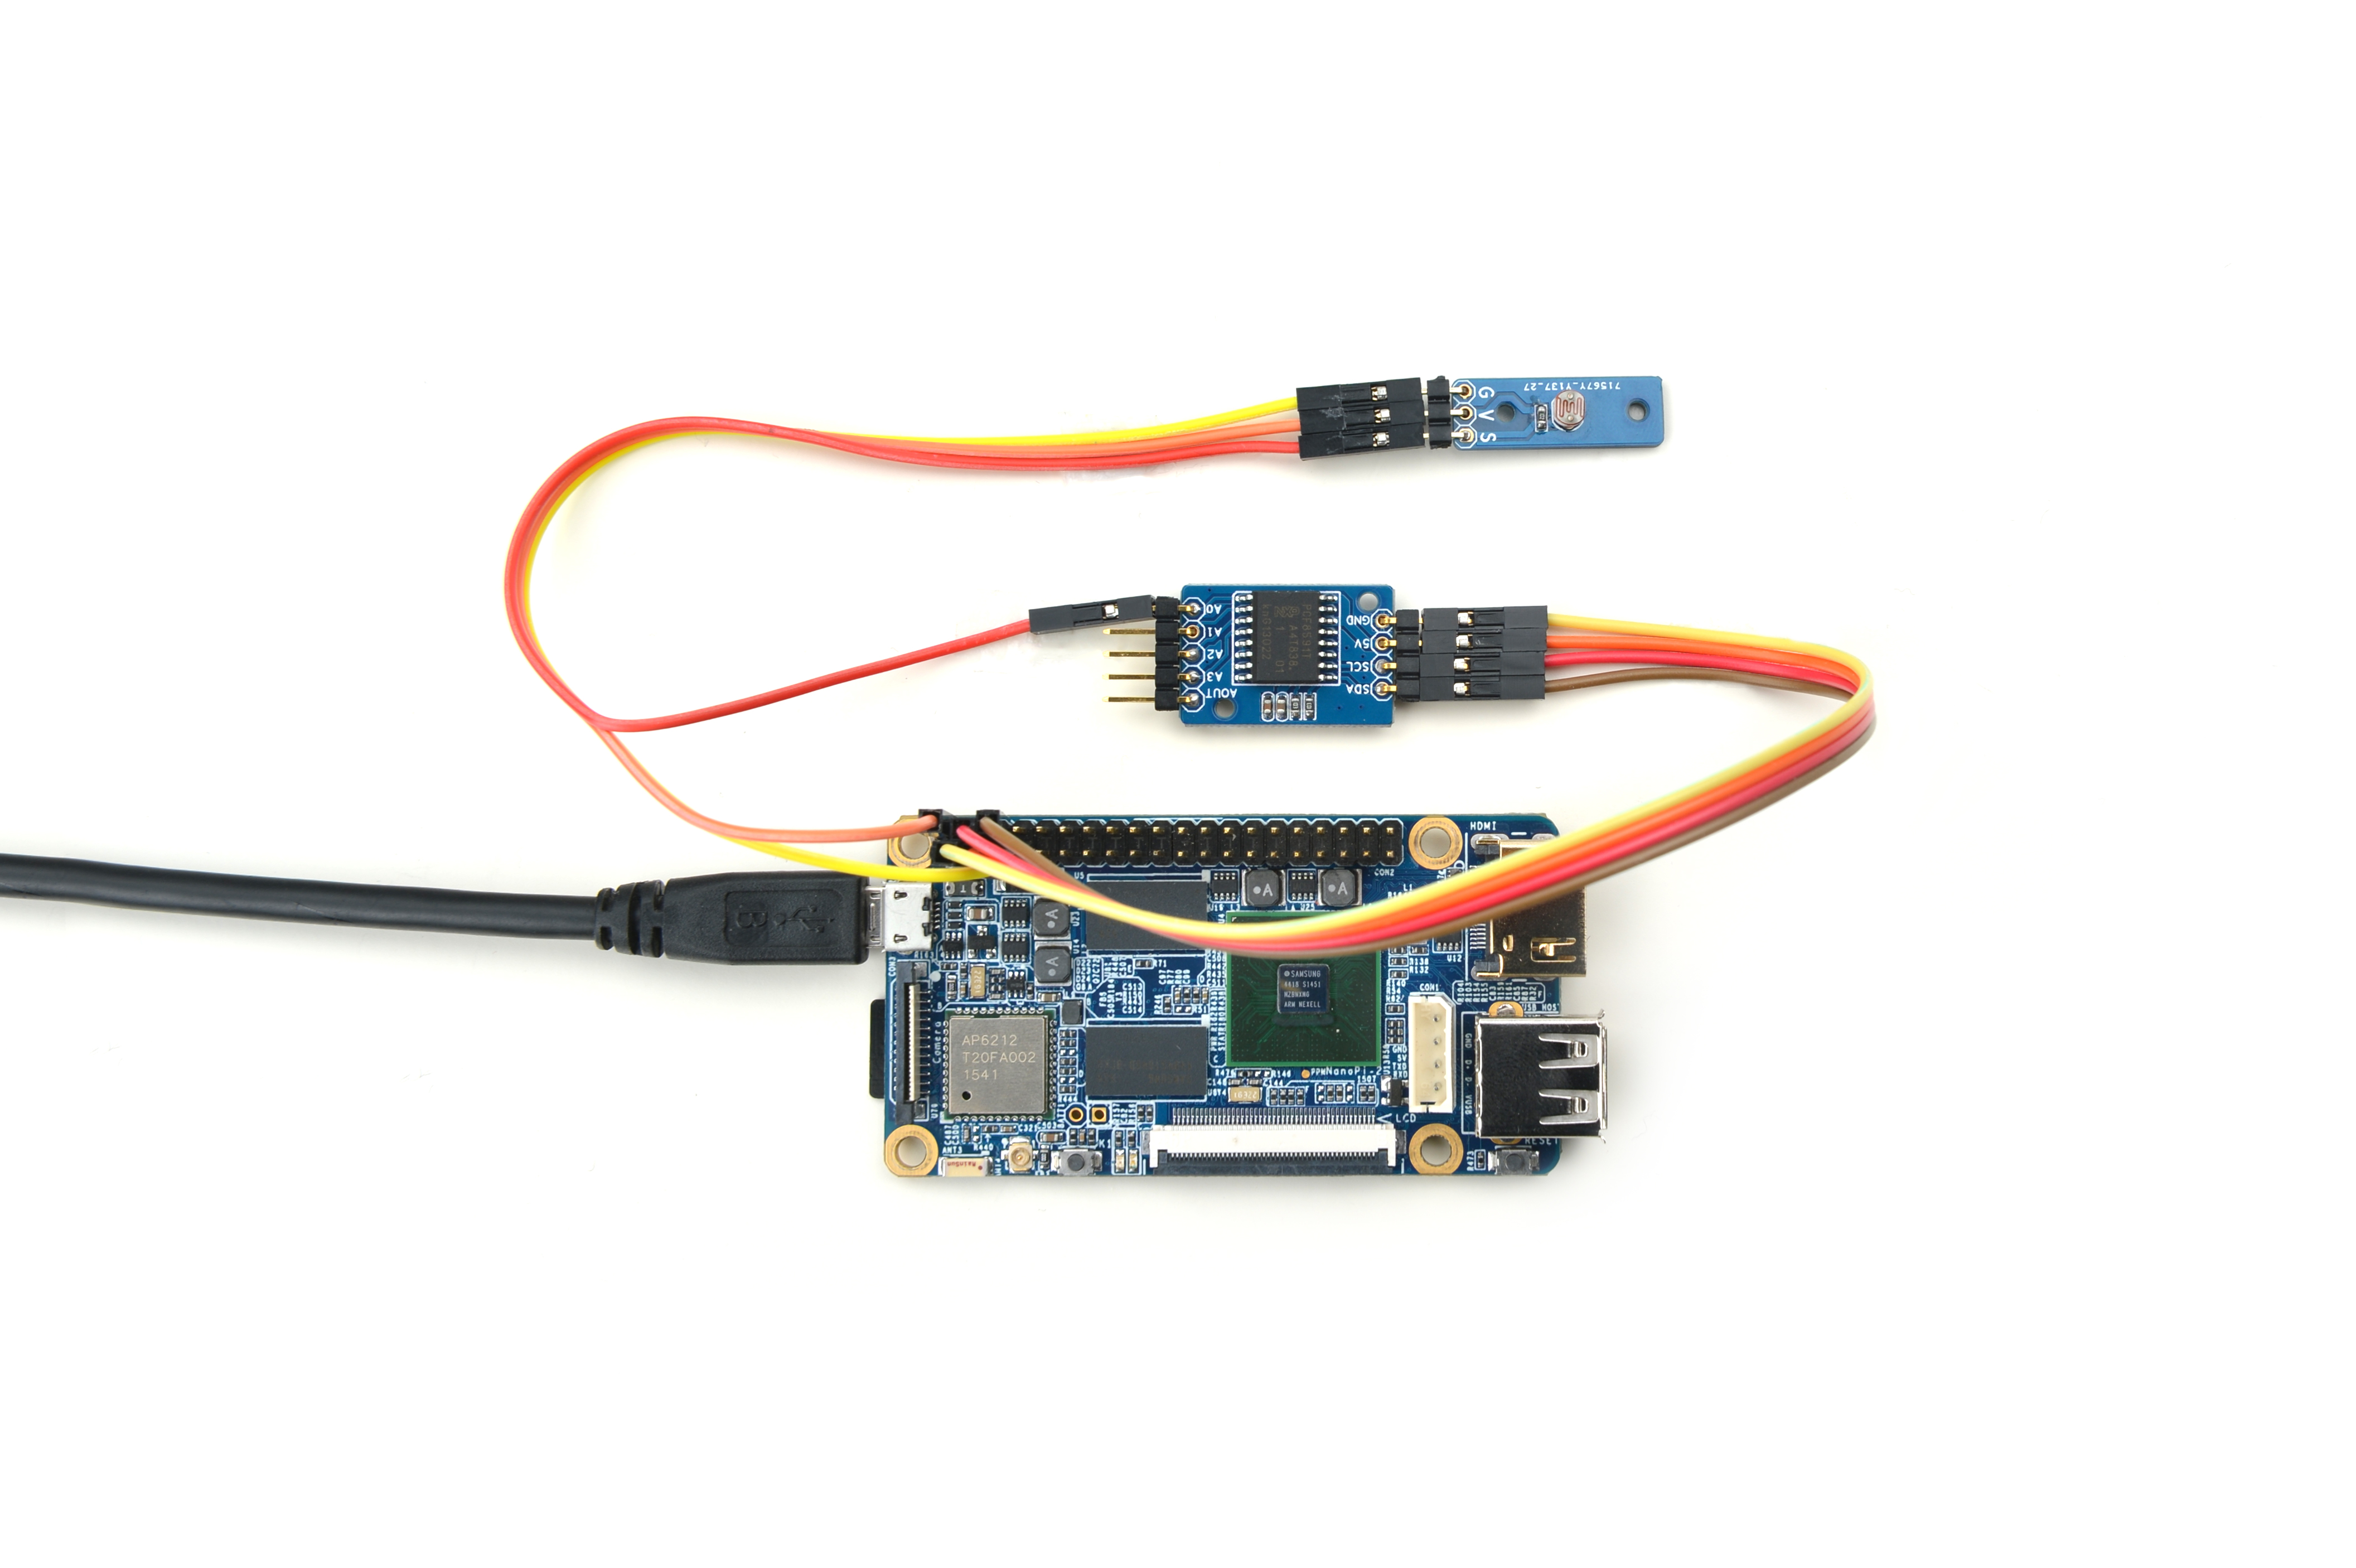
参考下图连接模块Matrix-Photoresistor和NanoPi 2:

连接说明:
| Matrix-Analog_to_Digital_Converter | NanoPi 2 |
| SDA | Pin3 |
| SCL | Pin5 |
| 5V | Pin4 |
| GND | Pin6 |
| Matrix-Photoresistor | |
| GND | NanoPi 2 Pin9 |
| 5V | NanoPi 2 Pin2 |
| S | Matrix-Analog_to_Digital_Converter A0 |
光敏电阻输出的是模拟信号,需要使用ADC转换模块Matrix-Analog_to_Digital_Converter将模拟信号转换为数字信号。
先把模块Matrix-Analog_to_Digital_Converter接在NanoPi 2上,然后将模块Matrix-Photoresistor的S引脚接在ADC转换模块的A0引脚。
关于模块Matrix-Analog_to_Digital_Converter可参考wiki:Matrix-Analog_to_Digital_Converter。
5.2 编译测试程序
进入Matrix代码仓库,切换到nanopi2分支
$ cd matrix
$ git checkout nanopi2
编译Matrix配件代码
$ make CROSS_COMPILE=arm-linux- clean
$ make CROSS_COMPILE=arm-linux-
$ make CROSS_COMPILE=arm-linux- install
注意:请确保你的主机PC当前使用的交叉编译器为NanoPi 2配套的arm-linux-gcc-4.9.3。
编译成功后库文件位于install/lib目录下,而测试程序则位于install/usr/bin目录下,模块Matrix-Photoresistor对应的测试程序为matrix-adc。
硬件驱动模块位于modules目录下,对应的驱动源码都包含在在NanoPi 2的Linux内核仓库里:https://github.com/friendlyarm/linux-3.4.y.git
5.3 运行测试程序
将带有Debian系统的SD卡插入一台运行Linux的电脑,可以挂载SD卡上的boot和rootfs分区。
假设rootfs分区的挂载路径为/media/rootfs,执行以下命令将Matrix的硬件驱动、库文件和测试程序拷贝到NanoPi 2的文件系统上。
$ cp modules /media/rootfs/ -r
$ cp install/lib/* /media/rootfs/lib/ -d
$ cp install/usr/bin/* /media/rootfs/usr/bin/
将SD卡重新插入NanoPi 2,上电启动,在Debian的shell终端中执行以下命令加载硬件驱动。
$ cd /modules
$ insmod pcf8591.ko
运行模块Matrix-Photoresistor的测试程序。
$ matrix-adc5.4 代码展示
int main(int argc, char ** argv)
{
    int i = 0;
    int value = 0;
    int channel = 0;

    if (argc == 2) {
        channel = atoi(argv[1]);
    }

    for (i=0; i<ADC_READ_TIMES; i++) {
        if (pcf8591Read(channel, &value) != -1) {
            printf("channel%d value=%d\n", channel, value);
        } else {
            printf("Fail to get channel%d value\n", channel);
        }
        usleep(10000);
    }
    return 0;
}


