Difference between revisions of "Matrix - I2C LCD1602"
(→工作原理) |
(→LCD1602工作原理) |
||
| Line 39: | Line 39: | ||
* If you need to read data from it you will need to set the module to the read mode (RW set to 1). Please refer to the PCF8574's datasheet for more details. | * If you need to read data from it you will need to set the module to the read mode (RW set to 1). Please refer to the PCF8574's datasheet for more details. | ||
| − | === | + | ===LCD1602=== |
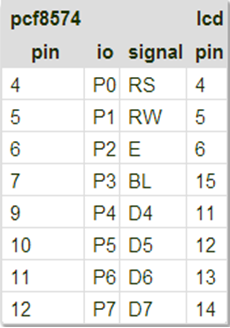
| − | * | + | * The connection diagram between the PCF8574 module and the LCD module is as follows: |
[[File:1602.png|frameless|400px|1602]] | [[File:1602.png|frameless|400px|1602]] | ||
| − | * | + | * RS is instruction/data register selection. RW is read/write selection. E is enable signal(edge triggering). BL is back light control. D4-D7 are data bits. |
| − | * | + | * The LCD module is controlled by four data bits through which we can send instructions to control its state. Because it has eight instruction/data bits (DB7 - DB0) when writing each instruction/data we need to write the most significant four bits DB7 - DB4 first and then the least significant four bits DB3 - DB0. |
| − | * | + | * Note: the LCD module has 192 most commonly used characters stored in CGROM. When we write a common character e.g "A" it will directly display "A". In addition it can store up to eight user defined characters in RAM called CGRAM. |
==下载Matrix源码== | ==下载Matrix源码== | ||
Revision as of 06:34, 30 September 2015
Contents
1 Introduction
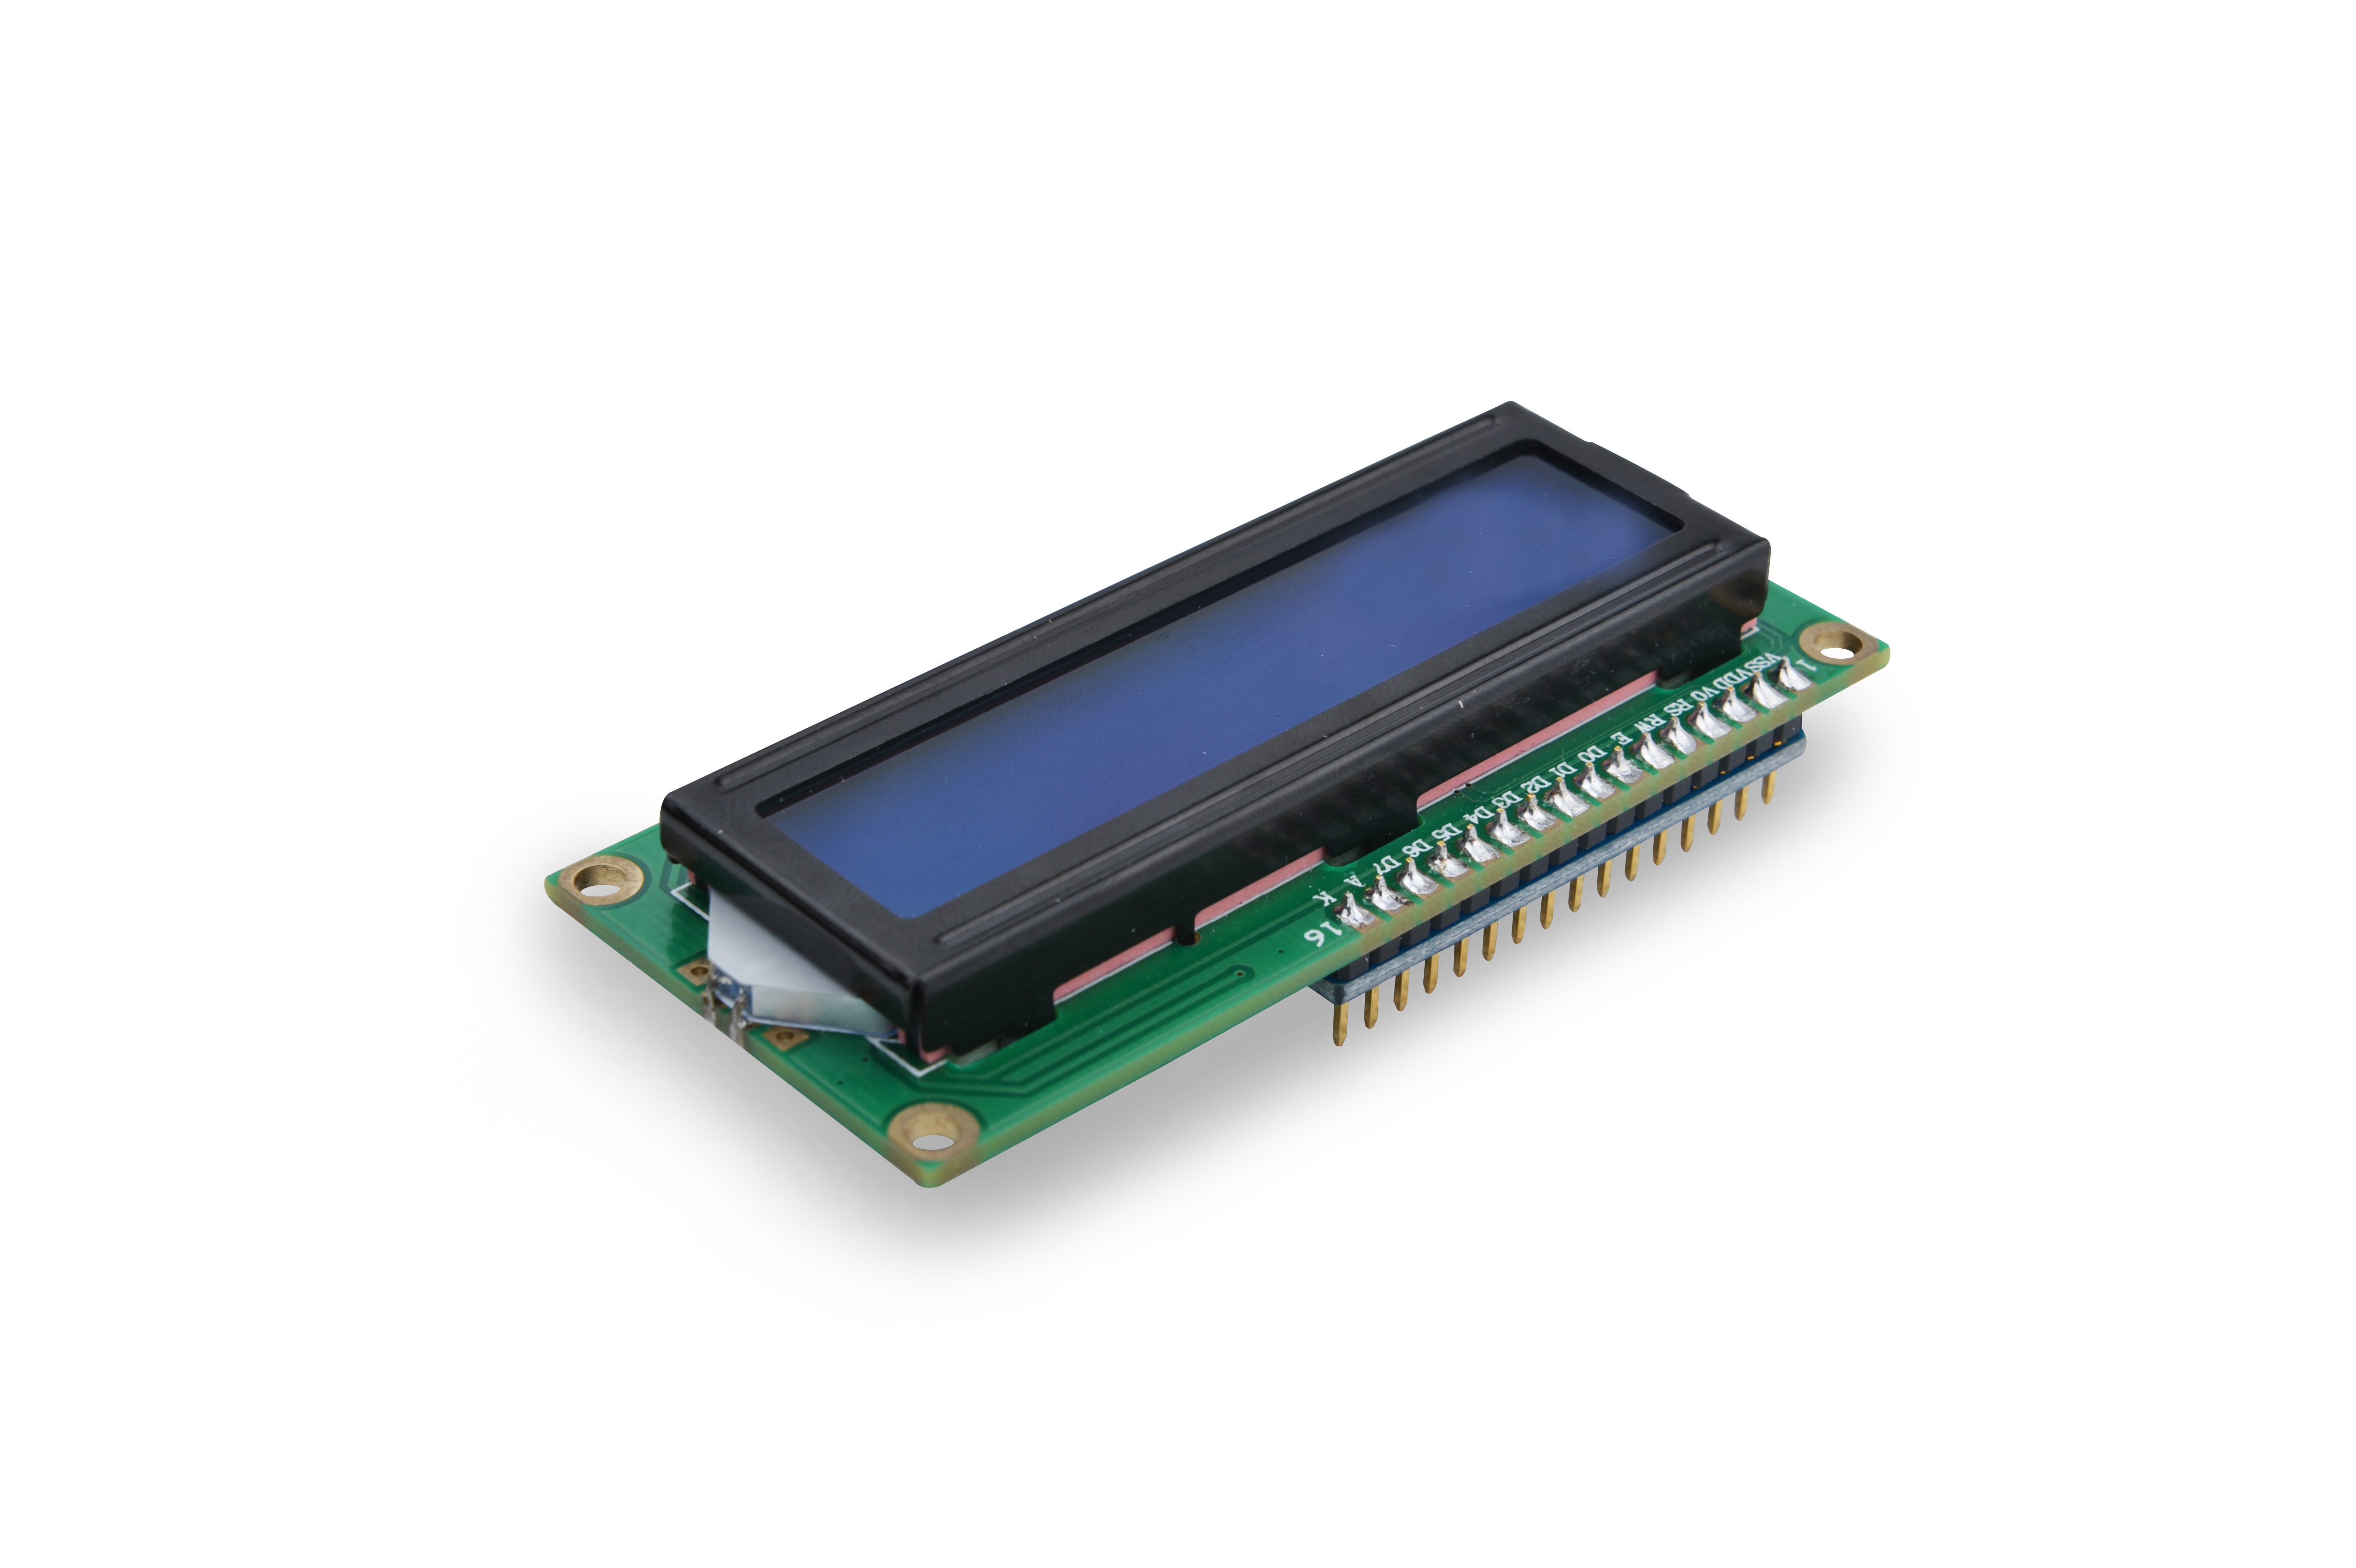
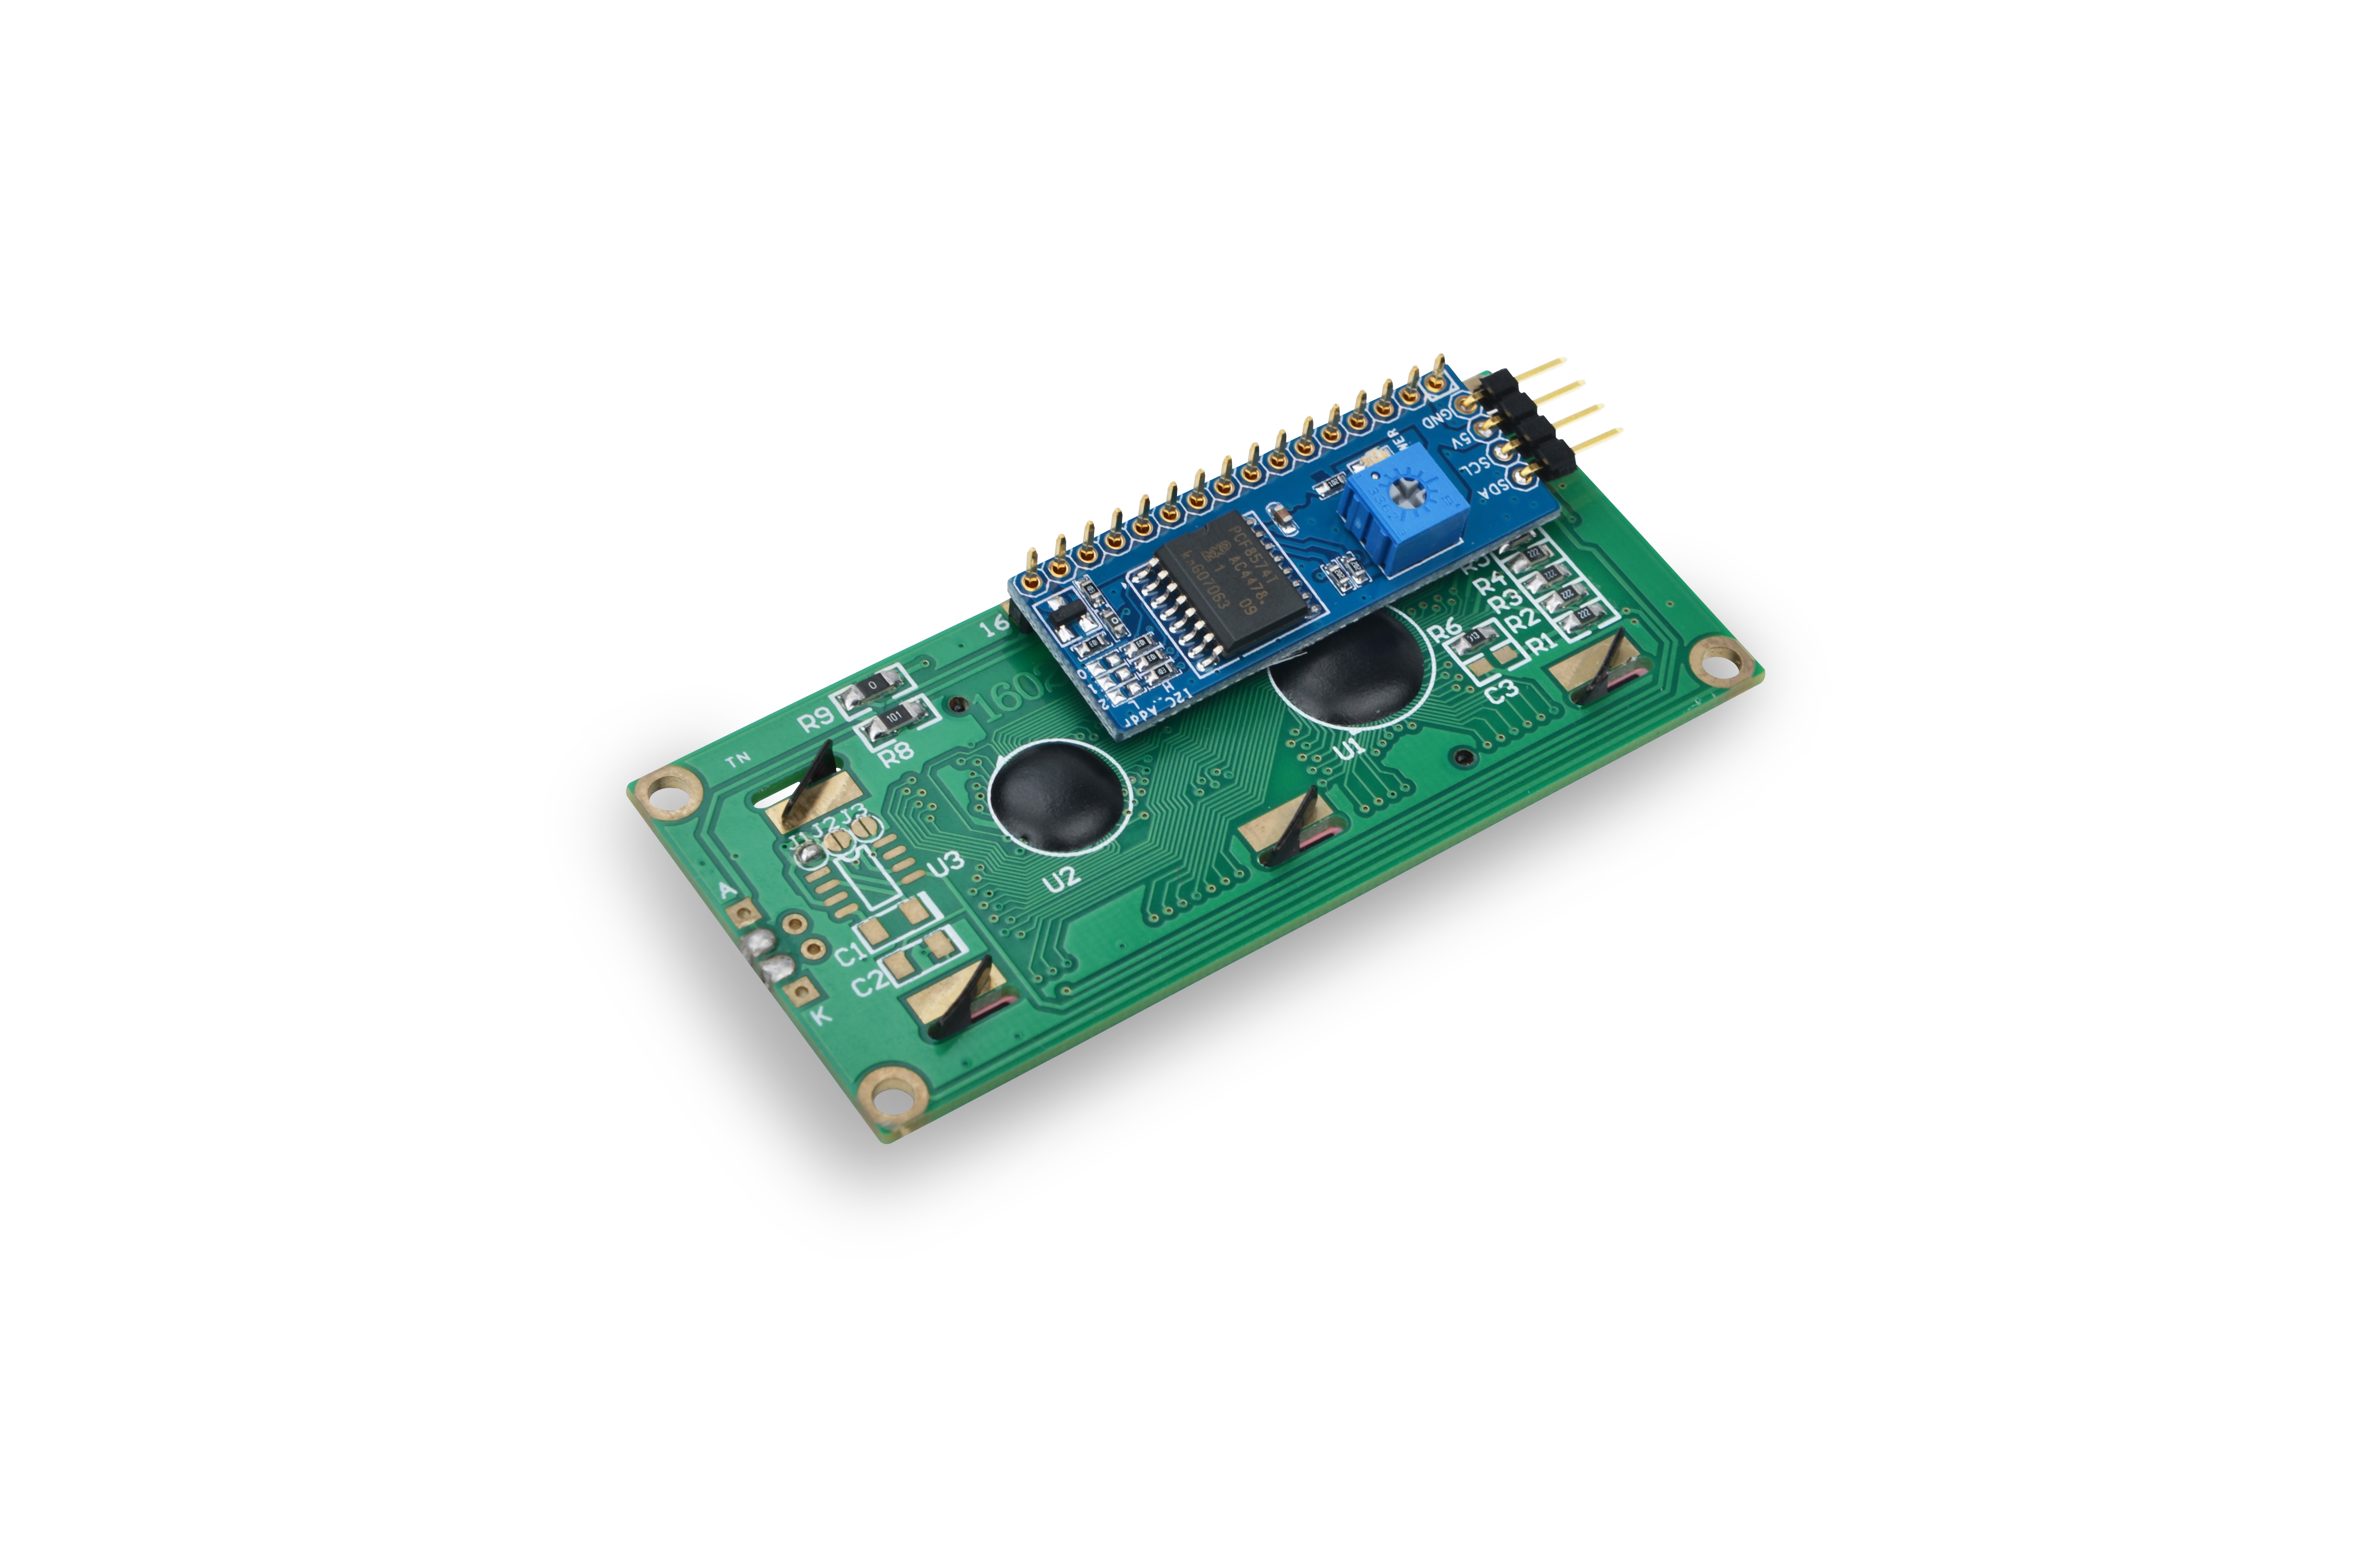
- The Matrix-I2C_LCD1602 is an LCD display module composed of an LCD1602 and a PCF8574 module.
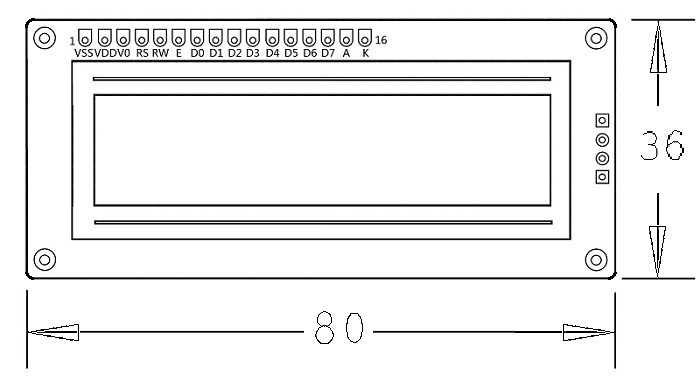
- The LCD1602 can display up to 16x2 characters. It has a parallel interface.
- The PCF8574 provides GPIO expansion up to 8 bit for I2C. It communicates with a master via I2C and converts data from the master to parallel signals to the LCD1602 thus controls the LCD's display and back light.
2 Features
- I2C interface, LCD display and backlight control
- 2.54mm spacing pin
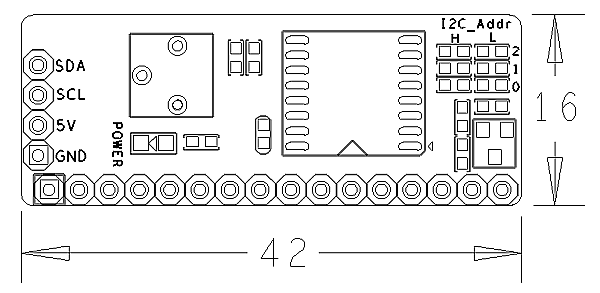
- IIC Module PCB dimension(mm): 16 x 42
- LCD1602 PCB dimension (mm): 36 x 80
- Pin Description:
| Pin | Description |
| SDA | I2C SDA |
| SCL | I2C SCL |
| 5V | Supply Voltage 5V |
| GND | Ground |
3 Basic Device Operation
3.1 PCF8574
- The PCF8574 has I2C parallel expansion. It has an 8bit (P0 - P7) I2C interface.
- The PCF8574 communicates with a master via I2C. The PCF8574's chip model is PCF8574T whose address specification is as follows:
- If A2 - A0 are all set to 1 the 7bit address will be 0x27(0100111). By default RW is 0 and it is in the write mode.
- In the write mode after opening the i2c-0 device and setting up its address the master can write data to it.
- If you need to read data from it you will need to set the module to the read mode (RW set to 1). Please refer to the PCF8574's datasheet for more details.
3.2 LCD1602
- The connection diagram between the PCF8574 module and the LCD module is as follows:
- RS is instruction/data register selection. RW is read/write selection. E is enable signal(edge triggering). BL is back light control. D4-D7 are data bits.
- The LCD module is controlled by four data bits through which we can send instructions to control its state. Because it has eight instruction/data bits (DB7 - DB0) when writing each instruction/data we need to write the most significant four bits DB7 - DB4 first and then the least significant four bits DB3 - DB0.
- Note: the LCD module has 192 most commonly used characters stored in CGROM. When we write a common character e.g "A" it will directly display "A". In addition it can store up to eight user defined characters in RAM called CGRAM.
4 下载Matrix源码
Matrix配件相关的代码是完全开源的,统一由一个仓库进行管理:git://github.com/friendlyarm/matrix.git
该仓库里不同的分支代表着Matrix配件所支持的不同开发板。
- nanopi分支包含了Matrix对NanoPi的支持;
- tiny4412分支包含了Matrix对Tiny4412的支持;
- raspberrypi分支包含了Matrix对RaspberryPi的支持;
在主机PC上安装git,以Ubuntu14.04为例
$ sudo apt-get install git
克隆Matrix配件代码仓库
$ git clone git://github.com/friendlyarm/matrix.git
克隆完成后会得到一个matrix目录,里面存放着所有Matrix配件的代码。
5 与NanoPi连接使用
5.1 准备工作
在NanoPi上运行Debian系统,然后在主机PC上安装并使用相应的编译器。参考wiki:NanoPi
注意:必须使用nanopi-v4.1.y-matrix分支编译出来的内核。
下载NanoPi内核源代码并编译
$ git clone https://github.com/friendlyarm/linux-4.x.y.git
$ cd linux-4.x.y
$ git checkout nanopi-v4.1.y-matrix
$ make nanopi_defconfig
$ touch .scmversion
$ make
5.2 硬件连接
参考下图连接模块Matrix-I2C_LCD1602和NanoPi
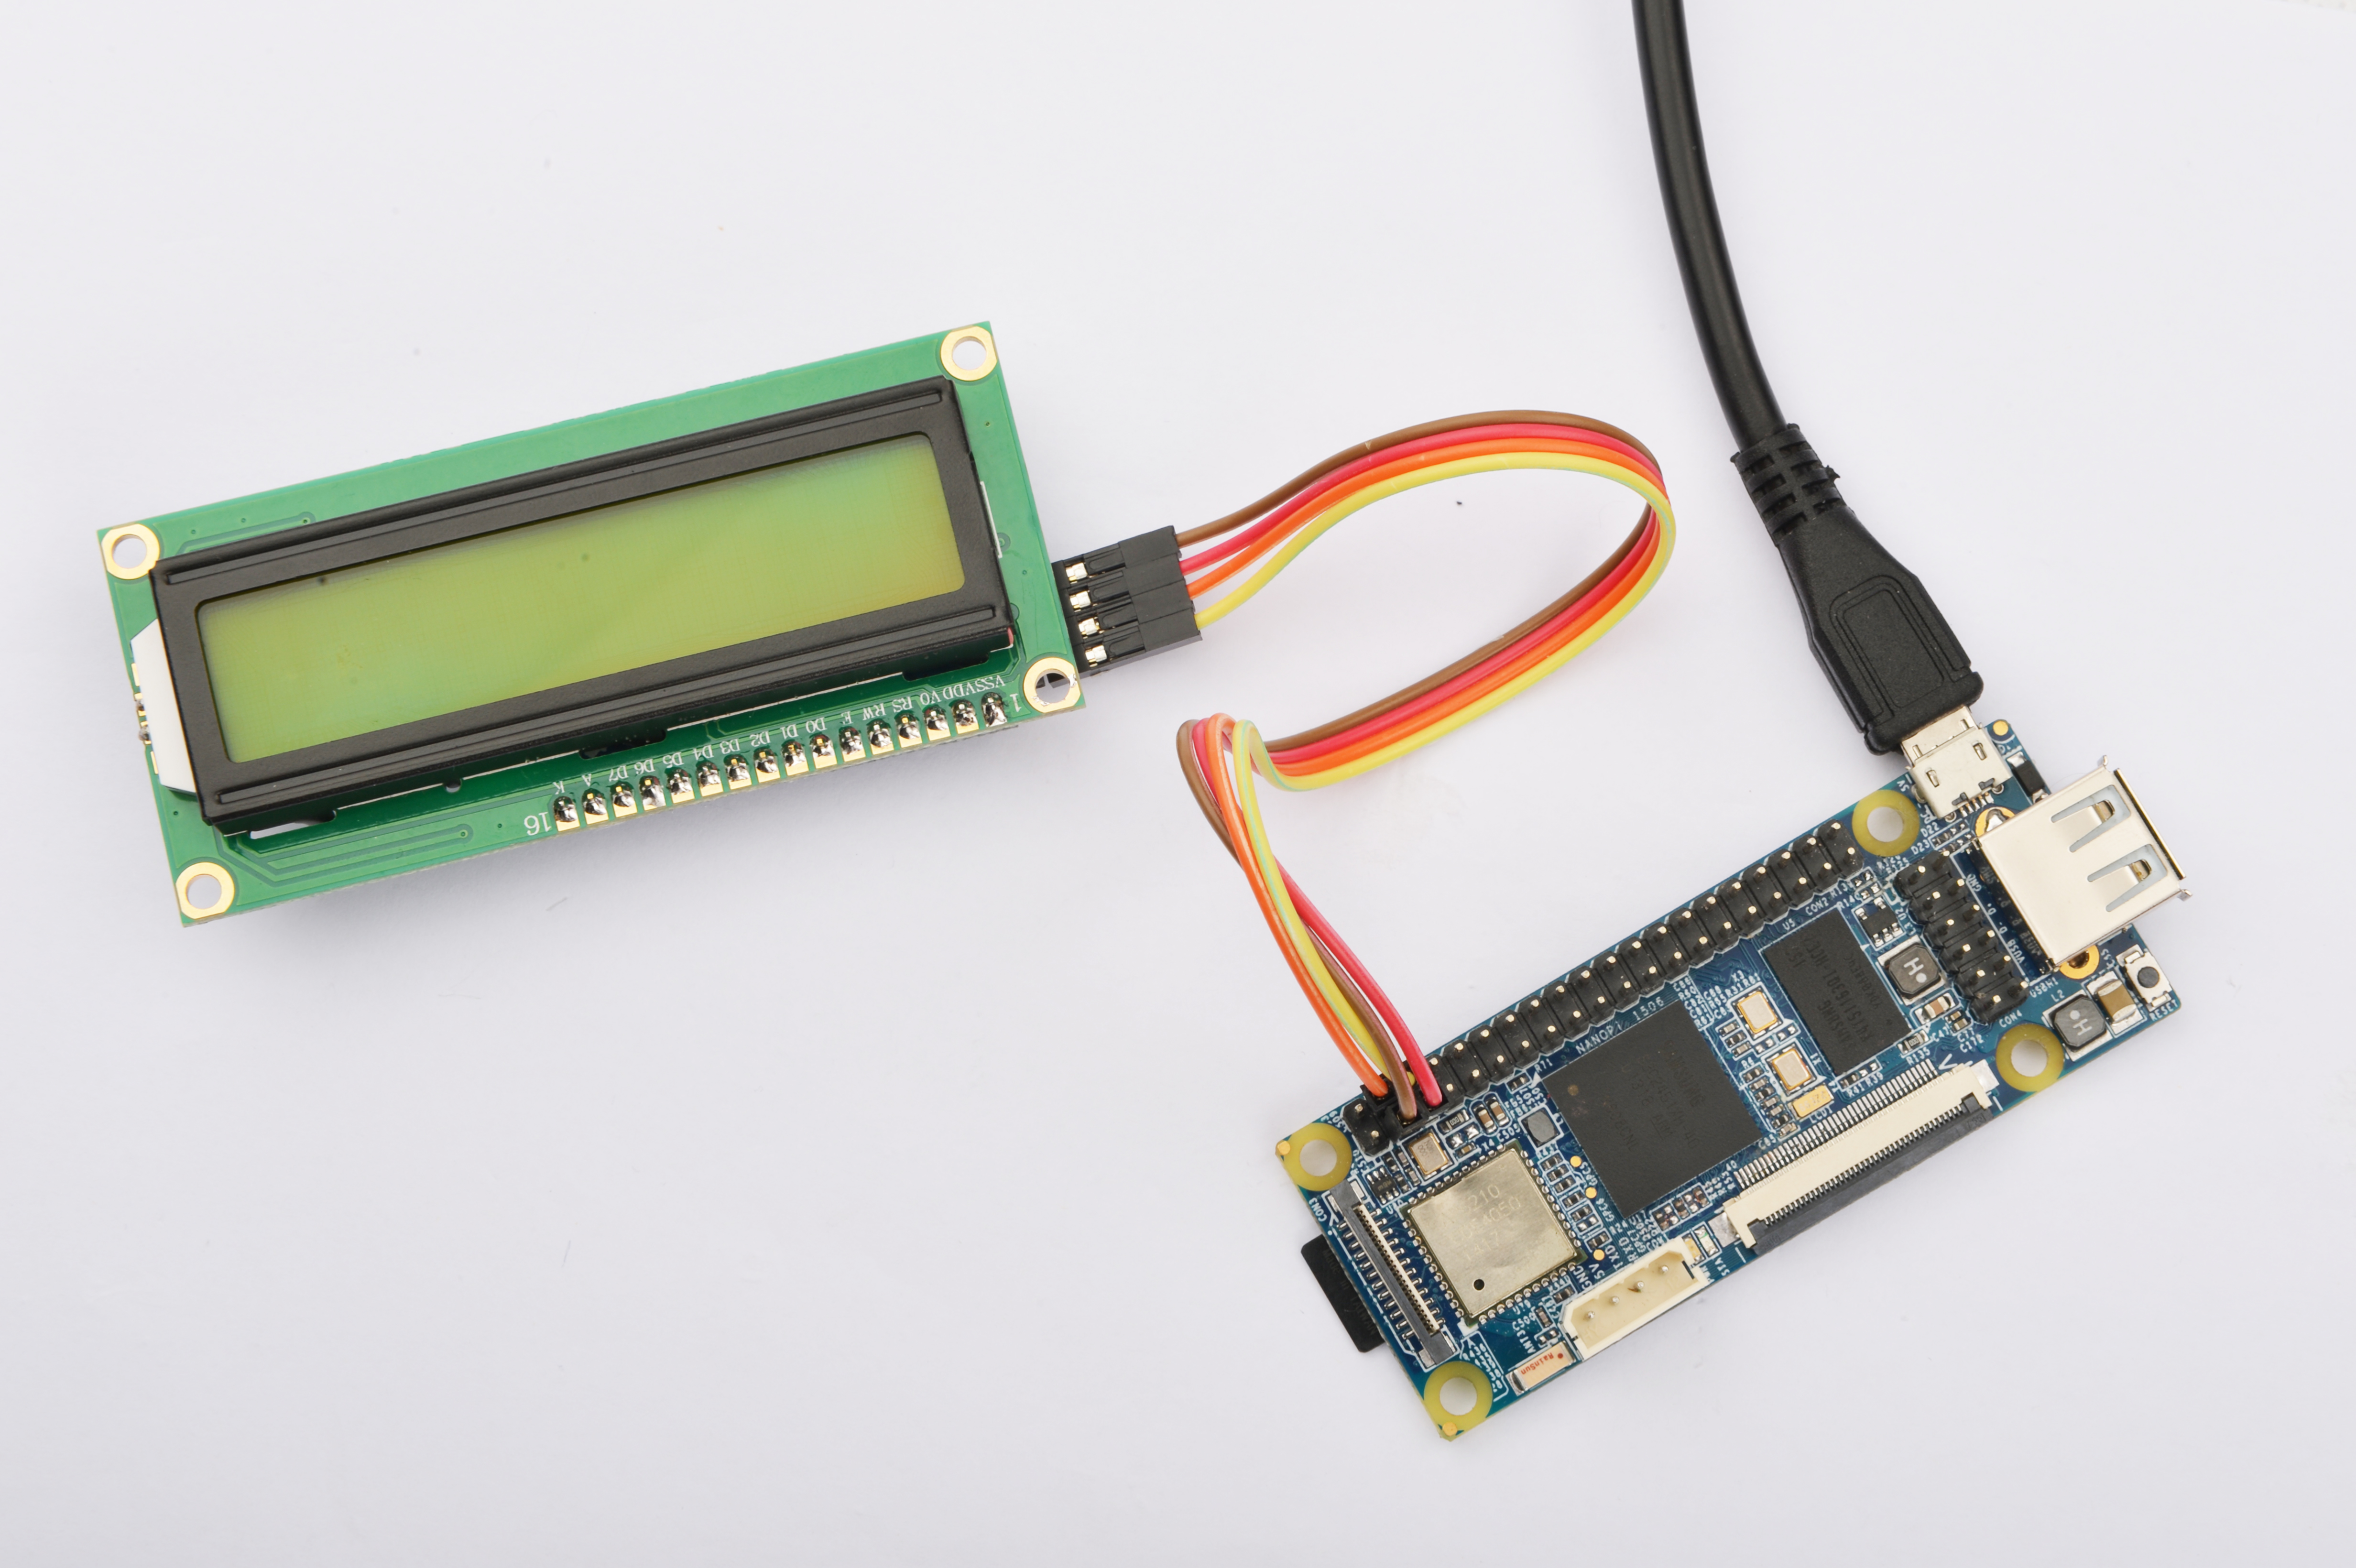
连接说明:
| Matrix-I2C_LCD1602 | NanoPi |
| SDA | Pin3 |
| SCL | Pin5 |
| 5V | Pin4 |
| GND | Pin6 |
5.3 编译测试程序
进入Matrix代码仓库,切换到nanopi分支
$ cd matrix
$ git checkout nanopi
编译Matrix配件代码
$ make CROSS_COMPILE=arm-linux- clean
$ make CROSS_COMPILE=arm-linux-
$ make CROSS_COMPILE=arm-linux- install
注意:请确保你的主机PC当前使用的交叉编译器为NanoPi-Debian配套的arm-linux-gcc-4.4.3。
编译出来的库文件位于install/lib目录下,而测试程序则位于install/usr/bin目录下,模块Matrix-I2C_LCD1602对应的测试程序为matrix-lcd1602。
5.4 运行测试程序
拷贝库文件和测试程序到NanoPi的文件系统上
$ cp install/usr/bin/* nanopi_rootfs/usr/bin/
$ cp install/lib/* nanopi_rootfs/lib/ -d
然后启动NanoPi,在Debian的shell终端中执行如下命令运行模块Matrix-I2C_LCD1602的测试程序
注意:此模块并不支持热插拔,启动系统前需要确保硬件正常连接。
$ matrix-lcd16025.5 代码展示
int main(int argc, char ** argv)
{
    int devFD;
    if ((devFD = LCD1602Init()) == -1) {
        printf("Fail to init LCD1602\n");
        return -1;
    }

    if (LCD1602Clear(devFD) == -1) {
        printf("Fail to Clear\n");
        return -1;
    }
    printf("clearing LCD1602\n");
    sleep(1);

    if (LCD1602DispLines(devFD, "  B&G Char LCD", "--by FriendlyARM") == -1) {
        printf("Fail to Display String\n");
        return -1;
    }
    printf("displaying LCD1602\n");
    LCD1602DeInit(devFD);
    return 0;
}
6 与Tiny4412连接使用
6.1 准备工作
参考Tiny4412光盘里的《友善之臂Ubuntu使用手册》,在Tiny4412上运行UbuntuCore系统,然后在主机PC上安装并使用相应的编译器。
注意:只能使用Tiny4412SDK-1506的底板。
6.2 硬件连接
参考下图连接模块Matrix-I2C_LCD1602和Tiny4412
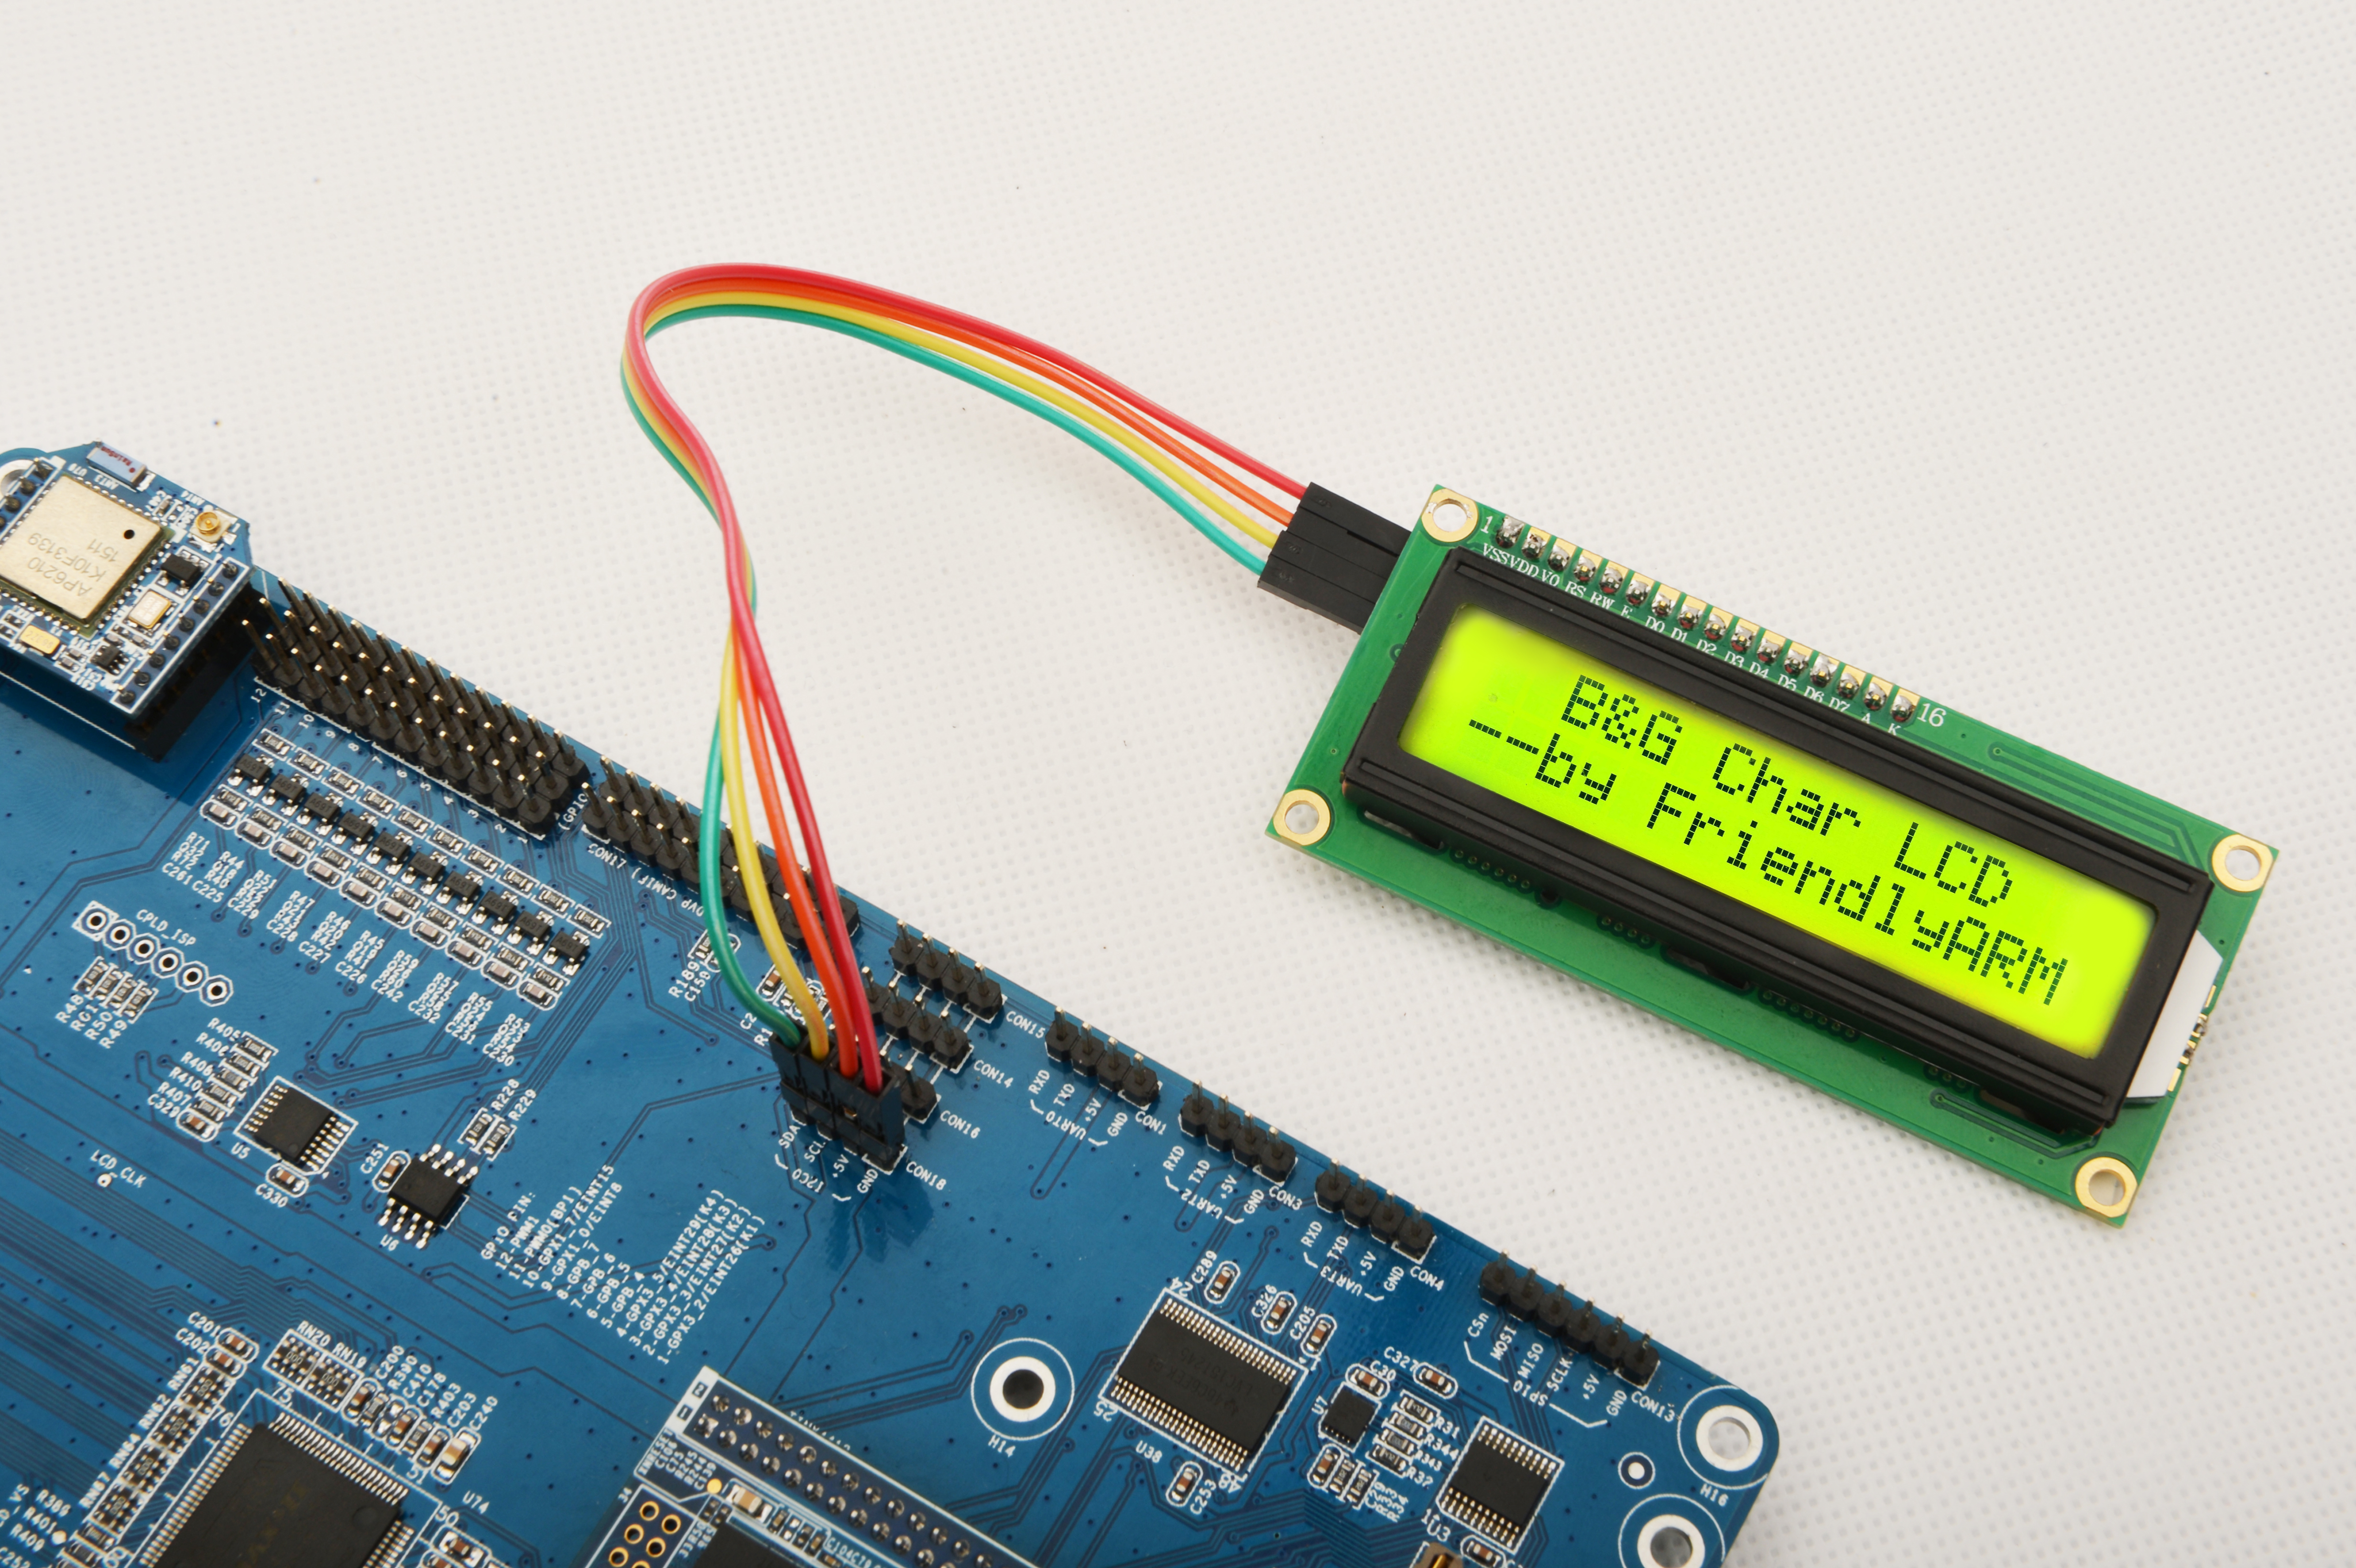
连接说明:
| Matrix-I2C_LCD1602 | Tiny4412 |
| SDA | CON18 SDA |
| SCL | CON18 SCL |
| 5V | CON18 5V |
| GND | CON18 GND |
6.3 编译测试程序
进入Matrix代码仓库,切换到tiny4412分支
$ cd matrix
$ git checkout tiny4412
编译matrix配件代码
$ make CROSS_COMPILE=arm-linux-gnueabihf- clean
$ make CROSS_COMPILE=arm-linux-gnueabihf-
$ make CROSS_COMPILE=arm-linux-gnueabihf- install
注意:请确保你的主机PC当前使用的交叉编译器为Tiny4412-UbuntuCore配套的arm-linux-gnueabihf-gcc-4.7.3。
编译出来的库文件位于install/lib目录下,而测试程序则位于install/usr/bin目录下,模块Matrix-I2C_LCD1602对应的测试程序为matrix-lcd1602。
6.4 运行测试程序
拷贝库文件和测试程序到Tiny4412的UbuntuCore的文件系统上
$ cp install/usr/bin/* tiny4412_rootfs/usr/bin/
$ cp install/lib/* tiny4412_rootfs/lib/ -d
然后启动Tiny4412,在UbuntuCore的shell终端中执行如下命令运行模块Matrix-I2C_LCD1602的测试程序
注意:此模块并不支持热插拔,启动系统前需要确保硬件正常连接。
$ matrix-lcd16026.5 代码展示
int main(int argc, char ** argv)
{
    int devFD;
    if ((devFD = LCD1602Init()) == -1) {
        printf("Fail to init LCD1602\n");
        return -1;
    }

    if (LCD1602Clear(devFD) == -1) {
        printf("Fail to Clear\n");
        return -1;
    }
    printf("clearing LCD1602\n");
    sleep(1);

    if (LCD1602DispLines(devFD, "  B&G Char LCD", "--by FriendlyARM") == -1) {
        printf("Fail to Display String\n");
        return -1;
    }
    printf("displaying LCD1602\n");
    LCD1602DeInit(devFD);
    return 0;
}
7 与RaspberryPi连接使用
8 与Arduino连接使用
8.1 准备工作
确保你的Arduino板能正常下载运行程序,参考:https://www.arduino.cc/en/Guide/HomePage
这里我们使用的是Arduino uno板。
8.2 硬件连接
参考下图连接模块Matrix-I2C_LCD1602和Arduino Uno
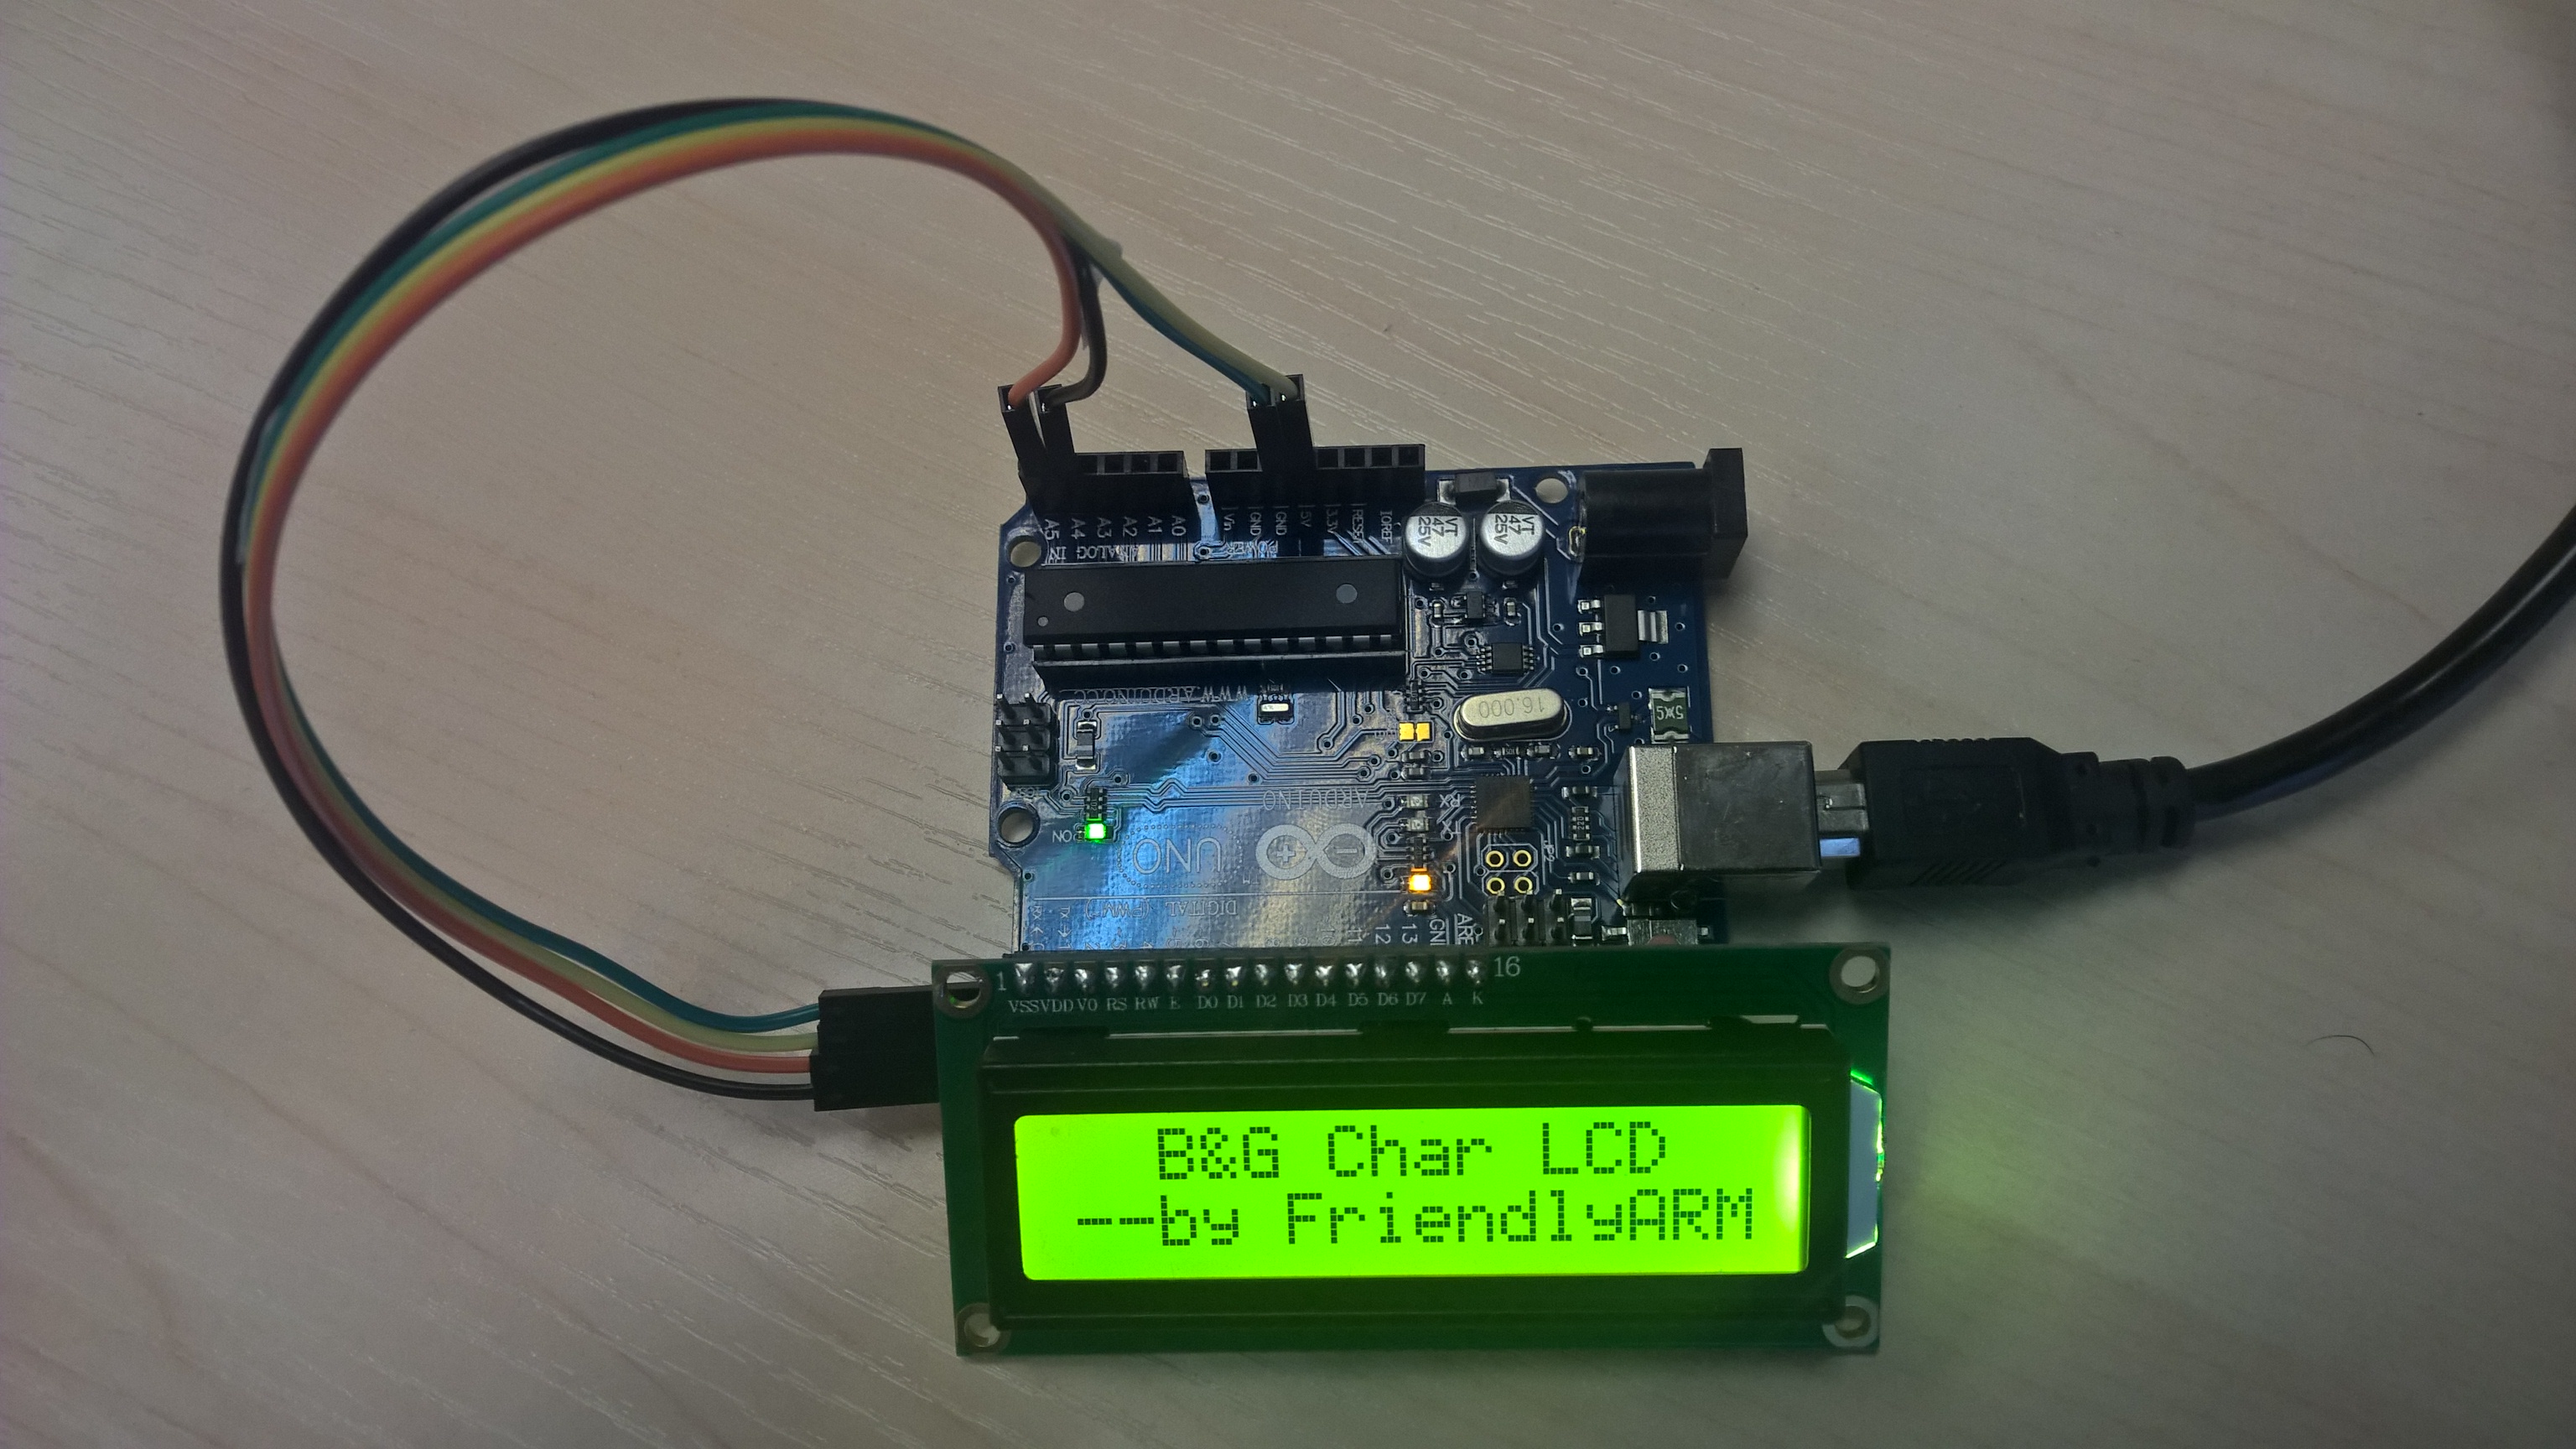
8.3 编译运行测试程序
由于arduino开发板并不运行Linux系统,所以matrix for arduino的代码由独立的仓库进行管理:git://github.com/friendlyarm/matrix-arduino.git
克隆matrix-arduino代码仓库
$ git clone git://github.com/friendlyarm/matrix-arduino.git
克隆完成后会得到一个matrix-arduino目录,里面存放着所有Matrix 配件用于支持arduino的代码。
拷贝matrix-i2c_lcd1602目录到Arduino IDE的libraries目录下
$ cd matrix-arduino
$ cp matrix-i2c_lcd1602 Arduino_IDE/libraies -r
启动Arduino IDE
点击File->Examples->matrix-i2c_lcd1602->displaychar,打开测试程序。
点击upload,运行测试程序。
8.4 代码展示
#include <Wire.h>
#include <LiquidCrystal_I2C.h>

// set the LCD address to 0x27 for a 16 chars and 2 line display
LiquidCrystal_I2C lcd(0x27,16,2);

void setup()
{
  lcd.init();
  lcd.backlight();
  lcd.setCursor(2, 0);
  lcd.print("B&G Char LCD");
  lcd.setCursor(0, 1);
  lcd.println("--by FriendlyARM");
}

void loop()
{
}
9 相关资料
