Difference between revisions of "BakeBit - Sound Sensor"
From FriendlyELEC WiKi
| (6 intermediate revisions by the same user not shown) | |||
| Line 1: | Line 1: | ||
[[BakeBit - Sound Sensor/zh|查看中文]] | [[BakeBit - Sound Sensor/zh|查看中文]] | ||
| − | == | + | ==Introduction== |
[[File:BakeBit - Sound Sensor.jpg|thumb|Sound Sensor]] | [[File:BakeBit - Sound Sensor.jpg|thumb|Sound Sensor]] | ||
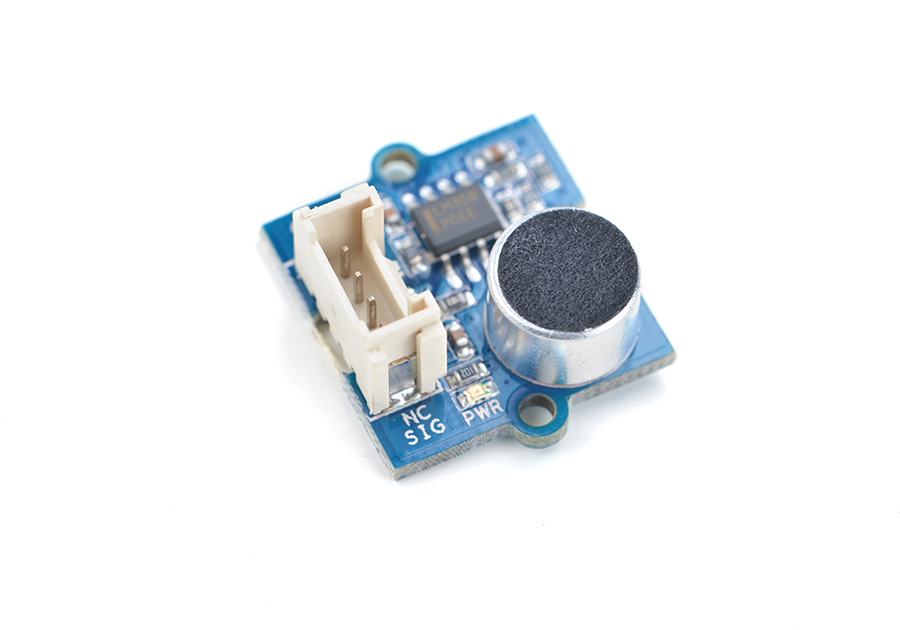
| − | *BakeBit - Sound | + | * The BakeBit - Sound Sensor is a sound detection module. The module contains an electret condenser microphone. Sound waves impinging on the diaphragm cause the capacitance between it and the back plate to change synchronously, this in turn induces an AC voltage on the back plate, which is amplified with LM358 as output. |
| − | * | + | * Its default output is high. When it detects a sound wave it will output low. When no sounds are detected it will output high. |
| − | == | + | ==Hardware Spec== |
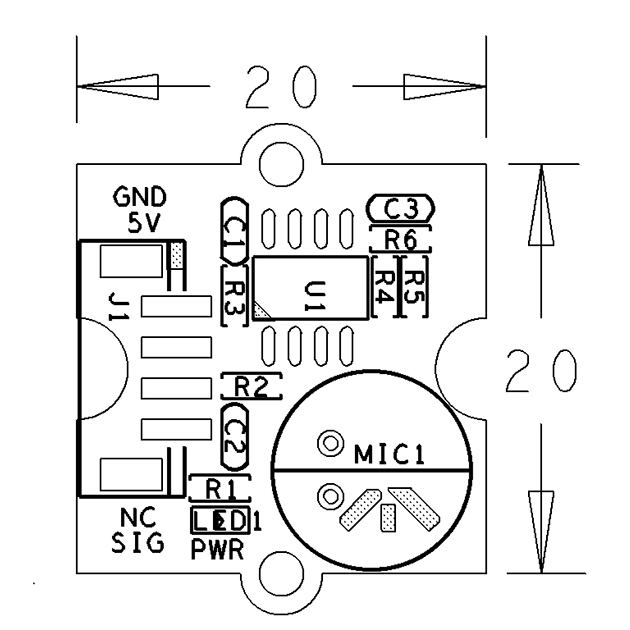
| − | * | + | * Standard 2.0mm 4-Pin BakeBit Interface |
[[File:BakeBit - Sound Sensor_PCB.png | frameless|320px|BakeBit - Sound Sensor]] | [[File:BakeBit - Sound Sensor_PCB.png | frameless|320px|BakeBit - Sound Sensor]] | ||
| − | * | + | * Pin Description: |
{| class="wikitable" | {| class="wikitable" | ||
|- | |- | ||
| − | | | + | |Pin || Description |
|- | |- | ||
| − | |GND || | + | |GND || Ground |
|- | |- | ||
| − | |5V || | + | |5V || 5V Supply Voltage |
|- | |- | ||
| − | |NC || | + | |NC || Not Connected |
|- | |- | ||
| − | |SIG || | + | |SIG || Signal |
|} | |} | ||
| − | |||
| − | + | == Code Sample:Sound Sensor == | |
| − | === | + | When this program runs if surrounding environment’s sounds reach a threshold value the LED will be turned on. |
| − | + | ||
| + | === Hardware Setup === | ||
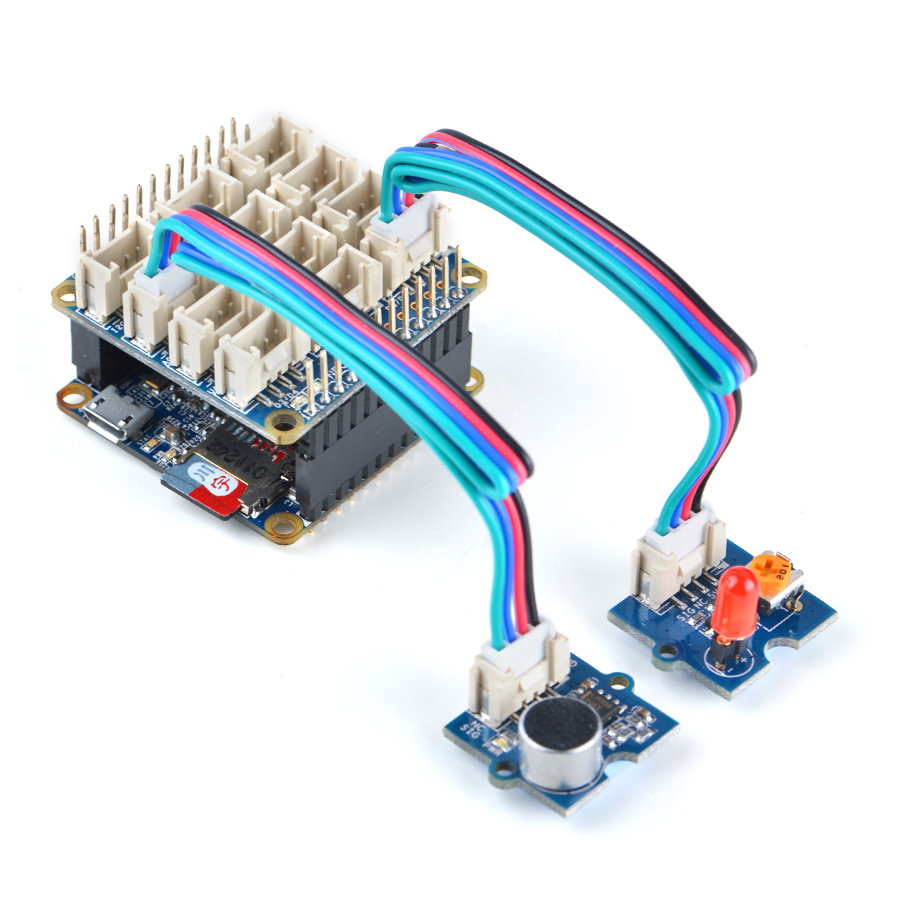
| + | Connect the Sound Sensor module to the NanoHat Hub's A0 and the LED module to the NanoHat Hub's D5: | ||
::{| class="wikitable" | ::{| class="wikitable" | ||
| Line 36: | Line 37: | ||
|} | |} | ||
| − | === | + | === Source Code === |
<syntaxhighlight lang="python"> | <syntaxhighlight lang="python"> | ||
| Line 77: | Line 78: | ||
| − | === | + | === Run Code Sample === |
| − | + | Before you run the code sample you need to follow the steps in [http://wiki.friendlyarm.com/bakebit bakebit tutorial] to install the BakeBit package.<br /> | |
| − | + | Enter the "BakeBit/Software/Python" directory and run the "bakebit_sound_sensor.py" program: | |
<syntaxhighlight lang="bash"> | <syntaxhighlight lang="bash"> | ||
cd ~/BakeBit/Software/Python | cd ~/BakeBit/Software/Python | ||
| Line 86: | Line 87: | ||
</syntaxhighlight> | </syntaxhighlight> | ||
| − | === | + | === Observation === |
| − | + | When you make some sounds to the sound sensor and if the sounds are big enough the LED will be turned on. | |
| − | == | + | ==Resources== |
*[Schematic]([http://wiki.friendlyarm.com/wiki/images/f/ff/02-SCHEMATIC_Sound_Sensor.pdf BakeBit - Sound Sensor.pdf]) | *[Schematic]([http://wiki.friendlyarm.com/wiki/images/f/ff/02-SCHEMATIC_Sound_Sensor.pdf BakeBit - Sound Sensor.pdf]) | ||
| − | *[BakeBit | + | *[BakeBit Github Project Page](https://github.com/friendlyarm/BakeBit) |
| − | *[BakeBit Starter | + | *[BakeBit Starter Kit User's Manual](http://wiki.friendlyarm.com/bakebit/bakebit_starter_kit_manual_en.pdf) |
| + | |||
| + | ==Update Log== | ||
| + | ===December-14-2016=== | ||
| + | * Released English version | ||
| + | |||
| + | ===Jan-19-2017=== | ||
| + | * Renamed "NEO-Hub" to "NanoHat-Hub" | ||
| + | |||
| + | ===Jan-20-2017=== | ||
| + | * Renamed "NanoHat-Hub" to "NanoHat Hub" | ||
Latest revision as of 08:21, 20 January 2017
Contents
1 Introduction
- The BakeBit - Sound Sensor is a sound detection module. The module contains an electret condenser microphone. Sound waves impinging on the diaphragm cause the capacitance between it and the back plate to change synchronously, this in turn induces an AC voltage on the back plate, which is amplified with LM358 as output.
- Its default output is high. When it detects a sound wave it will output low. When no sounds are detected it will output high.
2 Hardware Spec
- Standard 2.0mm 4-Pin BakeBit Interface
- Pin Description:
| Pin | Description |
| GND | Ground |
| 5V | 5V Supply Voltage |
| NC | Not Connected |
| SIG | Signal |
3 Code Sample:Sound Sensor
When this program runs if surrounding environment’s sounds reach a threshold value the LED will be turned on.
3.1 Hardware Setup
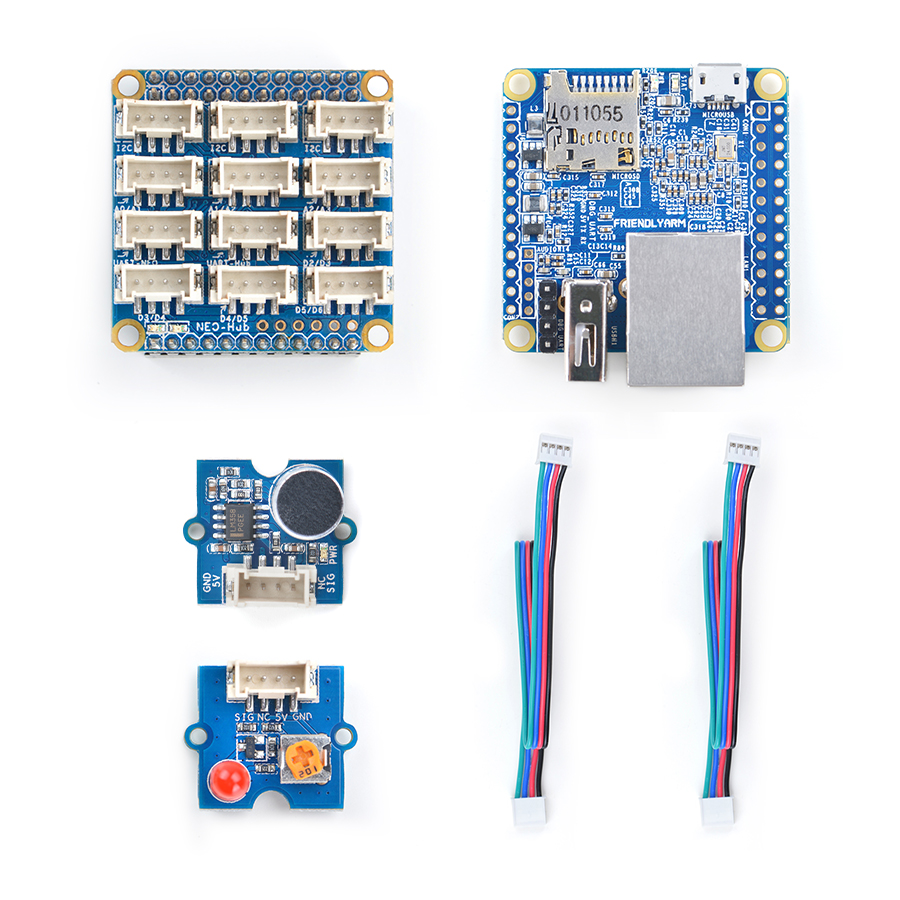
Connect the Sound Sensor module to the NanoHat Hub's A0 and the LED module to the NanoHat Hub's D5:
3.2 Source Code
import time
import bakebit

# Connect the BakeBit Sound Sensor to analog port A0
# SIG,NC,VCC,GND
sound_sensor = 0

# Connect the BakeBit LED to digital port D5
# SIG,NC,VCC,GND
led = 5

bakebit.pinMode(sound_sensor,"INPUT")
bakebit.pinMode(led,"OUTPUT")

# The threshold to turn the led on 400.00 * 5 / 1024 = 1.95v
threshold_value = 400

while True:
    try:
        # Read the sound level
        sensor_value = bakebit.analogRead(sound_sensor)

        # If loud, illuminate LED, otherwise dim
        if sensor_value > threshold_value:
            bakebit.digitalWrite(led,1)
        else:
            bakebit.digitalWrite(led,0)

        print("sensor_value = %d" %sensor_value)
        time.sleep(.2)

    except IOError:
        print ("Error")
3.3 Run Code Sample
Before you run the code sample you need to follow the steps in bakebit tutorial to install the BakeBit package.
Enter the "BakeBit/Software/Python" directory and run the "bakebit_sound_sensor.py" program:
cd ~/BakeBit/Software/Python
sudo python bakebit_sound_sensor.py
3.4 Observation
When you make some sounds to the sound sensor and if the sounds are big enough the LED will be turned on.
4 Resources
- [Schematic](BakeBit - Sound Sensor.pdf)
- [BakeBit Github Project Page](https://github.com/friendlyarm/BakeBit)
- [BakeBit Starter Kit User's Manual](http://wiki.friendlyarm.com/bakebit/bakebit_starter_kit_manual_en.pdf)
5 Update Log
5.1 December-14-2016
- Released English version
5.2 Jan-19-2017
- Renamed "NEO-Hub" to "NanoHat-Hub"
5.3 Jan-20-2017
- Renamed "NanoHat-Hub" to "NanoHat Hub"


