Difference between revisions of "BakeBit - Rotary Angle Sensor"
(→示例程序(2):Servo and Rotary Angle Sensor) |
|||
| (6 intermediate revisions by the same user not shown) | |||
| Line 27: | Line 27: | ||
A [[BakeBit - Rotary Angle Sensor]] module is needed in this test case. | A [[BakeBit - Rotary Angle Sensor]] module is needed in this test case. | ||
| − | === Hardware | + | === Hardware Setup === |
| − | Connect the LED module to the | + | Connect the LED module to the NanoHat Hub's D5 and the [[BakeBit - Rotary Angle Sensor]] module to the NanoHat Hub's A0: |
::{| class="wikitable" | ::{| class="wikitable" | ||
| Line 91: | Line 91: | ||
=== Run Code Sample === | === Run Code Sample === | ||
| − | Before you run the code sample you need to follow the steps in [http://wiki.friendlyarm.com/bakebit bakebit tutorial] to | + | Before you run the code sample you need to follow the steps in [http://wiki.friendlyarm.com/bakebit bakebit tutorial] to install the BakeBit package.<br /> |
Enter the "BakeBit/Software/Python" directory and run the "bakebit_rotary_angle_sensor.py" program: | Enter the "BakeBit/Software/Python" directory and run the "bakebit_rotary_angle_sensor.py" program: | ||
<syntaxhighlight lang="bash"> | <syntaxhighlight lang="bash"> | ||
| Line 97: | Line 97: | ||
sudo python bakebit_rotary_angle_sensor.py | sudo python bakebit_rotary_angle_sensor.py | ||
</syntaxhighlight> | </syntaxhighlight> | ||
| − | |||
=== Observation === | === Observation === | ||
| Line 107: | Line 106: | ||
A [[BakeBit - Servo]] is needed in this test case. For more details about the servo module refer to the [[BakeBit - Servo]] page. | A [[BakeBit - Servo]] is needed in this test case. For more details about the servo module refer to the [[BakeBit - Servo]] page. | ||
| − | == | + | == Code Sample(3): LED Bar and Rotary Angle Sensor == |
| − | + | This code sample shows how to adjust sound volume with the rotary angle sensor module.<br /> | |
| − | + | A [[BakeBit - LED Bar]] is needed in this test case. For more details about the LED Bar refer to the [[BakeBit - LED Bar]] page. | |
| − | == | + | ==Resources== |
*[Schematic]([http://wiki.friendlyarm.com/wiki/images/0/01/03-SCHEMATIC_Rotary_Angle_Senso.pdf BakeBit - Rotary Angle Sensor.pdf]) | *[Schematic]([http://wiki.friendlyarm.com/wiki/images/0/01/03-SCHEMATIC_Rotary_Angle_Senso.pdf BakeBit - Rotary Angle Sensor.pdf]) | ||
| − | *[BakeBit | + | *[BakeBit Github Project Page](https://github.com/friendlyarm/BakeBit) |
| − | *[BakeBit Starter | + | *[BakeBit Starter Kit User's Manual](http://wiki.friendlyarm.com/bakebit/bakebit_starter_kit_manual_en.pdf) |
| + | |||
| + | ==Update Log== | ||
| + | ===December-13-2016=== | ||
| + | * Released English version | ||
| + | |||
| + | ===Jan-19-2017=== | ||
| + | * Renamed "NEO-Hub" to "NanoHat-Hub" | ||
| + | |||
| + | ===Jan-20-2017=== | ||
| + | * Renamed "NanoHat-Hub" to "NanoHat Hub" | ||
Latest revision as of 08:16, 20 January 2017
Contents
1 Introduction
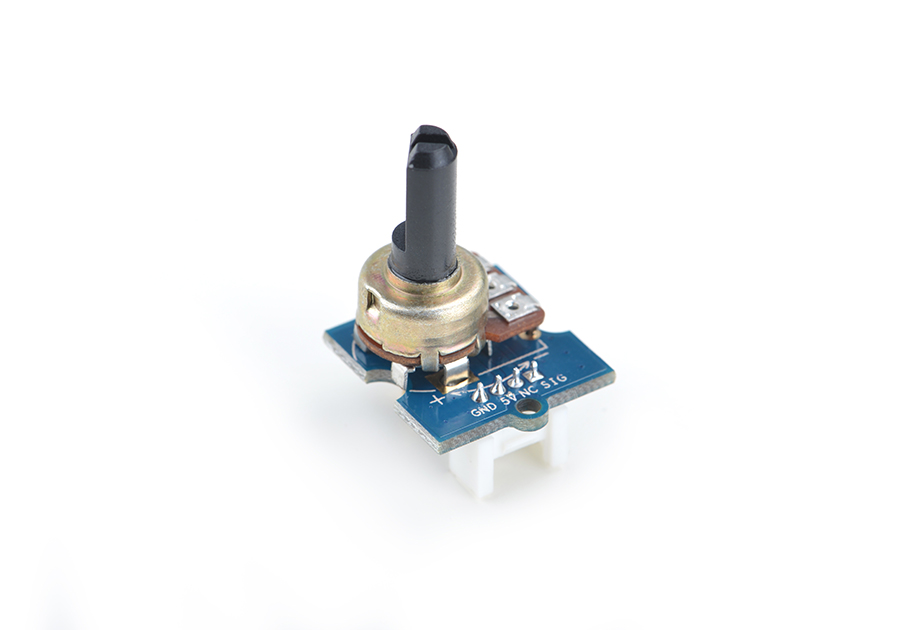
- The BakeBit - Rotary Angle Sensor module is a rotary sensor module. It acts as a variable resistor or rheostat.When the nub is rotated the resistance will change.
2 Hardware Spec
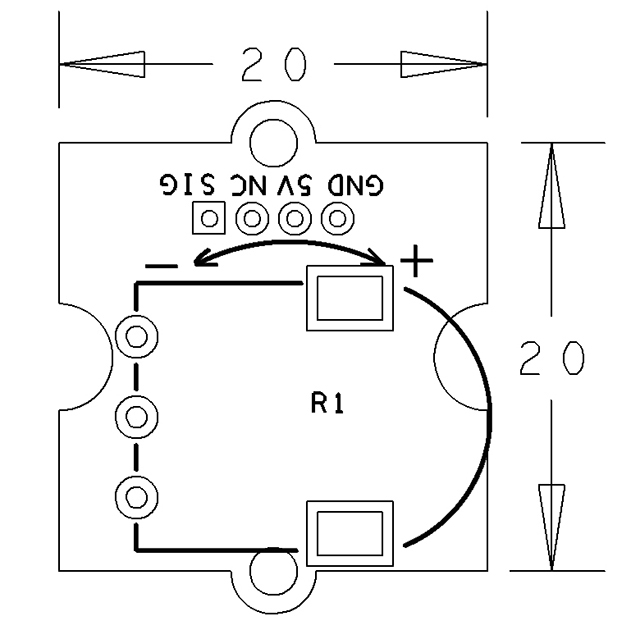
- Standard 2.0mm pitch 4-Pin BakeBit Interface
- Pin Description:
| Pin | Description |
| GND | Ground |
| 5V | 5V Supply Voltage |
| NC | Not Connected |
| SIG | Signal |
3 Code Sample(1): LED Fade
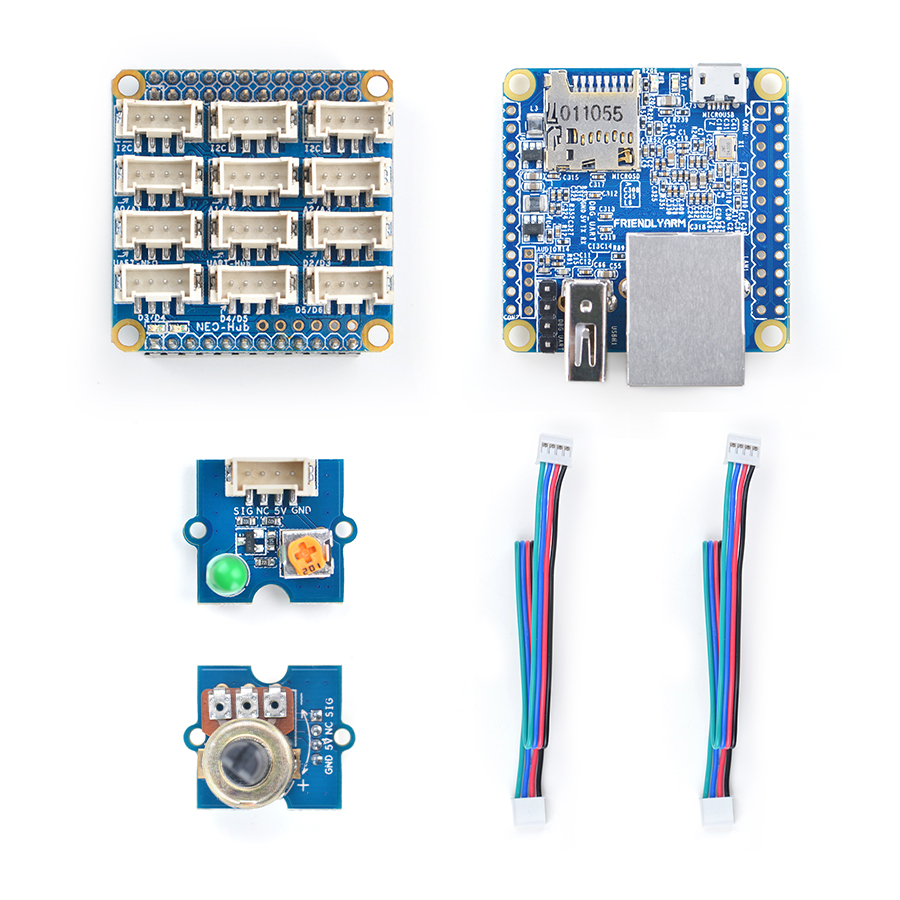
A BakeBit - Rotary Angle Sensor module is needed in this test case.
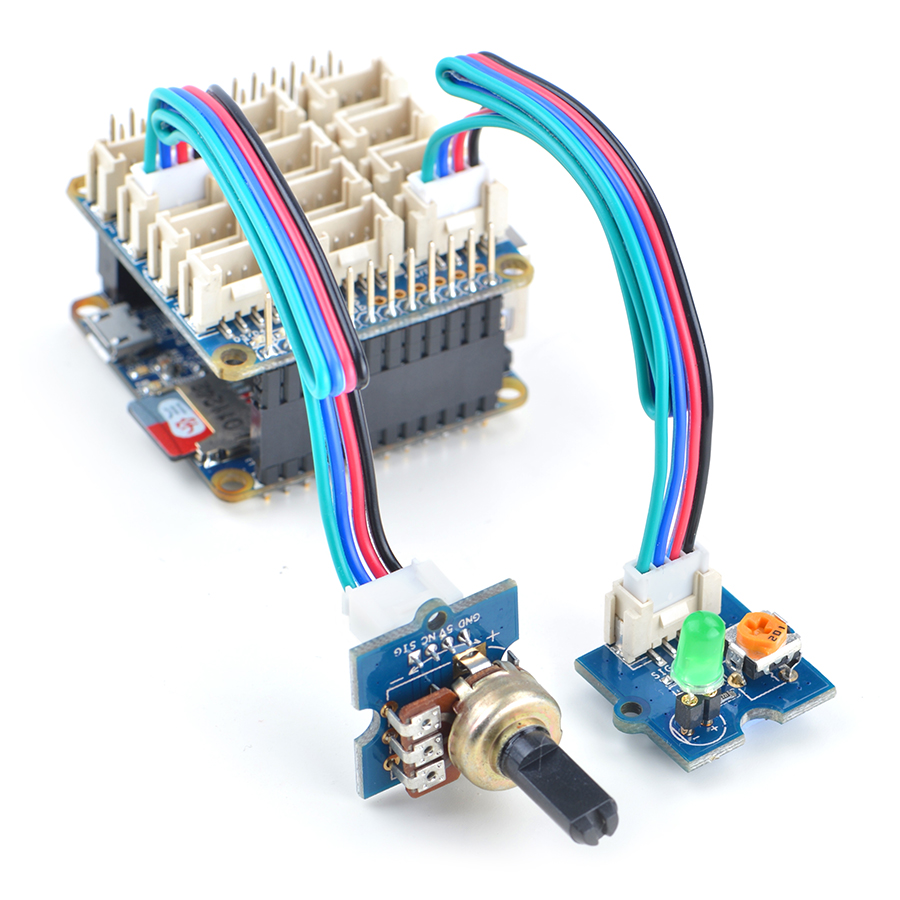
3.1 Hardware Setup
Connect the LED module to the NanoHat Hub's D5 and the BakeBit - Rotary Angle Sensor module to the NanoHat Hub's A0:
3.2 Source Code
import time
import bakebit

# Connect the BakeBit Rotary Angle Sensor to analog port A0
# SIG,NC,VCC,GND
potentiometer = 0

# Connect the LED to digital port D5
# SIG,NC,VCC,GND
led = 5

bakebit.pinMode(potentiometer,"INPUT")
bakebit.pinMode(led,"OUTPUT")
time.sleep(1)

# Reference voltage of ADC is 5v
adc_ref = 5

# Vcc of the BakeBit interface is normally 5v
bakebit_vcc = 5

# Full value of the rotary angle is 300 degrees, as per it's specs (0 to 300)
full_angle = 300

while True:
    try:
        # Read sensor value from potentiometer
        sensor_value = bakebit.analogRead(potentiometer)

        # Calculate voltage
        voltage = round((float)(sensor_value) * adc_ref / 1023, 2)

        # Calculate rotation in degrees (0 to 300)
        degrees = round((voltage * full_angle) / bakebit_vcc, 2)

        # Calculate LED brightess (0 to 255) from degrees (0 to 300)
        brightness = int(degrees / full_angle * 255)

        # Give PWM output to LED
        bakebit.analogWrite(led,brightness)

        print("sensor_value = %d voltage = %.2f degrees = %.1f brightness = %d" %(sensor_value, voltage, degrees, brightness))
    except KeyboardInterrupt:
        bakebit.analogWrite(led,0)
        break
    except IOError:
        print ("Error")
3.3 Run Code Sample
Before you run the code sample you need to follow the steps in bakebit tutorial to install the BakeBit package.
Enter the "BakeBit/Software/Python" directory and run the "bakebit_rotary_angle_sensor.py" program:
cd ~/BakeBit/Software/Python
sudo python bakebit_rotary_angle_sensor.py
3.4 Observation
When you rotate the rotary angle sensor module the LED’s luminance will change accordingly.
4 Code Sample(2): Servo and Rotary Angle Sensor
This code sample shows how to control a servo with the Rotary Angle Sensor module.
A BakeBit - Servo is needed in this test case. For more details about the servo module refer to the BakeBit - Servo page.
5 Code Sample(3): LED Bar and Rotary Angle Sensor
This code sample shows how to adjust sound volume with the rotary angle sensor module.
A BakeBit - LED Bar is needed in this test case. For more details about the LED Bar refer to the BakeBit - LED Bar page.
6 Resources
- [Schematic](BakeBit - Rotary Angle Sensor.pdf)
- [BakeBit Github Project Page](https://github.com/friendlyarm/BakeBit)
- [BakeBit Starter Kit User's Manual](http://wiki.friendlyarm.com/bakebit/bakebit_starter_kit_manual_en.pdf)
7 Update Log
7.1 December-13-2016
- Released English version
7.2 Jan-19-2017
- Renamed "NEO-Hub" to "NanoHat-Hub"
7.3 Jan-20-2017
- Renamed "NanoHat-Hub" to "NanoHat Hub"


