Difference between revisions of "Template:S5Pxx18-SPI-2.8TFT"
(→Connect SPI 2.8"LCD to S5P4418/S5P6818 Based Board) |
|||
| (4 intermediate revisions by 2 users not shown) | |||
| Line 1: | Line 1: | ||
| − | === | + | ===S5P4418/S5P6818=== |
| − | The following steps only apply to Kernel Linux-4.4. We took the NanoPi Fire3 as an example. Run the following commands to initialize FriendlyElec's 2.8" SPI LCD. | + | The following steps only apply to Kernel Linux-4.4. We took the NanoPi Fire3 as an example. Run the following commands to initialize FriendlyElec's 2.8" SPI LCD. These commands need to be run only once. <br /> |
| − | + | ||
<syntaxhighlight lang="bash"> | <syntaxhighlight lang="bash"> | ||
sudo mount /dev/mmcblk0p1 /boot | sudo mount /dev/mmcblk0p1 /boot | ||
| Line 23: | Line 22: | ||
The "Hardware" here is "NANOPI3", "Revision" is "0005", "CPU" is "S5P6818", therefore the NanoPi Fire3's kernel dtb file name is "s5p6818-nanopi3-rev05.dtb".<br /> | The "Hardware" here is "NANOPI3", "Revision" is "0005", "CPU" is "S5P6818", therefore the NanoPi Fire3's kernel dtb file name is "s5p6818-nanopi3-rev05.dtb".<br /> | ||
<br /> | <br /> | ||
| − | + | After the dtb file is confirmed you can reboot your board and run the following command to check if the fb_st7789v module is loaded: | |
<syntaxhighlight lang="bash"> | <syntaxhighlight lang="bash"> | ||
lsmod | lsmod | ||
</syntaxhighlight> | </syntaxhighlight> | ||
| − | + | Here is what you expect to see:<br /> | |
Module Size Used by<br /> | Module Size Used by<br /> | ||
fb_st7789v 3315 0<br /> | fb_st7789v 3315 0<br /> | ||
| Line 33: | Line 32: | ||
<br /> | <br /> | ||
| − | + | Or you can run dmesg to check that. In our case after we ran dmesg we found that the SPI LCD was recognized as an "fb1" device: | |
<syntaxhighlight lang="bash"> | <syntaxhighlight lang="bash"> | ||
dmesg | grep fb_st7789v | dmesg | grep fb_st7789v | ||
</syntaxhighlight> | </syntaxhighlight> | ||
| − | + | Here is what you expect to see:<br /> | |
[ 6.728000] fb_st7789v: module is from the staging directory, the quality is unknown, you have been warned.<br /> | [ 6.728000] fb_st7789v: module is from the staging directory, the quality is unknown, you have been warned.<br /> | ||
[ 6.908000] graphics fb1: fb_st7789v frame buffer, 320x240, 150 KiB video memory, 4 KiB buffer memory, fps=35, spi0.0 at 50 MHz<br /> | [ 6.908000] graphics fb1: fb_st7789v frame buffer, 320x240, 150 KiB video memory, 4 KiB buffer memory, fps=35, spi0.0 at 50 MHz<br /> | ||
| − | + | Now as long as you set your system's framebuffer device to fb1 in either Qt or X-Windows you will see output in your LCD. | |
| − | + | ====Launch Lubuntu Desktop on 2.8"LCD==== | |
| − | ==== | + | On lubuntu desktop run the following commands: <br /> |
| − | + | Firstly remove the armsoc configuration file: | |
| − | + | ||
<syntaxhighlight lang="bash"> | <syntaxhighlight lang="bash"> | ||
sudo rm -f /usr/share/X11/xorg.conf.d/20-armsoc.conf | sudo rm -f /usr/share/X11/xorg.conf.d/20-armsoc.conf | ||
</syntaxhighlight> | </syntaxhighlight> | ||
| − | + | Secondly create a new configuration file /etc/X11/xorg.conf: | |
<syntaxhighlight lang="bash"> | <syntaxhighlight lang="bash"> | ||
sudo vi /etc/X11/xorg.conf | sudo vi /etc/X11/xorg.conf | ||
</syntaxhighlight> | </syntaxhighlight> | ||
| − | + | Here is its content: | |
<syntaxhighlight lang="bash"> | <syntaxhighlight lang="bash"> | ||
Section "Monitor" | Section "Monitor" | ||
| Line 69: | Line 67: | ||
EndSection | EndSection | ||
</syntaxhighlight> | </syntaxhighlight> | ||
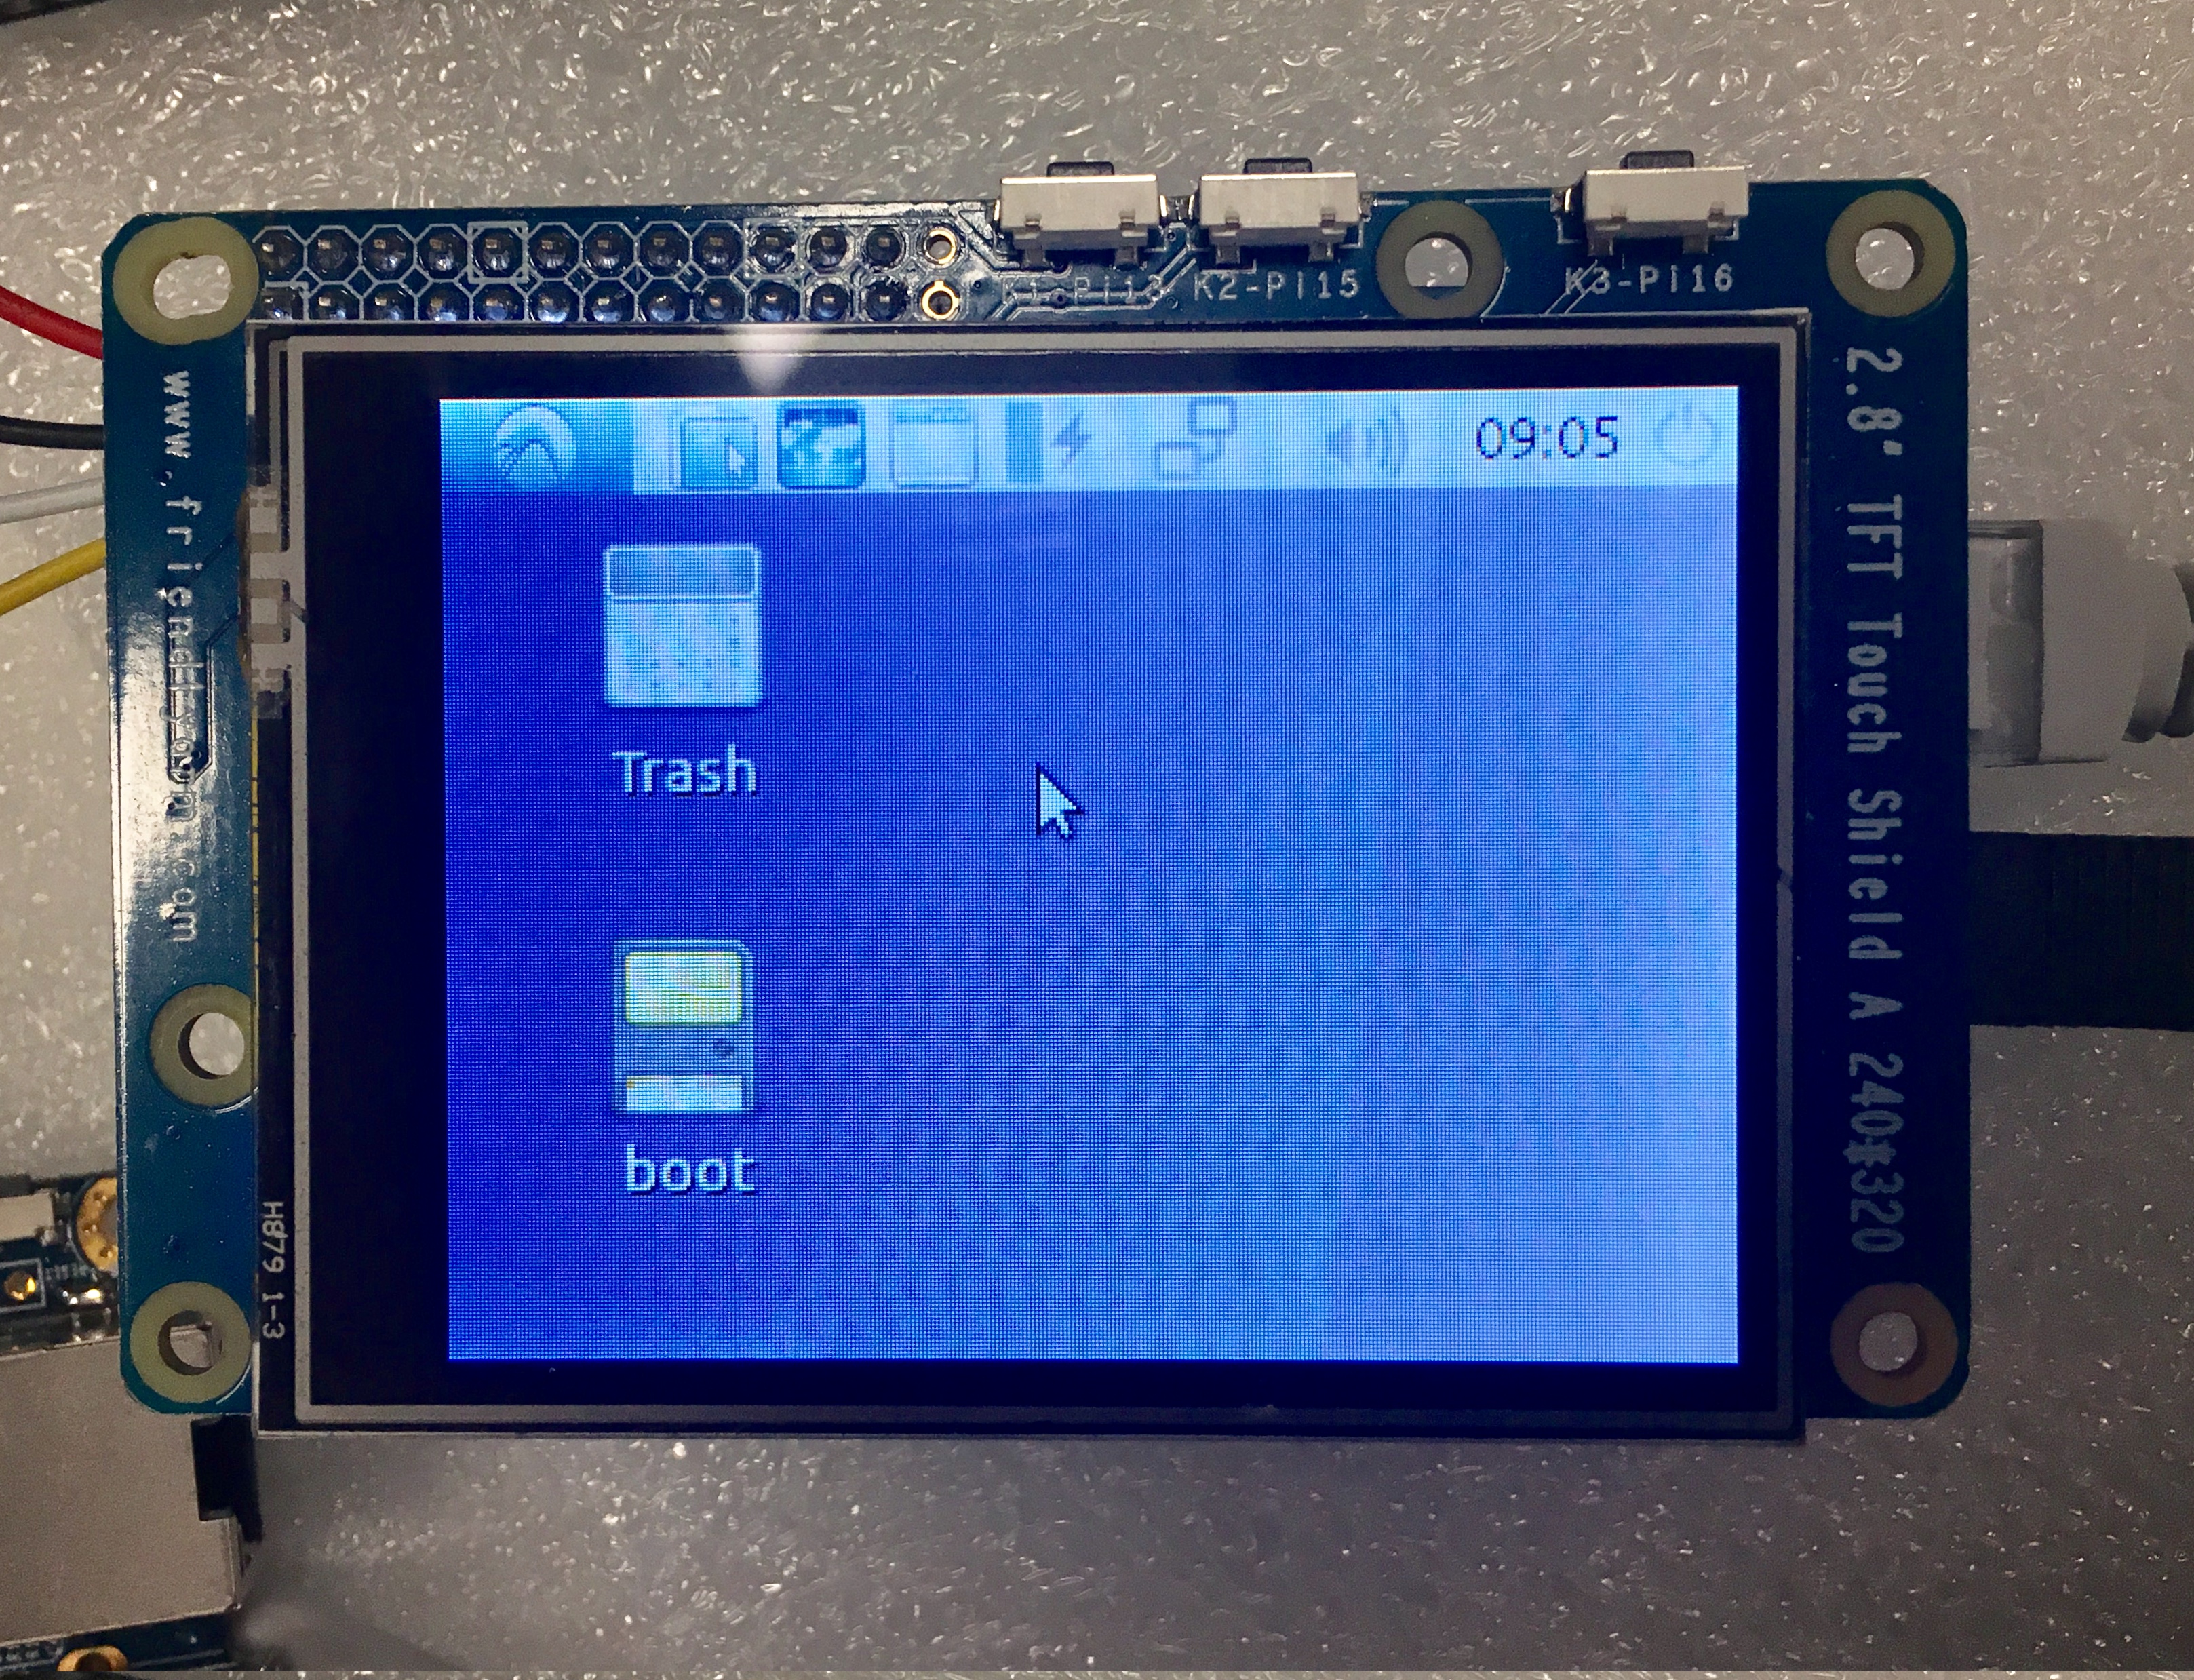
| − | + | After reboot you will see the following GUI:<br /> | |
[[File:s5pxx18-lubuntu-spi2.8tft.png|frameless|600px|s5pxx18-lubuntu-spi2.8tft.png]]<br /> | [[File:s5pxx18-lubuntu-spi2.8tft.png|frameless|600px|s5pxx18-lubuntu-spi2.8tft.png]]<br /> | ||
| − | + | A touch panel is currently not supported yet. You need to use a mouse and keyboard to operate. | |
| − | ==== | + | ====Run Qt Application on 2.8"LCD==== |
| − | + | Open a terminal in friendly-core and run the following commands to start a Qt demo: | |
<syntaxhighlight lang="bash"> | <syntaxhighlight lang="bash"> | ||
. setqt5env | . setqt5env | ||
| Line 82: | Line 80: | ||
$QTDIR/examples/widgets/widgets/tetrix/tetrix | $QTDIR/examples/widgets/widgets/tetrix/tetrix | ||
</syntaxhighlight> | </syntaxhighlight> | ||
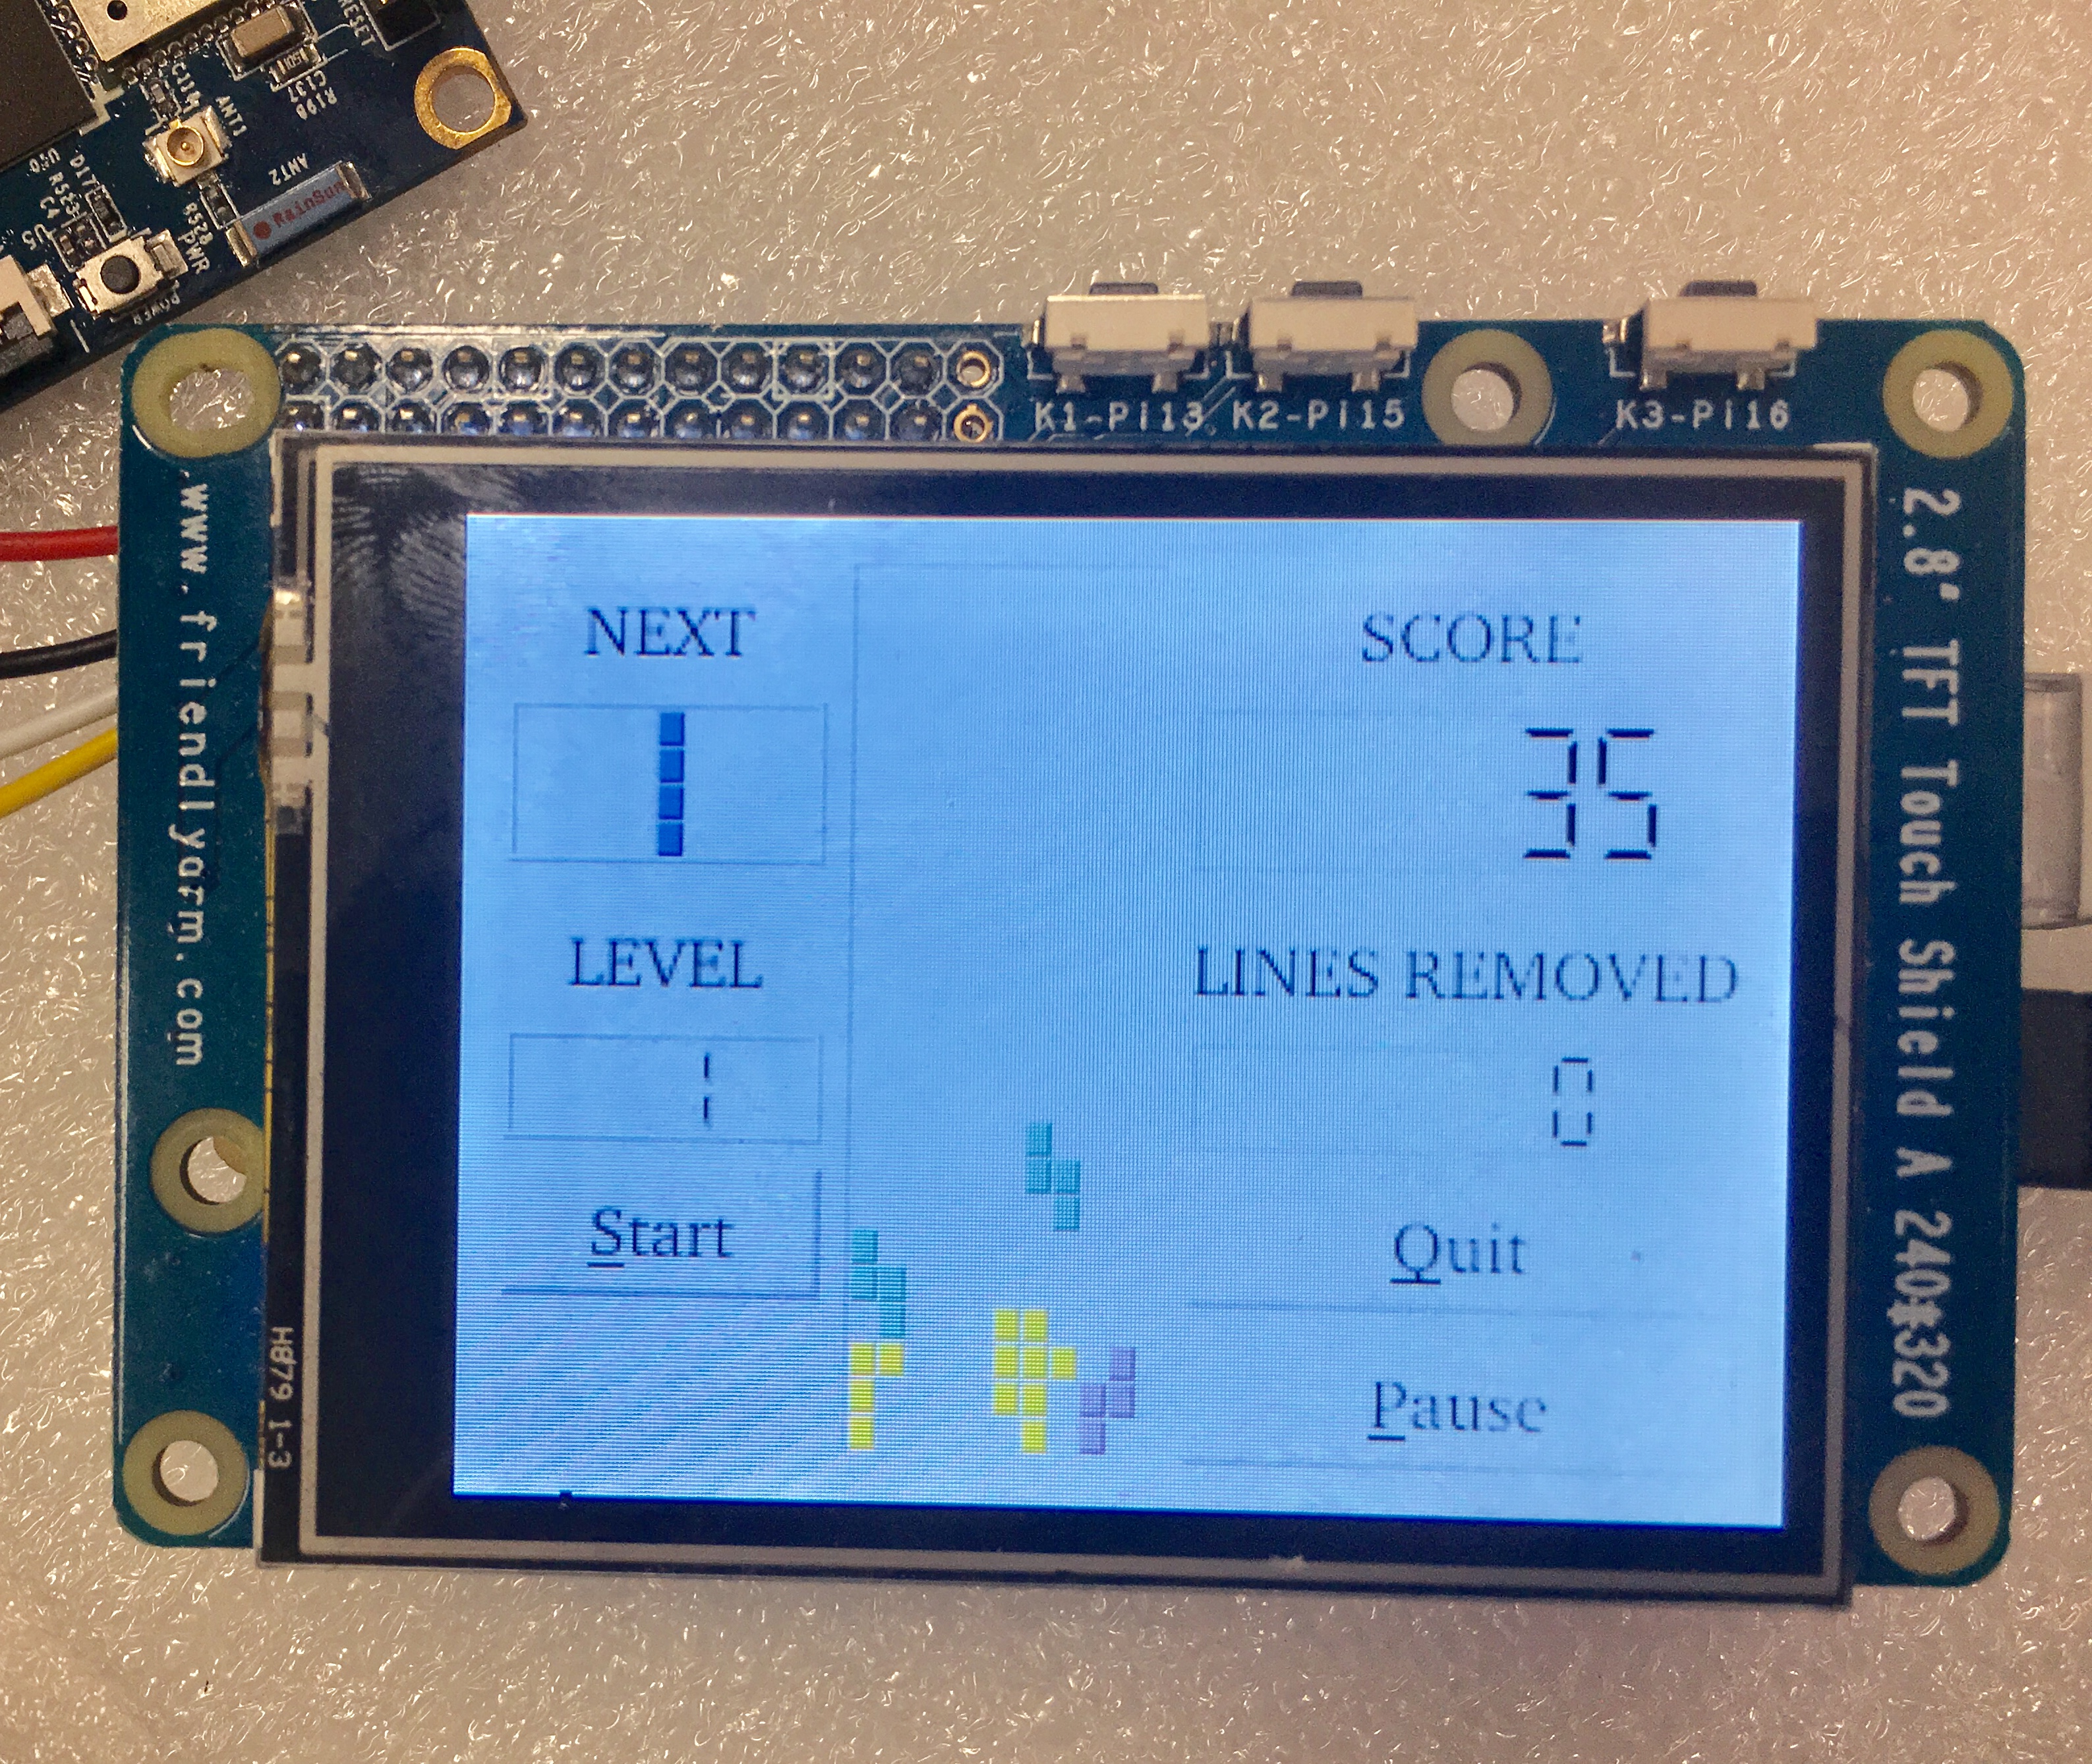
| − | + | Here is a Qt demo:<br /> | |
[[File:S5pxx18-friendlycore-spi2.8tft.png|frameless|600px|s5pxx18-lubuntu-spi2.8tft.png]]<br /> | [[File:S5pxx18-friendlycore-spi2.8tft.png|frameless|600px|s5pxx18-lubuntu-spi2.8tft.png]]<br /> | ||
| − | + | A touch panel is currently not supported yet. You need to use a mouse and keyboard to operate. | |
| + | |||
| + | ==Update Log== | ||
| + | ===Dec-15-2017=== | ||
| + | * Released English version | ||
Latest revision as of 02:26, 21 December 2018
Contents
1 S5P4418/S5P6818
The following steps only apply to Kernel Linux-4.4. We took the NanoPi Fire3 as an example. Run the following commands to initialize FriendlyElec's 2.8" SPI LCD. These commands need to be run only once.
sudo mount /dev/mmcblk0p1 /boot
sudo apt-get update
sudo apt-get install device-tree-compiler
sudo fdtput /boot/s5p6818-nanopi3-rev05.dtb spi0/spidev@0 status -t s "disabled"
sudo fdtget /boot/s5p6818-nanopi3-rev05.dtb spi0/spidev@0 status
sudo fdtput /boot/s5p6818-nanopi3-rev05.dtb spi0/fbtft@0 status -t s "okay"
sudo fdtget /boot/s5p6818-nanopi3-rev05.dtb spi0/fbtft@0 status
sudo reboot
Note: the "s5p6818-nanopi3-rev05.dtb" file is the kernel dtb file for the NanoPi Fire3. For another board you need to check its system's "/sys/devices/platform/board/info" file to figure out its dtb file.:
cat /sys/devices/platform/board/info
Here is the info file's content for the NanoPi Fire3:
Hardware : NANOPI3
Revision : 0005
Serial : fa6818dba7110739
The "Hardware" here is "NANOPI3", "Revision" is "0005", "CPU" is "S5P6818", therefore the NanoPi Fire3's kernel dtb file name is "s5p6818-nanopi3-rev05.dtb".
After the dtb file is confirmed you can reboot your board and run the following command to check if the fb_st7789v module is loaded:
lsmodHere is what you expect to see:
Module Size Used by
fb_st7789v 3315 0
fbtft 31881 1 fb_st7789v
Or you can run dmesg to check that. In our case after we ran dmesg we found that the SPI LCD was recognized as an "fb1" device:
dmesg | grep fb_st7789v
Here is what you expect to see:
[ 6.728000] fb_st7789v: module is from the staging directory, the quality is unknown, you have been warned.
[ 6.908000] graphics fb1: fb_st7789v frame buffer, 320x240, 150 KiB video memory, 4 KiB buffer memory, fps=35, spi0.0 at 50 MHz
Now as long as you set your system's framebuffer device to fb1 in either Qt or X-Windows you will see output in your LCD.
1.1 Launch Lubuntu Desktop on 2.8"LCD
On lubuntu desktop run the following commands:
Firstly remove the armsoc configuration file:
sudo rm -f /usr/share/X11/xorg.conf.d/20-armsoc.conf
Secondly create a new configuration file /etc/X11/xorg.conf:
sudo vi /etc/X11/xorg.conf
Here is its content:
Section "Monitor"
    Identifier          "Primary"
    VendorName          "FriendlyARM"
EndSection

Section "Device"
    Identifier          "Primary"
    Driver              "fbdev"
    Option              "fbdev" "/dev/fb1"
EndSection
After reboot you will see the following GUI:

A touch panel is currently not supported yet. You need to use a mouse and keyboard to operate.
1.2 Run Qt Application on 2.8"LCD
Open a terminal in friendly-core and run the following commands to start a Qt demo:
. setqt5env
export QT_QPA_PLATFORM=linuxfb:fb=/dev/fb1
export QT_QPA_EGLFS_TSLIB=1
export QT_QPA_GENERIC_PLUGINS=tslib,evdevkeyboard
$QTDIR/examples/widgets/widgets/tetrix/tetrix
Here is a Qt demo:

A touch panel is currently not supported yet. You need to use a mouse and keyboard to operate.
2 Update Log
2.1 Dec-15-2017
- Released English version