Difference between revisions of "NanoPi K2"
(→Update Log) |
(updated by API) |
||
| (15 intermediate revisions by 2 users not shown) | |||
| Line 16: | Line 16: | ||
* Wireless:802.11 b/g/n | * Wireless:802.11 b/g/n | ||
* Bluetooth:4.0 dual mode | * Bluetooth:4.0 dual mode | ||
| − | * Antenna: One onboard porcelain antenna shared by both WiFi and Bluetooth. One individual | + | * Antenna: One onboard porcelain antenna shared by both WiFi and Bluetooth. One individual IPEX connector. |
* IR: Onboard IR receiver | * IR: Onboard IR receiver | ||
* Audio: Via HDMI/Bluetooth | * Audio: Via HDMI/Bluetooth | ||
| Line 157: | Line 157: | ||
::#VDD_5V: 5V power output5V. The input range is 4.7V ~ 5.6V | ::#VDD_5V: 5V power output5V. The input range is 4.7V ~ 5.6V | ||
::#All pins are 3.3V | ::#All pins are 3.3V | ||
| − | ::#For more details refer to the document:[http://wiki. | + | ::#For more details refer to the document:[http://wiki.friendlyelec.com/wiki/images/d/d1/NanoPi-K2-1701-Schematic.pdf NanoPi-K2-1701-Schematic.pdf] |
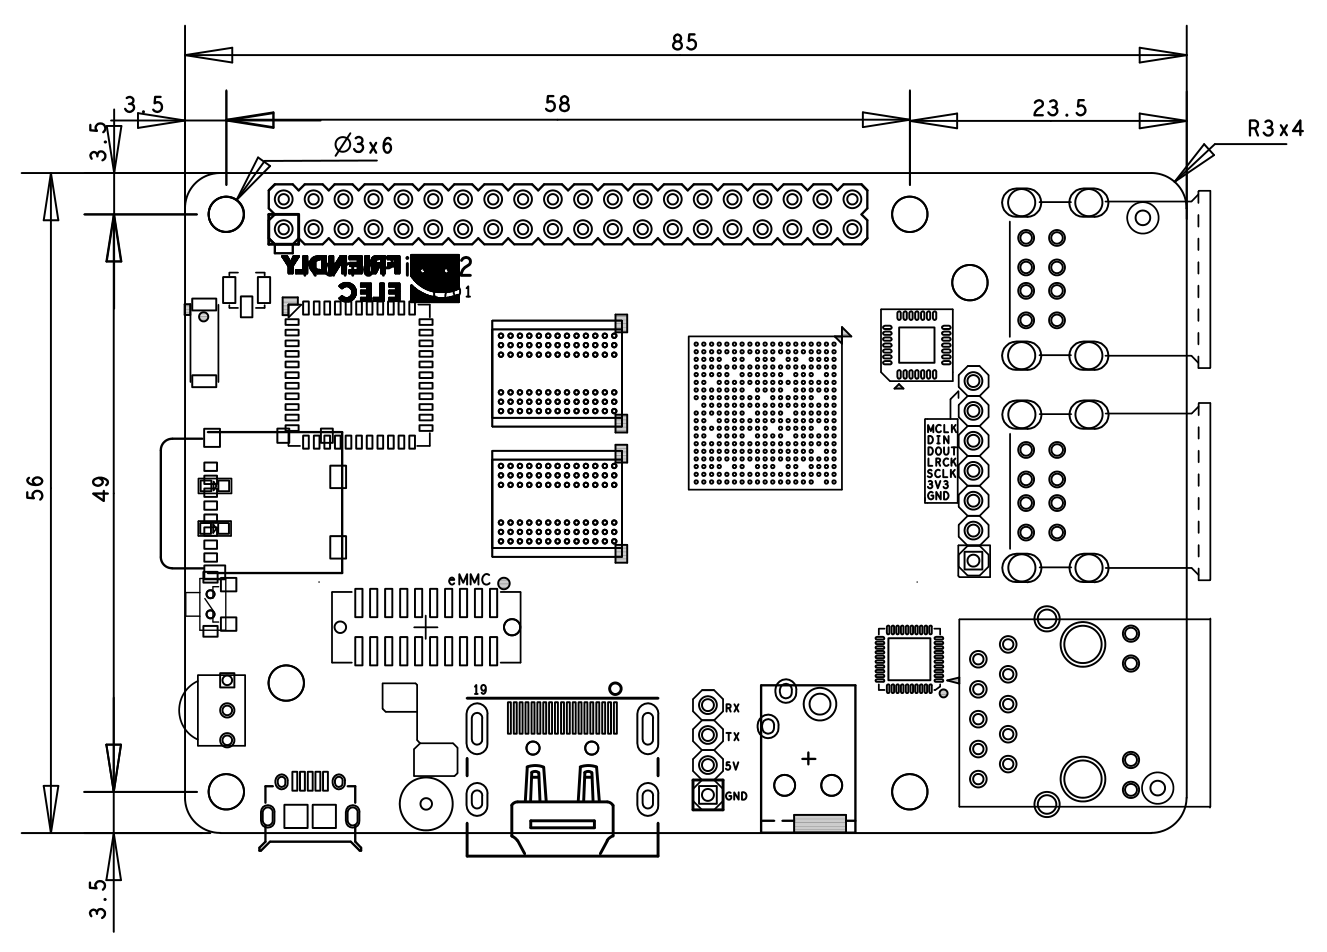
===Board Dimension=== | ===Board Dimension=== | ||
[[File:NanoPi-K2-1701-Dim.png|frameless|500px|NanoPi K2 Dimensions]] | [[File:NanoPi-K2-1701-Dim.png|frameless|500px|NanoPi K2 Dimensions]] | ||
| − | ::For more details refer to the document:[http://wiki. | + | ::For more details refer to the document:[http://wiki.friendlyelec.com/wiki/images/2/26/NanoPi-K2-1701-dxf.zip NanoPi-K2-1701-dxf.zip] |
==Get Started== | ==Get Started== | ||
| Line 172: | Line 172: | ||
* HDMI monitor | * HDMI monitor | ||
* USB keyboard and USB mouse | * USB keyboard and USB mouse | ||
| − | * A host computer running Ubuntu | + | * A host computer running Ubuntu 18.04 64 bit system |
| − | + | {{TFCardsWeTested}} | |
| − | + | ||
| − | + | ||
| − | + | ||
| − | + | ||
| − | + | ||
| − | + | ||
| − | + | ||
| − | + | ||
| − | + | ||
| − | + | ||
| − | + | ||
| − | + | ||
| + | ===Make an Installation TF Card/eMMC Module=== | ||
| + | ====Boot OS from TF Card/eMMC Module==== | ||
| + | Get the following files from [http://dl.friendlyelec.com/nanopik2 download link]: <br /> | ||
| + | * Download needed image files and utilities | ||
::{| class="wikitable" | ::{| class="wikitable" | ||
|- | |- | ||
| − | |colspan=2|Image | + | |colspan=2|Image File: |
|- | |- | ||
| − | |nanopi-k2_android_5.1.1-YYYYMMDD.img.zip || Android5.1 Image File | + | |nanopi-k2_android_5.1.1-YYYYMMDD.img.zip || Android5.1 Image File for flashing a TF card |
|- | |- | ||
| − | |nanopi-k2_ubuntu_core_xenial-YYYYMMDD.img.zip || Ubuntu-Core with Qt-Embedded Image File | + | |nanopi-k2_ubuntu_core_xenial-YYYYMMDD.img.zip || Ubuntu-Core with Qt-Embedded Image File for flashing a TF card |
| + | |- | ||
| + | |nanopi-k2_android_5.1.1-emmc-YYYYMMDD.img.zip || Android5.1 Image File for flashing an eMMC module | ||
| + | |- | ||
| + | |nanopi-k2_ubuntu_core_xenial-emmc-YYYYMMDD.img.zip || Ubuntu-Core with Qt-Embedded Image File for flashing an eMMC module | ||
|- | |- | ||
|colspan=2|Flash Utility: | |colspan=2|Flash Utility: | ||
| Line 201: | Line 197: | ||
|- | |- | ||
|} | |} | ||
| − | + | =====Flash Image to TF Card===== | |
* Extract an image file and win32diskimager.rar. Insert a TF card(at least 8G) into a Windows PC and run the win32diskimager utility as administrator. On the utility's main window select your TF card's drive, the wanted image file and click on "write" to start flashing the TF card. | * Extract an image file and win32diskimager.rar. Insert a TF card(at least 8G) into a Windows PC and run the win32diskimager utility as administrator. On the utility's main window select your TF card's drive, the wanted image file and click on "write" to start flashing the TF card. | ||
* Insert this card into your NanoPi K2's BOOT slot and power on (with a 5V/2A power source). If both the green LED and blue LED are solid on this indicates your NanoPi K2 has successfully booted.<br /> | * Insert this card into your NanoPi K2's BOOT slot and power on (with a 5V/2A power source). If both the green LED and blue LED are solid on this indicates your NanoPi K2 has successfully booted.<br /> | ||
| + | |||
| + | =====Flash Image to eMMC Module===== | ||
| + | * Extract an image file and win32diskimager.rar on a Window PC. Connect an eMMC module to a TF card to eMMC adapter, insert this TF card adapter to a TF to USB adapter and insert this USB adapter to the Windows PC. Run the win32diskimager utility as administrator. On the utility's main window select this TF adapter's drive, the wanted image file and click on "write" to start flashing the eMMC module. | ||
| + | [[File:EMMC_module_1.jpg|400px]][[File:EMMC_module_4.jpg|400px]] | ||
| + | * After flashing is done take off the eMMC module of the TF card adapter. Insert the eMMC module to the eMMC slot on a NanoPi K2 and power on (with a 5V/2A power source) the board. If both the green LED and blue LED are solid on this indicates your NanoPi K2 has successfully booted.<br /> | ||
| + | [[File:Emmc_k2.jpg|400px]] | ||
| + | * When a K2 board has both a TF card and an eMMC module inserted it will always boot from the eMMC module. If you want to boot your K2 from a TF card just insert a TF card only and leave the eMMC slot empty. | ||
====Make Installation Card under Linux Desktop==== | ====Make Installation Card under Linux Desktop==== | ||
| − | *1) Insert your | + | *1) Insert your TF card/TF adapter with eMMC flash into a host computer running Ubuntu and check your SD card's device name |
<syntaxhighlight lang="bash"> | <syntaxhighlight lang="bash"> | ||
dmesg | tail | dmesg | tail | ||
| Line 218: | Line 221: | ||
</syntaxhighlight> | </syntaxhighlight> | ||
| − | *3) Make Android | + | *3) Make Android TF Card |
<syntaxhighlight lang="bash"> | <syntaxhighlight lang="bash"> | ||
su | su | ||
| − | ./fusing.sh /dev/sdx | + | ./fusing.sh /dev/sdx android |
</syntaxhighlight> | </syntaxhighlight> | ||
(Note: you need to replace "/dev/sdx" with the device name in your system)<br/> | (Note: you need to replace "/dev/sdx" with the device name in your system)<br/> | ||
When you run the script for the first time it will prompt you to download an image you have to hit “Y” within 10 seconds otherwise you will miss the download | When you run the script for the first time it will prompt you to download an image you have to hit “Y” within 10 seconds otherwise you will miss the download | ||
| − | ====Extend NanoPi K2's | + | *4) Make Android eMMC Module |
| − | * If your board runs Ubuntu you can skip this section since Ubuntu will automatically extend your | + | <syntaxhighlight lang="bash"> |
| + | su | ||
| + | ./fusing.sh /dev/sdx android emmc | ||
| + | </syntaxhighlight> | ||
| + | (Note: you need to replace "/dev/sdx" with the device name in your system)<br/> | ||
| + | When you run the script for the first time it will prompt you to download an image you have to hit “Y” within 10 seconds otherwise you will miss the download | ||
| + | |||
| + | ====Extend NanoPi K2's TF Card/eMMC Module Section==== | ||
| + | * If your board runs Ubuntu you can skip this section since Ubuntu will automatically extend your TF card's section. When Android is loaded you need to run the following commands on your host PC to extend your TF card's section: | ||
<syntaxhighlight lang="bash"> | <syntaxhighlight lang="bash"> | ||
sudo umount /dev/sdx? | sudo umount /dev/sdx? | ||
| Line 271: | Line 282: | ||
Here is a what you expect to observe. This is an open source Qt Demo application:<br /> | Here is a what you expect to observe. This is an open source Qt Demo application:<br /> | ||
[[File:K2-QtE.png|frameless|500px|K2-QtE]]<br /> | [[File:K2-QtE.png|frameless|500px|K2-QtE]]<br /> | ||
| − | For more details about Ubuntu Core refer to: [http://wiki. | + | For more details about Ubuntu Core refer to: [http://wiki.friendlyelec.com/wiki/index.php/Ubuntu_Core_with_Qt-Embedded/zh Ubuntu Core with Qt-Embedded] |
==Make Your Own OS Image== | ==Make Your Own OS Image== | ||
| Line 330: | Line 341: | ||
</syntaxhighlight> | </syntaxhighlight> | ||
| − | After your compilation succeeds a u-boot.bin will be generated. If you want to test it flash it to your installation | + | After your compilation succeeds a u-boot.bin will be generated. If you want to test it flash it to your installation TF card via fastboot. Here is how you can do it: |
<syntaxhighlight lang="bash"> | <syntaxhighlight lang="bash"> | ||
sudo ./fusing.sh /dev/sdc | sudo ./fusing.sh /dev/sdc | ||
| + | </syntaxhighlight> | ||
| + | |||
| + | You can type the following command to update both a TF card and an eMMC Flash | ||
| + | <syntaxhighlight lang="bash"> | ||
| + | sudo ./fusing.sh /dev/sdc emmc | ||
</syntaxhighlight> | </syntaxhighlight> | ||
| Line 343: | Line 359: | ||
fastboot flash bootloader fip/gxb/u-boot.bin | fastboot flash bootloader fip/gxb/u-boot.bin | ||
</syntaxhighlight> | </syntaxhighlight> | ||
| + | We haven't found a way to update the uboot on an eMMC flash with fastboot. | ||
===Compile Linux kernel=== | ===Compile Linux kernel=== | ||
| Line 356: | Line 373: | ||
* Compile Android Kernel | * Compile Android Kernel | ||
<syntaxhighlight lang="bash"> | <syntaxhighlight lang="bash"> | ||
| − | make ARCH=arm64 nanopi- | + | touch .scmversion |
| + | make ARCH=arm64 nanopi-k2_android_defconfig | ||
make ARCH=arm64 CROSS_COMPILE=aarch64-linux-gnu- Image nanopi-k2.dtb | make ARCH=arm64 CROSS_COMPILE=aarch64-linux-gnu- Image nanopi-k2.dtb | ||
</syntaxhighlight> | </syntaxhighlight> | ||
After your compilation succeeds an arch/arm64/boot/dts/amlogic/nanopi-k2.dtb file and an arch/arm64/boot/Image will be generated. You can use them to replace the existing files under your SD card's boot section. | After your compilation succeeds an arch/arm64/boot/dts/amlogic/nanopi-k2.dtb file and an arch/arm64/boot/Image will be generated. You can use them to replace the existing files under your SD card's boot section. | ||
| + | |||
| + | * Compile Ubuntu Kernel | ||
| + | <syntaxhighlight lang="bash"> | ||
| + | touch .scmversion | ||
| + | make ARCH=arm64 nanopi-k2_ubuntu_defconfig | ||
| + | make ARCH=arm64 CROSS_COMPILE=aarch64-linux-gnu- Image nanopi-k2.dtb | ||
| + | </syntaxhighlight> | ||
====User Your Generated Kernel==== | ====User Your Generated Kernel==== | ||
| Line 379: | Line 404: | ||
===Compile Android=== | ===Compile Android=== | ||
* Install Cross Compiler | * Install Cross Compiler | ||
| − | Install a 64-bit Ubuntu | + | Install a 64-bit Ubuntu 16.04 on your host PC |
<syntaxhighlight lang="bash"> | <syntaxhighlight lang="bash"> | ||
sudo apt-get install bison g++-multilib git gperf libxml2-utils make python-networkx zip | sudo apt-get install bison g++-multilib git gperf libxml2-utils make python-networkx zip | ||
| Line 434: | Line 459: | ||
sudo fastboot reboot | sudo fastboot reboot | ||
</syntaxhighlight> | </syntaxhighlight> | ||
| + | |||
| + | {{MoreOS}} | ||
==Update Log== | ==Update Log== | ||
| Line 444: | Line 471: | ||
===July-21-2017=== | ===July-21-2017=== | ||
* Added sections 3 and 5.5 | * Added sections 3 and 5.5 | ||
| + | |||
| + | ===Nov-17-2017=== | ||
| + | * Added sections 5.3.1.2 | ||
| + | * Updated sections 5.3.1, 5.3.3, 6.2 and 6.3 | ||
Latest revision as of 07:18, 21 February 2022
Contents
1 Introduction
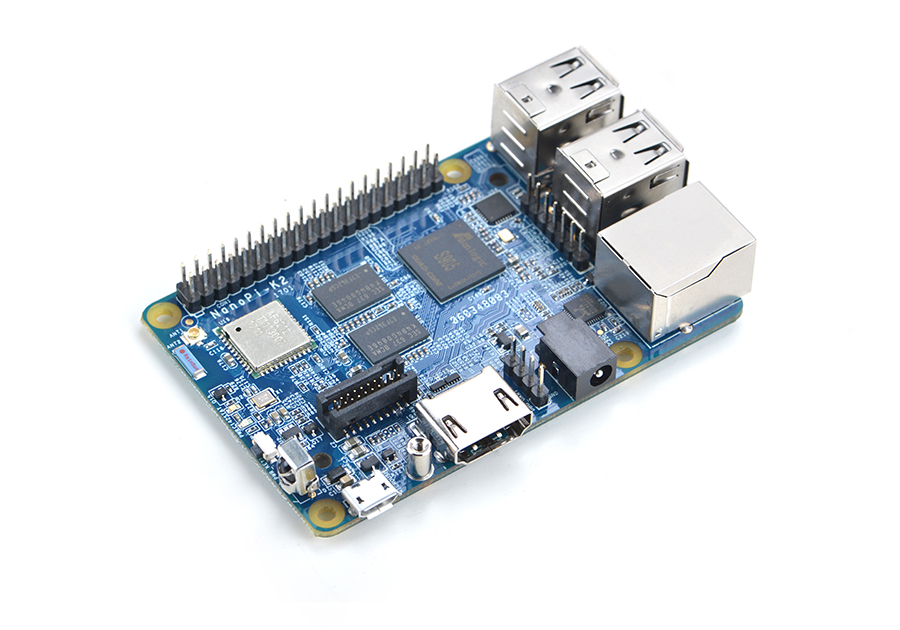
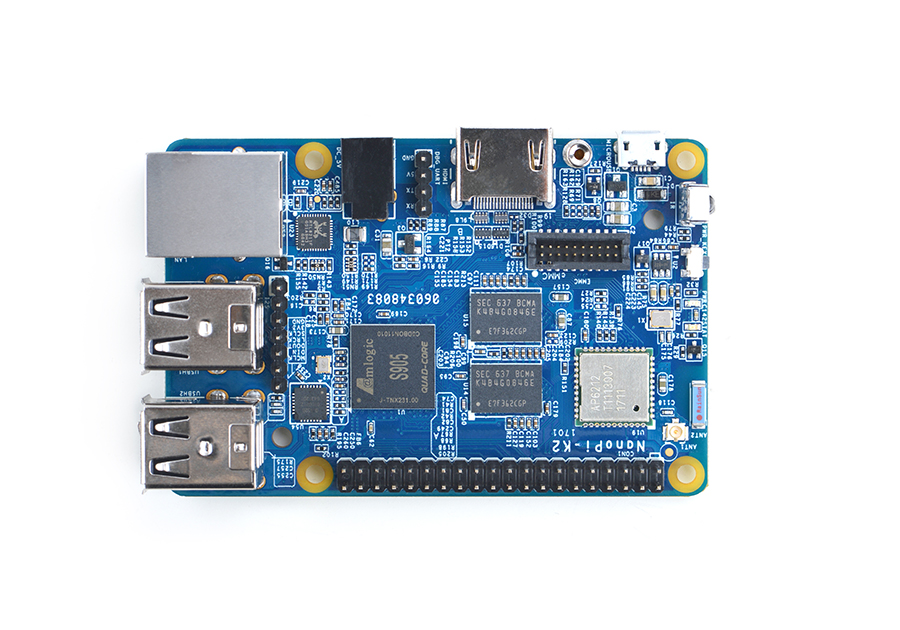
- FriendlyElec's NanoPi K2 uses Amlogic's 64-bit quad-core A53 S905 SoC. This SoC has an internal Mali450 GPU. S905's dynamic frequency scales up to 2G Hz.In FriendlyElec's tests it can scale up to 2G. Its most significant feature is that it supports various video formats and has strong video decoding capability
- The NanoPi K2 has 2GB DDR3 RAM, onboard WiFi & Bluetooth, 1000M Ethernet, USB, HDMI, IR and more. It has a socket for adding an external eMMC card. It boots an OS from a TF card. It has the same form factor, GPIO interface and port layout as the RPi 3. An Android image is ready for K2. Later on a Ubuntu image will be ready.
- A special feature of the NanoPi K2 is that it supports DVFS and can play high-definition video steams stably and smoothly. It is a good platform for applications such as advertisement machines, TV boxes, home entertainment appliances, multi-media devices and etc.
2 Hardware Spec
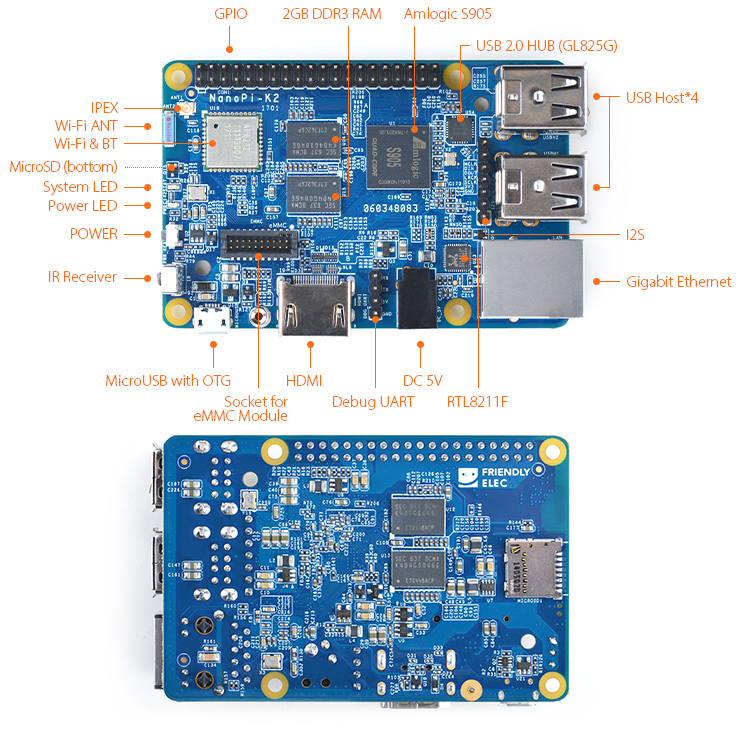
- SoC: Amlogic S905, Quad-core ARM Cortex-A53@1.5GHz, DVFS
- GPU: Penta-core ARM Mali™-450
- RAM: 2GB DDR3
- Network Connectivity: 10/100/1000M (RTL8211F)
- Wireless:802.11 b/g/n
- Bluetooth:4.0 dual mode
- Antenna: One onboard porcelain antenna shared by both WiFi and Bluetooth. One individual IPEX connector.
- IR: Onboard IR receiver
- Audio: Via HDMI/Bluetooth
- eMMC interface: eMMC socket
- I2S: 7-Pin, 2.54mm pitch pin-header
- SD: 1 x MicroSD slot
- USB Host: 4 x USB 2.0 Host, standard type A
- Micro USB: 1 x USB 2.0, OTG, power input and data transmission
- HDMI: HDMI 2.0, Type-A. It supports 4K video
- GPIO: 40-Pin, 2.54mm pitch pin-header including I2C, ADC, GPIO, UART, PWM, SPDIF and CVBS
- Serial debug port: 4-Pin, 2.54mm pitch single-row pin-header
- User Key: 1 x power key
- LED: 1 x power LED and 1 x status LED
- Power Interface: DC jack, MicroUSB
- Power Supply: DC 5V/2A
- PCB dimension: 56 x 85mm,6-layer, ENIG
3 Software Features
3.1 UbuntuCore
- it supports output to an HDMI monitor
- it supports WiFi
- it supports Ethernet
- it supports Bluetooth
- built-in Qt-Embedded
3.2 Android
- Kodi integrated
4 Diagram, Layout and Dimension
4.1 Layout
- GPIO Pin Description
Pin# Name Pin# Name 1 SYS_3.3V 2 VDD_5V 3 GPIODV_24/I2C_SDA_A 4 VDD_5V 5 GPIODV_25/I2C_SCK_A 6 GND 7 GPIOY_0 8 GPIOY_13/UART_TX_C 9 DGND 10 GPIOY_13/UART_RX_C 11 GPIOY_1 12 GPIOY_16/PWM_A 13 GPIOY_2 14 GND 15 GPIOY_3 16 GPIOY_15/PWM_F 17 SYS_3.3V 18 GPIOY_4 19 GPIOY_5 20 GND 21 GPIOY_7 22 GPIOY_6 23 GPIOY_9 24 GPIOY_8 25 DGND 26 GPIOY_10 27 GPIODV_26/I2C_SDA_B 28 GPIODV_27/I2C_SCK_B 29 GPIOY_11/SPDIF_IN 30 GND 31 GPIOAO_5 32 GPIOY_12/SPDIF_OUT 33 GPIOH_3 34 GND 35 GPIOCLK_1 36 CVBS 37 AIN1 38 1.8V Vref Out 39 GND 40 AIN0
- eMMC Interface Pin Description
Pin# Name Pin# Name 1 eMMC_D0 2 eMMC_D1 3 eMMC_D2 4 eMMC_D3 5 eMMC_D4 6 eMMC_D5 7 eMMC_D6 8 eMMC_D7 9 eMMC_DS 10 GND 11 eMMC_CMD 12 eMMC_CLK 13 NC 14 GND 15 NC 16 1.8V OUT 17 eMMC_RST 18 3.3V OUT 19 GPIOY_5 20 GND
- Debug Port(UART0)
Pin# Name 1 GND 2 VDD_5V 3 UART_TX_AO_A 4 UART_RX_AO_A
- 7Pin I2S Interface Pin Description
Pin# Name 1 GND 2 SYS_3.3V 3 I2S_SCLK 4 I2S_LRCLK 5 I2S_DATA_OUT 6 I2S_DATA_IN 7 I2S_MCLK
- Notes
- SYS_3.3V: 3.3V power output
- VDD_5V: 5V power output5V. The input range is 4.7V ~ 5.6V
- All pins are 3.3V
- For more details refer to the document:NanoPi-K2-1701-Schematic.pdf
4.2 Board Dimension
- For more details refer to the document:NanoPi-K2-1701-dxf.zip
5 Get Started
5.1 Essentials You Need
Before starting to use your NanoPi K2 get the following items ready
- NanoPi K2
- MicroSD Card/TF Card: Class 10 or Above, minimum 8GB SDHC
- A DC 5V/2A power is a must
- HDMI monitor
- USB keyboard and USB mouse
- A host computer running Ubuntu 18.04 64 bit system
5.2 TF Cards We Tested
To make your device boot and run fast we highly recommend you use a Class10 8GB SDHC TF card or a better one. The following cards are what we used in all our test cases presented here:
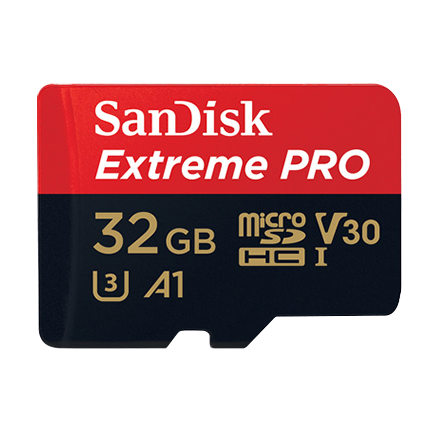
- Sandisk MicroSDHC V30 32GB Extreme Pro (Developer choice)
- SanDisk 32GB High Endurance Video MicroSDHC Card with Adapter for Dash Cam and Home Monitoring Systems (High reliability)
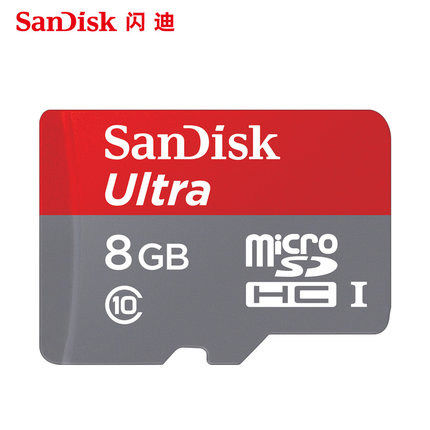
- SanDisk TF 8G Class10 Micro/SD High Speed TF card:
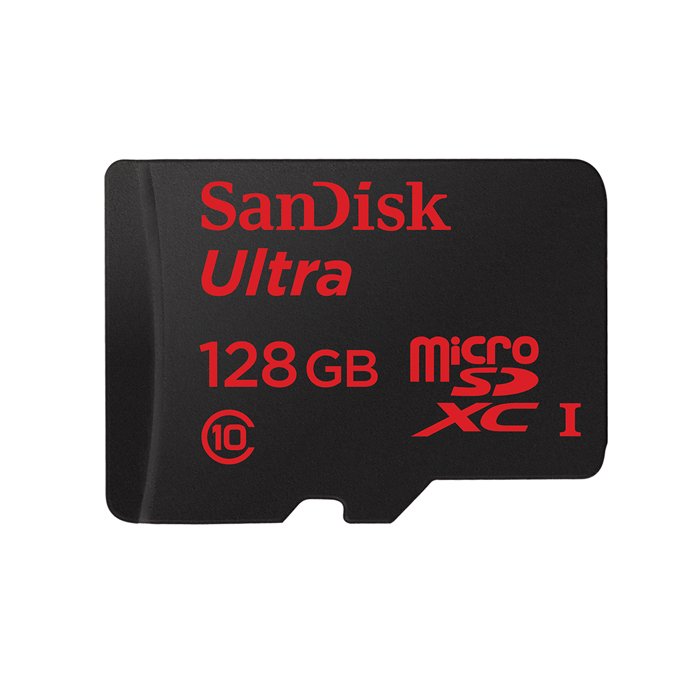
- SanDisk TF128G MicroSDXC TF 128G Class10 48MB/S:
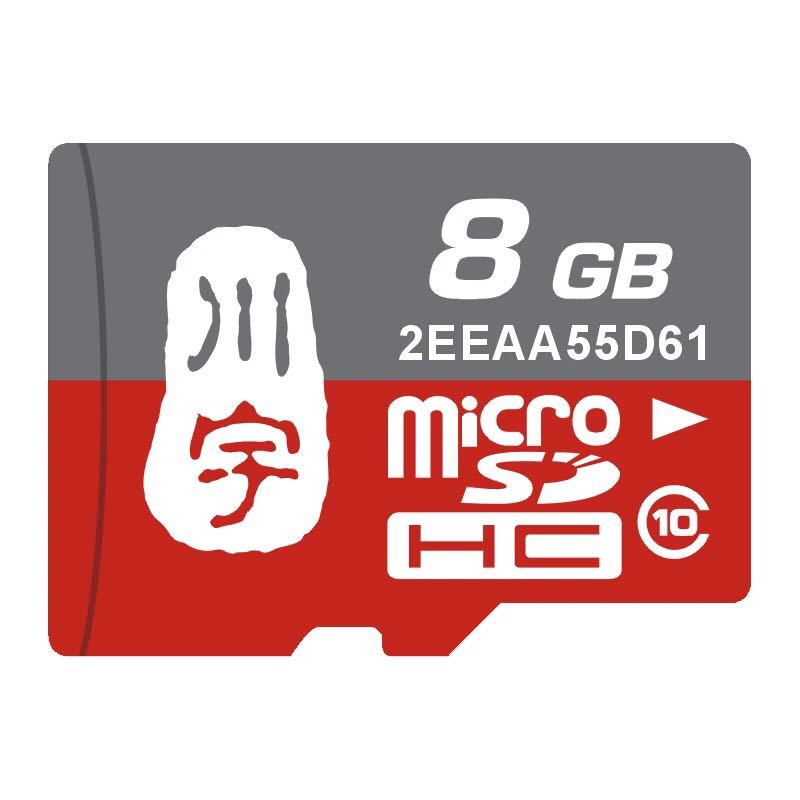
- 川宇 8G C10 High Speed class10 micro SD card:
5.3 Make an Installation TF Card/eMMC Module
5.3.1 Boot OS from TF Card/eMMC Module
Get the following files from download link:
- Download needed image files and utilities
Image File: nanopi-k2_android_5.1.1-YYYYMMDD.img.zip Android5.1 Image File for flashing a TF card nanopi-k2_ubuntu_core_xenial-YYYYMMDD.img.zip Ubuntu-Core with Qt-Embedded Image File for flashing a TF card nanopi-k2_android_5.1.1-emmc-YYYYMMDD.img.zip Android5.1 Image File for flashing an eMMC module nanopi-k2_ubuntu_core_xenial-emmc-YYYYMMDD.img.zip Ubuntu-Core with Qt-Embedded Image File for flashing an eMMC module Flash Utility: win32diskimager.rar Windows utility. Under Linux users can use "dd"
5.3.1.1 Flash Image to TF Card
- Extract an image file and win32diskimager.rar. Insert a TF card(at least 8G) into a Windows PC and run the win32diskimager utility as administrator. On the utility's main window select your TF card's drive, the wanted image file and click on "write" to start flashing the TF card.
- Insert this card into your NanoPi K2's BOOT slot and power on (with a 5V/2A power source). If both the green LED and blue LED are solid on this indicates your NanoPi K2 has successfully booted.
5.3.1.2 Flash Image to eMMC Module
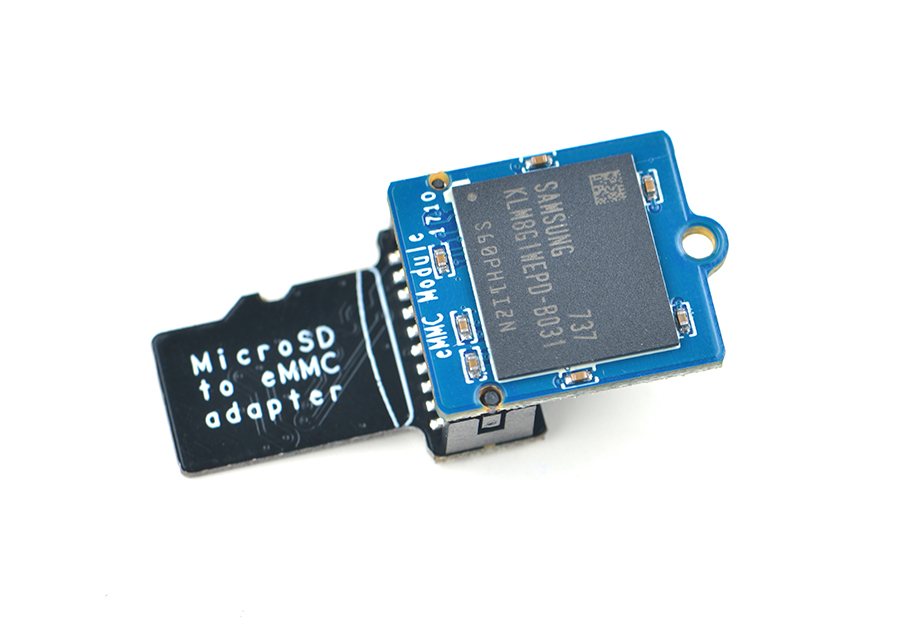
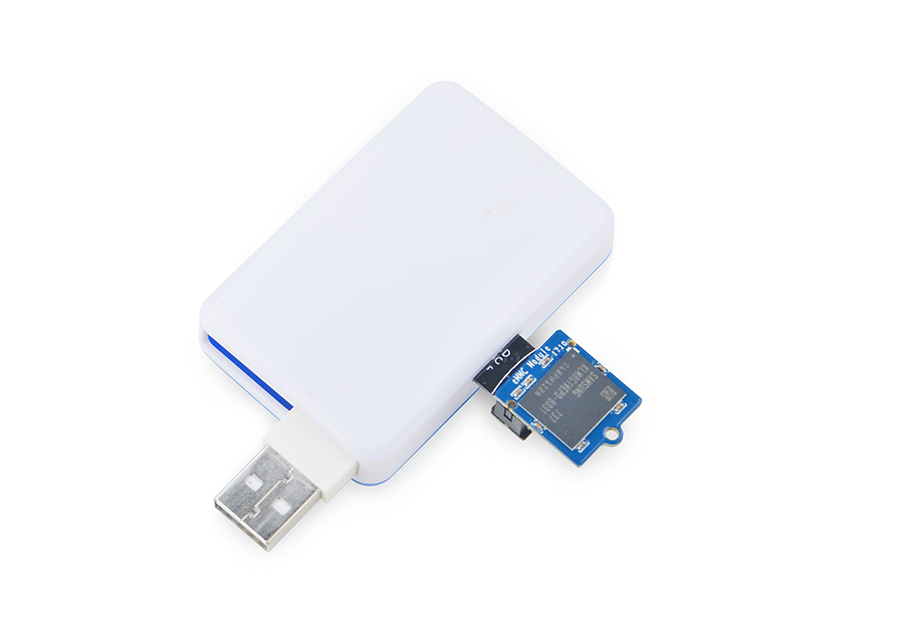
- Extract an image file and win32diskimager.rar on a Window PC. Connect an eMMC module to a TF card to eMMC adapter, insert this TF card adapter to a TF to USB adapter and insert this USB adapter to the Windows PC. Run the win32diskimager utility as administrator. On the utility's main window select this TF adapter's drive, the wanted image file and click on "write" to start flashing the eMMC module.
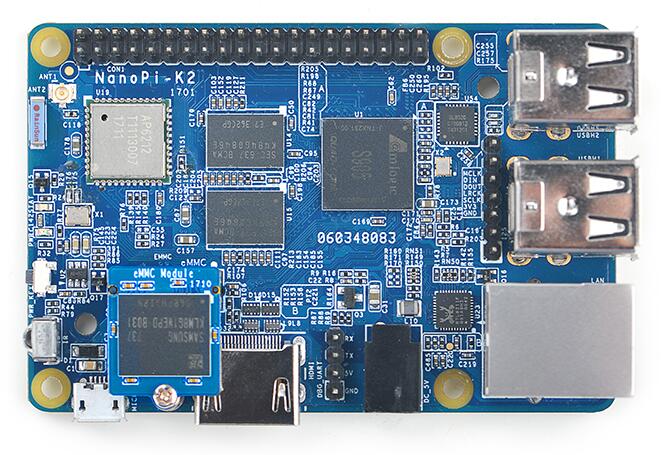
- After flashing is done take off the eMMC module of the TF card adapter. Insert the eMMC module to the eMMC slot on a NanoPi K2 and power on (with a 5V/2A power source) the board. If both the green LED and blue LED are solid on this indicates your NanoPi K2 has successfully booted.
- When a K2 board has both a TF card and an eMMC module inserted it will always boot from the eMMC module. If you want to boot your K2 from a TF card just insert a TF card only and leave the eMMC slot empty.
5.3.2 Make Installation Card under Linux Desktop
- 1) Insert your TF card/TF adapter with eMMC flash into a host computer running Ubuntu and check your SD card's device name
dmesg | tail
Search the messages output by "dmesg" for similar words like "sdc: sdc1 sdc2". If you can find them it means your SD card has been recognized as "/dev/sdc". Or you can check that by commanding "cat /proc/partitions".
- 2) Downlaod Linux script
git clone https://github.com/friendlyarm/sd-fuse_amlogic.git
cd sd-fuse_amlogic
- 3) Make Android TF Card
su
./fusing.sh /dev/sdx android
(Note: you need to replace "/dev/sdx" with the device name in your system)
When you run the script for the first time it will prompt you to download an image you have to hit “Y” within 10 seconds otherwise you will miss the download
- 4) Make Android eMMC Module
su
./fusing.sh /dev/sdx android emmc
(Note: you need to replace "/dev/sdx" with the device name in your system)
When you run the script for the first time it will prompt you to download an image you have to hit “Y” within 10 seconds otherwise you will miss the download
5.3.3 Extend NanoPi K2's TF Card/eMMC Module Section
- If your board runs Ubuntu you can skip this section since Ubuntu will automatically extend your TF card's section. When Android is loaded you need to run the following commands on your host PC to extend your TF card's section:
sudo umount /dev/sdx?
sudo parted /dev/sdx unit % resizepart 4 100 unit MB print
sudo resize2fs -f /dev/sdx4
(Note: you need to replace "/dev/sdx" with the device name in your system)
5.3.4 HDMI Resolution
If your NanoPi K2 is connected to an HDMI monitor and it runs Android it will automatically set the resolution to an appropriate HDMI mode by checking the "EDID".
5.4 Run Android
- Insert an SD card with Android image into your NanoPi K2, connect the board to an HDMI monitor, power on the board K2 will boot from the SD card. If you can see the PWR LED on and the blue LED are solid on it means your board is working and you will see Android being loaded on the HDMI monitor.
- It is recommended to turn off its power by pressing the PWR key otherwise the system data in the TF card will be damaged.
5.4.1 Play Multi-Media Stream with Kodi
Kodi is pre-installed on Android. It supports hard-decoding. Here is how Kodi looks like:
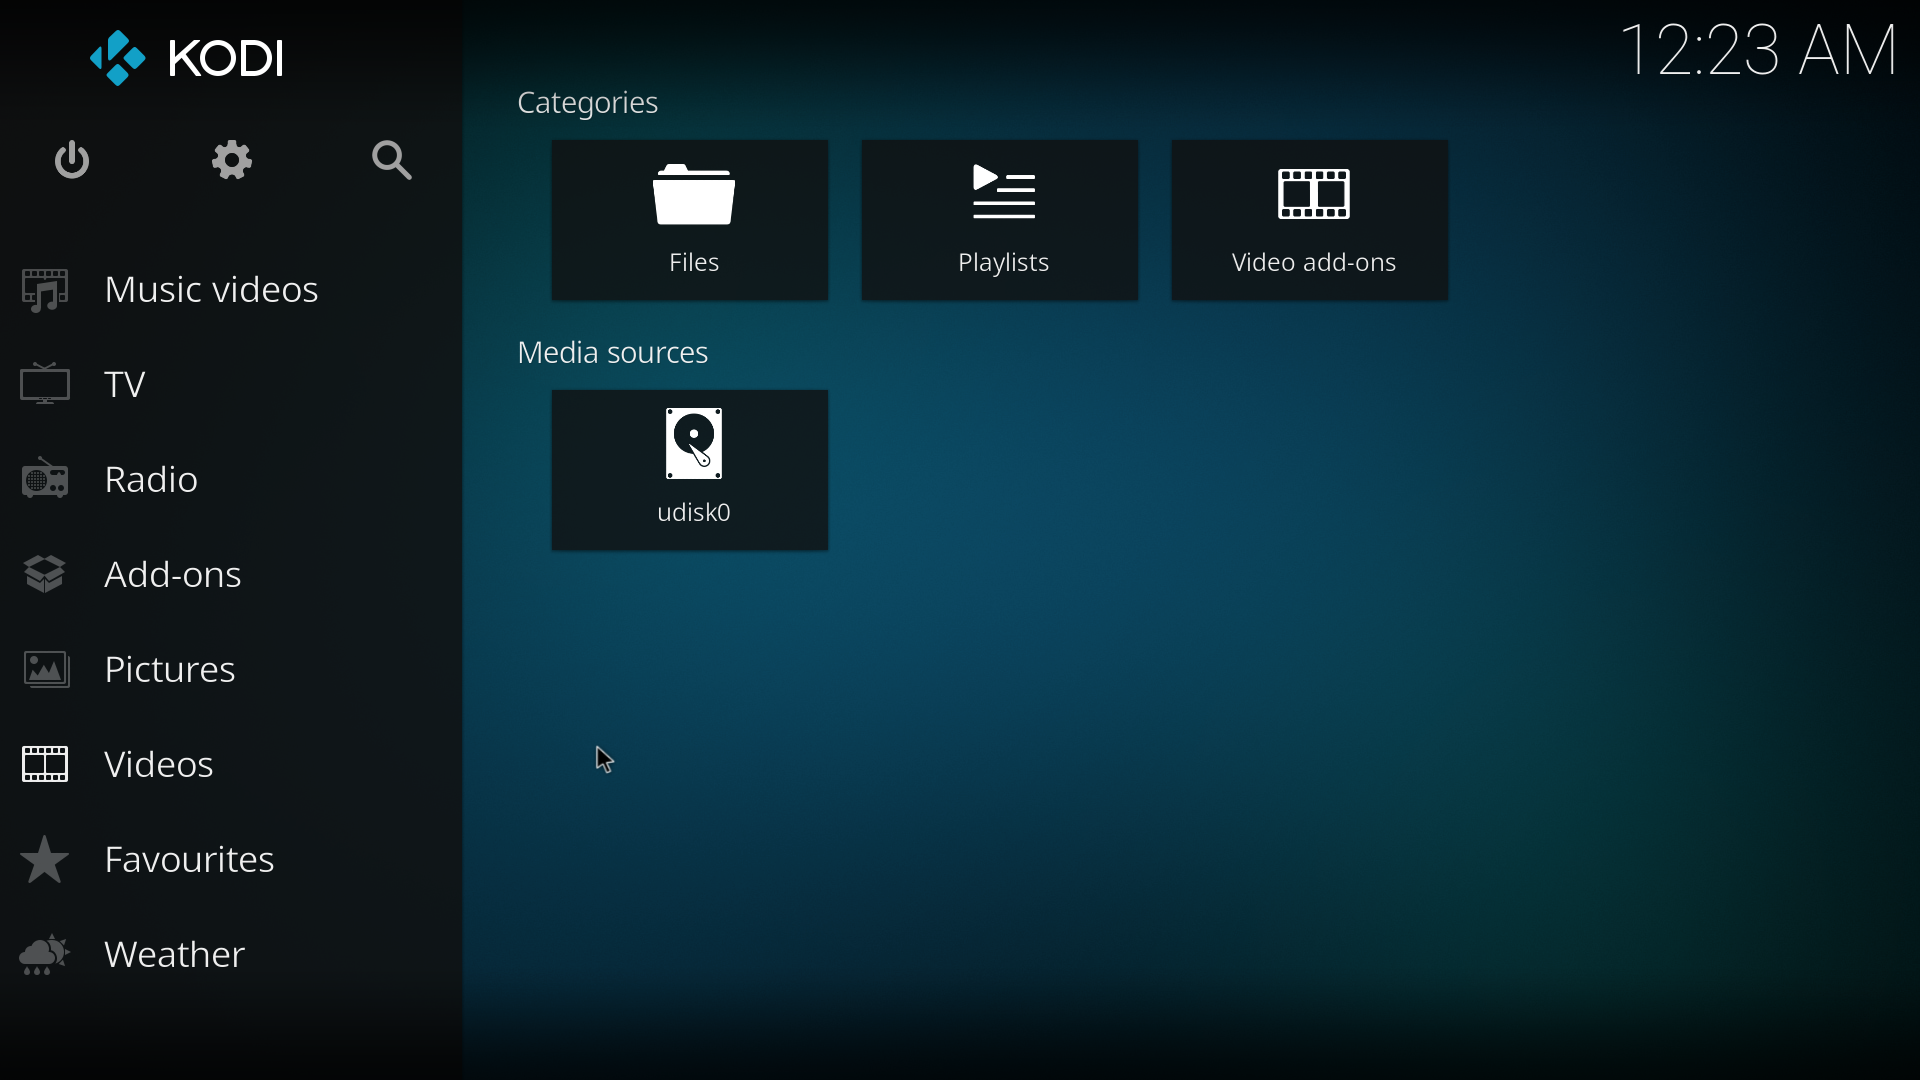
Insert a USB storage card with a video file to K2's USB port and on Kodi's main window select "Videos -> udisk0" to load and play the video file in the storage card:

5.5 Run Ubuntu core
5.5.1 Introduction to Ubuntu core
Ubuntu Core with Qt-Embedded is a light Linux system without X-windows. It uses the Qt-Embedded's GUI and is popular in industrial and enterprise applications.
Besides the regular Ubuntu core's features our Ubuntu-Core has the following additional features:
- it supports output to an HDMI monitor
- it supports WiFi
- it supports Ethernet
- it supports Bluetooth
- built-in Qt-Embedded
Thanks to A53 SoC's powerful performance, 2G RAM and Gbps Ethernet the NanoPi K2 with Ubuntu is well suited for IoT applications and light server applications such as NAS.
5.5.2 Applications under Ubuntu core
After you insert an SD card pre-installed with Ubuntu to a NanoPi K2 and power up the board you will observe the following GUI:
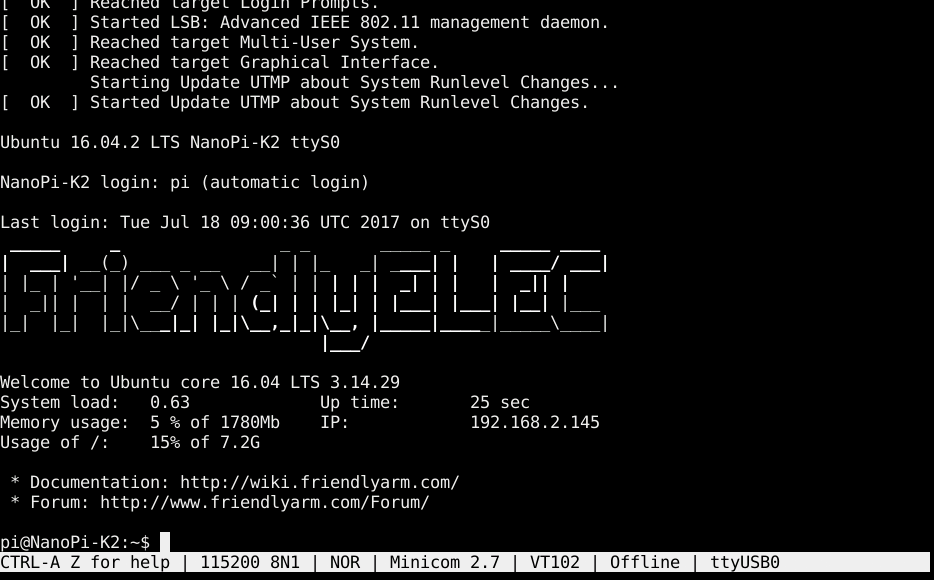
To enable Qt-Embedded GUI you can run the following command:
$ sudo /opt/QtE-Demo/run.sh
Here is a what you expect to observe. This is an open source Qt Demo application:
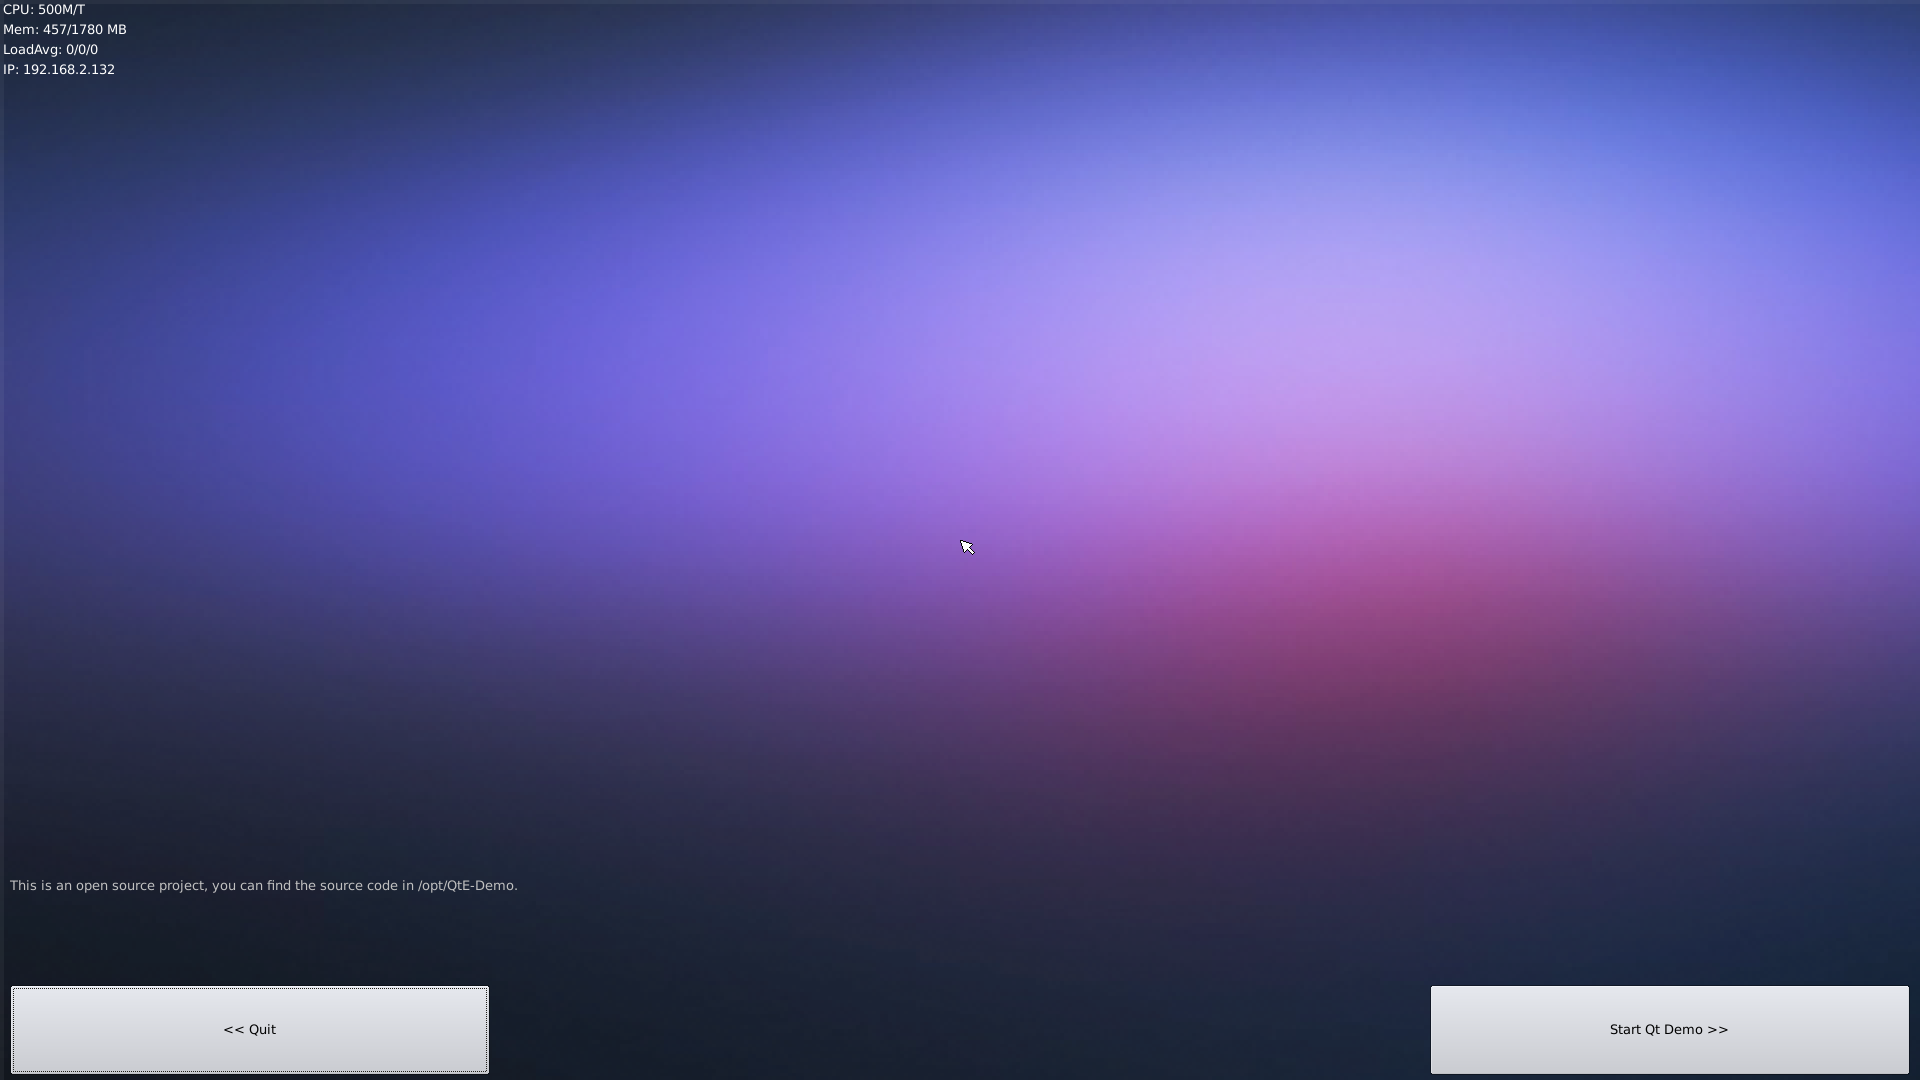
For more details about Ubuntu Core refer to: Ubuntu Core with Qt-Embedded
6 Make Your Own OS Image
6.1 Install Cross Compiler
- Install ARMv7 Cross Compiler
Download the compiler package:
git clone https://github.com/friendlyarm/prebuilts.git
sudo mkdir -p /opt/FriendlyARM/toolchain
sudo tar xf prebuilts/gcc-x64/arm-cortexa9-linux-gnueabihf-4.9.3.tar.xz -C /opt/FriendlyARM/toolchain/
Then add the compiler's directory to "PATH" by appending the following lines in "~/.bashrc".:
export PATH=/opt/FriendlyARM/toolchain/4.9.3/bin:$PATH
export GCC_COLORS=auto
Execute "~/.bashrc" to make the changes take effect. Note that there is a space after the first ".":
. ~/.bashrcThis compiler is a 64-bit one therefore it cannot be run on a 32-bit Linux machine. After the compiler is installed you can verify it by running the following commands:
arm-linux-gcc -v
Using built-in specs.
COLLECT_GCC=arm-linux-gcc
COLLECT_LTO_WRAPPER=/opt/FriendlyARM/toolchain/4.9.3/libexec/gcc/arm-cortexa9-linux-gnueabihf/4.9.3/lto-wrapper
Target: arm-cortexa9-linux-gnueabihf
Configured with: /work/toolchain/build/src/gcc-4.9.3/configure --build=x86_64-build_pc-linux-gnu
--host=x86_64-build_pc-linux-gnu --target=arm-cortexa9-linux-gnueabihf --prefix=/opt/FriendlyARM/toolchain/4.9.3
--with-sysroot=/opt/FriendlyARM/toolchain/4.9.3/arm-cortexa9-linux-gnueabihf/sys-root --enable-languages=c,c++
--with-arch=armv7-a --with-tune=cortex-a9 --with-fpu=vfpv3 --with-float=hard
...
Thread model: posix
gcc version 4.9.3 (ctng-1.21.0-229g-FA)
- Install AArch64 Cross Compiler
The AArch64 cross compiler is needed to compile U-Boot and Linux. We used linaro toolchain:
wget http://releases.linaro.org/components/toolchain/binaries/4.9-2017.01/aarch64-linux-gnu/gcc-linaro-4.9.4-2017.01-x86_64_aarch64-linux-gnu.tar.xz
tar xf gcc-linaro-4.9.4-2017.01-x86_64_aarch64-linux-gnu.tar.xz
export PATH=~/gcc-linaro-4.9.4-2017.01-x86_64_aarch64-linux-gnu/bin:$PATH
Add the compiler's directory to "PATH".
6.2 Compile U-Boot
Download the U-Boot source code and compile it. Note that the github's branch is nanopi-k2-v2015.01:
git clone https://github.com/friendlyarm/u-boot.git uboot
cd uboot
git checkout nanopi-k2-v2015.01
make nanopi-k2_defconfig
make
After your compilation succeeds a u-boot.bin will be generated. If you want to test it flash it to your installation TF card via fastboot. Here is how you can do it:
sudo ./fusing.sh /dev/sdc
You can type the following command to update both a TF card and an eMMC Flash
sudo ./fusing.sh /dev/sdc emmc
Or you can do it with fastboot:
1) On your host PC run "sudo apt-get install android-tools-fastboot" to install the fastboot utility;
2) Connect your NanoPi K2 to your host PC via a serial cable (e.g. PSU-ONECOME). Press the enter key within two seconds right after you power on your NanoPi K2 and you will enter uboot's command line mode;
3) After type in "fastboot" and press "enter" you will enter the fastboot mode;
4) Connect your NanoPi K2 to this host PC via a microUSB cable and type in the following command to flash u-boot.bin:
fastboot flash bootloader fip/gxb/u-boot.bin
We haven't found a way to update the uboot on an eMMC flash with fastboot.
6.3 Compile Linux kernel
6.3.1 Compile Kernel
- Download Kernel Source Code
git clone https://github.com/friendlyarm/linux.git
cd linux
git checkout nanopi-k2-3.14.y
The NanoPi K2's kernel source code lies in the "nanopi-k2-3.14.y" branch.
- Compile Android Kernel
touch .scmversion
make ARCH=arm64 nanopi-k2_android_defconfig
make ARCH=arm64 CROSS_COMPILE=aarch64-linux-gnu- Image nanopi-k2.dtb
After your compilation succeeds an arch/arm64/boot/dts/amlogic/nanopi-k2.dtb file and an arch/arm64/boot/Image will be generated. You can use them to replace the existing files under your SD card's boot section.
- Compile Ubuntu Kernel
touch .scmversion
make ARCH=arm64 nanopi-k2_ubuntu_defconfig
make ARCH=arm64 CROSS_COMPILE=aarch64-linux-gnu- Image nanopi-k2.dtb
6.3.2 User Your Generated Kernel
- Update the kernel file in SD card
If you use an SD card to boot Android you can copy your generated uImage file and nanopi-k2.dtb file to your SD card's boot section(e.g. section 1 /dev/sdX1).
- Update kernel with adb
You can update your kernel with adb and here is how you can do it:
adb shell mount -t ext4 /dev/block/mmcblk0p1 /storage/sdcard1/
adb push arch/arm64/boot/Image /storage/sdcard1/
adb push arch/arm64/boot/dts/amlogic/nanopi-k2.dtb /storage/sdcard1/
adb reboot
- Update Image and nanopi-k2.dtb
If you want to generate a new Android's boot.img you need to use your newly generated image and nanopi-k2.dtb to replace the existing files under "device/friendly-arm/nanopi-k2-kernel" and recompile Android.
6.4 Compile Android
- Install Cross Compiler
Install a 64-bit Ubuntu 16.04 on your host PC
sudo apt-get install bison g++-multilib git gperf libxml2-utils make python-networkx zip
sudo apt-get install flex libncurses5-dev zlib1g-dev gawk minicom
For more details refer to https://source.android.com/source/initializing.html
- Download Android5.1 Source Code
You need to use repo to get the Android source code. Refer to https://source.android.com/source/downloading.html .
mkdir android && cd android
repo init -u https://github.com/friendlyarm/android_manifest.git -b nanopi-k2-lollipop
repo sync
"android" is the working directory.
- Compile System
source build/envsetup.sh
lunch nanopi_k2-userdebug
make -j8
After compilation succeeds an image file will be generated under "out/target/product/nanopi-k2"
filename partition Description u-boot.bin bootloader - boot.img boot - cache.img cache - userdata.img userdata - system.img system - partmap.txt - partition file
- Flash Image to SD Card
If you want to boot your board from an SD card you need to copy your generated image file to the "sd-fuse_amlogic/android/" directory and flash it to your SD card with our script. For more details refer to # Make Installation Card under Linux Desktop.
- Update Image with fastboot
Right after the NanoPi K2 is booted press any key to enter the uboot commandline mode and type in "fastboot usb"
Connect your K2 to a host PC with a USB cable and type the following commands from your PC's terminal:
cd out/target/product/nanopi-k2
sudo fastboot flash boot boot.img
sudo fastboot flash cache cache.img
sudo fastboot flash userdata userdata.img
sudo fastboot flash system system.img
sudo fastboot reboot
7 More OS Support
7.1 DietPi

DietPi is a highly optimised & minimal Debian-based Linux distribution. DietPi is extremely lightweight at its core, and also extremely easy to install and use.
Setting up a single board computer (SBC) or even a computer, for both regular or server use, takes time and skill. DietPi provides an easy way to install and run favourite software you choose.
For more information, please visit this link https://dietpi.com/docs/.
DietPi supports many of the NanoPi board series, you may download the image file from here:
8 Update Log
8.1 April-14-2017
- Released English version
8.2 June-4-2017
- Added section 4.5: kodi support
8.3 July-21-2017
- Added sections 3 and 5.5
8.4 Nov-17-2017
- Added sections 5.3.1.2
- Updated sections 5.3.1, 5.3.3, 6.2 and 6.3
