Difference between revisions of "BakeBit - Ultrasonic Ranger"
From FriendlyELEC WiKi
(→示例程序:Ultrasonic Sensor with LED) |
|||
| (4 intermediate revisions by the same user not shown) | |||
| Line 3: | Line 3: | ||
==Introduction== | ==Introduction== | ||
[[File:BakeBit - Ultrasonic.jpg|thumb|Ultrasonic Ranger]] | [[File:BakeBit - Ultrasonic.jpg|thumb|Ultrasonic Ranger]] | ||
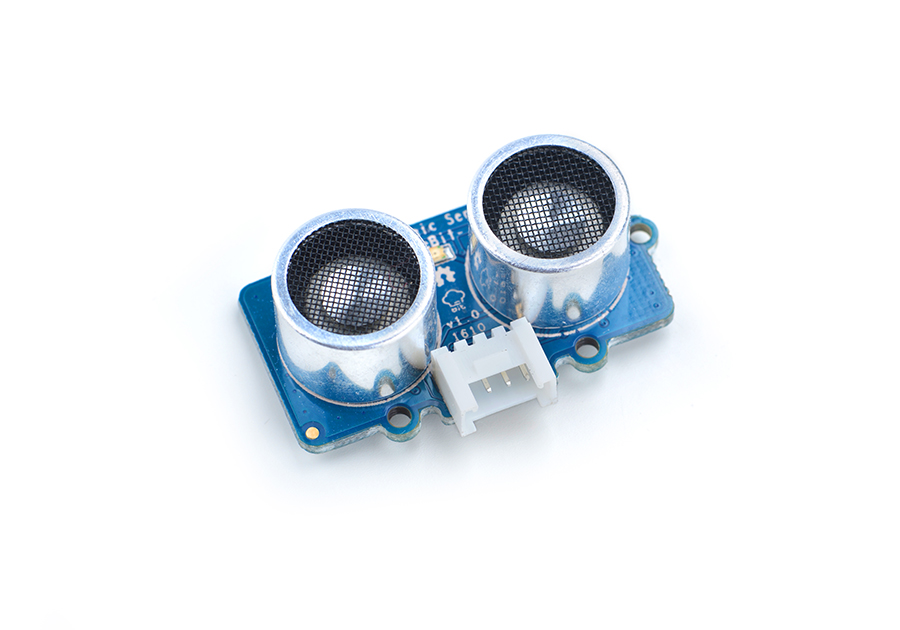
| − | * The BakeBit - Ultrasonic Ranger is | + | * The BakeBit - Ultrasonic Ranger is an ultrasonic module.The module's sensor emits a sound wave whose wave length is around 6mm and frequency is 40K Hz, which bounces off a reflective surface and returns to the sensor. Then, using the amount of time it takes for the wave to return to the sensor, the distance to the object can be computed.The receiver converts ultrasound waves to electrical signals in mV. |
* The master sends a signal to the module starting to emit a sound wave. After the module receives the returned signal it will will generate a high level indicating the elapsed time and the distance will be calculated by distance = (elapsed time * speed of sound)/2. | * The master sends a signal to the module starting to emit a sound wave. After the module receives the returned signal it will will generate a high level indicating the elapsed time and the distance will be calculated by distance = (elapsed time * speed of sound)/2. | ||
| Line 32: | Line 32: | ||
This code sample shows how to use the ultrasonic sensor module to measure a distance. When the module detects an object in front of itself the LED will be turned on. | This code sample shows how to use the ultrasonic sensor module to measure a distance. When the module detects an object in front of itself the LED will be turned on. | ||
| − | === Hardware | + | === Hardware Setup === |
| − | Connect the LED module to the | + | Connect the LED module to the NanoHat Hub's D3 and the ultrasonic sensor module to the NanoHat Hub's D4: |
::{| class="wikitable" | ::{| class="wikitable" | ||
| Line 102: | Line 102: | ||
When an object is in front of the sensor module within 10 cm the LED will be turned on otherwise the LED will be off. | When an object is in front of the sensor module within 10 cm the LED will be turned on otherwise the LED will be off. | ||
| − | == | + | ==Resources== |
*[Schematic]([http://wiki.friendlyarm.com/wiki/images/e/e0/12-SCHEMATIC_Ultrasonic.pdf BakeBit - Ultrasonic Ranger.pdf]) | *[Schematic]([http://wiki.friendlyarm.com/wiki/images/e/e0/12-SCHEMATIC_Ultrasonic.pdf BakeBit - Ultrasonic Ranger.pdf]) | ||
| − | *[BakeBit | + | *[BakeBit Github Project Page](https://github.com/friendlyarm/BakeBit) |
| − | *[BakeBit Starter | + | *[BakeBit Starter Kit User's Manual](http://wiki.friendlyarm.com/bakebit/bakebit_starter_kit_manual_en.pdf) |
| + | |||
| + | ==Update Log== | ||
| + | ===December-15-2016=== | ||
| + | * Released English version | ||
| + | |||
| + | ===Jan-19-2017=== | ||
| + | * Renamed "NEO-Hub" to "NanoHat-Hub" | ||
| + | |||
| + | ===Jan-20-2017=== | ||
| + | * Renamed "NanoHat-Hub" to "NanoHat Hub" | ||
Latest revision as of 08:22, 20 January 2017
Contents
1 Introduction
- The BakeBit - Ultrasonic Ranger is an ultrasonic module.The module's sensor emits a sound wave whose wave length is around 6mm and frequency is 40K Hz, which bounces off a reflective surface and returns to the sensor. Then, using the amount of time it takes for the wave to return to the sensor, the distance to the object can be computed.The receiver converts ultrasound waves to electrical signals in mV.
- The master sends a signal to the module starting to emit a sound wave. After the module receives the returned signal it will will generate a high level indicating the elapsed time and the distance will be calculated by distance = (elapsed time * speed of sound)/2.
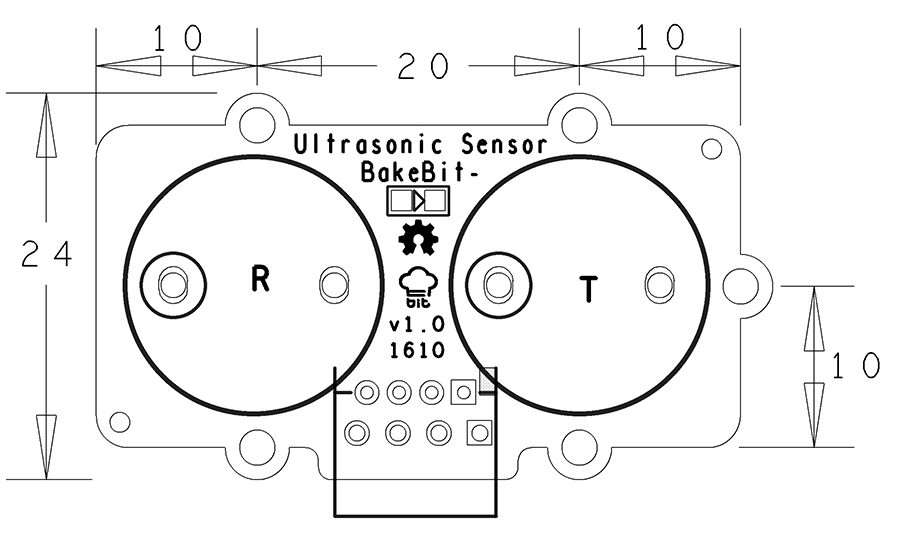
2 Hardware Spec
- Standard 2.0mm pitch 4-Pin BakeBit Interface
- Range: 5cm - 300cm
- Accuracy: 1cm
- PCB dimension(mm): 24 x 42
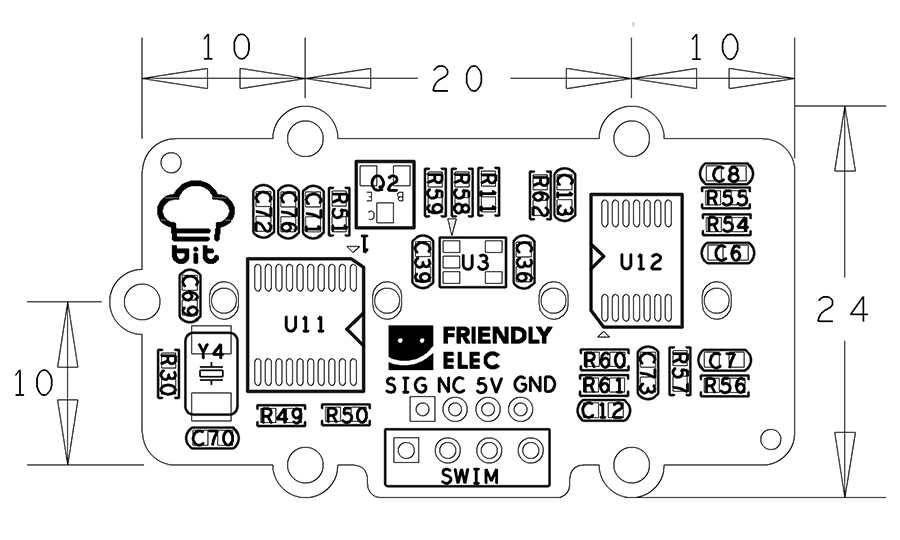
- Pin Desription:
| Pin | Description |
| GND | Ground |
| 5V | 5V Supply Voltage |
| NC | Not Connected |
| SIG | Signal |
3 Code Sample:Ultrasonic Sensor with LED
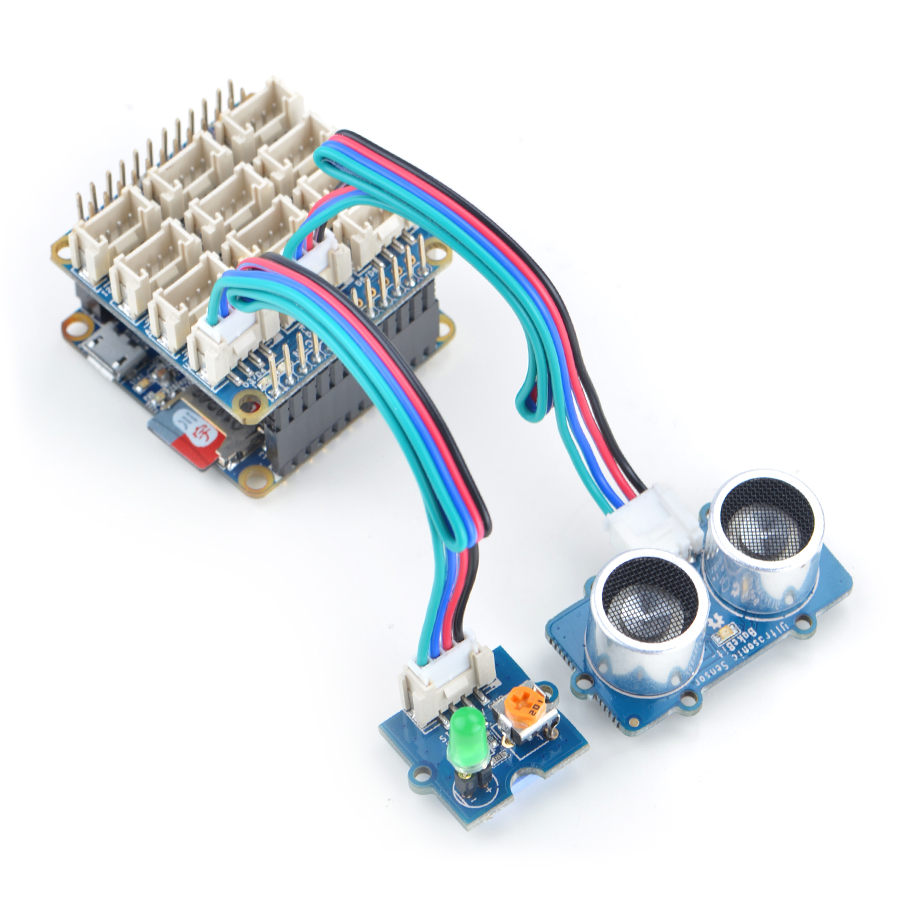
This code sample shows how to use the ultrasonic sensor module to measure a distance. When the module detects an object in front of itself the LED will be turned on.
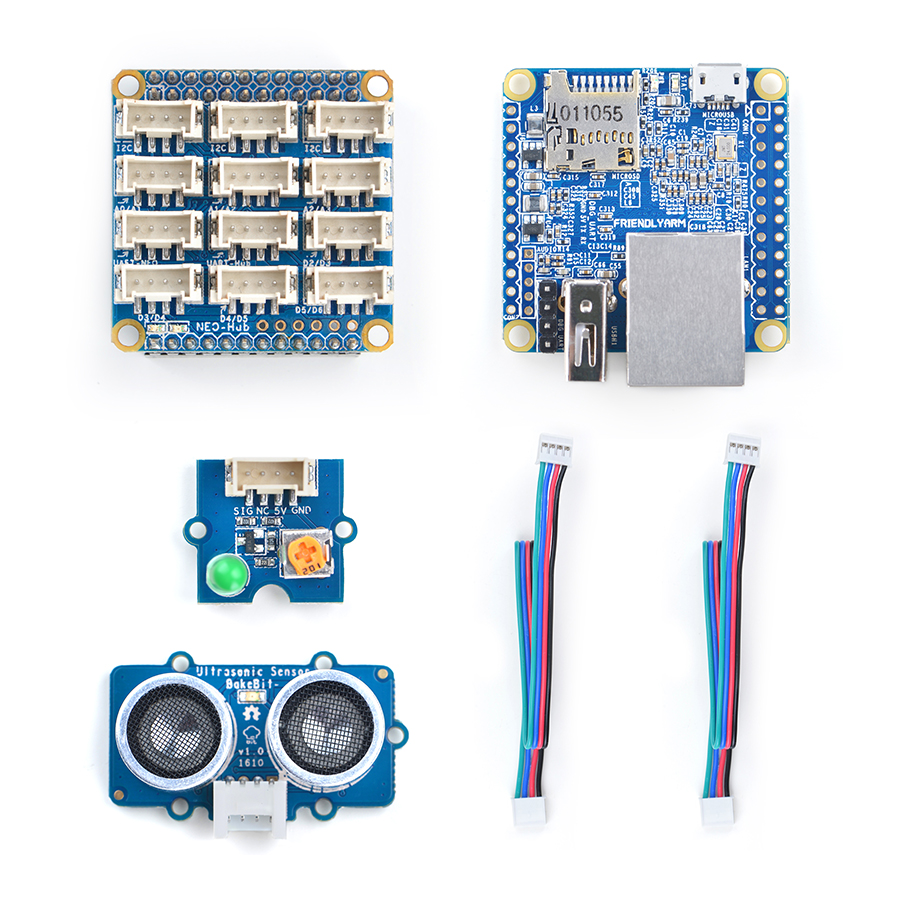
3.1 Hardware Setup
Connect the LED module to the NanoHat Hub's D3 and the ultrasonic sensor module to the NanoHat Hub's D4:
3.2 Source Code
import bakebit
import time

# Connect the BakeBit Ultrasonic Ranger to digital port D4
# SIG,NC,VCC,GND
ultrasonic_ranger = 4

# Connect the BakeBit LED to digital port D3
led = 3

bakebit.pinMode(led,"OUTPUT")
light = 0

while True:
    try:
        # Read distance value from Ultrasonic
	distance = bakebit.ultrasonicRead(ultrasonic_ranger)
        print(distance)
	if distance > 0:
		if distance<10:
			if light == 0:
				print("\ton")
				bakebit.digitalWrite(led,1)
				light = 1
		else:
			if light == 1:
				print("\toff")
				bakebit.digitalWrite(led,0)
				light = 0
	time.sleep(.2)

    except KeyboardInterrupt:
	bakebit.digitalWrite(led,0)
        break

    except TypeError:
        print ("Error")
    except IOError:
        print ("Error")
3.3 Run Code Sample
Before you run the code sample you need to follow the steps in bakebit tutorial to install the BakeBit package.
Enter the "BakeBit/Software/Python" directory and run the "bakebit_prj_Ultrasonic_Sensor_with_LED.py" program:
cd ~/BakeBit/Software/Python
sudo python bakebit_prj_Ultrasonic_Sensor_with_LED.py
3.4 Observation
When an object is in front of the sensor module within 10 cm the LED will be turned on otherwise the LED will be off.
4 Resources
- [Schematic](BakeBit - Ultrasonic Ranger.pdf)
- [BakeBit Github Project Page](https://github.com/friendlyarm/BakeBit)
- [BakeBit Starter Kit User's Manual](http://wiki.friendlyarm.com/bakebit/bakebit_starter_kit_manual_en.pdf)
5 Update Log
5.1 December-15-2016
- Released English version
5.2 Jan-19-2017
- Renamed "NEO-Hub" to "NanoHat-Hub"
5.3 Jan-20-2017
- Renamed "NanoHat-Hub" to "NanoHat Hub"
