Difference between revisions of "BakeBit - LED Bar/zh"
From FriendlyELEC WiKi
(→示例程序:LED Bar) |
|||
| (2 intermediate revisions by the same user not shown) | |||
| Line 24: | Line 24: | ||
|SIG || 信号 | |SIG || 信号 | ||
|} | |} | ||
| − | == | + | == 示例程序(1):LED Bar == |
| − | + | ||
| − | + | 这个项目实现类拟音量调节的效果,用到电位器模块和LED Bar。<br /> | |
| − | [[File: | + | 本示例需要配合[[BakeBit - Rotary Angle Sensor]]使用。 |
| + | |||
| + | === 硬件连接 === | ||
| + | 简单的将 LED Bar 模块插入 D3 接口,将 电位器 插入 A0 接口,如下面这样: | ||
| + | |||
| + | ::{| class="wikitable" | ||
| + | |- | ||
| + | |[[File:LED Bar-1.jpg |frameless|300px]] || [[File:LED Bar-2.jpg |frameless|300px]] | ||
| + | |- | ||
| + | |} | ||
| + | |||
| + | === 示例源代码 === | ||
| + | |||
| + | <syntaxhighlight lang="python"> | ||
| + | |||
| + | import time | ||
| + | import bakebit | ||
| + | import random | ||
| + | |||
| + | # Connect the BakeBit LED Bar to digital port D3 | ||
| + | # DI,DCKI,VCC,GND | ||
| + | ledbar = 3 | ||
| + | |||
| + | # Connect the BakeBit Rotary Angle Sensor to analog port A0 | ||
| + | # SIG,NC,VCC,GND | ||
| + | potentiometer = 0 | ||
| + | |||
| + | # Reference voltage of ADC is 5v | ||
| + | adc_ref = 5 | ||
| + | |||
| + | # Vcc of the bakebit interface is normally 5v | ||
| + | bakebit_vcc = 5 | ||
| + | |||
| + | # Full value of the rotary angle is 360 degrees, as per it's specs (0 to 360) | ||
| + | full_angle = 360 | ||
| + | |||
| + | bakebit.pinMode(potentiometer,"INPUT") | ||
| + | bakebit.pinMode(ledbar,"OUTPUT") | ||
| + | time.sleep(1) | ||
| + | |||
| + | # LED Bar methods | ||
| + | # bakebit.bakeBitLedBar_Init(pin, chipset, numOfLED) | ||
| + | # bakebit.bakeBitLedBar_Release(pin) | ||
| + | # bakebit.bakeBitLedBar_Show(pin,colorHigh,colorLow) | ||
| + | |||
| + | bakebit.bakeBitLedBar_Init(ledbar, 0, 5) | ||
| + | time.sleep(.5) | ||
| + | |||
| + | old_color = 0 | ||
| + | while True: | ||
| + | try: | ||
| + | # Read sensor value from potentiometer | ||
| + | sensor_value = bakebit.analogRead(potentiometer) | ||
| + | |||
| + | # Calculate voltage | ||
| + | voltage = round((float)(sensor_value) * adc_ref / 1023, 2) | ||
| + | |||
| + | # Calculate rotation in degrees (0 to 360) | ||
| + | degrees = round((voltage * full_angle) / bakebit_vcc, 2) | ||
| + | print("sensor_value = %d voltage = %.2f degrees = %.1f" % (sensor_value, voltage, degrees)) | ||
| + | |||
| + | color16bit = 0 | ||
| + | if degrees > 0: | ||
| + | color16bit = color16bit | bakebit.Green | ||
| + | if degrees > 72: | ||
| + | color16bit = color16bit | (bakebit.Green<<3) | ||
| + | if degrees > 144: | ||
| + | color16bit = color16bit | (bakebit.Green << 6) | ||
| + | if degrees > 216: | ||
| + | color16bit = color16bit | (bakebit.Yellow << 9) | ||
| + | if degrees > 288: | ||
| + | color16bit = color16bit | (bakebit.Red << 12) | ||
| + | if degrees == 360: | ||
| + | color16bit = 0 | ||
| + | color16bit = color16bit | bakebit.Red | ||
| + | color16bit = color16bit | (bakebit.Red << 3) | ||
| + | color16bit = color16bit | (bakebit.Red << 6) | ||
| + | color16bit = color16bit | (bakebit.Red << 9) | ||
| + | color16bit = color16bit | (bakebit.Red << 12) | ||
| + | |||
| + | if color16bit == old_color: | ||
| + | continue | ||
| + | old_color = color16bit | ||
| + | |||
| + | lowBits = color16bit & 255 | ||
| + | highBits = (color16bit & (255<<8))>>8 | ||
| + | print("%s %s" % ('{0:08b}'.format(highBits), '{0:08b}'.format(lowBits))) | ||
| + | bakebit.bakeBitLedBar_Show(ledbar, highBits, lowBits) | ||
| + | time.sleep(.2) | ||
| + | |||
| + | except KeyboardInterrupt: | ||
| + | bakebit.bakeBitLedBar_Release(ledbar) | ||
| + | time.sleep(.2) | ||
| + | break | ||
| + | except IOError: | ||
| + | print ("Error") | ||
| + | </syntaxhighlight> | ||
| + | |||
| + | [https://github.com/friendlyarm/BakeBit/blob/master/Software/Python/bakebit_prj_LEDBar_And_RotaryAngleSensor.py Github] | ||
| + | |||
| + | |||
| + | === 运行示例 === | ||
| + | |||
| + | 假设你已经参考[http://wiki.friendlyarm.com/bakebit bakebit教程]安装了BakeBit源代码,<br /> | ||
| + | 要运行示例程序,可以在开发板上进入 BakeBit/Software/Python目录,运行bakebit_prj_LEDBar_And_RotaryAngleSensor.py: | ||
| + | <syntaxhighlight lang="bash"> | ||
| + | cd ~/BakeBit/Software/Python | ||
| + | sudo python bakebit_prj_LEDBar_And_RotaryAngleSensor.py | ||
| + | </syntaxhighlight> | ||
| + | |||
| + | === 运行结果 === | ||
| + | |||
| + | 旋转电位器,LED Bar上被点亮的LED个数将根据你的操作角度而进行变化。 | ||
| + | |||
| + | |||
| + | == 示例程序(2):Smart Lighting == | ||
| + | 该示例利用[[BakeBit - Light Sensor]]亮度传感器,聪明地控制灯光(灯用LED Bar来模拟),环境越暗就让灯越亮,环境亮度足够时,就将灯变暗或者熄灭。<br /> | ||
| + | 该示例是配合[[BakeBit - Light Sensor]]来实现的,可参考[[BakeBit - Light Sensor]]页面。 | ||
==相关资料== | ==相关资料== | ||
*[Schematic]([http://wiki.friendlyarm.com/wiki/images/0/08/07-SCHEMATIC_LED_Bar.pdf BakeBit - LED Bar.pdf]) | *[Schematic]([http://wiki.friendlyarm.com/wiki/images/0/08/07-SCHEMATIC_LED_Bar.pdf BakeBit - LED Bar.pdf]) | ||
| + | *[BakeBit Github项目](https://github.com/friendlyarm/BakeBit) | ||
| + | *[BakeBit Starter Kit手册](http://wiki.friendlyarm.com/bakebit/bakebit_starter_kit_manual_cn.pdf) | ||
Latest revision as of 08:20, 28 November 2016
Contents
1 介绍
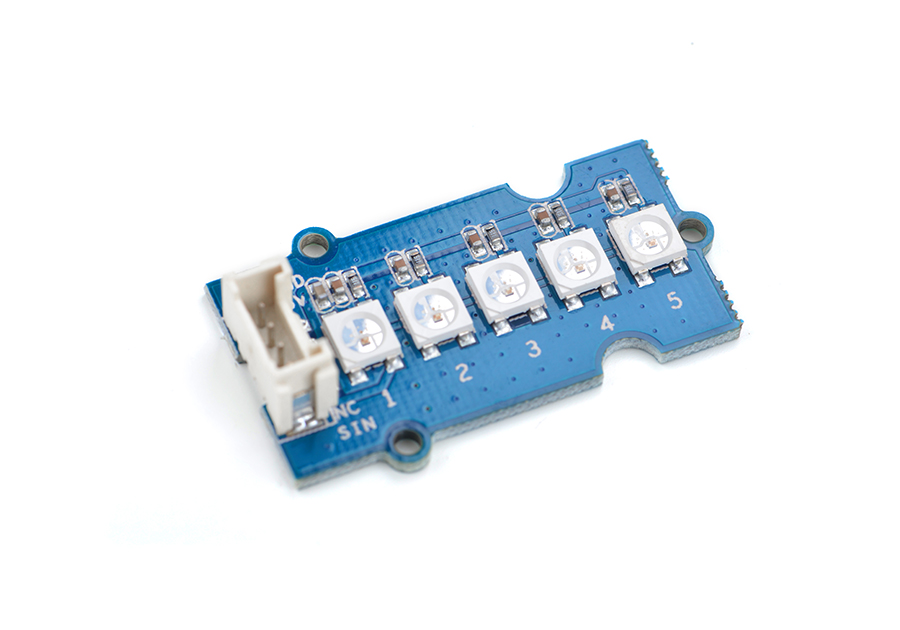
- BakeBit - LED-Bar是一个多彩led模块,模块使用了五个内部集成了Ws2812控制芯片的多彩LED,每个LED内部有R、G、B三个发光二极管。Ws2812控制芯片串行读取控制信号,并从中提取出RGB颜色分量,再分别控制R、G、B发光二极管的亮度,混色出不同的色彩。每个像素点的三基色颜色可实现256级亮度显示,总共完成16777216种颜色的全真色彩显示。
- 五个LED串行级联,只需要串行的写入控制信号,五个LED便会发出缤纷斑斓的色彩。
2 特性
- 使用标准的2.0mm 4 Pin BakeBit接口
- 多彩R、G、B LED
- 全真色彩显示
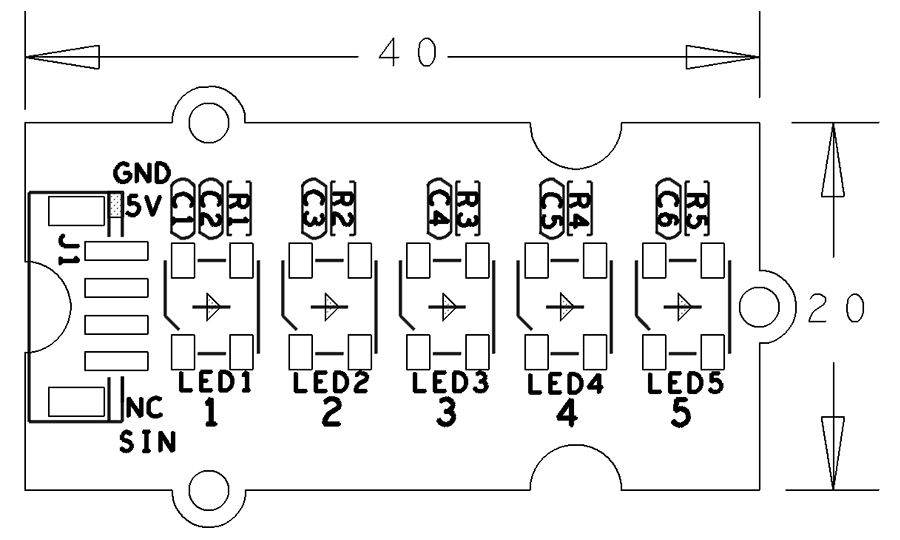
- 引脚说明:
| 名称 | 描述 |
| GND | 地 |
| 5V | 电源5V |
| NC | 空 |
| SIG | 信号 |
3 示例程序(1):LED Bar
这个项目实现类拟音量调节的效果,用到电位器模块和LED Bar。
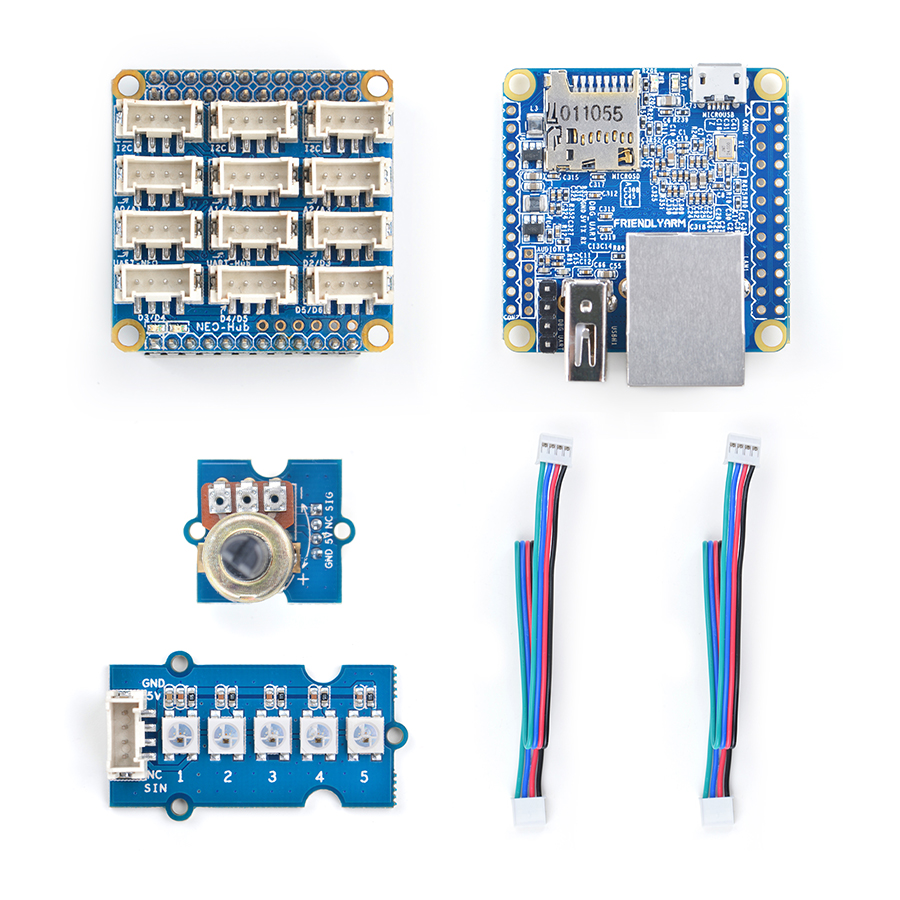
本示例需要配合BakeBit - Rotary Angle Sensor使用。
3.1 硬件连接
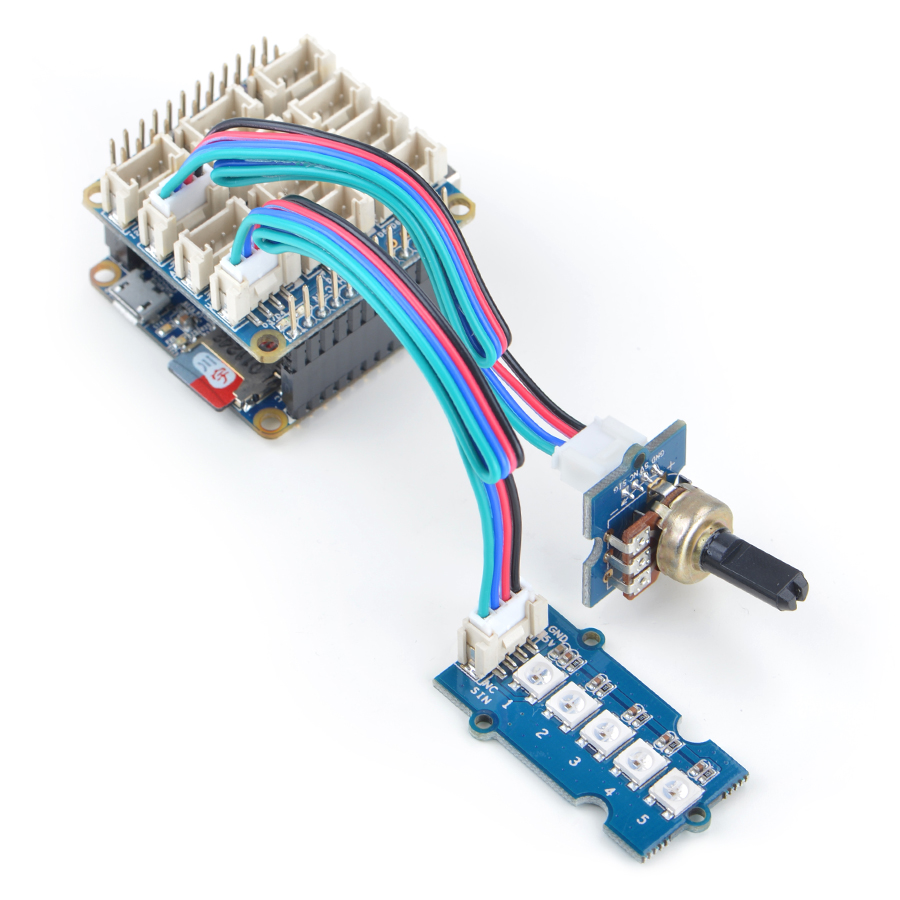
简单的将 LED Bar 模块插入 D3 接口,将 电位器 插入 A0 接口,如下面这样:
3.2 示例源代码
import time
import bakebit
import random

# Connect the BakeBit LED Bar to digital port D3
# DI,DCKI,VCC,GND
ledbar = 3

# Connect the BakeBit Rotary Angle Sensor to analog port A0
# SIG,NC,VCC,GND
potentiometer = 0

# Reference voltage of ADC is 5v
adc_ref = 5

# Vcc of the bakebit interface is normally 5v
bakebit_vcc = 5

# Full value of the rotary angle is 360 degrees, as per it's specs (0 to 360)
full_angle = 360

bakebit.pinMode(potentiometer,"INPUT")
bakebit.pinMode(ledbar,"OUTPUT")
time.sleep(1)

# LED Bar methods
# bakebit.bakeBitLedBar_Init(pin, chipset, numOfLED)
# bakebit.bakeBitLedBar_Release(pin)
# bakebit.bakeBitLedBar_Show(pin,colorHigh,colorLow)

bakebit.bakeBitLedBar_Init(ledbar, 0, 5)
time.sleep(.5)

old_color = 0
while True:
    try:
        # Read sensor value from potentiometer
        sensor_value = bakebit.analogRead(potentiometer)

        # Calculate voltage
        voltage = round((float)(sensor_value) * adc_ref / 1023, 2)

        # Calculate rotation in degrees (0 to 360)
        degrees = round((voltage * full_angle) / bakebit_vcc, 2)
        print("sensor_value = %d voltage = %.2f degrees = %.1f" % (sensor_value, voltage, degrees))

        color16bit = 0
        if degrees > 0:
            color16bit = color16bit | bakebit.Green
        if degrees > 72:
            color16bit = color16bit | (bakebit.Green<<3)
        if degrees > 144:
            color16bit = color16bit | (bakebit.Green << 6)
        if degrees > 216:
            color16bit = color16bit | (bakebit.Yellow << 9)
        if degrees > 288:
            color16bit = color16bit | (bakebit.Red << 12)
        if degrees == 360:
            color16bit = 0
            color16bit = color16bit | bakebit.Red
            color16bit = color16bit | (bakebit.Red << 3)
            color16bit = color16bit | (bakebit.Red << 6)
            color16bit = color16bit | (bakebit.Red << 9)
            color16bit = color16bit | (bakebit.Red << 12)

        if color16bit == old_color:
            continue
        old_color = color16bit

        lowBits = color16bit & 255
        highBits = (color16bit & (255<<8))>>8
        print("%s %s" % ('{0:08b}'.format(highBits), '{0:08b}'.format(lowBits)))
        bakebit.bakeBitLedBar_Show(ledbar, highBits, lowBits)
        time.sleep(.2)

    except KeyboardInterrupt:
        bakebit.bakeBitLedBar_Release(ledbar)
        time.sleep(.2)
        break
    except IOError:
        print ("Error")
3.3 运行示例
假设你已经参考bakebit教程安装了BakeBit源代码,
要运行示例程序,可以在开发板上进入 BakeBit/Software/Python目录,运行bakebit_prj_LEDBar_And_RotaryAngleSensor.py:
cd ~/BakeBit/Software/Python
sudo python bakebit_prj_LEDBar_And_RotaryAngleSensor.py
3.4 运行结果
旋转电位器,LED Bar上被点亮的LED个数将根据你的操作角度而进行变化。
4 示例程序(2):Smart Lighting
该示例利用BakeBit - Light Sensor亮度传感器,聪明地控制灯光(灯用LED Bar来模拟),环境越暗就让灯越亮,环境亮度足够时,就将灯变暗或者熄灭。
该示例是配合BakeBit - Light Sensor来实现的,可参考BakeBit - Light Sensor页面。
5 相关资料
- [Schematic](BakeBit - LED Bar.pdf)
- [BakeBit Github项目](https://github.com/friendlyarm/BakeBit)
- [BakeBit Starter Kit手册](http://wiki.friendlyarm.com/bakebit/bakebit_starter_kit_manual_cn.pdf)


