Difference between revisions of "Template:FriendlyCoreAllwinnerH3"
(→Connect to USB Camera(FA-CAM202)) |
(updated by API) |
||
| (14 intermediate revisions by 2 users not shown) | |||
| Line 17: | Line 17: | ||
The FA-CAM202 is a 200M USB camera. Connect your board to camera module. Then boot OS, connect your board to a network, log into the board as root and run "mjpg-streamer": | The FA-CAM202 is a 200M USB camera. Connect your board to camera module. Then boot OS, connect your board to a network, log into the board as root and run "mjpg-streamer": | ||
<syntaxhighlight lang="bash"> | <syntaxhighlight lang="bash"> | ||
| − | $ cd /root/mjpg-streamer | + | $ cd /root/C/mjpg-streamer |
$ make | $ make | ||
$ ./start.sh | $ ./start.sh | ||
| Line 67: | Line 67: | ||
===Check CPU's Working Temperature=== | ===Check CPU's Working Temperature=== | ||
You can get CPU's working temperature by running the following command: | You can get CPU's working temperature by running the following command: | ||
| − | <syntaxhighlight lang=" | + | <syntaxhighlight lang="text"> |
| − | $ cpu_freq | + | $ cpu_freq |
| − | CPU0 online=1 temp= | + | Aavailable frequency(KHz): |
| − | CPU1 online=1 temp= | + | 480000 624000 816000 1008000 |
| − | CPU2 online=1 temp= | + | Current frequency(KHz): |
| − | CPU3 online=1 temp= | + | CPU0 online=1 temp=26548C governor=ondemand freq=624000KHz |
| + | CPU1 online=1 temp=26548C governor=ondemand freq=624000KHz | ||
| + | CPU2 online=1 temp=26548C governor=ondemand freq=624000KHz | ||
| + | CPU3 online=1 temp=26548C governor=ondemand freq=624000KHz | ||
</syntaxhighlight> | </syntaxhighlight> | ||
| − | This message means there are currently four CPUs working. All of their working temperature is 26.5 degree in Celsius and each one's clock is | + | This message means there are currently four CPUs working. All of their working temperature is 26.5 degree in Celsius and each one's clock is 624MHz.<br> |
| + | Set CPU frequency: | ||
| + | <syntaxhighlight lang="text"> | ||
| + | $ cpu_freq -s 1008000 | ||
| + | Aavailable frequency(KHz): | ||
| + | 480000 624000 816000 1008000 | ||
| + | Current frequency(KHz): | ||
| + | CPU0 online=1 temp=36702C governor=userspace freq=1008000KHz | ||
| + | CPU1 online=1 temp=36702C governor=userspace freq=1008000KHz | ||
| + | CPU2 online=1 temp=36702C governor=userspace freq=1008000KHz | ||
| + | CPU3 online=1 temp=36702C governor=userspace freq=1008000KHz | ||
| + | </syntaxhighlight> | ||
| + | |||
<!-- | <!-- | ||
===Check System Information with Rpi-Monitor=== | ===Check System Information with Rpi-Monitor=== | ||
| Line 87: | Line 102: | ||
--> | --> | ||
| − | + | {{#switch: {{{1}}} | |
| − | + | | NanoPi-R1 = | |
| − | + | <!-- don't have IR-Receiver--> | |
| − | + | | #default = | |
| − | + | ||
| − | + | ||
| − | + | ||
| − | + | ||
| − | + | ||
| − | + | ||
| − | + | ||
| − | + | ||
===Test Infrared Receiver=== | ===Test Infrared Receiver=== | ||
{{Linux-IR-Receiver}} | {{Linux-IR-Receiver}} | ||
| + | }} | ||
| − | + | {{#switch: {{{1}}} | |
| − | + | | NanoPi-R1 | |
| − | + | | NanoPi-R1S-H3 | |
| − | + | | NanoPi-R1S-H5 | |
| − | + | | NanoPi-Duo2 | |
| − | + | | ZeroPi = | |
| − | + | ||
| − | {{# | + | |
| − | | | + | |
<!-- do nothing --> | <!-- do nothing --> | ||
| − | | | + | | #default = |
===Run Qt Demo=== | ===Run Qt Demo=== | ||
Run the following command<br /> | Run the following command<br /> | ||
| Line 120: | Line 125: | ||
Here is what you expect to observe. This is an [https://github.com/friendlyarm/QtE-Demo open source Qt Demo]:<br /> | Here is what you expect to observe. This is an [https://github.com/friendlyarm/QtE-Demo open source Qt Demo]:<br /> | ||
[[File:K2-QtE.png|frameless|400px|K2-QtE]]<br /> | [[File:K2-QtE.png|frameless|400px|K2-QtE]]<br /> | ||
| + | }} | ||
| + | |||
| + | {{UbuntuXenial-Armhf-Install-Docker}} | ||
| + | {{#switch: {{{1}}} | ||
| + | | NanoPi-R1 = | ||
| + | ===Using RTC=== | ||
| + | NanoPi-R1提供了RTC电池接口,使用系统的RTC功能需要连接CR2032带线RTC纽扣电池给板子的RTC电路供电,电池连接如下图所示:<br /> | ||
| + | [[File:NanoPi R1-RTC-BAT-en.png|frameless|350px|]]<br /> | ||
| + | [http://wiki.friendlyelec.com/wiki/images/c/c5/1.25mm-2A.pdf Dimensional diagram of on board RTC battery connector ] | ||
| + | ***待完善**** | ||
}} | }} | ||
Latest revision as of 06:33, 4 July 2022
Contents
1 Connect to USB Camera(FA-CAM202)
The FA-CAM202 is a 200M USB camera. Connect your board to camera module. Then boot OS, connect your board to a network, log into the board as root and run "mjpg-streamer":
$ cd /root/C/mjpg-streamer
$ make
$ ./start.sh
You need to change the start.sh script and make sure it uses a correct /dev/videoX node. You can check your camera's node by running the following commands:
$ apt-get install v4l-utils
$ v4l2-ctl -d /dev/video0 -D
Driver Info (not using libv4l2):
        Driver name   : uvcvideo
        Card type     : HC 3358+2100: HC 3358+2100  / USB 2.0 Camera: USB 2.0 Camera
        Bus info      : usb-1c1b000.usb-1
	...
The above messages indicate that "/dev/video0" is camera's device node.The mjpg-streamer application is an open source video steam server. After it is successfully started the following messages will be popped up:
$ ./start.sh
 i: Using V4L2 device.: /dev/video0
 i: Desired Resolution: 1280 x 720
 i: Frames Per Second.: 30
 i: Format............: YUV
 i: JPEG Quality......: 90
 o: www-folder-path...: ./www/
 o: HTTP TCP port.....: 8080
 o: username:password.: disabled
 o: commands..........: enabled
start.sh runs the following two commands:
export LD_LIBRARY_PATH="$(pwd)"
./mjpg_streamer -i "./input_uvc.so -d /dev/video0 -y 1 -r 1280x720 -f 30 -q 90 -n -fb 0" -o "./output_http.so -w ./www"
Here are some details for mjpg_streamer's major options:
-i: input device. For example "input_uvc.so" means it takes input from a camera;
-o: output device. For example "output_http.so" means the it transmits data via http;
-d: input device's subparameter. It defines a camera's device node;
-y: input device's subparameter. It defines a camera's data format: 1:yuyv, 2:yvyu, 3:uyvy 4:vyuy. If this option isn't defined MJPEG will be set as the data format;
-r: input device's subparameter. It defines a camera's resolution;
-f: input device's subparameter. It defines a camera's fps. But whether this fps is supported depends on its driver;
-q: input device's subparameter. It defines the quality of an image generated by libjpeg soft-encoding;
-n: input device's subparameter. It disables the dynctrls function;
-fb: input device's subparameter. It specifies whether an input image is displayed at "/dev/fbX";
-w: output device's subparameter. It defines a directory to hold web pages;
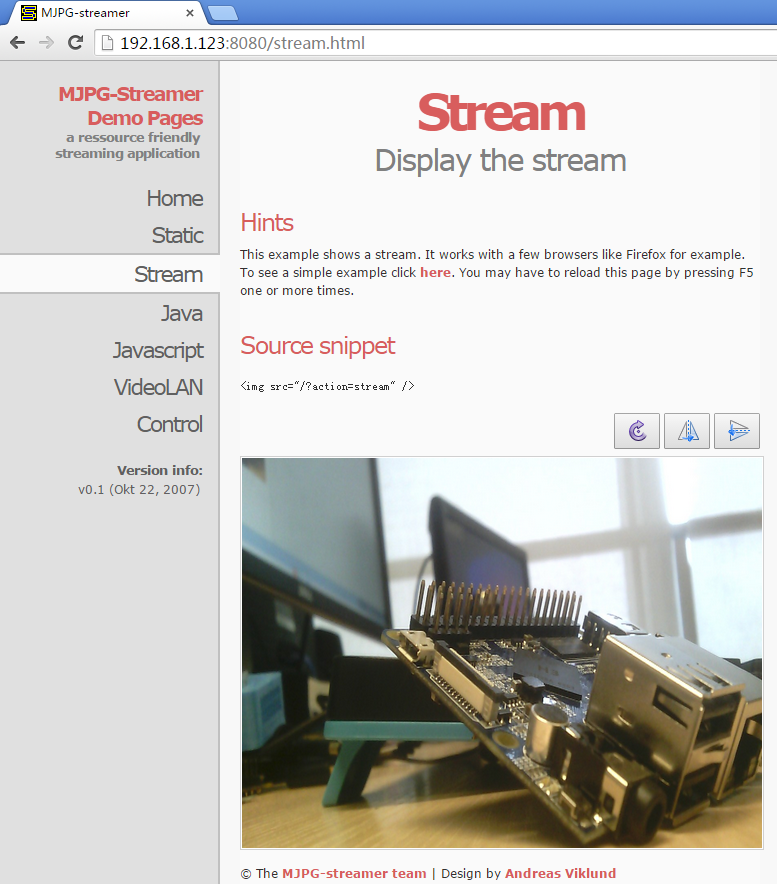
In our case the board's IP address was 192.168.1.230. We typed 192.168.1.230:8080 in a browser and were able to view the images taken from the camera's. Here is what you would expect to observe:

2 Check CPU's Working Temperature
You can get CPU's working temperature by running the following command:
$ cpu_freq
Aavailable frequency(KHz):
        480000 624000 816000 1008000
Current frequency(KHz):
        CPU0 online=1 temp=26548C governor=ondemand freq=624000KHz
        CPU1 online=1 temp=26548C governor=ondemand freq=624000KHz
        CPU2 online=1 temp=26548C governor=ondemand freq=624000KHz
        CPU3 online=1 temp=26548C governor=ondemand freq=624000KHz
This message means there are currently four CPUs working. All of their working temperature is 26.5 degree in Celsius and each one's clock is 624MHz.
Set CPU frequency:
$ cpu_freq -s 1008000
Aavailable frequency(KHz):
        480000 624000 816000 1008000
Current frequency(KHz):
        CPU0 online=1 temp=36702C governor=userspace freq=1008000KHz
        CPU1 online=1 temp=36702C governor=userspace freq=1008000KHz
        CPU2 online=1 temp=36702C governor=userspace freq=1008000KHz
        CPU3 online=1 temp=36702C governor=userspace freq=1008000KHz
3 Test Infrared Receiver
Note: Please Check your board if IR receiver exist.
By default the infrared function is disabled you can enable it by using the npi-config utility:
$ npi-config
    6 Advanced Options     Configure advanced settings
        A8 IR              Enable/Disable IR
            ir Enable/Disable ir[enabled]
Reboot your system and test its infrared function by running the following commands:
$ apt-get install ir-keytable
$ echo "+rc-5 +nec +rc-6 +jvc +sony +rc-5-sz +sanyo +sharp +mce_kbd +xmp" > /sys/class/rc/rc0/protocols   # Enable infrared
$ ir-keytable -t
Testing events. Please, press CTRL-C to abort.
"ir-keytable -t" is used to check whether the receiver receives infrared signals. You can use a remote control to send infrared signals to the receiver. If it works you will see similar messages as follows:
1522404275.767215: event type EV_MSC(0x04): scancode = 0xe0e43
1522404275.767215: event type EV_SYN(0x00).
1522404278.911267: event type EV_MSC(0x04): scancode = 0xe0e42
1522404278.911267: event type EV_SYN(0x00).
4 Run Qt Demo
Run the following command
$ sudo /opt/QtE-Demo/run.sh
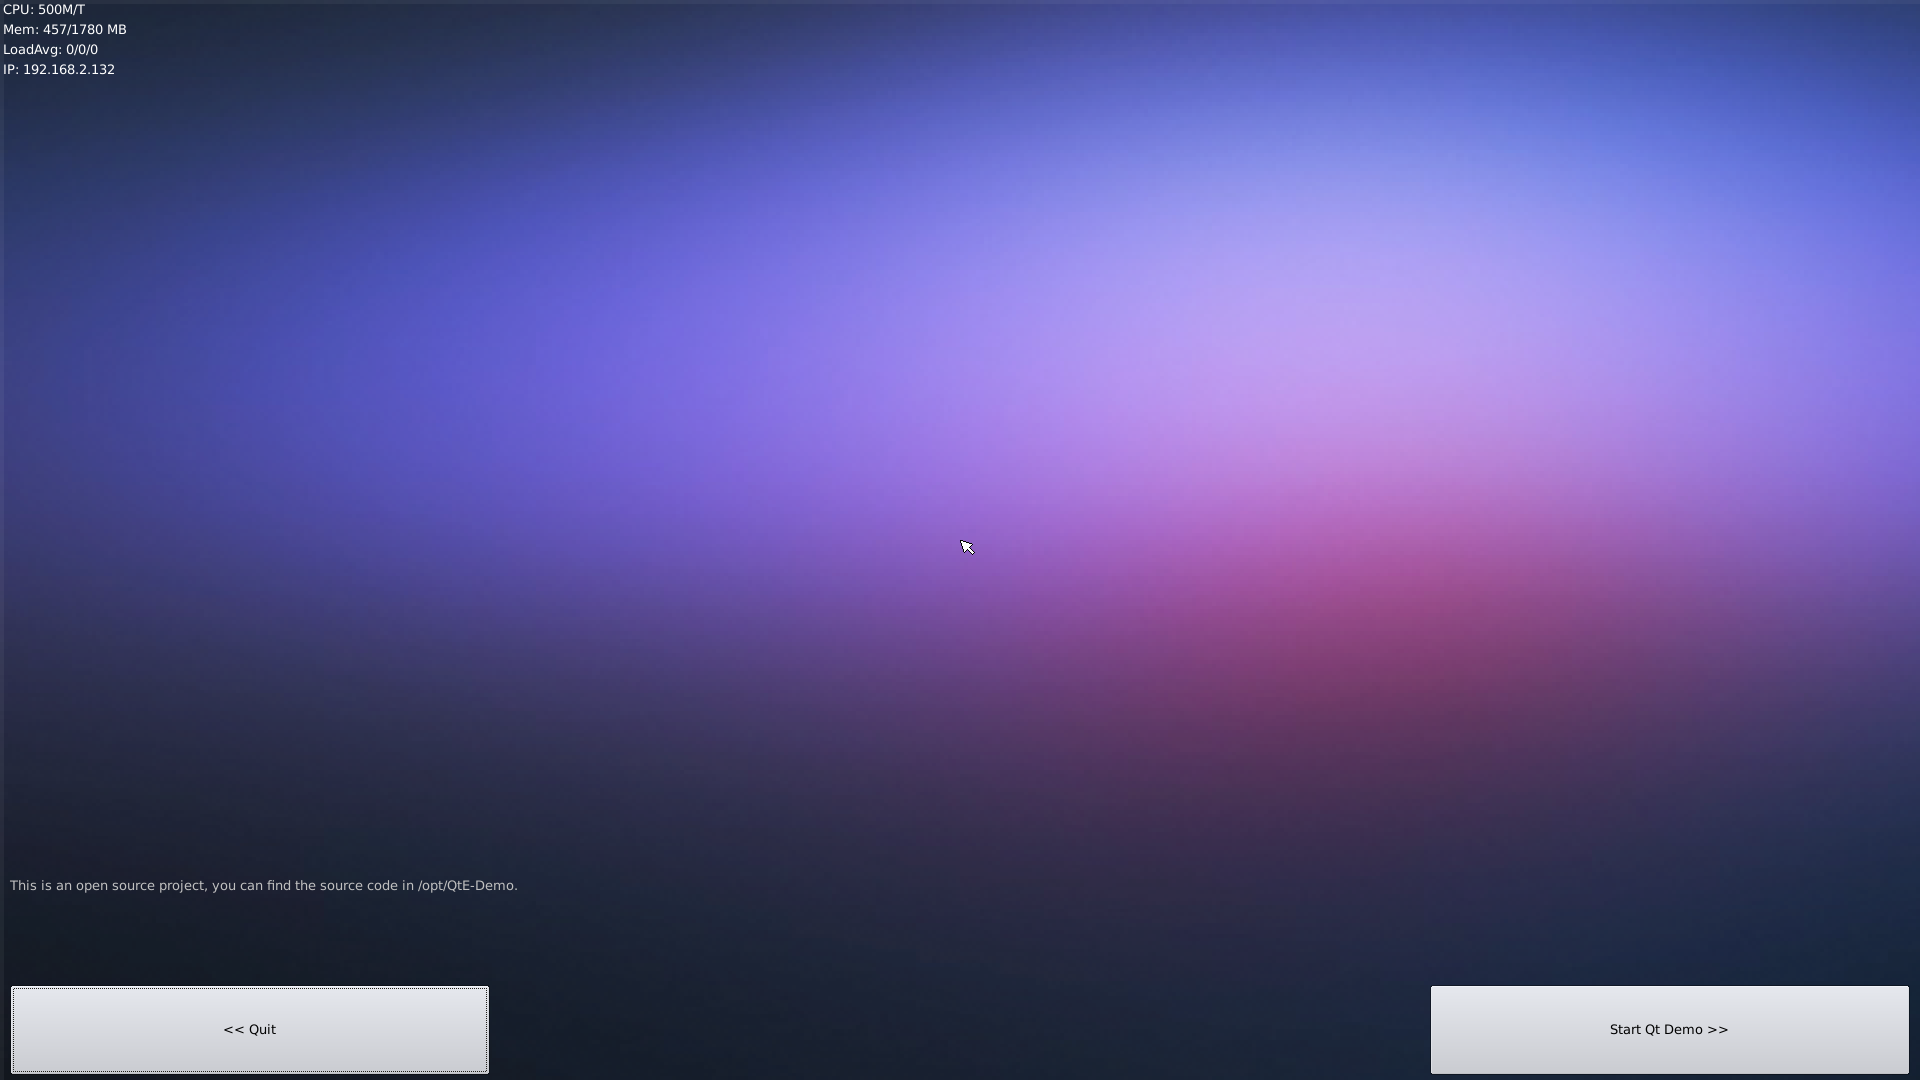
Here is what you expect to observe. This is an open source Qt Demo:

5 How to install and use docker (for armhf system)
5.1 How to Install Docker
Run the following commands:
sudo apt-get update
sudo apt-get install docker.io
5.2 Test Docker installation
Test that your installation works by running the simple docker image:
git clone https://github.com/friendlyarm/debian-jessie-arm-docker
cd debian-jessie-arm-docker
./rebuild-image.sh
./run.sh