Difference between revisions of "Matrix - Sound Sensor"
| Line 1: | Line 1: | ||
[[Matrix - Sound Sensor/zh|查看中文]] | [[Matrix - Sound Sensor/zh|查看中文]] | ||
| − | == | + | ==Introduction== |
[[File:SoundSensor01.png|thumb|Sound Sensor]] | [[File:SoundSensor01.png|thumb|Sound Sensor]] | ||
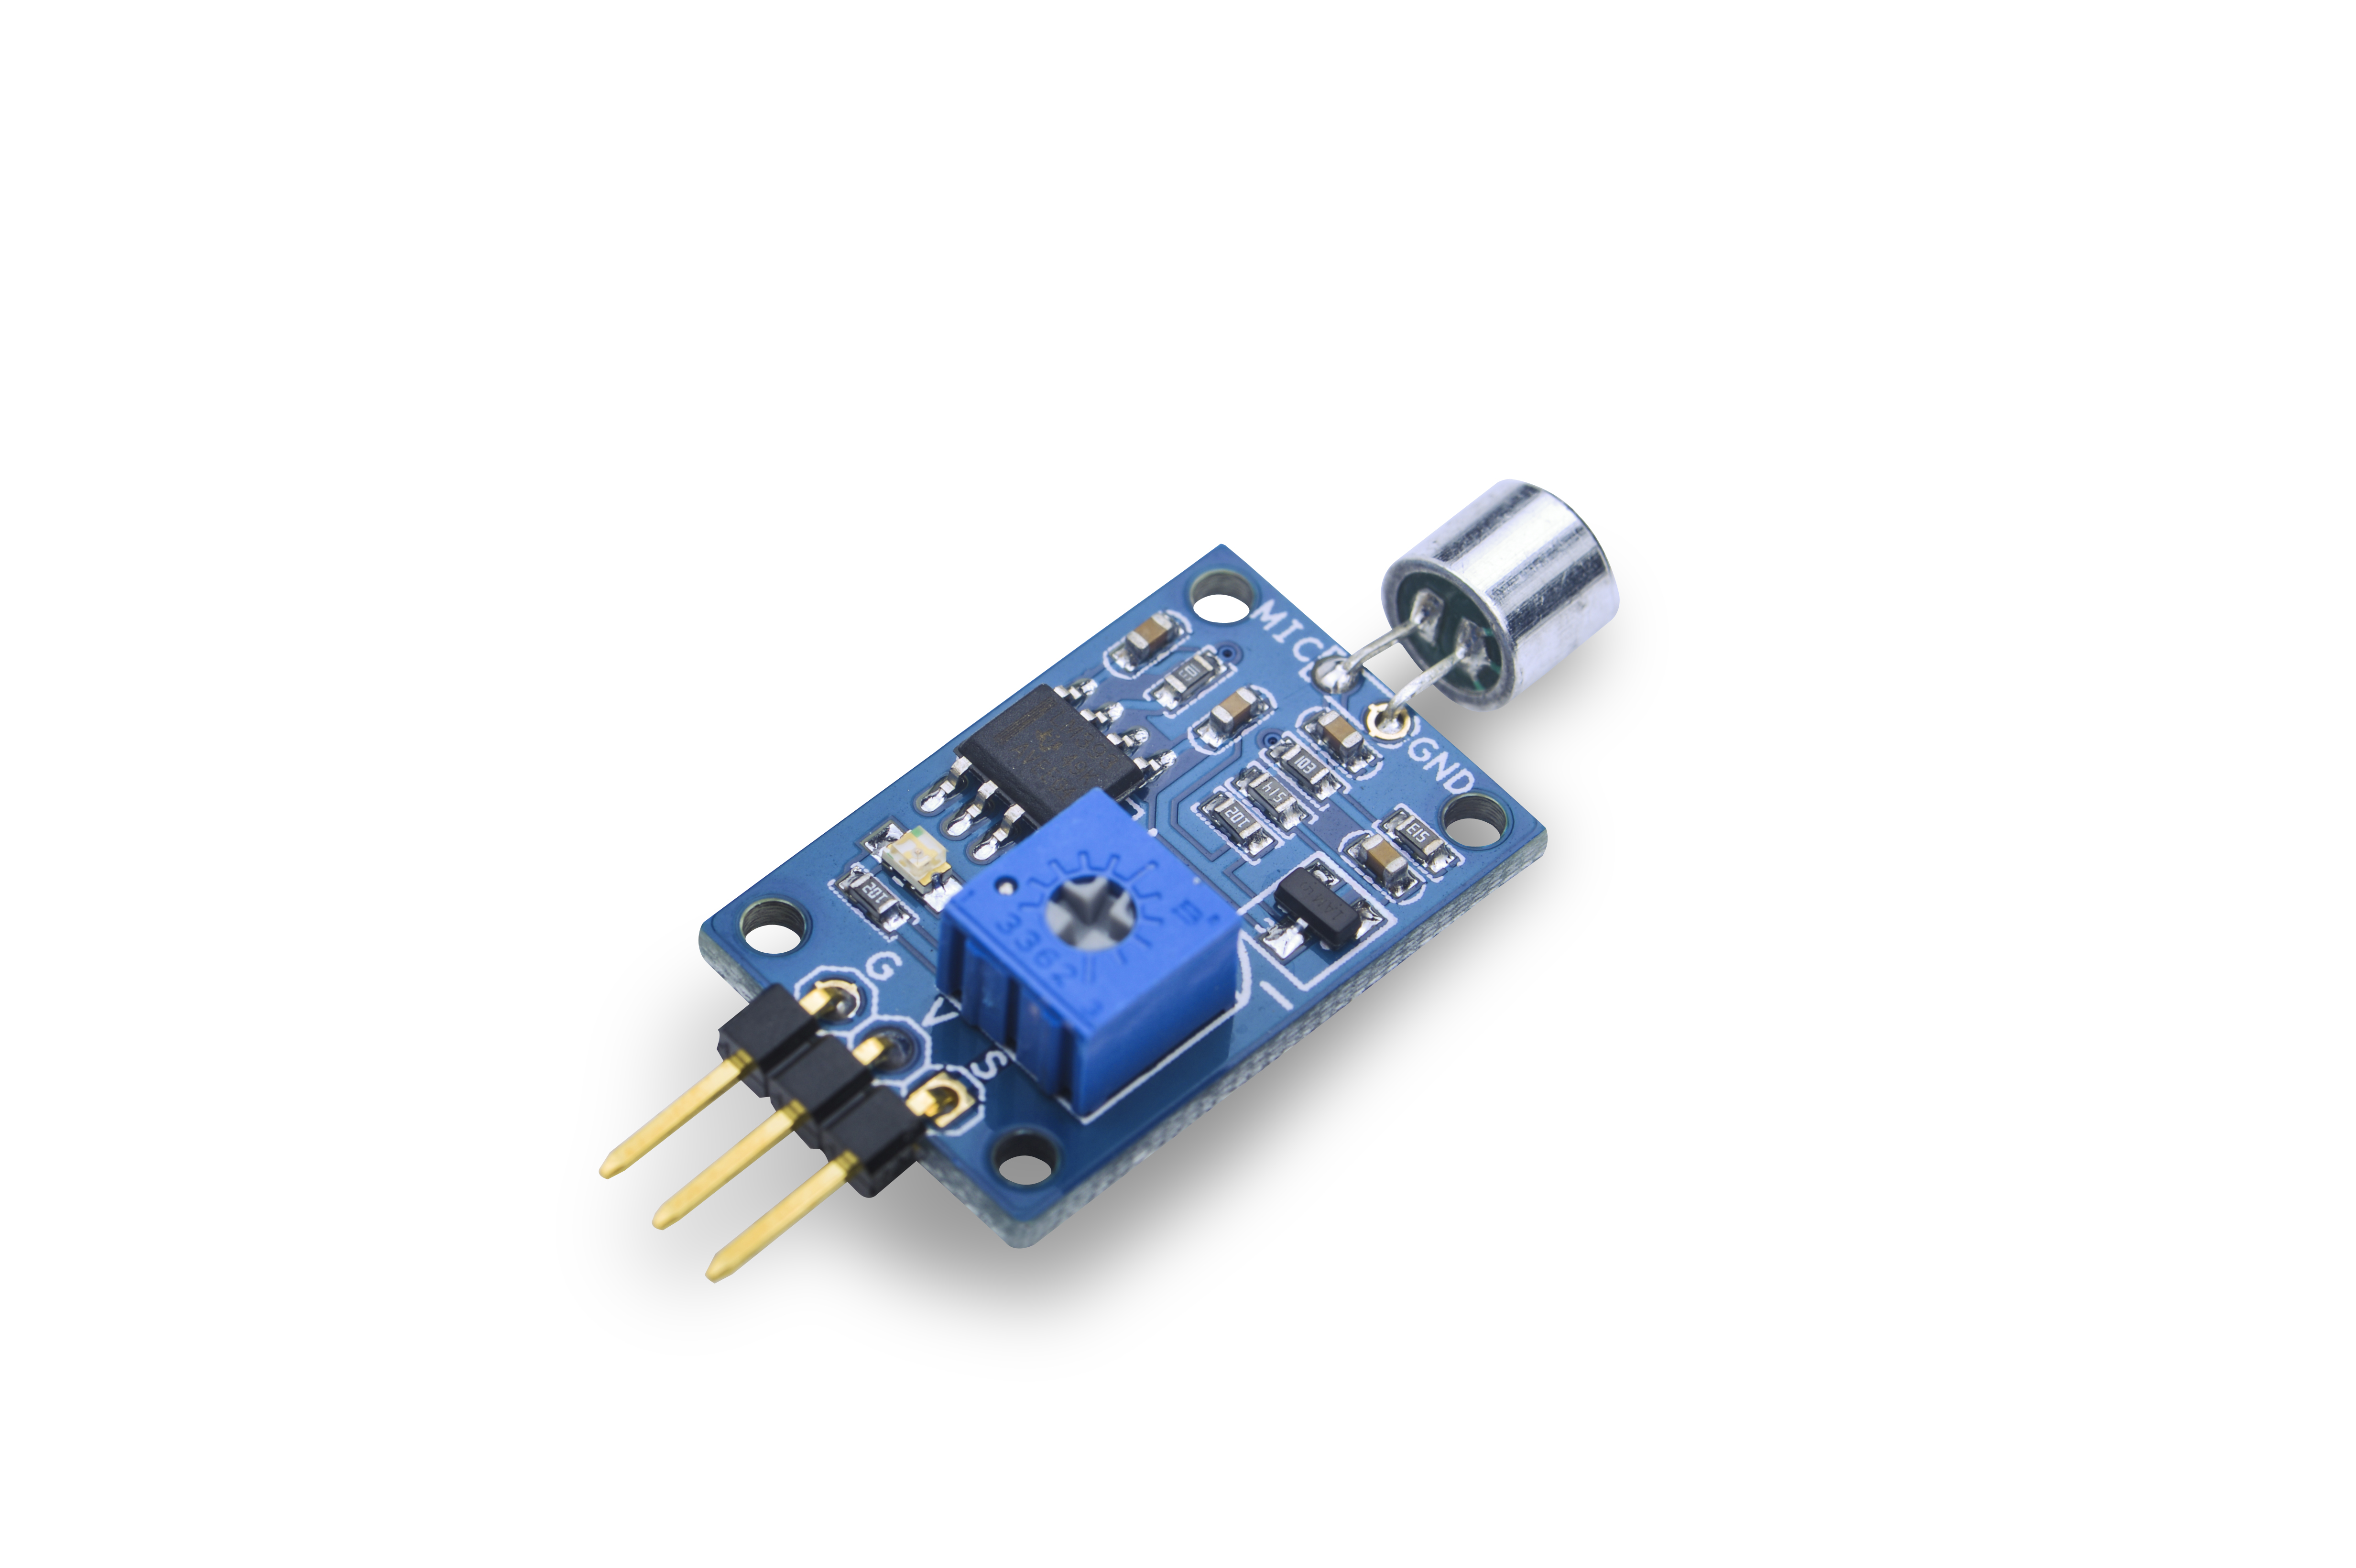
| − | * | + | * The Matrix-Sound_Sensor module is used to detect sound. |
| − | * | + | * The module has a variable resistor which can be used to control the threshold value of a sound level. Only when a sound level's value is greater than this threshold the module can detect it. Turning clockwise increases this threshold value. Turning anticlockwise decreases this value. |
| − | * | + | * By default this module's output level is high. When it detects sound signals its output level will turn low. When sound signals are not detected its output will turn high again without time delay. |
| − | == | + | ==Features== |
| − | * | + | * Variable threshold value |
| − | * 2. | + | * 2.54mm spacing pin interface |
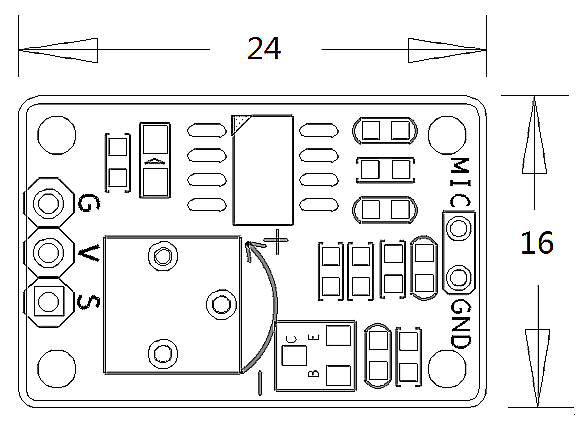
| − | * | + | * PCB dimension (mm): 16 x 24 |
[[File:micpcb.png|frameless|400px|声音传感器PCB]] | [[File:micpcb.png|frameless|400px|声音传感器PCB]] | ||
Revision as of 08:15, 28 September 2015
Contents
1 Introduction
- The Matrix-Sound_Sensor module is used to detect sound.
- The module has a variable resistor which can be used to control the threshold value of a sound level. Only when a sound level's value is greater than this threshold the module can detect it. Turning clockwise increases this threshold value. Turning anticlockwise decreases this value.
- By default this module's output level is high. When it detects sound signals its output level will turn low. When sound signals are not detected its output will turn high again without time delay.
2 Features
- Variable threshold value
- 2.54mm spacing pin interface
- PCB dimension (mm): 16 x 24
- 引脚说明:
| 名称 | 描述 |
| S | GPIO |
| V | 电源5V |
| G | 地 |
3 工作原理
- 该传感器内置一个对声音敏感的电容式驻极体话筒。声波使话筒内的驻极体薄膜振动,导致电容的变化,而产生与之对应变化的微小电压。
- 声音传感器的作用相当于一个话筒(麦克风)。它用来接收声波,显示声音的振动图象。当接收当声音时会输出1,但不能对噪声的强度进行测量。
4 下载Matrix源码
Matrix配件相关的代码是完全开源的,统一由一个仓库进行管理:git://github.com/friendlyarm/matrix.git
该仓库里不同的分支代表着Matrix配件所支持的不同开发板。
- nanopi分支包含了Matrix对NanoPi的支持;
- tiny4412分支包含了Matrix对Tiny4412的支持;
- raspberrypi分支包含了Matrix对RaspberryPi的支持;
在主机PC上安装git,以Ubuntu14.04为例
$ sudo apt-get install git
克隆Matrix配件代码仓库
$ git clone git://github.com/friendlyarm/matrix.git
克隆完成后会得到一个matrix目录,里面存放着所有Matrix配件的代码。
5 与NanoPi连接使用
5.1 准备工作
在NanoPi上运行Debian系统,然后在主机PC上安装并使用相应的编译器。参考wiki:NanoPi
注意:必须使用nanopi-v4.1.y-matrix分支编译出来的内核。
下载NanoPi内核源代码并编译
$ git clone https://github.com/friendlyarm/linux-4.x.y.git
$ cd linux-4.x.y
$ git checkout nanopi-v4.1.y-matrix
$ make nanopi_defconfig
$ touch .scmversion
$ make
5.2 硬件连接
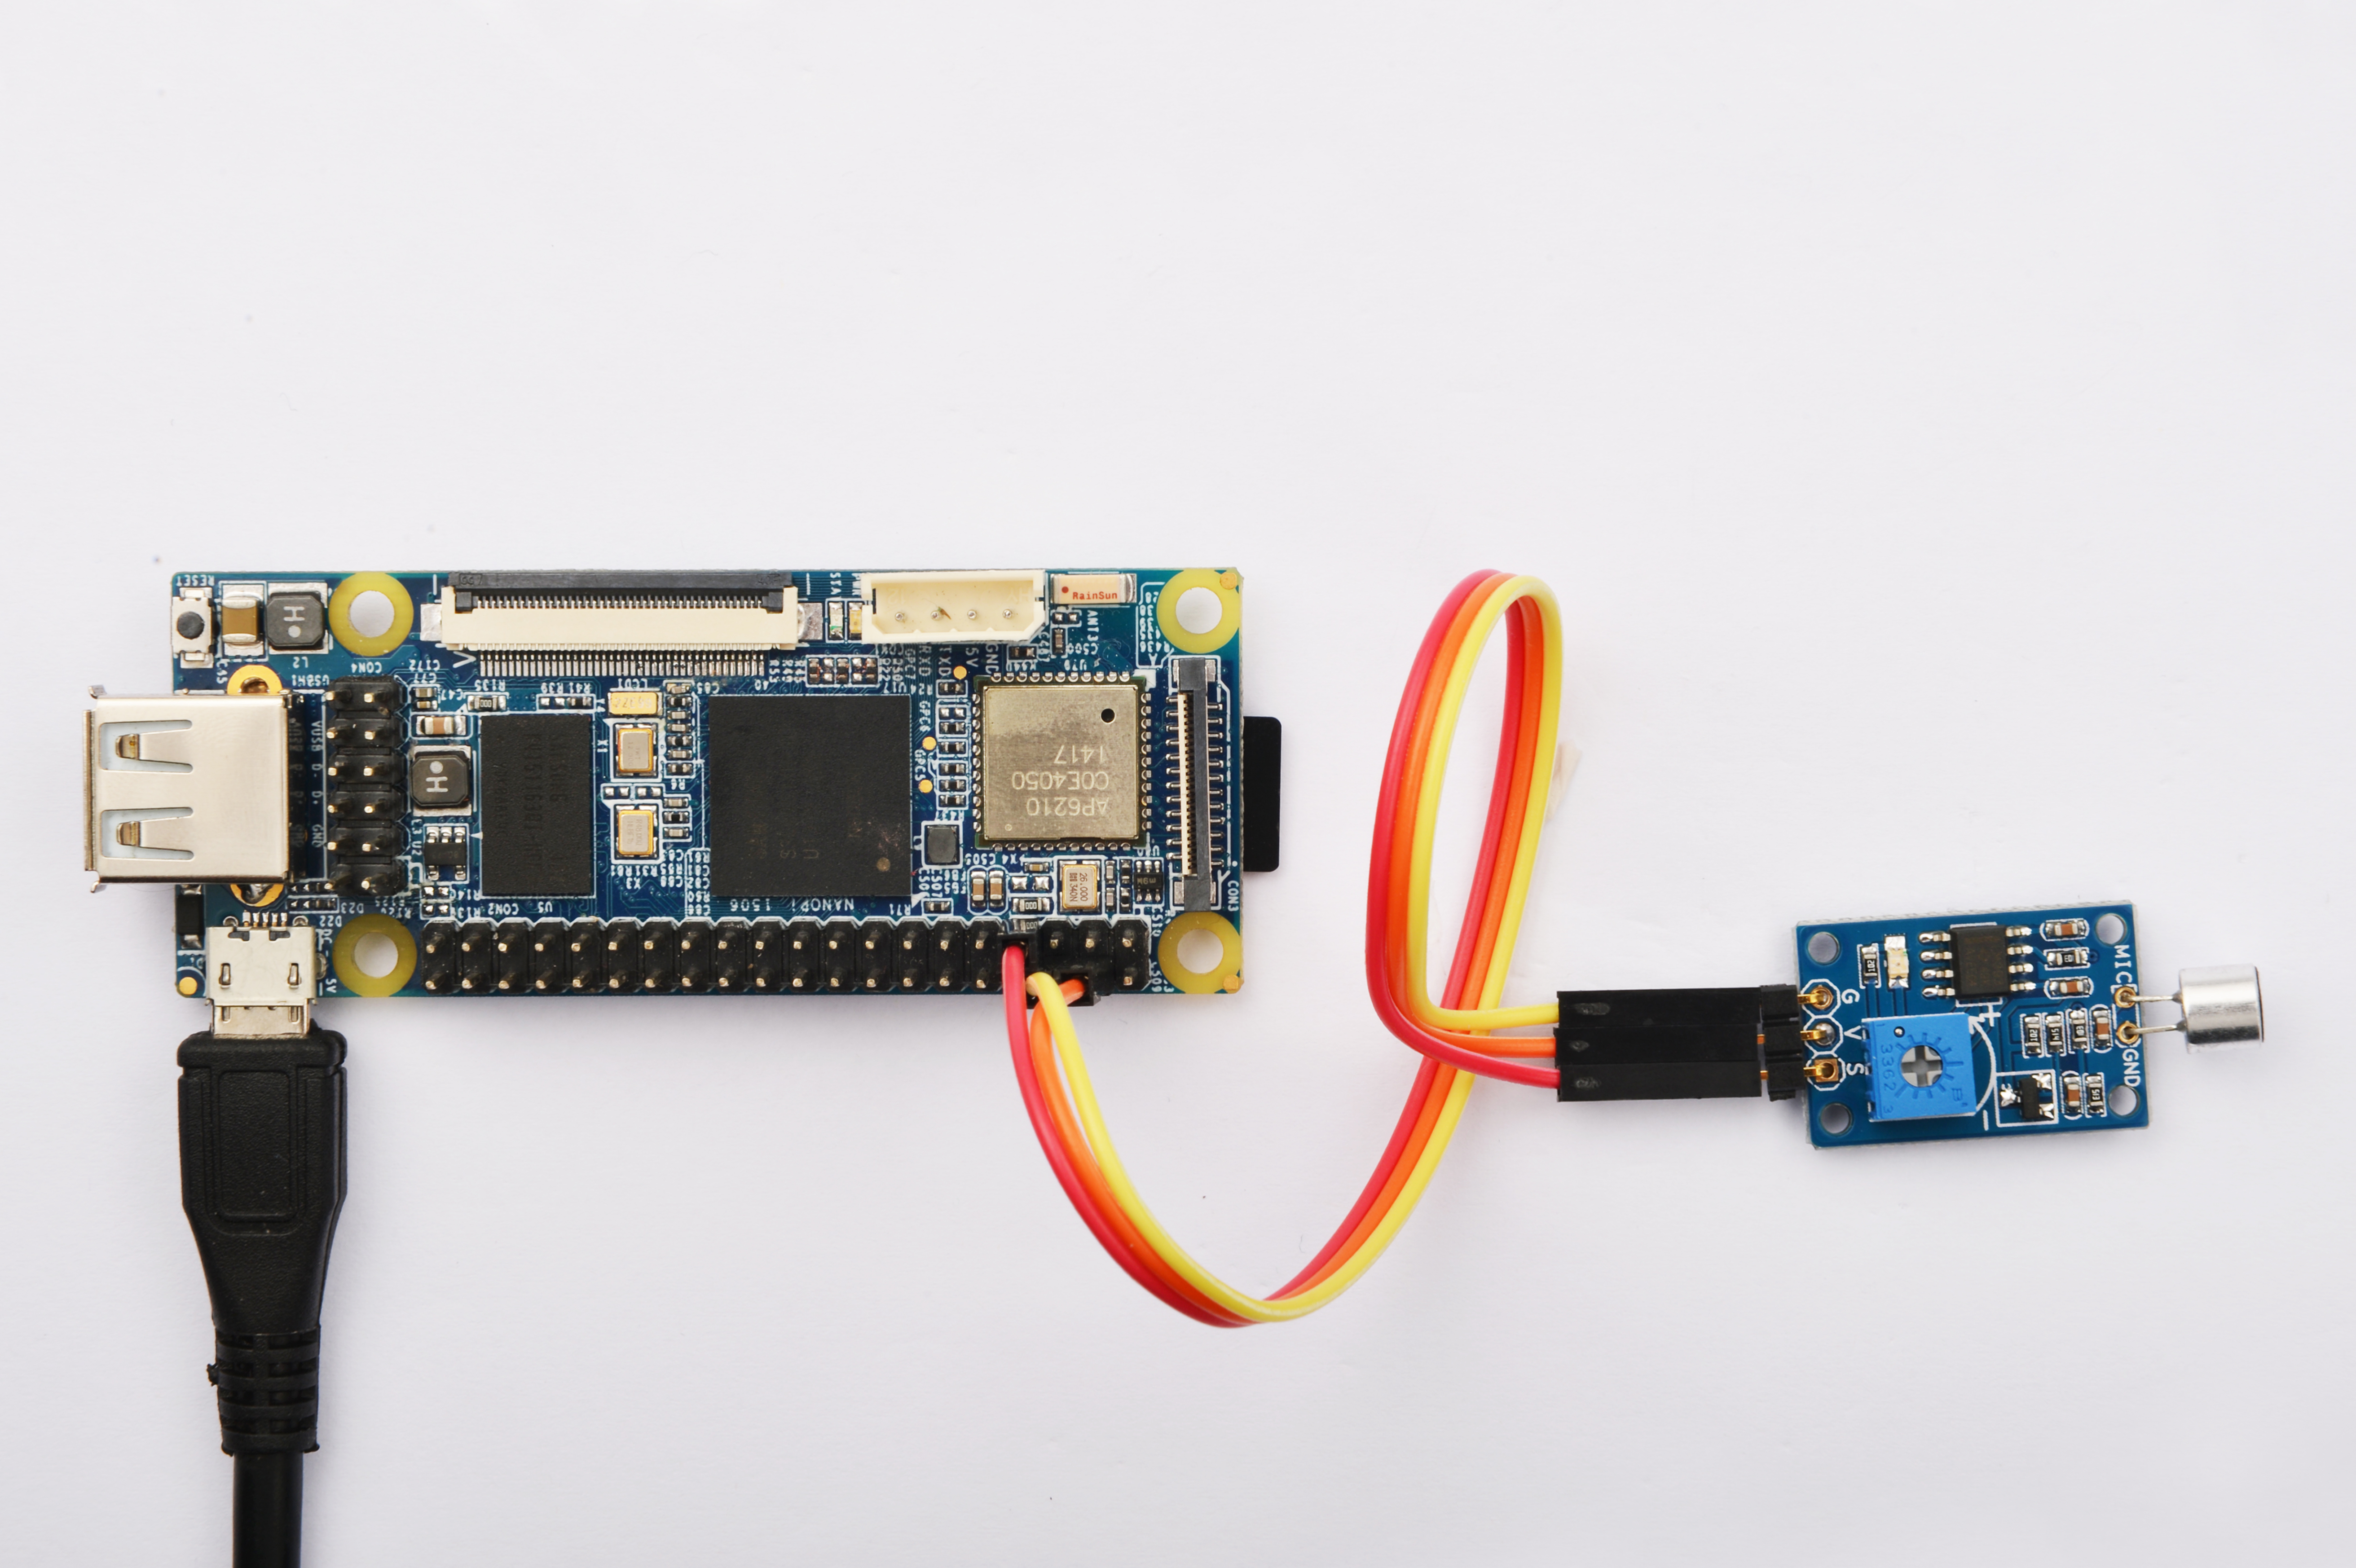
参考下图连接模块Matrix-Sound_Sensor和NanoPi

连接说明:
| Matrix-Sound_Sensor | NanoPi |
| S | Pin7 |
| V | Pin4 |
| G | Pin6 |
5.3 编译测试程序
进入Matrix代码仓库,切换到nanopi分支
$ cd matrix
$ git checkout nanopi
编译Matrix配件代码
$ make CROSS_COMPILE=arm-linux- clean
$ make CROSS_COMPILE=arm-linux-
$ make CROSS_COMPILE=arm-linux- install
注意:请确保你的主机PC当前使用的交叉编译器为NanoPi-Debian配套的arm-linux-gcc-4.4.3。
编译出来的库文件位于install/lib目录下,而测试程序则位于install/usr/bin目录下,模块Matrix-Sound_Sensor对应的测试程序为matrix-sound_sensor。
5.4 运行测试程序
拷贝库文件和测试程序到NanoPi的文件系统上
$ cp install/usr/bin/* nanopi_rootfs/usr/bin/
$ cp install/lib/* nanopi_rootfs/lib/ -d
然后启动NanoPi,在Debian的shell终端中执行如下命令运行模块Matrix-Sound_Sensor的测试程序
$ matrix-sound_sensor5.5 代码展示
static struct sensor sound[] = {
        {
                GPIO_PIN1,
                IRQ_TYPE_EDGE_BOTH,
        }
};

int main(void)
{
    int i;
    int retSize = -1;
    char value[ARRAY_SIZE(sound)];
    int devFD = -1;
    if ((devFD =sensorInit(sound, ARRAY_SIZE(sound))) == -1) {
        printf("Fail to init sensor\n");
        return -1;
    }

    if (( retSize = sensorRead(devFD, value, ARRAY_SIZE(sound)) ) == -1) {
        printf("Fail to read sensors\n");
    }
    if (retSize > 0) {
        i = 0;
        for(i=0; i<retSize; i++)
        {
            printf("sound[%d]:%d\n", i, value[i]);
        }
        printf("\n");
    }
    sensorDeinit(devFD);
    return 0;
}
6 与Tiny4412连接使用
6.1 准备工作
参考Tiny4412光盘里的《友善之臂Ubuntu使用手册》,在Tiny4412上运行UbuntuCore系统,然后在主机PC上安装并使用相应的编译器。
注意:只能使用Tiny4412SDK-1506的底板。
6.2 硬件连接
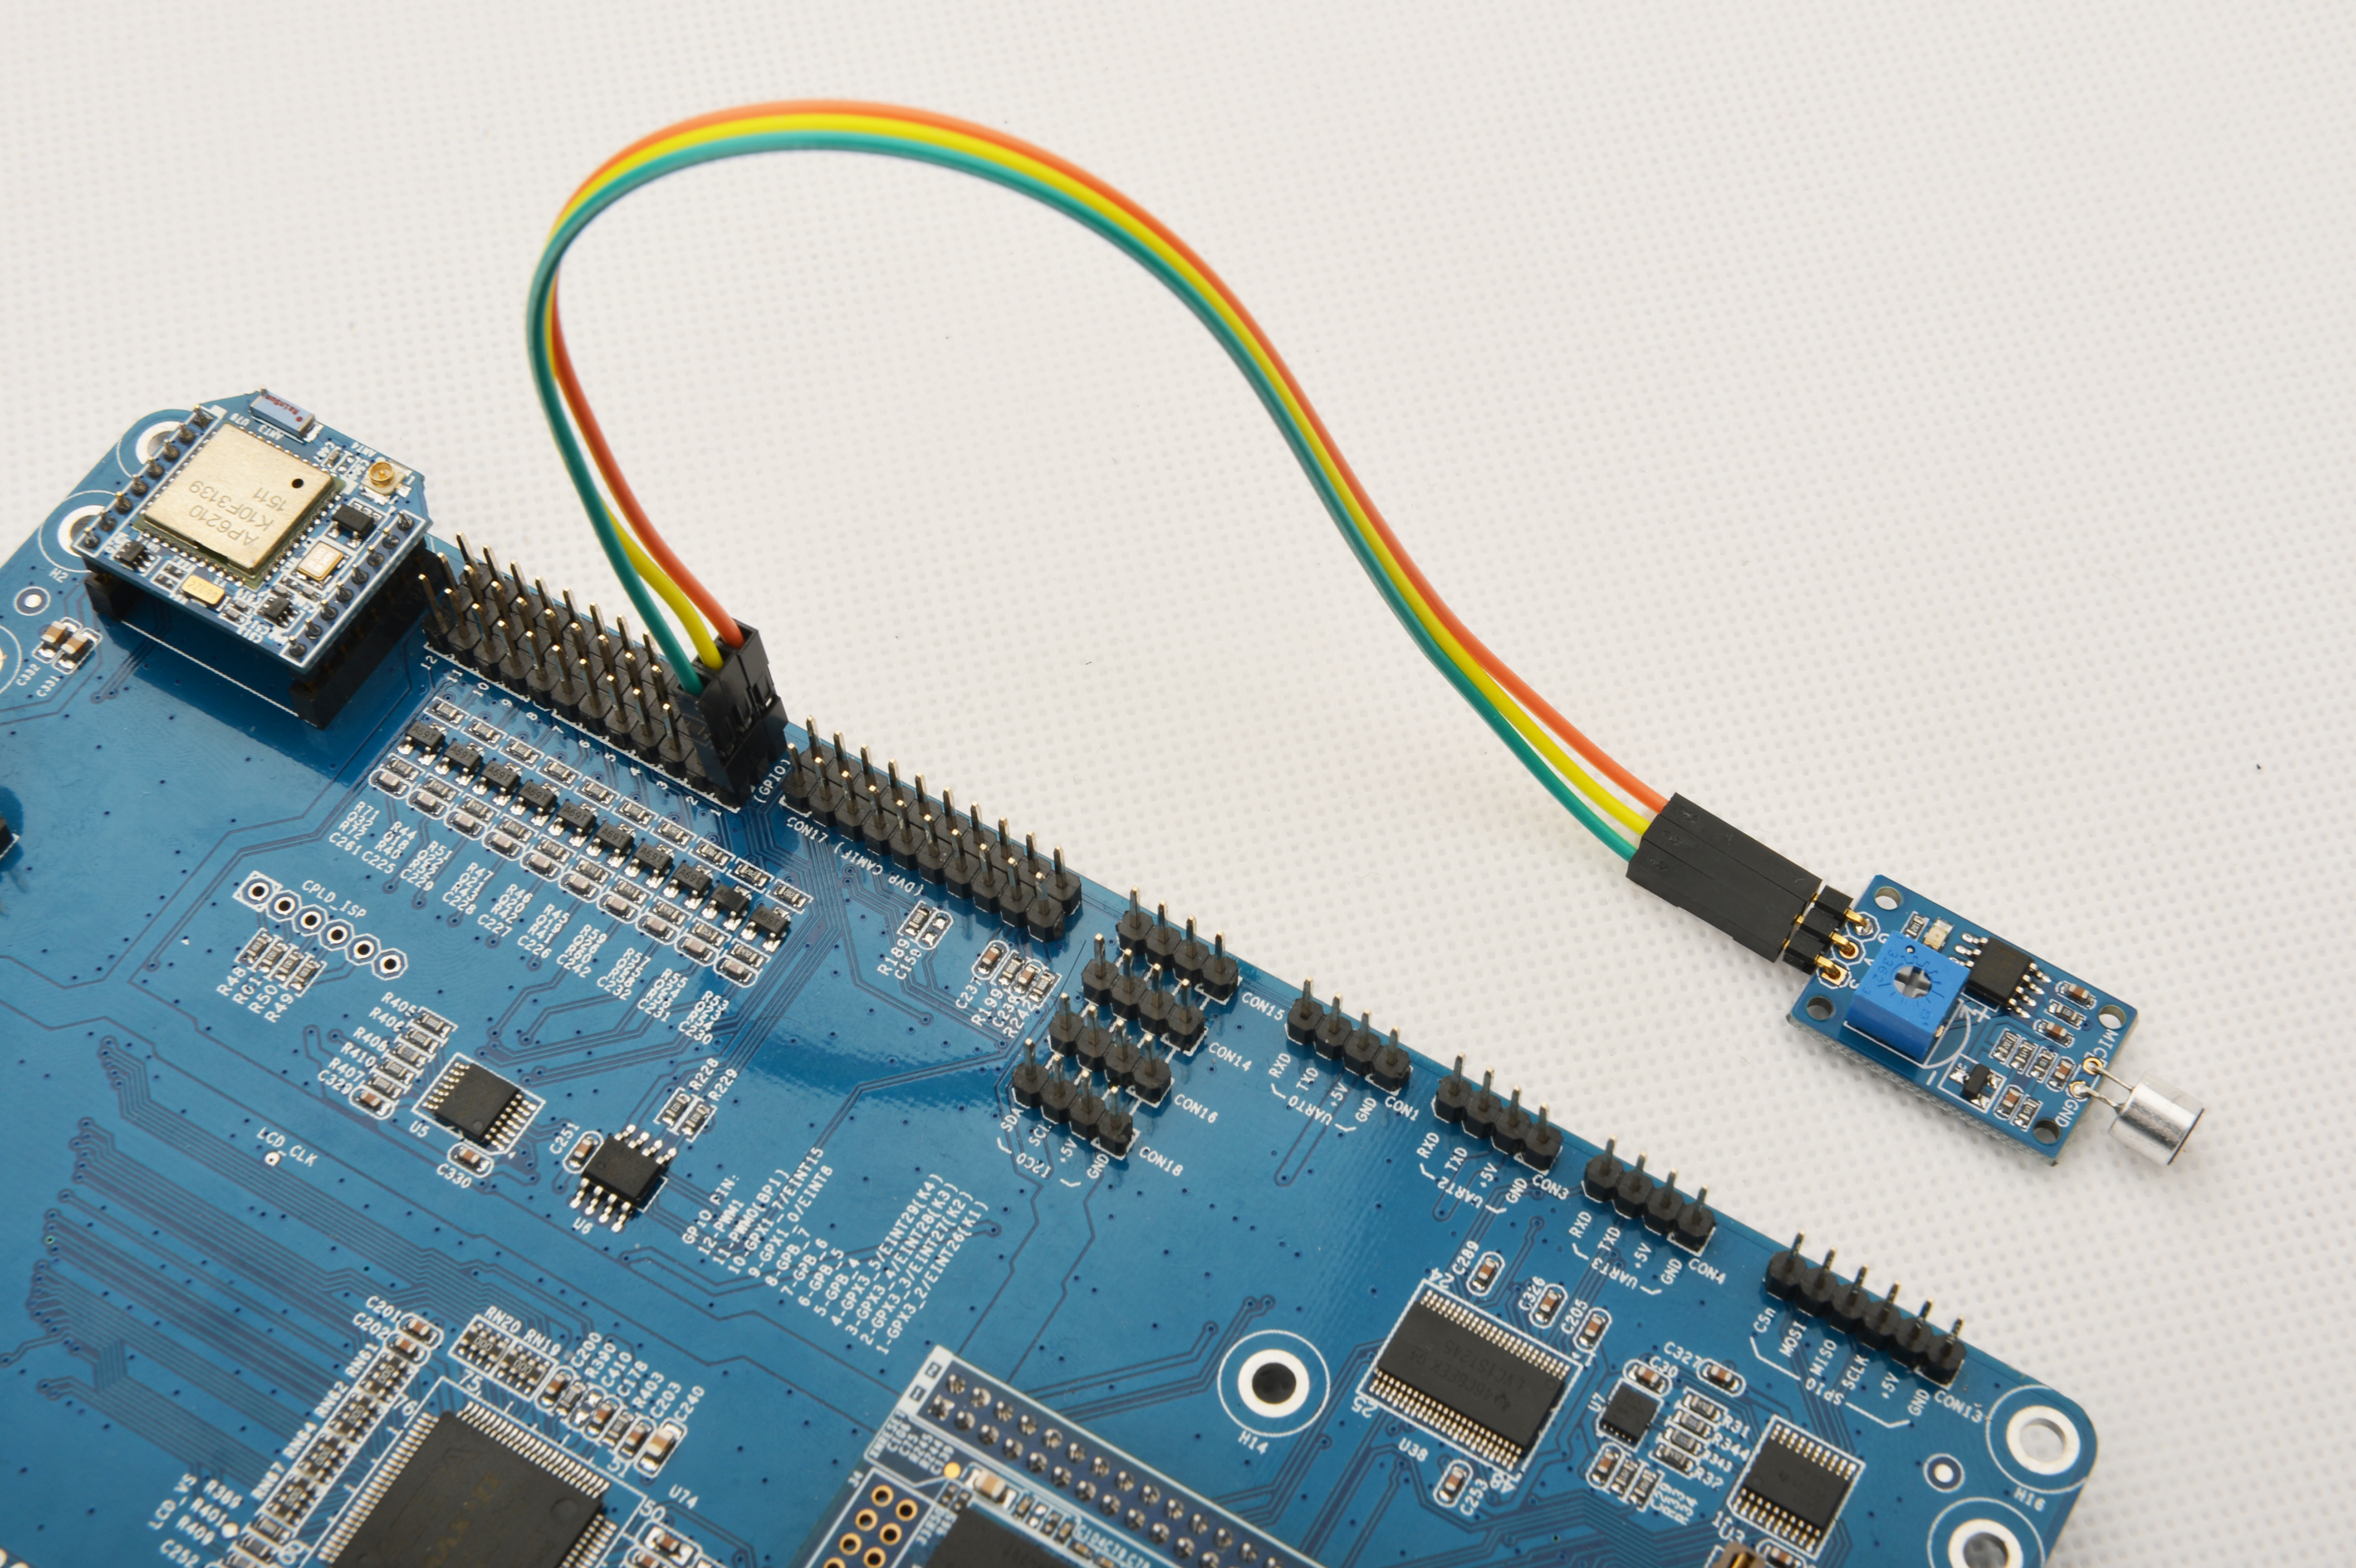
参考下图连接模块Matrix-Sound_Sensor和Tiny4412

连接说明:
| Matrix-Sound_Sensor | Tiny4412 |
| S | GPIO1 S |
| V | GPIO1 5V |
| G | GPIO1 GND |
6.3 编译测试程序
进入Matrix代码仓库,切换到tiny4412分支
$ cd matrix
$ git checkout tiny4412
编译Matrix配件代码
$ make CROSS_COMPILE=arm-linux-gnueabihf- clean
$ make CROSS_COMPILE=arm-linux-gnueabihf-
$ make CROSS_COMPILE=arm-linux-gnueabihf- install
注意:请确保你的主机PC当前使用的交叉编译器为Tiny4412-UbuntuCore配套的arm-linux-gnueabihf-gcc-4.7.3。
编译出来的库文件位于install/lib目录下,而测试程序则位于install/usr/bin目录下,模块Matrix-Sound_Sensor对应的测试程序为matrix-sound_sensor。
6.4 运行测试程序
拷贝库文件和测试程序到Tiny4412的UbuntuCore的文件系统上
$ cp install/usr/bin/* tiny4412_rootfs/usr/bin/
$ cp install/lib/* tiny4412_rootfs/lib/ -d
然后启动Tiny4412,在UbuntuCore的shell终端中执行如下命令运行模块Matrix-Sound_Sensor的测试程序
$ matrix-sound_sensor6.5 代码展示
static struct sensor sound[] = {
        {
                GPIO_PIN1,
                IRQ_TYPE_EDGE_BOTH,
        }
};

int main(void)
{
    int i;
    int retSize = -1;
    char value[ARRAY_SIZE(sound)];
    int devFD = -1;
    if ((devFD =sensorInit(sound, ARRAY_SIZE(sound))) == -1) {
        printf("Fail to init sensor\n");
        return -1;
    }

    if (( retSize = sensorRead(devFD, value, ARRAY_SIZE(sound)) ) == -1) {
        printf("Fail to read sensors\n");
    }
    if (retSize > 0) {
        i = 0;
        for(i=0; i<retSize; i++)
        {
            printf("sound[%d]:%d\n", i, value[i]);
        }
        printf("\n");
    }
    sensorDeinit(devFD);
    return 0;
}

