Difference between revisions of "Matrix - I2C LCD1602 Keypad"
(→Introduction) |
(→Introduction) |
||
| Line 5: | Line 5: | ||
[[File:LCD160202.png|thumb|I2C LCD1602]] | [[File:LCD160202.png|thumb|I2C LCD1602]] | ||
* The Matrix-I2C_LCD1602_Keypad module is an easy-to-use display module based on the LCD1602. | * The Matrix-I2C_LCD1602_Keypad module is an easy-to-use display module based on the LCD1602. | ||
| − | * | + | * This module integrates the LCD1602 and the MCP23017 module. It has five programmable keys which allow users to control the LCD1602's display and external devices connected to the module. |
* 模块上的电位器是调节屏幕显示的灰度。 | * 模块上的电位器是调节屏幕显示的灰度。 | ||
* LCD1602是可以显示16x2个字符的液晶显示屏,其本身是并行接口,需要较多的IO资源才可以与之通讯。使用IIC控制模块之后,只需要两根GPIO引脚即可。 | * LCD1602是可以显示16x2个字符的液晶显示屏,其本身是并行接口,需要较多的IO资源才可以与之通讯。使用IIC控制模块之后,只需要两根GPIO引脚即可。 | ||
Revision as of 07:25, 17 September 2015
Contents
1 Introduction
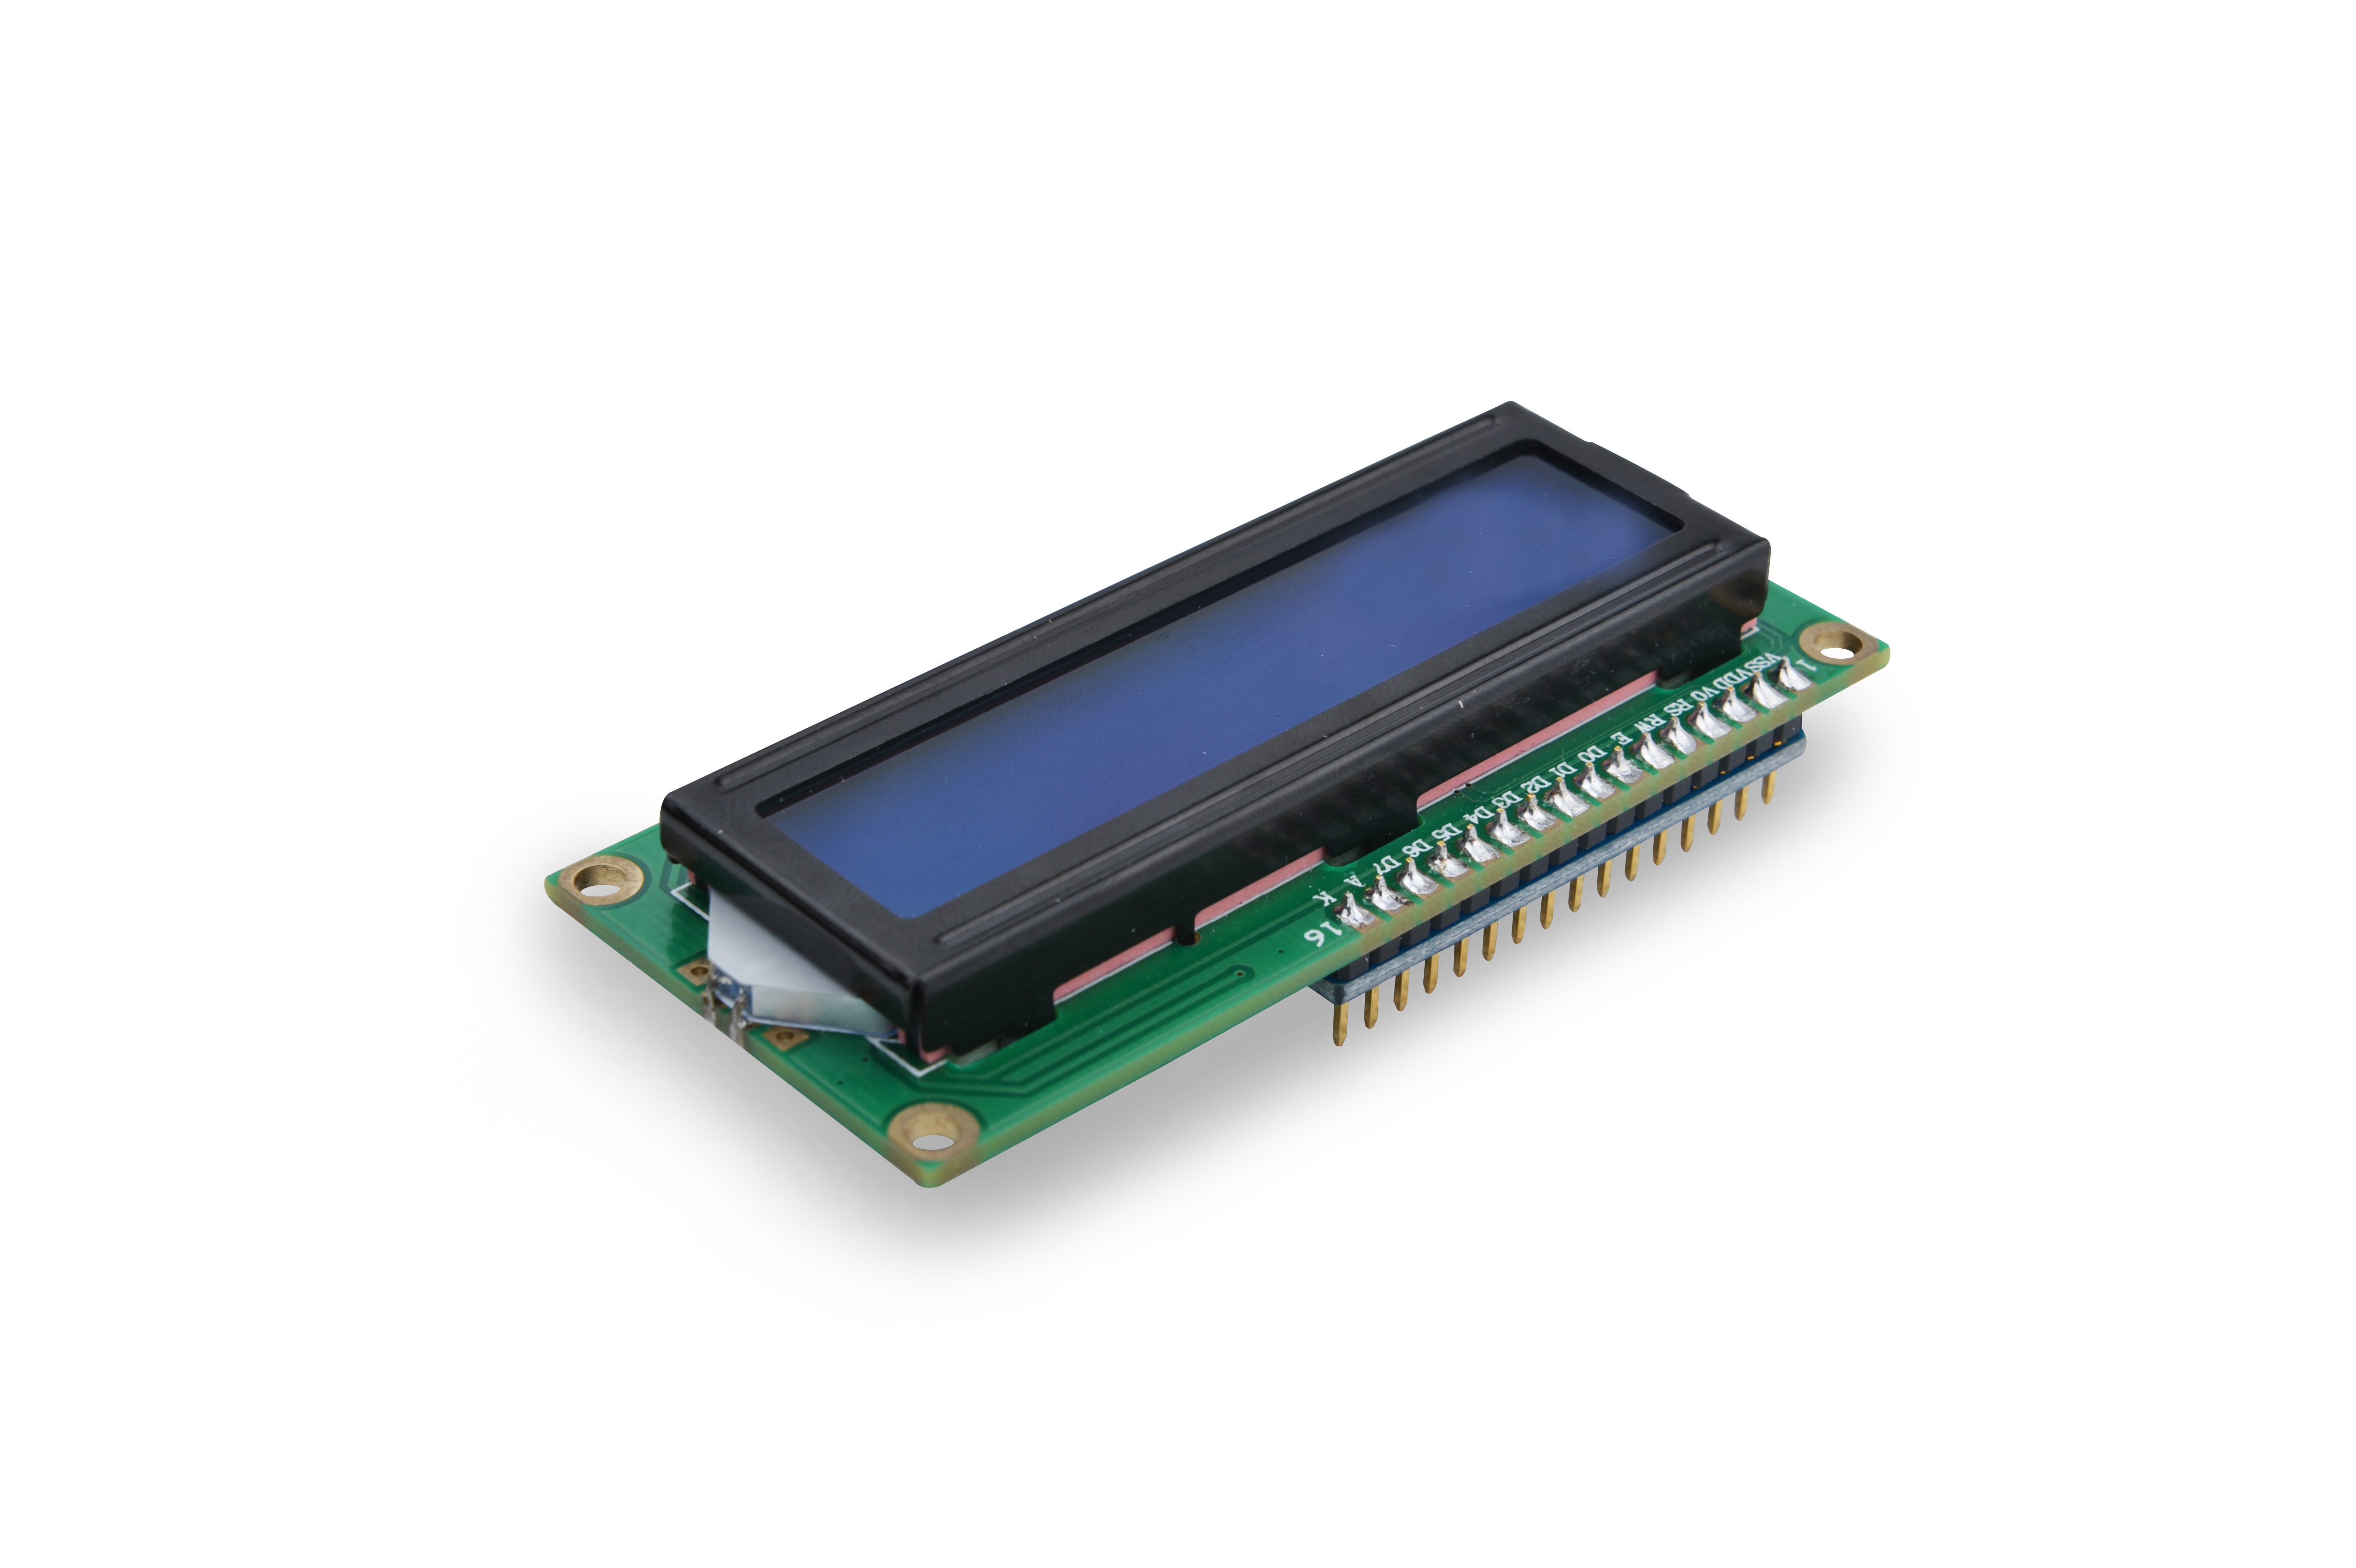
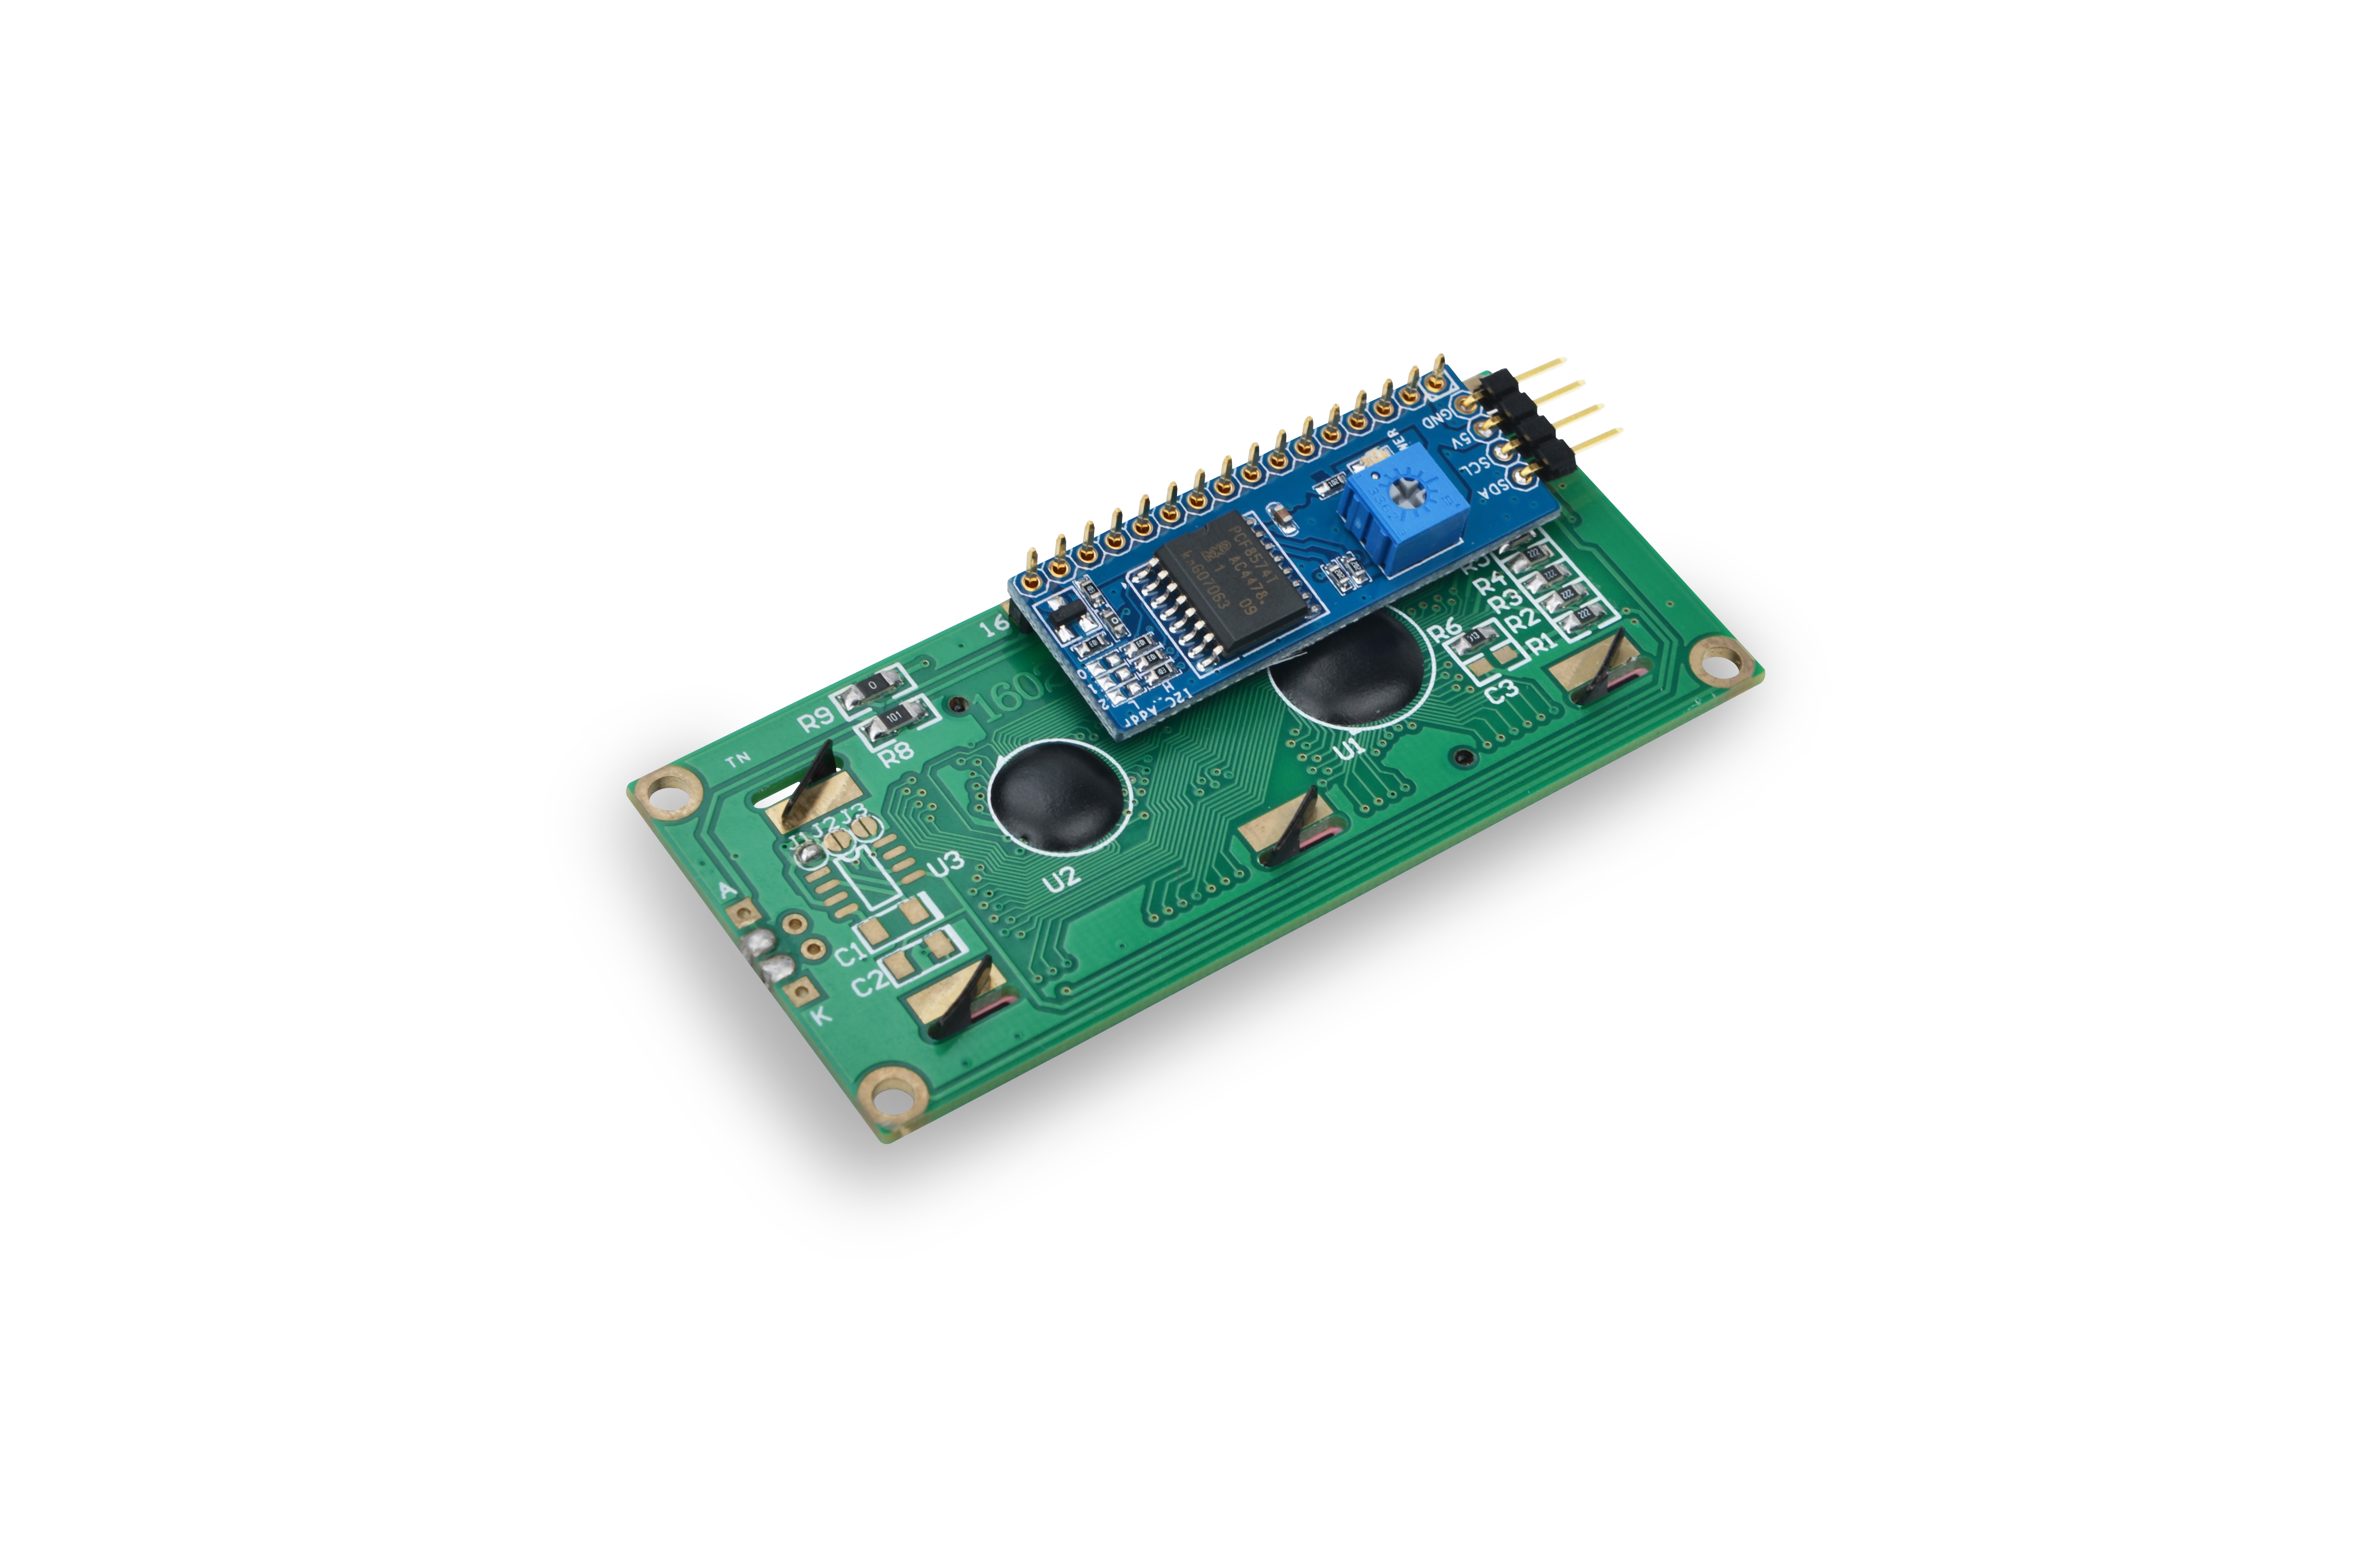
- The Matrix-I2C_LCD1602_Keypad module is an easy-to-use display module based on the LCD1602.
- This module integrates the LCD1602 and the MCP23017 module. It has five programmable keys which allow users to control the LCD1602's display and external devices connected to the module.
- 模块上的电位器是调节屏幕显示的灰度。
- LCD1602是可以显示16x2个字符的液晶显示屏,其本身是并行接口,需要较多的IO资源才可以与之通讯。使用IIC控制模块之后,只需要两根GPIO引脚即可。
- MCP23017带有串行接口的16 位远程双向I/O 扩展器,高速IIC接口,三个硬件地址引脚,最多可允许总线上连接8个器件。它可通过I2C与主控通讯,将主控发过来的数据信息转换成并行信号再转发给LCD1602,从而在实现LCD1602的显示和背光调节功能,达到节约IO资源和简化控制的目的。
2 特性
- I2C通讯,显示和背光可控
- 2.54mm排针接口,接线方便,通用性强
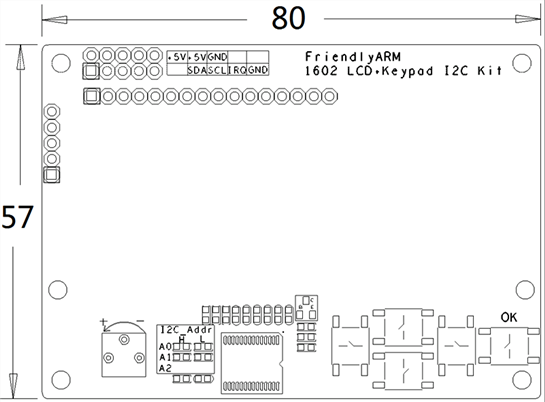
- IIC模块PCB尺寸(mm):57x80
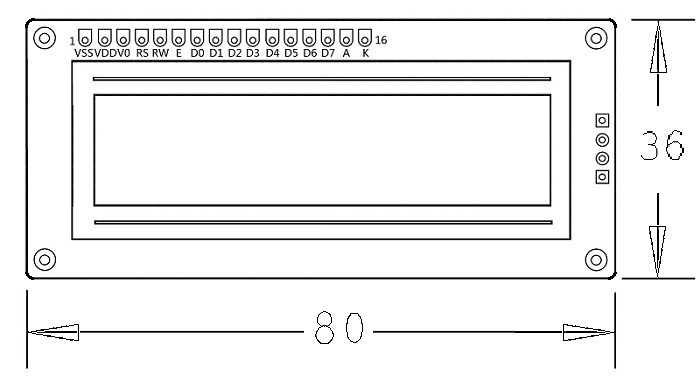
- LCD1602 PCB尺寸(mm):36x80
- 引脚说明:
| 名称 | 描述 |
| IRQ | BUTTON IRQ |
| SDA | I2C SDA |
| SCL | I2C SCL |
| 5V | 电源5V |
| GND | 地 |
3 工作原理
3.1 MCP23017工作原理
- MCP23017器件为IIC总线扩展,带有串行接口的16位远程双向I/O端口。系统主器件可通过写入I/O配置位将I/O使能为输入或输出,每个输入输出的数据都保存在对应的输入输出寄存器中,它为高速IIC接口,有三个硬件地址引脚,最多可允许总线上连接8个器件,具有两个可配置的中断引脚INTA和INTB。
- I2C 写操作包括控制字节和寄存器地址序列,该序列后面跟随来自系统主器件的8 位数据和来自MCP23017 的应答(ACK)。该操作以主系统生成的停止(P)或重新启动(SR)条件结束。
- I2C读操作包括控制字节序列,该序列后跟R/W位置1(R/W = 1)的另一个控制字节(包括启动条件和ACK)。MCP23017 随后会发送被寻址寄存器中包含的数据。该序列以系统主器件生成停止或重新启动条件结束。
- I2C 顺序写入/ 读取对于顺序操作(读操作或写操作),在完成数据传送后,系统主器件将发送地址指针指向的下一字节,而不是发送停止或重新启动条件。该序列以系统主器件发送停止或重新启动条件结束。MCP23017 地址指针在到达最后一个寄存器地址后,将返回到地址0。
3.2 LCD1602工作原理
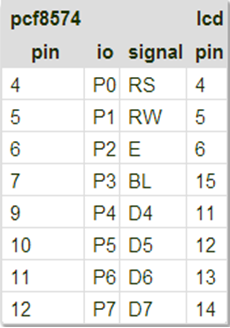
- 由模块的原理图可以看出PCF8574模块的输出引脚P0-P7与LCD模块的引脚连接如下图:
- RS为指令/数据控制位,RW为读/写控制位,E为使能位(边沿触发),BL为背光灯控制位,D4-D7为数据位。
- 由于LCD用到四个数据位,因此只能使用4线来驱动。通过指令表我们可以对LCD进行写指令设置LCD的工作转态,但这里的指令/数据(DB7-DB0)是八位的,而LCD却是4线驱动,因此每次写指令/数据时是先写高四位(DB7-DB4),再写低四位(DB3-DB0)。
- 注意:LCD内置了192个常用字模,存放在CGROM,所以我们在显示字符A时可以直接写入“A”,此外LCD还有8个允许用户自定义的字符产生的RAM,称为CGRAM,这里由于没有涉及到所以不介绍,有兴趣的用户可以去了解一下。
4 下载Matrix源码
Matrix配件相关的代码是完全开源的,统一由一个仓库进行管理:git://github.com/friendlyarm/matrix.git
该仓库里不同的分支代表着Matrix配件所支持的不同开发板。
- nanopi分支包含了Matrix对NanoPi的支持;
- tiny4412分支包含了Matrix对Tiny4412的支持;
- raspberrypi分支包含了Matrix对RaspberryPi的支持;
在主机PC上安装git,以Ubuntu14.04为例
$ sudo apt-get install git
克隆Matrix配件代码仓库
$ git clone git://github.com/friendlyarm/matrix.git
克隆完成后会得到一个matrix目录,里面存放着所有Matrix配件的代码。
5 与NanoPi连接使用
5.1 准备工作
在NanoPi上运行Debian系统,然后在主机PC上安装并使用相应的编译器。参考wiki:NanoPi
注意:必须使用nanopi-v4.1.y-matrix分支编译出来的内核。
下载NanoPi内核源代码并编译
$ git clone https://github.com/friendlyarm/linux-4.x.y.git
$ cd linux-4.x.y
$ git checkout nanopi-v4.1.y-matrix
$ make nanopi_defconfig
$ touch .scmversion
$ make
5.2 硬件连接
参考下图连接模块Matrix-I2C_LCD1602_Keypad和NanoPi
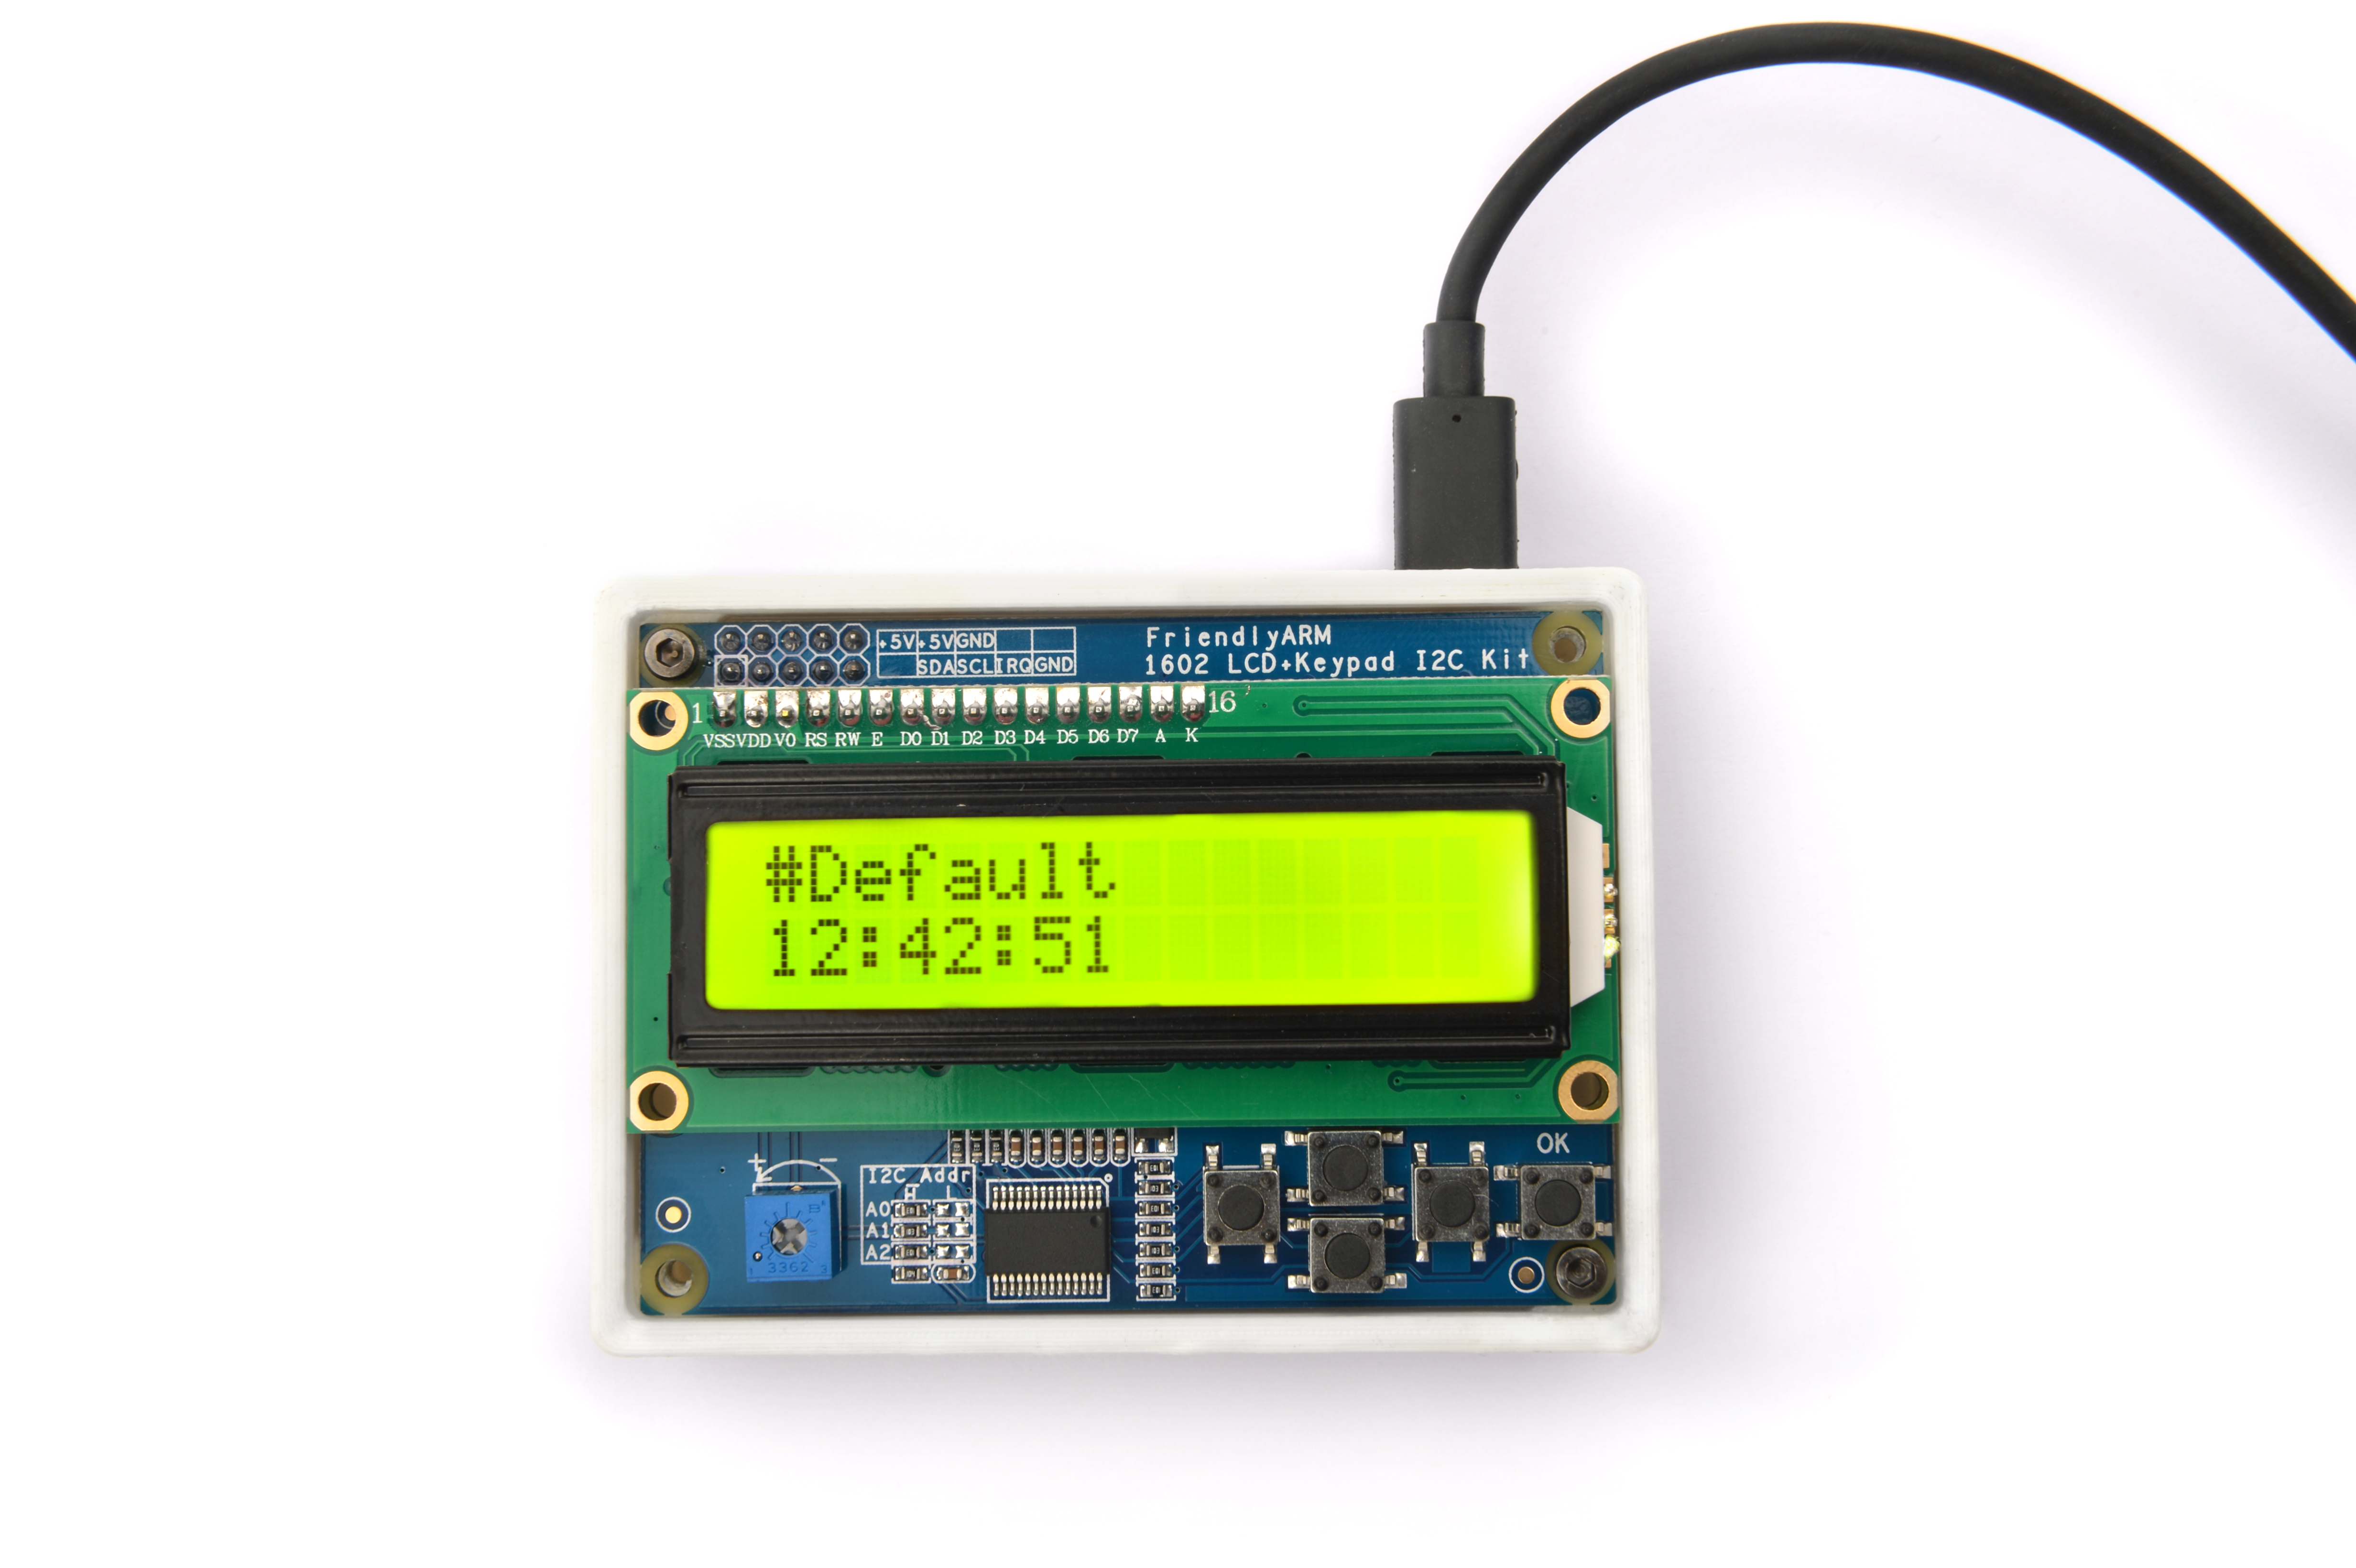
连接说明:
| Matrix-I2C_LCD1602_Keypad | NanoPi |
| SDA | Pin3 |
| SCL | Pin5 |
| 5V | Pin4 |
| GND | Pin6 |
5.3 编译测试程序
进入Matrix代码仓库,切换到nanopi分支
$ cd matrix
$ git checkout nanopi
编译Matrix配件代码
$ make CROSS_COMPILE=arm-linux- clean
$ make CROSS_COMPILE=arm-linux-
$ make CROSS_COMPILE=arm-linux- install
注意:请确保你的主机PC当前使用的交叉编译器为NanoPi-Debian配套的arm-linux-gcc.4.4.3。
编译出来的库文件位于install/lib目录下,而测试程序则位于install/usr/bin目录下,模块Matrix-I2C_LCD1602_Keypad对应的测试程序为matrix-i2c_lcd1602_keypad。
5.4 运行测试程序
拷贝库文件和测试程序到NanoPi的文件系统上
$ cp install/usr/bin/* nanopi_rootfs/usr/bin/
$ cp install/lib/* nanopi_rootfs/lib/ -d
然后启动NanoPi,在Debian的shell终端中执行如下命令运行模块Matrix-I2C_LCD1602_Keypad的测试程序
注意:此模块并不支持热插拔,启动系统前需要确保硬件正常连接。
$ matrix-i2c_lcd1602_keypad5.5 代码展示
int main(int argc, char ** argv) { int devFD; int keyValue = 0; int showDefault = 1; int needClear = 1; time_t lt; char curTime[TIME_STR_BUFSIZE]; char preTime[TIME_STR_BUFSIZE]; int hostNameLen = 0; if ((devFD = LCD1602KeyInit()) == -1) { printf("Fail to init LCD1602\n"); return -1; } LCD1602KeyClear(devFD); printf("waiting key press...\n"); while (1) { keyValue = LCD1602GetKey(devFD); switch (keyValue) { // F1 case 0x1e: showDefault = 0; LCD1602KeyClear(devFD); LCD1602KeyDispStr(devFD, 0, 0, "#F1-IP address"); showIP(devFD, "usb0"); break; // F2 case 0x1d: showDefault = 0; LCD1602KeyClear(devFD); LCD1602KeyDispStr(devFD, 0, 0, "#F2-Your favor"); LCD1602KeyDispStr(devFD, 0, 1, "Come add it"); break; // F3 case 0x1b: showDefault = 0; LCD1602KeyClear(devFD); LCD1602KeyDispStr(devFD, 0, 0, "#F3-Your idea"); LCD1602KeyDispStr(devFD, 0, 1, "Come show it"); break; // F4 case 0x17: showDefault = 0; LCD1602KeyClear(devFD); LCD1602KeyDispStr(devFD, 0, 0, "#F4-About"); LCD1602KeyDispStr(devFD, 0, 1, "by FriendlyARM"); break; // F5 case 0xf: showDefault = 1; break; } if (showDefault == 1) { if (needClear) { LCD1602KeyClear(devFD); LCD1602KeyDispStr(devFD, 0, 0, "#Default"); needClear = 0; } memset(curTime, 0, TIME_STR_BUFSIZE); lt = time(NULL); strncpy(curTime, ctime(<) + 11, 8); if(strcmp(curTime, preTime)) { printf("time:%s\n", curTime); LCD1602KeyDispStr(devFD, 0, 1, curTime); } memset(preTime, 0, TIME_STR_BUFSIZE); strcpy(preTime, curTime); } else { needClear = 1; usleep(1000); } } printf("quit reading key press\n"); LCD1602KeyDeInit(devFD); return 0; }
6 与Tiny4412连接使用
6.1 准备工作
参考Tiny4412光盘里的《友善之臂Ubuntu使用手册》,在Tiny4412上运行UbuntuCore系统,然后在主机PC上安装并使用相应的编译器。
注意:只能使用Tiny4412SDK-1506的底板。
6.2 硬件连接
参考下图连接模块Matrix-I2C_LCD1602_Keypad和Tiny4412
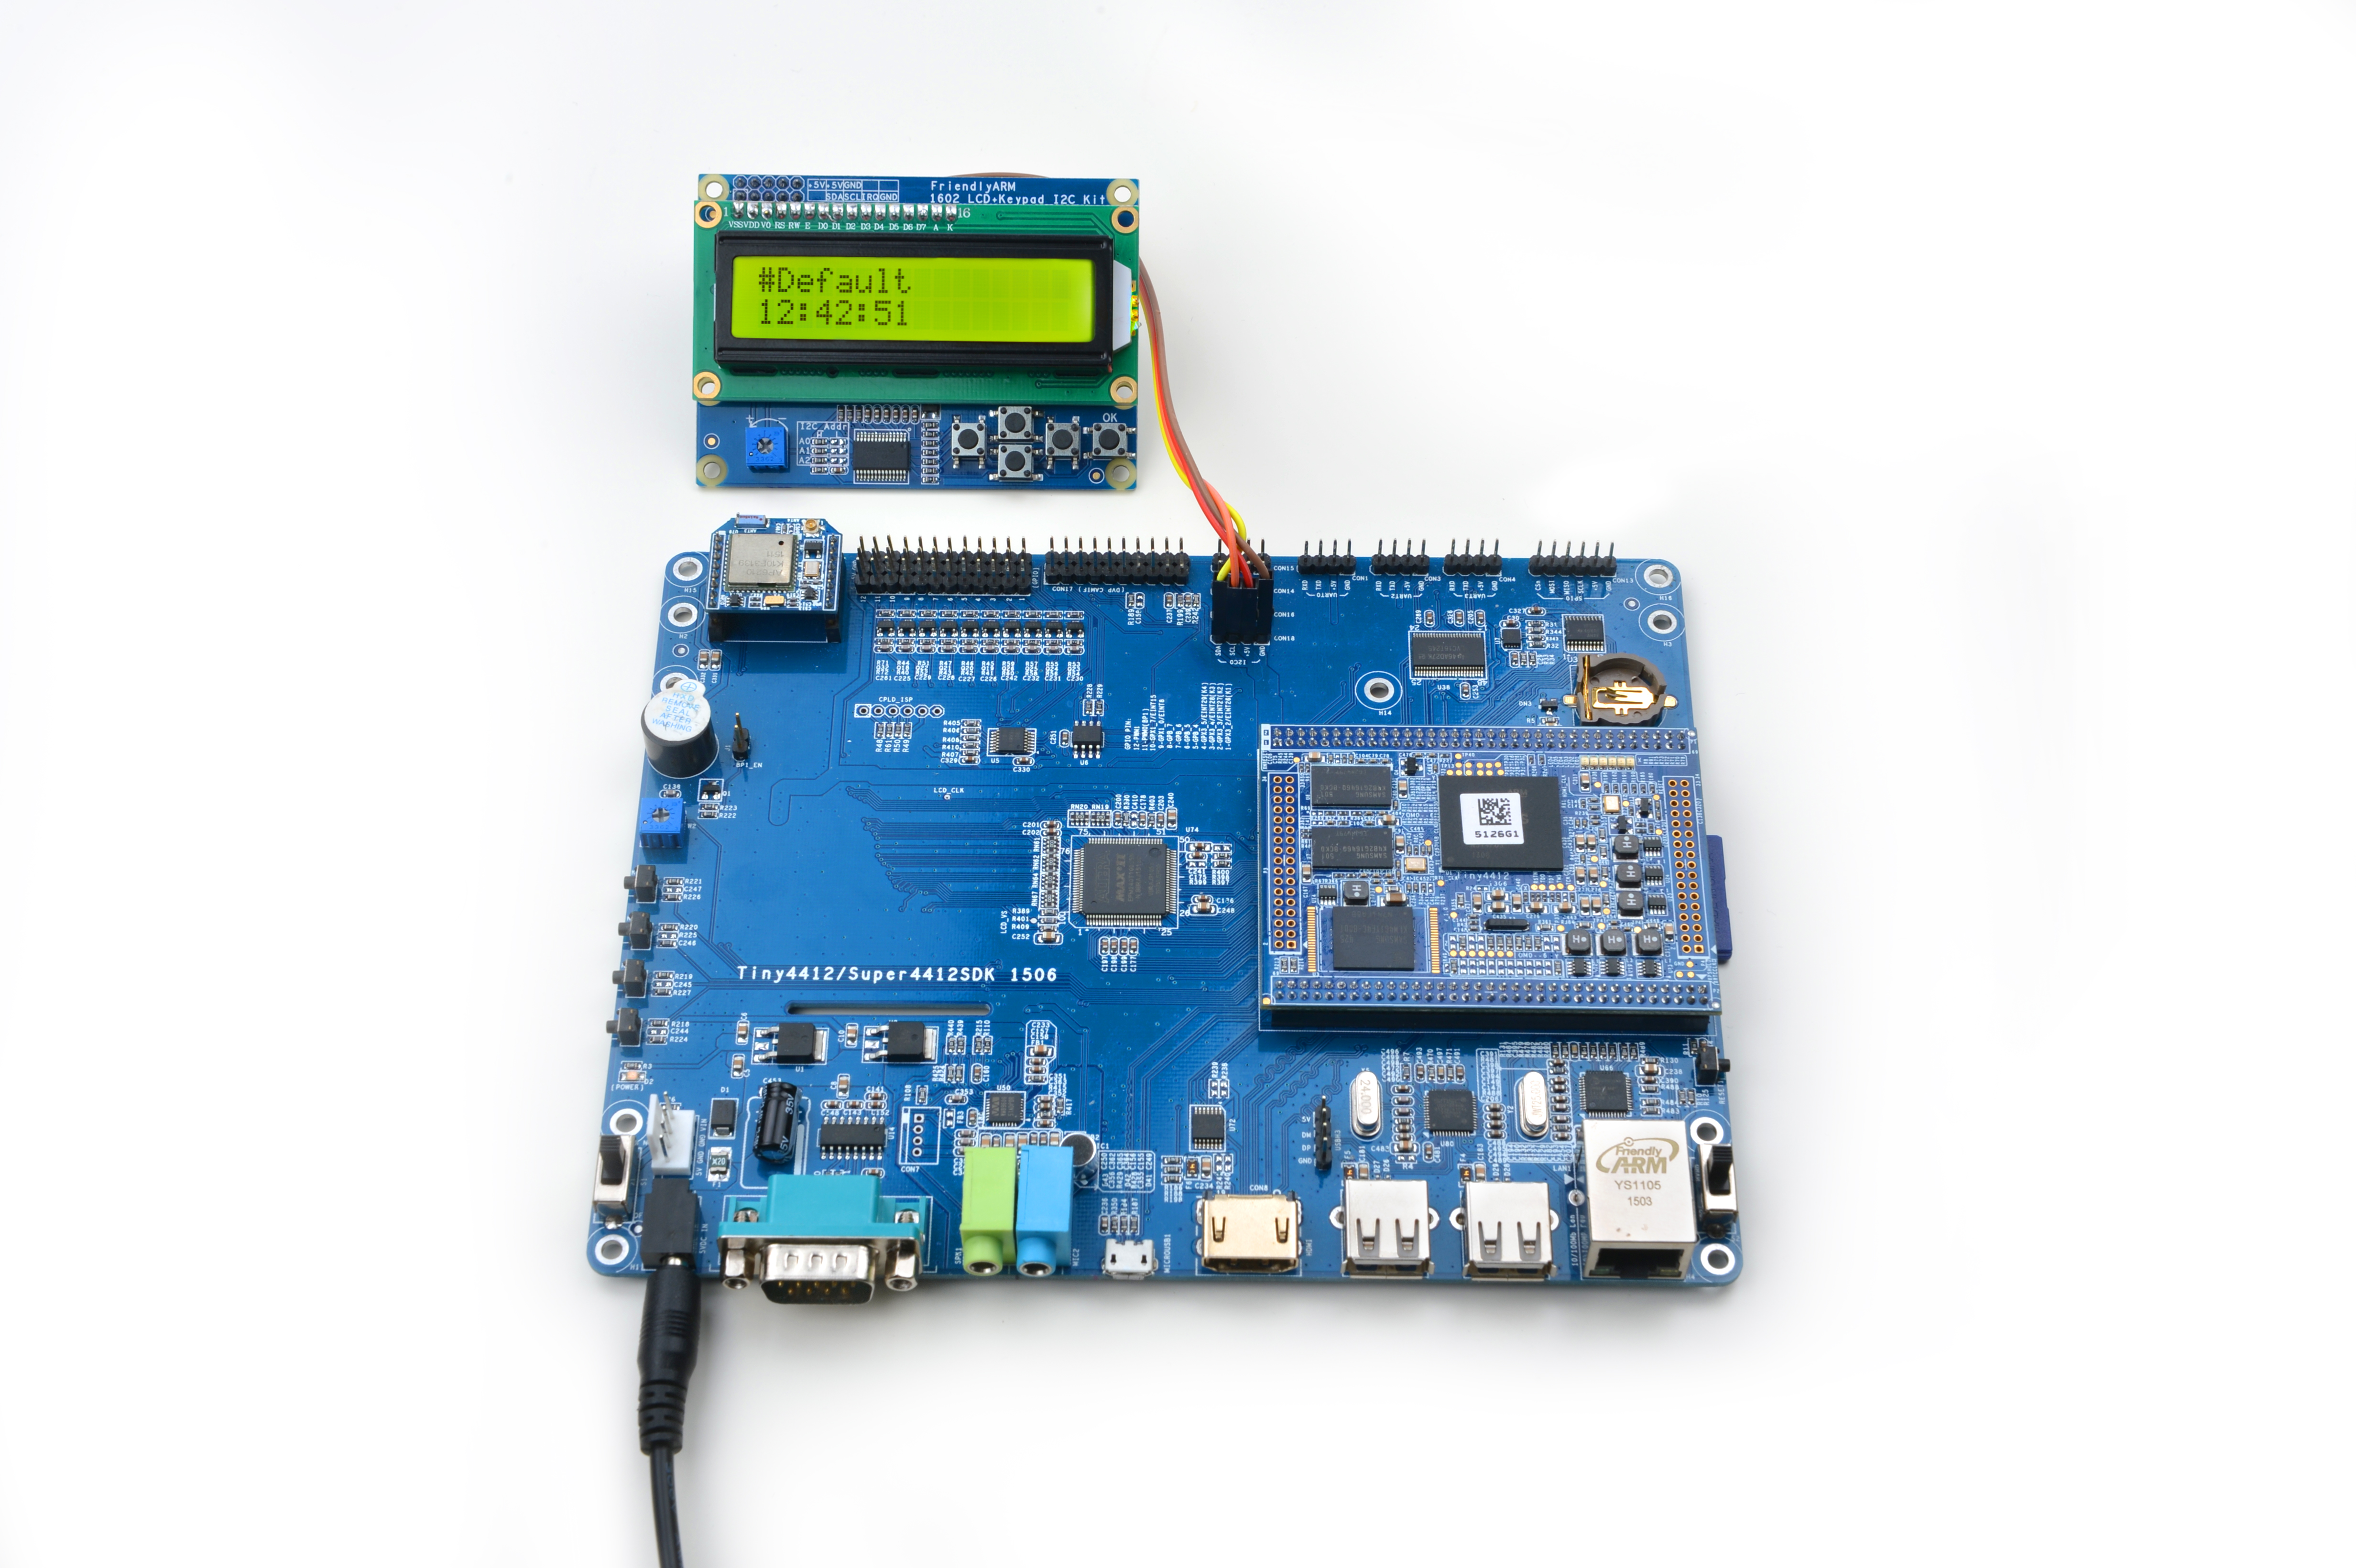
连接说明:
| Matrix-I2C_LCD1602_Keypad | Tiny4412 |
6.3 编译测试程序
进入Matrix代码仓库,切换到tiny4412分支
$ cd matrix
$ git checkout tiny4412
编译Matrix配件代码
$ make CROSS_COMPILE=arm-linux-gnueabihf- clean
$ make CROSS_COMPILE=arm-linux-gnueabihf-
$ make CROSS_COMPILE=arm-linux-gnueabihf- install
注意:请确保你的主机PC当前使用的交叉编译器为Tiny4412-UbuntuCore配套的arm-linux-gnueabihf-gcc-4.7.3。
编译出来的库文件位于install/lib目录下,而测试程序则位于install/usr/bin目录下,模块Matrix-I2C_LCD1602_Keypad对应的测试程序为matrix-i2c_lcd1602_keypad。
6.4 运行测试程序
拷贝库文件和测试程序到Tiny4412的UbuntuCore的文件系统上
$ cp install/usr/bin/* tiny4412_rootfs/usr/bin/
$ cp install/lib/* tiny4412_rootfs/lib/ -d
然后启动Tiny4412,在UbuntuCore的shell终端中执行如下命令运行模块Matrix-I2C_LCD1602_Keypad的测试程序
注意:此模块并不支持热插拔,启动系统前需要确保硬件正常连接。
$ matrix-i2c_lcd1602_keypad6.5 代码展示
int main(int argc, char ** argv) { int devFD; int keyValue = 0; int showDefault = 1; int needClear = 1; time_t lt; char curTime[TIME_STR_BUFSIZE]; char preTime[TIME_STR_BUFSIZE]; int hostNameLen = 0; if ((devFD = LCD1602KeyInit()) == -1) { printf("Fail to init LCD1602\n"); return -1; } LCD1602KeyClear(devFD); printf("waiting key press...\n"); while (1) { keyValue = LCD1602GetKey(devFD); switch (keyValue) { // F1 case 0x1e: showDefault = 0; LCD1602KeyClear(devFD); LCD1602KeyDispStr(devFD, 0, 0, "#F1-IP address"); showIP(devFD, "usb0"); break; // F2 case 0x1d: showDefault = 0; LCD1602KeyClear(devFD); LCD1602KeyDispStr(devFD, 0, 0, "#F2-Your favor"); LCD1602KeyDispStr(devFD, 0, 1, "Come add it"); break; // F3 case 0x1b: showDefault = 0; LCD1602KeyClear(devFD); LCD1602KeyDispStr(devFD, 0, 0, "#F3-Your idea"); LCD1602KeyDispStr(devFD, 0, 1, "Come show it"); break; // F4 case 0x17: showDefault = 0; LCD1602KeyClear(devFD); LCD1602KeyDispStr(devFD, 0, 0, "#F4-About"); LCD1602KeyDispStr(devFD, 0, 1, "by FriendlyARM"); break; // F5 case 0xf: showDefault = 1; break; } if (showDefault == 1) { if (needClear) { LCD1602KeyClear(devFD); LCD1602KeyDispStr(devFD, 0, 0, "#Default"); needClear = 0; } memset(curTime, 0, TIME_STR_BUFSIZE); lt = time(NULL); strncpy(curTime, ctime(<) + 11, 8); if(strcmp(curTime, preTime)) { printf("time:%s\n", curTime); LCD1602KeyDispStr(devFD, 0, 1, curTime); } memset(preTime, 0, TIME_STR_BUFSIZE); strcpy(preTime, curTime); } else { needClear = 1; usleep(1000); } } printf("quit reading key press\n"); LCD1602KeyDeInit(devFD); return 0; }
