Difference between revisions of "Template:FriendlyCoreRK3399QtDev"
(updated by API) |
(→Qt 双USB摄像头示例) |
||
| (10 intermediate revisions by 2 users not shown) | |||
| Line 1: | Line 1: | ||
| − | === | + | ===Develop Qt Application=== |
| − | + | The Qt 5.10.0 FriendlyELEC ported for RK3399 supports the following plug-ins:KMS, EGLFS and XCB. All these three plug-ins support OpenGL ES and GPU hardware acceleration but in different ways:<br> | |
| − | + | * KMS - it calls Linux kernel's DRM interface to display<br> | |
| − | * KMS | + | * EGLFS - it calls OpenGL ES interface to display<br> |
| − | * EGLFS | + | * XCB - it runs on X11 server and is integrated in X11 windows system<br> |
| − | * XCB | + | |
<br> | <br> | ||
| − | + | Three plug-ins support different Qt features and here is a table: <br> | |
::{| class="wikitable" | ::{| class="wikitable" | ||
|- | |- | ||
| − | | | + | | Plug-in |
| OpenGL ES | | OpenGL ES | ||
| QtWebEngine | | QtWebEngine | ||
| QtMultimedia | | QtMultimedia | ||
| − | | | + | | Video Playing with Hardware Decoding |
| − | | | + | | Different Display |
|- | |- | ||
| KMS | | KMS | ||
| Line 37: | Line 36: | ||
| <b>Yes</b> | | <b>Yes</b> | ||
|} | |} | ||
| − | <b> | + | <b>We recommend to use KMS or XCB.</b><br><br> |
| − | + | FriendlyCore has four scripts for setting Qt environmental variables for users and here is a table: | |
::{| class="wikitable" | ::{| class="wikitable" | ||
|- | |- | ||
| − | | | + | |Script||Comment |
|- | |- | ||
| − | |/usr/bin/setqt5env-kms|| | + | |/usr/bin/setqt5env-kms||set kms' environmental variables |
|- | |- | ||
| − | |/usr/bin/setqt5env-eglfs|| | + | |/usr/bin/setqt5env-eglfs||set eglfs' environmental variables |
|- | |- | ||
| − | |/usr/bin/setqt5env-xcb|| | + | |/usr/bin/setqt5env-xcb||set xcb's environmental variables |
|- | |- | ||
| − | |/usr/bin/setqt5env-nogui|| | + | |/usr/bin/setqt5env-nogui||set environmental variables for a system without a Qt GUI |
|} | |} | ||
| − | + | For instance, if you want to use KMS to display you can run the following commands: | |
<syntaxhighlight lang="bash"> | <syntaxhighlight lang="bash"> | ||
. setqt5env-kms | . setqt5env-kms | ||
./apps | ./apps | ||
</syntaxhighlight> | </syntaxhighlight> | ||
| − | + | (Note:there is a space between '.' and 's') | |
| − | ==== | + | ====Setup Qt Development Envronment==== |
| − | + | FriendlyELEC developed two methods for RK3399 to cross-compile a Qt program: | |
| − | * | + | * 1:Use Docker. For more details you can refer to github :http://github.com/friendlyarm/friendlyelec-ubuntu18-docker |
| − | * | + | * 2:Setup a local cross-compiler. You need to run a Ubuntu 18.04 64-bit OS and you can refer to :[[How to Build and Install Qt Application for FriendlyELEC Boards/zh]] |
| − | ==== | + | ====Qt Demo==== |
| − | + | FriendlyCore has several Qt demo programs: | |
| − | * <b>Qt | + | * <b>Qt QML: CinematicExperience</b> |
| − | + | CinematicExperience is a utility for selecting a video file and it is developed with Qt QML.<br /> | |
| − | + | This demo uses Qt QML's various features and runs very smoothly on RK3399. This performance is achieved by hardware and software optimization.<br /> | |
| − | + | You can start it in a commandline utility by running the following commands:<br /> | |
<syntaxhighlight lang="bash"> | <syntaxhighlight lang="bash"> | ||
cd /opt/Qt5_CinematicExperience | cd /opt/Qt5_CinematicExperience | ||
./run.sh | ./run.sh | ||
</syntaxhighlight> | </syntaxhighlight> | ||
| − | + | Here is what it looks like:<br /> | |
[[File:Cinematicsexperience.jpg|frameless|480px]]<br /> | [[File:Cinematicsexperience.jpg|frameless|480px]]<br /> | ||
| − | * <b>QQt | + | * <b>QQt WebEngine: web browser</b> |
| − | Qt | + | Qt WebEngine uses Chromium and supports HTML5.<br /> |
| − | + | You can start it by running the following commands:<br /> | |
<syntaxhighlight lang="bash"> | <syntaxhighlight lang="bash"> | ||
cd /opt/qt5-brower | cd /opt/qt5-brower | ||
| Line 84: | Line 83: | ||
</syntaxhighlight> | </syntaxhighlight> | ||
| − | + | Here is what it looks like:<br /> | |
[[File:qt5-brower.jpg|frameless|480px]]<br /> | [[File:qt5-brower.jpg|frameless|480px]]<br /> | ||
| − | + | Note:Qt WebEngine depends on the Xcb plug-in. | |
| − | * <b>Qt | + | * <b>Qt Different Display</b> |
| − | + | This demo shows that when a board is connected to an HDMI monitor and an eDP LCD these two devices display differently. You can start it by running the following commands: | |
<syntaxhighlight lang="bash"> | <syntaxhighlight lang="bash"> | ||
cd /opt/qt5-multi-screen-demo | cd /opt/qt5-multi-screen-demo | ||
./run.sh | ./run.sh | ||
</syntaxhighlight> | </syntaxhighlight> | ||
| − | + | Here is what it looks like:<br /> | |
[[File:qt5-multi-screen.jpg|frameless|480px]]<br /> | [[File:qt5-multi-screen.jpg|frameless|480px]]<br /> | ||
| − | * <b>Qt Multimedia: | + | * <b>Qt Multimedia: qt5-player with hard decoding</b> |
| − | qt5- | + | The qt5-player works with Rockchip's gstreamer plug-in and supports 4K video playing. Since Rockchip's plug-in only supports output images to an X11 window the qt5-player needs to use XCB for display.<br /> |
| − | + | You can start the demo by running the following commands:<br /> | |
<syntaxhighlight lang="bash"> | <syntaxhighlight lang="bash"> | ||
cd /opt/qt5-player | cd /opt/qt5-player | ||
./run.sh | ./run.sh | ||
</syntaxhighlight> | </syntaxhighlight> | ||
| − | + | Here is what it looks like. You can set it to display in full-screen and adjust the voice's volume:<br /> | |
[[File:qt5-player.gif|frameless|480px]]<br /> | [[File:qt5-player.gif|frameless|480px]]<br /> | ||
| − | * <b>Qt | + | * <b>Qt WebGL demo: nmapper</b> |
| − | Qt | + | Qt WebGL allows you to remotely access a Qt program running on your board.<br /> |
| − | + | Before you run the demo you need to connect your board to the internet and run the following commands:<br /> | |
<syntaxhighlight lang="bash"> | <syntaxhighlight lang="bash"> | ||
cd /opt/qt5-nmapper | cd /opt/qt5-nmapper | ||
./run-with-webgl.sh | ./run-with-webgl.sh | ||
</syntaxhighlight> | </syntaxhighlight> | ||
| − | + | You can open a browser on another device, type the IP address of your board on the browser's address bar, enter and you will be able to see a Qt GUI. Here is what it looks like:<br /> | |
[[File:qtwebgl.gif|frameless|480px]]<br /> | [[File:qtwebgl.gif|frameless|480px]]<br /> | ||
| − | * <b>Qt | + | * <b>Qt VNC demo: Smart home applicance GUI</b> |
| − | Qt | + | Qt VNC allows you to run a program as a VNC Server on your board and you can access the program from a VNC client on another device. This program can be developed with either QtWidgets or QML.<br /> |
| − | + | You can start it by running the following commands:<br /> | |
<syntaxhighlight lang="bash"> | <syntaxhighlight lang="bash"> | ||
cd /opt/qt5-smarthome | cd /opt/qt5-smarthome | ||
./run-with-vnc.sh | ./run-with-vnc.sh | ||
</syntaxhighlight> | </syntaxhighlight> | ||
| − | + | Start a VNC viewer on a smart phone or mobile device and type your board's IP address and port number 5900. For instance if your board's IP address is 192.168.1.100 you can type "192.168.1.100:5900", enter and you will see the following GUI:<br /> | |
[[File:qt5smarthomevnc.png|frameless|480px]]<br /> | [[File:qt5smarthomevnc.png|frameless|480px]]<br /> | ||
| + | |||
| + | ====Play with Dual Cameras under Qt==== | ||
| + | This sample shows how to connect dual cameras to the board and play with them. Before run the sample make sure you connect dual cameras and an LCD to your board. In general popular UVC cameras should work however we suggest users use the following modules which we have tested:<br /> | ||
| + | ::{| class="wikitable" | ||
| + | |- | ||
| + | |Index||Model | ||
| + | |- | ||
| + | |1 || Logitech C270 | ||
| + | |- | ||
| + | |2 || Logitech C270i | ||
| + | |- | ||
| + | |3 || Logitech C922 Pro | ||
| + | |} | ||
| + | Run the following commands:<br /> | ||
| + | <syntaxhighlight lang="bash"> | ||
| + | cd /opt/dual-camera | ||
| + | ./run.sh | ||
| + | </syntaxhighlight> | ||
| + | Here is what you expect to observe:<br /> | ||
| + | [[File:qt5dualcamera.jpg|frameless|480px]]<br /> | ||
Latest revision as of 06:31, 10 October 2018
Contents
1 Develop Qt Application
The Qt 5.10.0 FriendlyELEC ported for RK3399 supports the following plug-ins:KMS, EGLFS and XCB. All these three plug-ins support OpenGL ES and GPU hardware acceleration but in different ways:
- KMS - it calls Linux kernel's DRM interface to display
- EGLFS - it calls OpenGL ES interface to display
- XCB - it runs on X11 server and is integrated in X11 windows system
Three plug-ins support different Qt features and here is a table:
Plug-in OpenGL ES QtWebEngine QtMultimedia Video Playing with Hardware Decoding Different Display KMS Yes No Yes No Yes EGLFS Yes No Yes No No XCB Yes Yes Yes Yes Yes
We recommend to use KMS or XCB.
FriendlyCore has four scripts for setting Qt environmental variables for users and here is a table:
Script Comment /usr/bin/setqt5env-kms set kms' environmental variables /usr/bin/setqt5env-eglfs set eglfs' environmental variables /usr/bin/setqt5env-xcb set xcb's environmental variables /usr/bin/setqt5env-nogui set environmental variables for a system without a Qt GUI
For instance, if you want to use KMS to display you can run the following commands:
. setqt5env-kms
./apps
(Note:there is a space between '.' and 's')
1.1 Setup Qt Development Envronment
FriendlyELEC developed two methods for RK3399 to cross-compile a Qt program:
- 1:Use Docker. For more details you can refer to github :http://github.com/friendlyarm/friendlyelec-ubuntu18-docker
- 2:Setup a local cross-compiler. You need to run a Ubuntu 18.04 64-bit OS and you can refer to :How to Build and Install Qt Application for FriendlyELEC Boards/zh
1.2 Qt Demo
FriendlyCore has several Qt demo programs:
- Qt QML: CinematicExperience
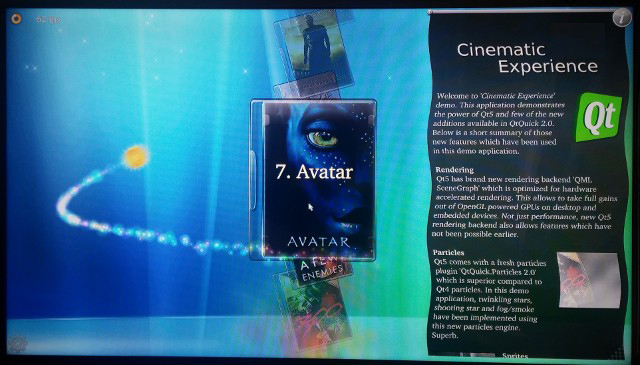
CinematicExperience is a utility for selecting a video file and it is developed with Qt QML.
This demo uses Qt QML's various features and runs very smoothly on RK3399. This performance is achieved by hardware and software optimization.
You can start it in a commandline utility by running the following commands:
cd /opt/Qt5_CinematicExperience
./run.sh
- QQt WebEngine: web browser
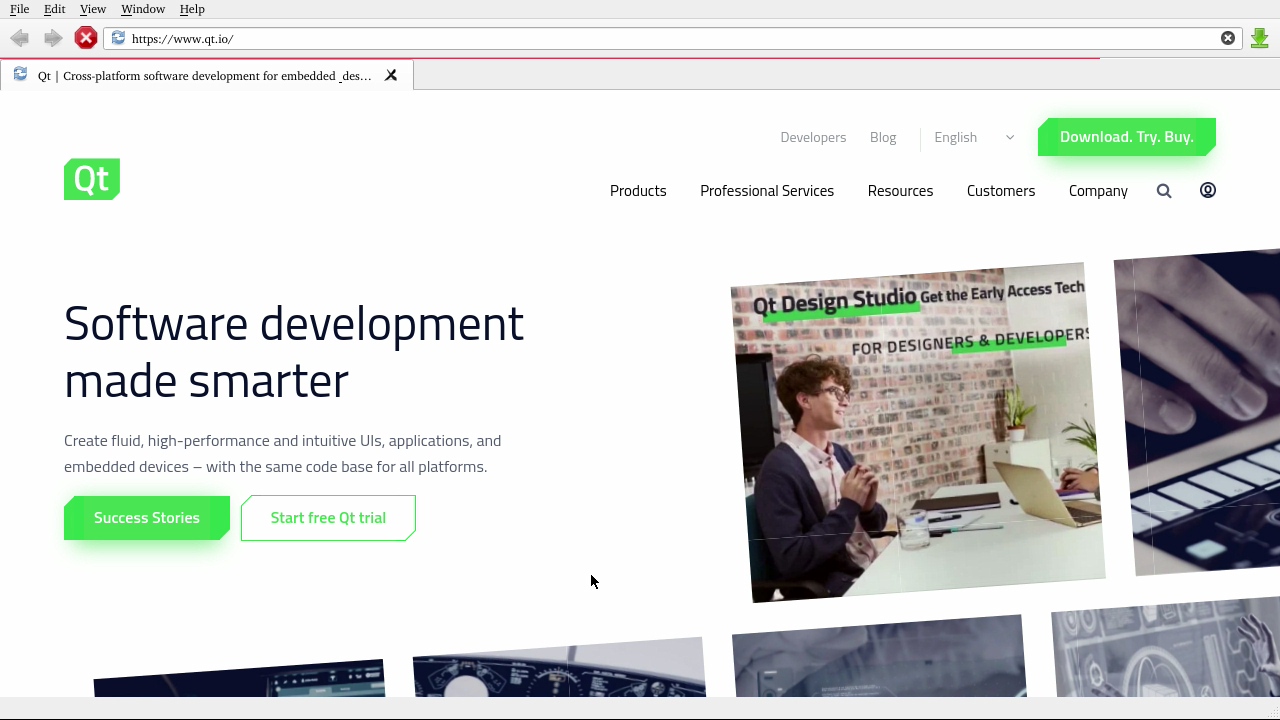
Qt WebEngine uses Chromium and supports HTML5.
You can start it by running the following commands:
cd /opt/qt5-brower
./run.sh
Note:Qt WebEngine depends on the Xcb plug-in.
- Qt Different Display
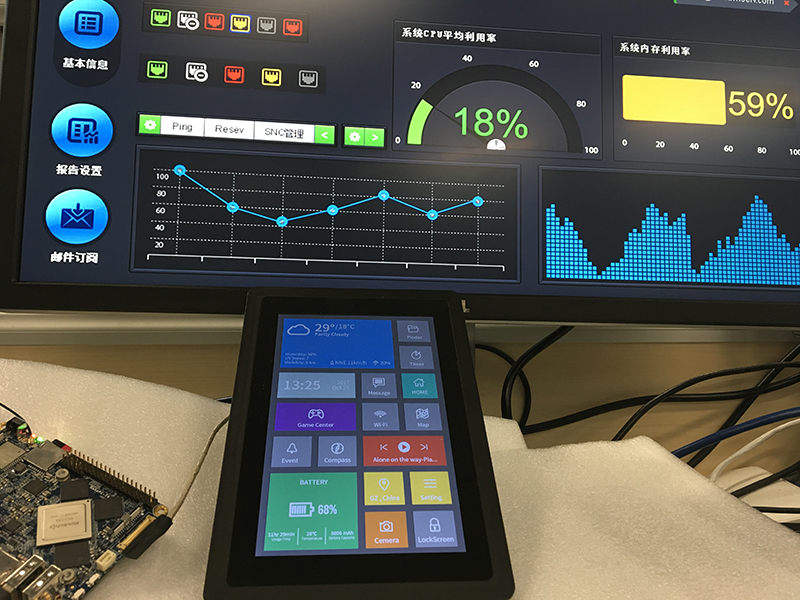
This demo shows that when a board is connected to an HDMI monitor and an eDP LCD these two devices display differently. You can start it by running the following commands:
cd /opt/qt5-multi-screen-demo
./run.sh
- Qt Multimedia: qt5-player with hard decoding
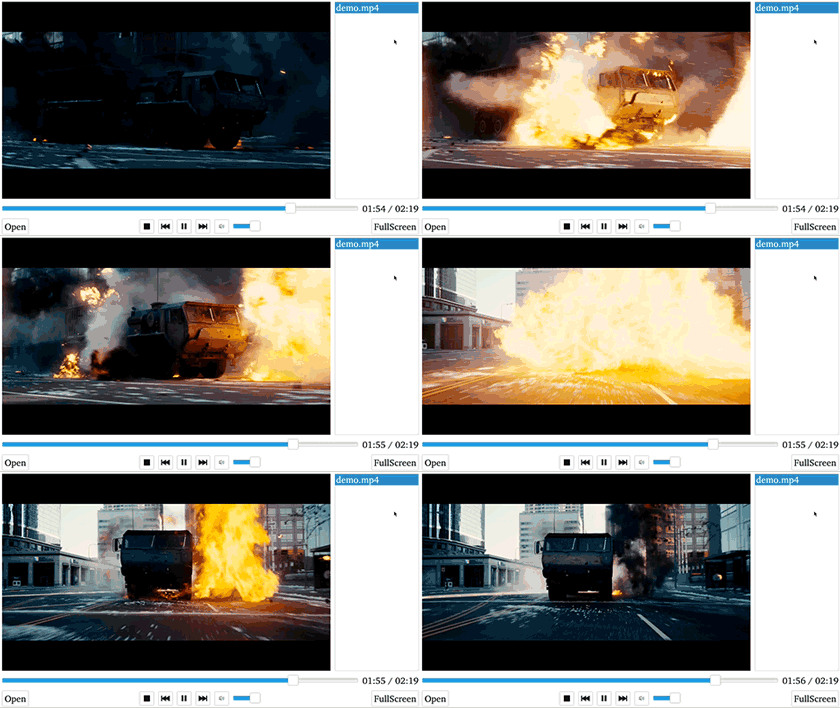
The qt5-player works with Rockchip's gstreamer plug-in and supports 4K video playing. Since Rockchip's plug-in only supports output images to an X11 window the qt5-player needs to use XCB for display.
You can start the demo by running the following commands:
cd /opt/qt5-player
./run.sh
Here is what it looks like. You can set it to display in full-screen and adjust the voice's volume:
- Qt WebGL demo: nmapper
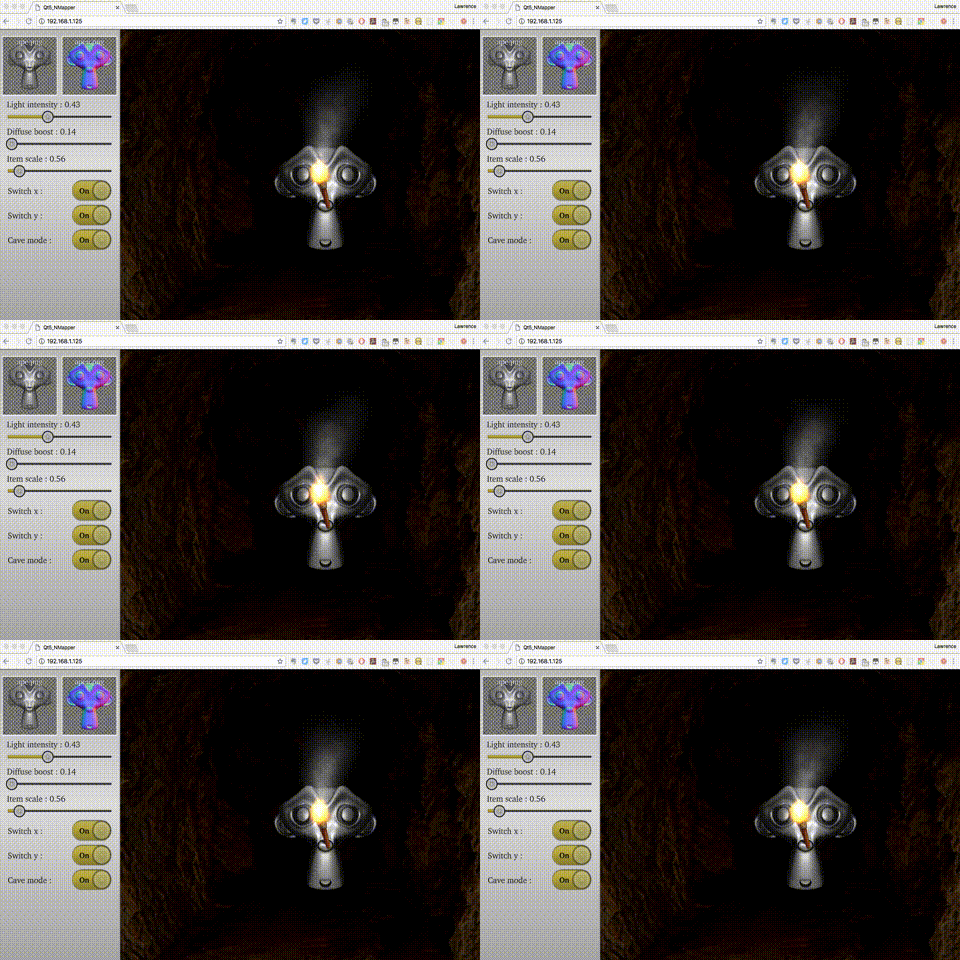
Qt WebGL allows you to remotely access a Qt program running on your board.
Before you run the demo you need to connect your board to the internet and run the following commands:
cd /opt/qt5-nmapper
./run-with-webgl.sh
You can open a browser on another device, type the IP address of your board on the browser's address bar, enter and you will be able to see a Qt GUI. Here is what it looks like:
- Qt VNC demo: Smart home applicance GUI
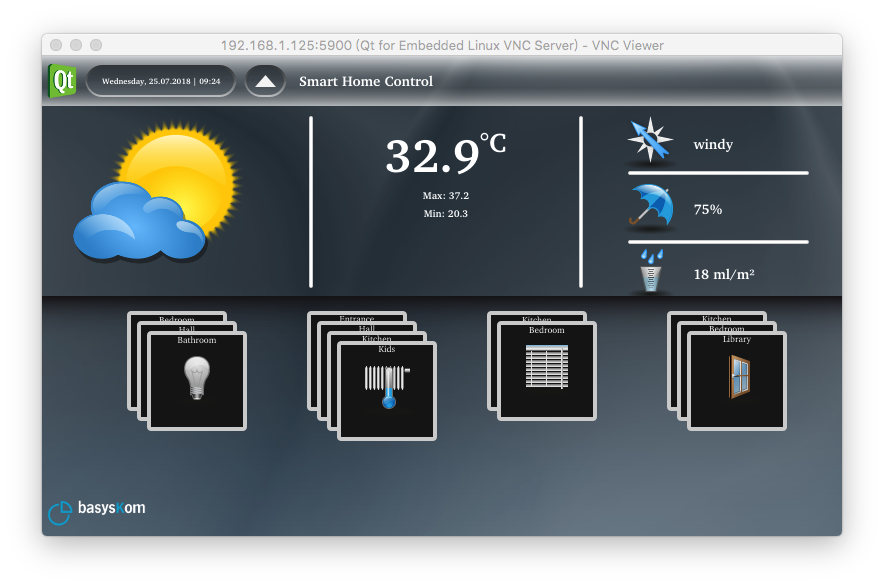
Qt VNC allows you to run a program as a VNC Server on your board and you can access the program from a VNC client on another device. This program can be developed with either QtWidgets or QML.
You can start it by running the following commands:
cd /opt/qt5-smarthome
./run-with-vnc.sh
Start a VNC viewer on a smart phone or mobile device and type your board's IP address and port number 5900. For instance if your board's IP address is 192.168.1.100 you can type "192.168.1.100:5900", enter and you will see the following GUI:
1.3 Play with Dual Cameras under Qt
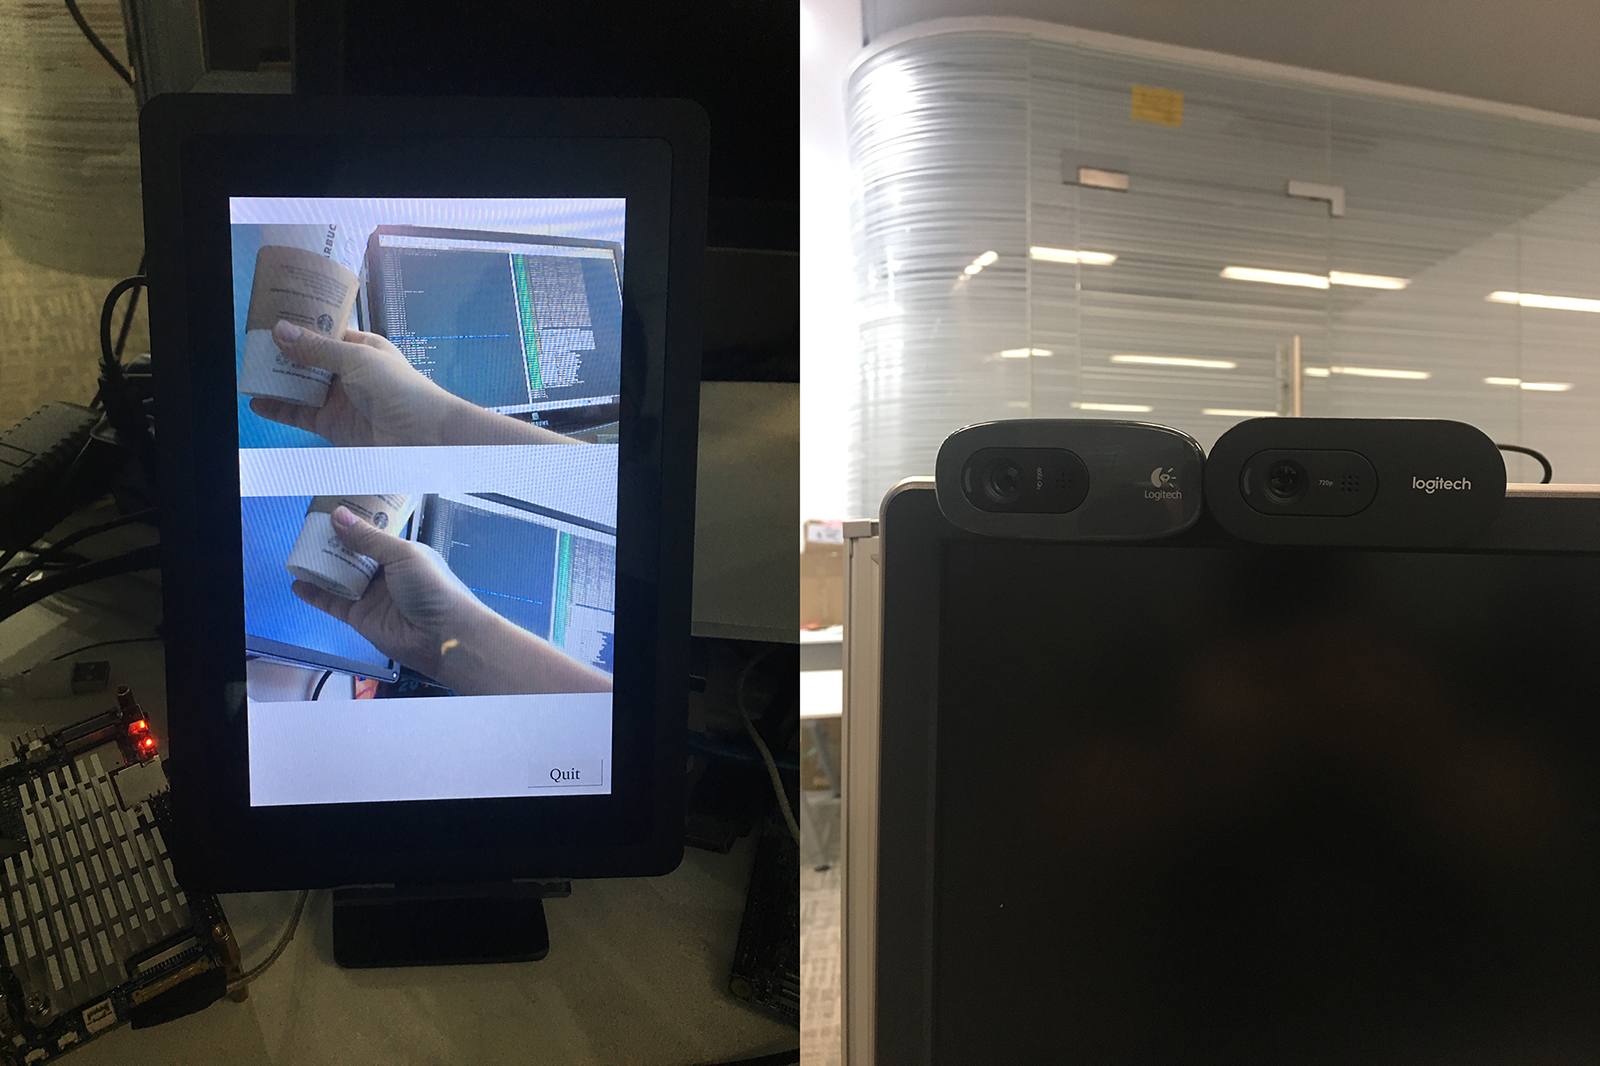
This sample shows how to connect dual cameras to the board and play with them. Before run the sample make sure you connect dual cameras and an LCD to your board. In general popular UVC cameras should work however we suggest users use the following modules which we have tested:
Index Model 1 Logitech C270 2 Logitech C270i 3 Logitech C922 Pro
Run the following commands:
cd /opt/dual-camera
./run.sh
