UNO Dock V2.0 for NanoPi NEO
Contents
1 Introduction
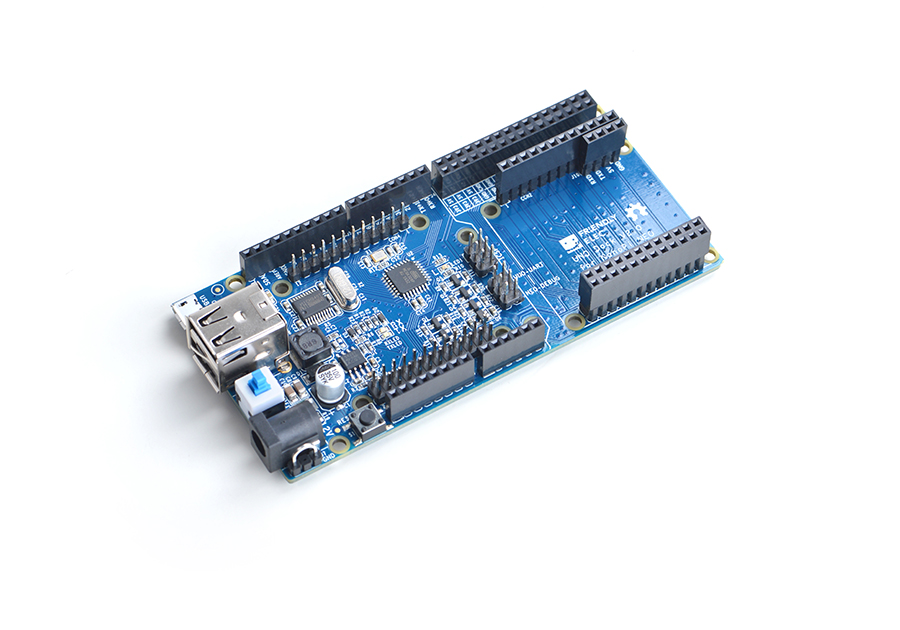
- The UNO Dock V2.0 for NanoPi NEO is a NanoHat Hub alike extension board.
- It is an Arduino board compatible with Arduino UNO and works with Arduino programs.
- The UNO Dock V2.0 communicates with NanoPi NEO/Air/NEO2 with I2C. The MEGA328P on the board acts as an interface between an external module connected to the board and the NanoPi NEO/Air/NEO2 that is mounted on the board.When a NanoPi NEO/Air/NEO2 and an Arduino module are connected to the UNO DOCK users can easily access the Arduino module from the NanoPi NEO/Air/NEO2.
- It has an onboard USB to Serial port chip which allows users to set the serial port as either Arduino serial port or NanoPi NEO/Air/NEO2's debug port with a jumper
- It has 12V power input to 5V/2A output.
- The two USB ports on the NanoPi NEO/Air/NEO2 are populated to the module
- The male connectors on the NanoPi NEO/Air/NEO2 are populated to the module and a NanoHat module can be stacked on it.
- NEO's GPIO pins are populated to the module
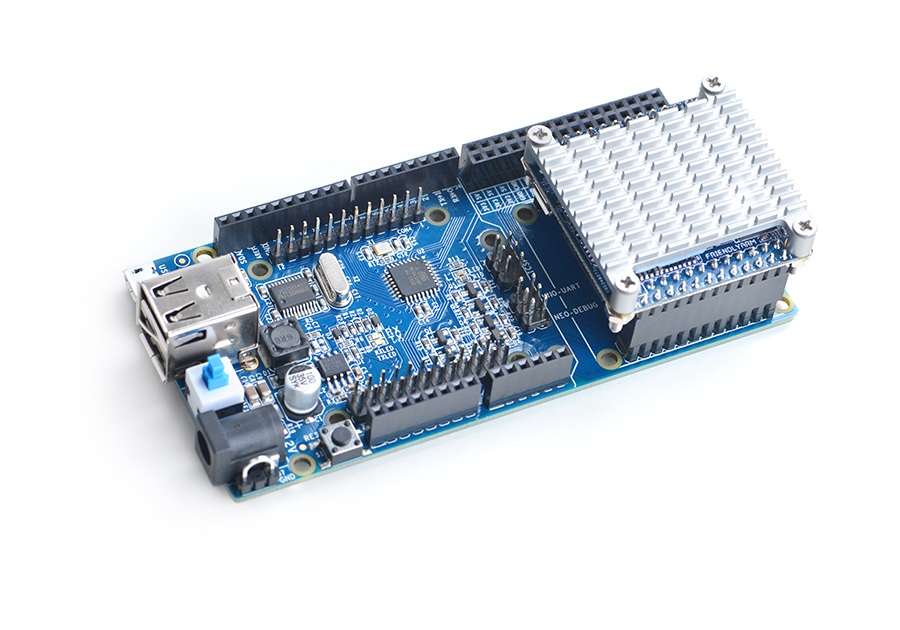
- NanoPi NEO/Air/NEO2 can be directly mounted on the UNO Dock V2.0.
2 Hardware Spec
- Arduino UNO supported
- Onboard USB to Serial port
- 12V power input to 5V/2A output
- Compatible with BakeBit Modules
- 2 x USB port
- NEO's connectors are populated and a NanoHat can be stacked on it
- NEO's GPIO pins are populated
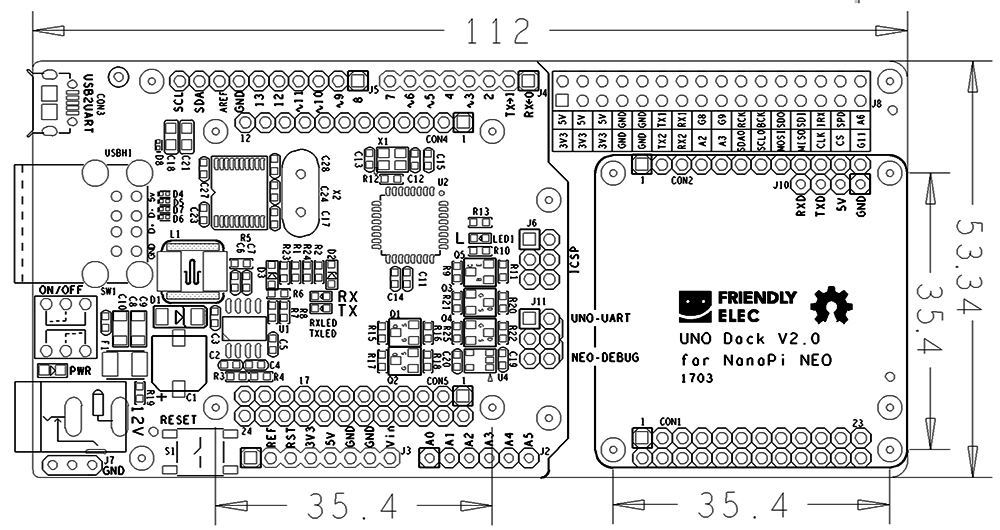
- PCB dimension(mm): 112 x 53.3
- For more details refer to: UNO Dock V2.0 for NanoPi NEO Dimension.rar
2.1 Connector Pin Description
Here is a pin description for the UNO Dock V2.0 for NanoPi NEO's connectors:
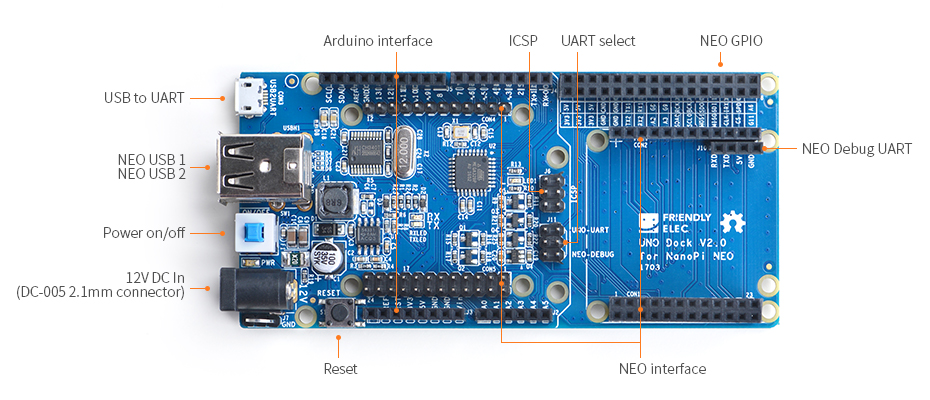
- UNO Dock V2.0 for NanoPi NEO Connector Pin Description:
| Pin | Description |
| 12V DC In | 12V Input |
| Power on/off | Power Switch |
| NEO USB 1 | Populated NanoPi NEO/Air/NEO2's USB 1 |
| NEO USB 2 | Populated NanoPi NEO/Air/NEO2's USB 2 |
| USB to URAT | USB to Serial |
| Arduino interface | Arduino Interface |
| ICSP | ICSP Interface |
| UART select | UNO UART/NEO DEBUG Mode Switch |
| NEO GPIO | NEO GPIO Female Connector |
| NEO Debug UART | Populated NanoPi NEO/Air/NEO2's Serial Debug Port |
| NEO interface | Populated NanoPi NEO/Air/NEO2's Interface |
| Reset | UNO Reset |
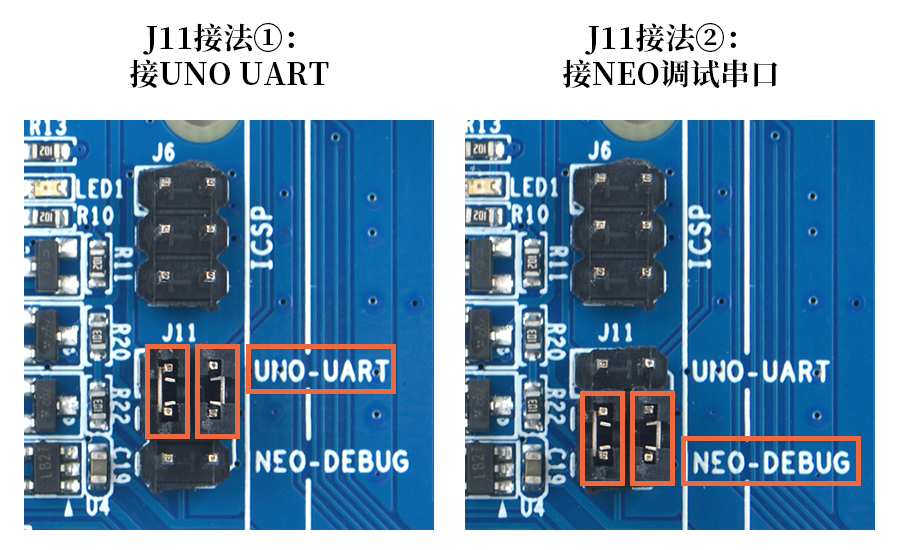
You can use a jumper to short J11's two options to connect onboard USB2SERIAL to either UNO-UART or NEO-DEBUG.
(1) When UNO-UART is shorted the onboard USB2SERIAL will be connected to UNO-UART and users can download programs with Arduion IDE.
(2) When NEO-DEBUG is shorted the onboard USB2SERIAL will be connected to NEO-DEBUG and users can use a terminal to access NEO's serial debug port.
Here is a hardware setup:
3 Connect UNO Dock V2.0 for NanoPi NEO to NanoPi NEO/Air/NEO2
3.1 Connect to NanoPi NEO/Air/NEO2
Currently the applicable boards are FriendlyElec's NanoPi NEO/Air/NEO2.
The module can be stacked on a NanoPi NEO/Air/NEO2. Here is a hardware setup:
3.2 Install BakeBit Software
- Step 1 - SSH to a master device(NanoPi NEO/Air/NEO2) via ssh and download the BakeBit code from github:
cd  ~
git clone https://github.com/friendlyarm/BakeBit.git
- Step 2 - Install BakeBit software packages by running the following commands:
cd BakeBit/Script
chmod +x install.sh
./install.sh
- Step 3 - Reboot:
reboot
- Step 4 - Test UNO Dock V2.0 for NanoPi NEO:
Connect a BakeBit LED module to a UNO Dock V2.0 for NanoPi NEO by linking the LED module's SIG pin to the Dock's D3 and run the following command:
python ~/BakeBit/Software/Python/grove_led_blink.py
If the LED blinks it means the UNO Dock V2.0 for NanoPi NEO works!
4 Setup Arduino on UNO Dock V2.0 for NanoPi NEO
- Step 1:use a jumper in place of "UNO-UART", connect the Dock to a PC host with a USB cable and power the Dock with a 12V DC power source
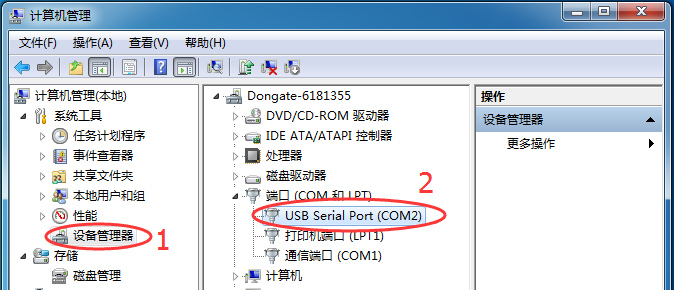
- Step 2:check the device name in your PC's device manager. In our test case it was "COM2".
- Step 3:download Arduino IDE Arduino IDE Download Link
Setup development environment:
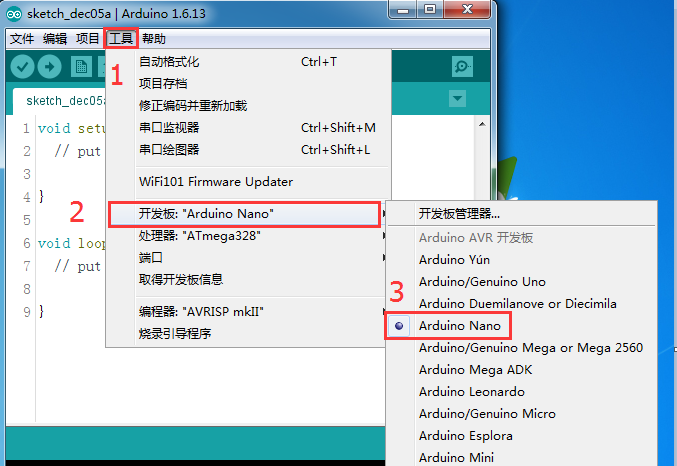
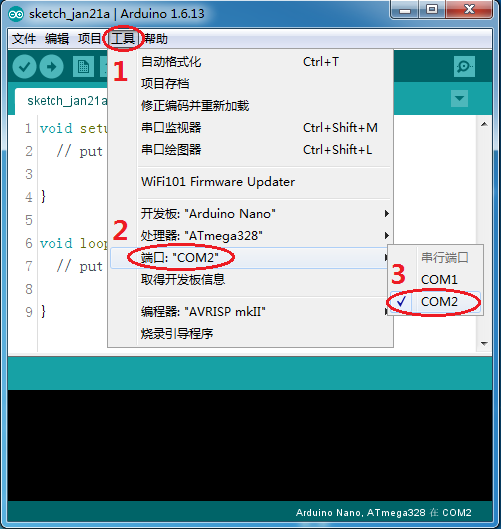
1. Tools -> Board Arduino Nano
2. Tools -> Processor ATmega328
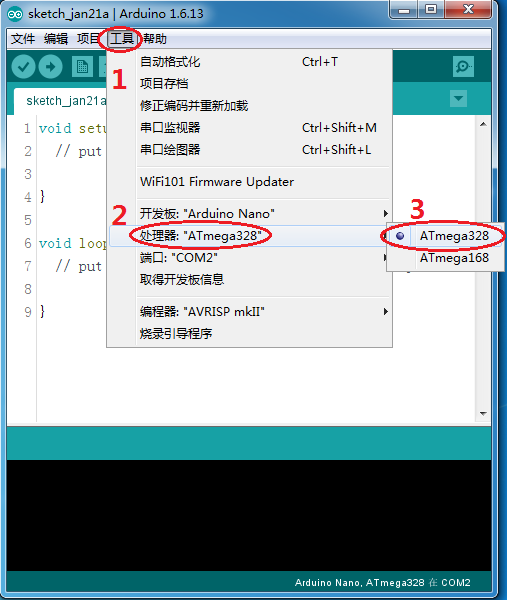
3. Tools -> Port ->COM2(the device name you find in your PC)
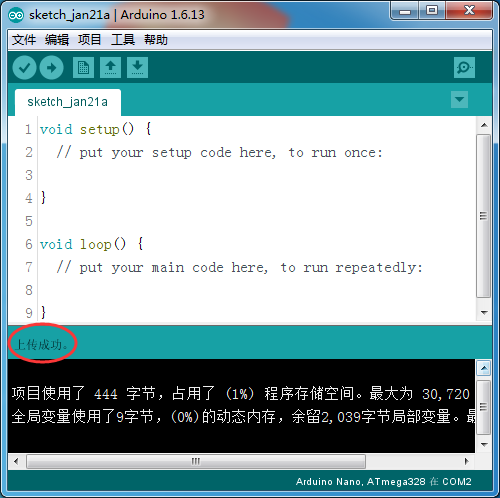
- Step 4: click on "upload".
After Arduino IDE shows uploading success you can start playing with your UNO Dock!
5 Note
After you download the Arduino IDE packages the firmware in the chip of the UNO Dock V2.0 for NanoPi NEO will be removed and replaced. If you want to use it as UNO Dock you need to reinstall the firmware for UNO Dock V2.0 for NanoPi NEO.
Download Link to Firmware
6 Resources
- [Schematic](UNO Dock V2.0 for NanoPi NEO.pdf)
- [Dimension](UNO Dock V2.0 for NanoPi NEO Dimension.rar)
7 Update Log
7.1 April-28-2017
- Released English version
7.2 Nov-24-2017
- Updated section 2.1
