Difference between revisions of "Npi-config"
(→Boot Options) |
|||
| Line 17: | Line 17: | ||
==Boot Options== | ==Boot Options== | ||
| − | ===B1 Autologin: | + | ===B1 Autologin: System Login Options=== |
| − | + | There are three login options:<br> | |
| − | *<1> Console: | + | *<1> Console: you are required to type username and password to login; |
| − | *<2> Console Autologin: | + | *<2> Console Autologin: you will automatically login as "pi"; |
| − | *<3> Qt/Embedded: | + | *<3> Qt/Embedded: you don't login but will see a Qt Demo GUI; |
| − | ===B2 Wait for Network at Boot: | + | ===B2 Wait for Network at Boot: Wait Time for Connecting to Ethernet=== |
| − | + | In general this is set to "No" since you can login without connecting to Ethernet. | |
| − | ===B3 Boot device: | + | ===B3 Boot device: Select Boot Device=== |
| − | ==== | + | ====Set Mini Shield for NanoPi NEO Core/Core2 to Boot from SSD==== |
<syntaxhighlight lang="html4strict"> | <syntaxhighlight lang="html4strict"> | ||
$ npi-config | $ npi-config | ||
</syntaxhighlight> | </syntaxhighlight> | ||
[[File:Boot Options.jpg|frameless|600px|Boot Options]]<br /> | [[File:Boot Options.jpg|frameless|600px|Boot Options]]<br /> | ||
| − | + | After you enter the Boot Options menu and select "Boot device" you will see two options:<br /> | |
1) D1 Hard drive<br /> | 1) D1 Hard drive<br /> | ||
2) D2 TF card<br /> | 2) D2 TF card<br /> | ||
[[File:Choose_Boot device.jpg|frameless|600px|Choose Boot device]]<br /> | [[File:Choose_Boot device.jpg|frameless|600px|Choose Boot device]]<br /> | ||
| − | + | Select "D1 Hard drive" and follow the prompts to proceed.<br /> | |
| − | + | If you want to boot your board from a TF card select "D2 TF card".<br /><br /> | |
==Advanced Options== | ==Advanced Options== | ||
Revision as of 09:09, 12 April 2018
Contents
1 Introduction
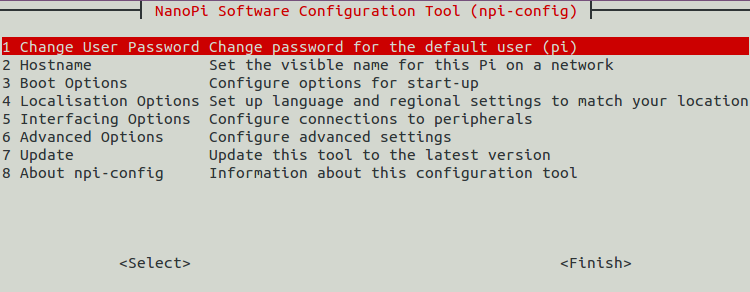
- npi-config is a commandline utility. It can be used to set system configurations such as: password, language, timezone, Hostname, SSH enable/disable, auto-login, hardware(Serial/I2C/SPI/PWM/I2S) enable/disable and etc. You can start it by running the following command as root:
$ npi-config
- Here is what npi-config looks like:
- npi-config currently only works under Ubuntu distros such as FriendlyCore, Ubuntu-oled, Ubuntu-tft and doesn't work under Debian.
- If you don't see the functions described here in your npi-configure's menu you can try updating it by clicking on the "Update" option on the menu.
$ npi-config
	7 Update|               Update this tool to the latest version
2 Boot Options
2.1 B1 Autologin: System Login Options
There are three login options:
- <1> Console: you are required to type username and password to login;
- <2> Console Autologin: you will automatically login as "pi";
- <3> Qt/Embedded: you don't login but will see a Qt Demo GUI;
2.2 B2 Wait for Network at Boot: Wait Time for Connecting to Ethernet
In general this is set to "No" since you can login without connecting to Ethernet.
2.3 B3 Boot device: Select Boot Device
2.3.1 Set Mini Shield for NanoPi NEO Core/Core2 to Boot from SSD
$ npi-config
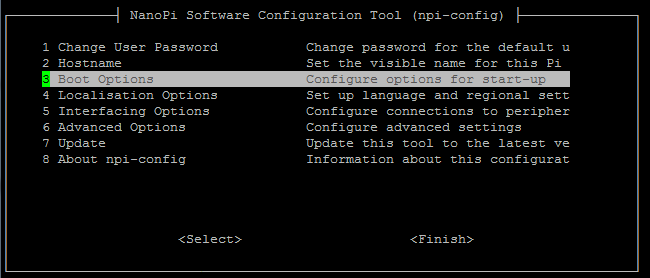
After you enter the Boot Options menu and select "Boot device" you will see two options:
1) D1 Hard drive
2) D2 TF card

Select "D1 Hard drive" and follow the prompts to proceed.
If you want to boot your board from a TF card select "D2 TF card".
3 Advanced Options
3.1 A0 Display: 选择系统默认显示设备
该功能仅支持全志芯片系列的开发板。
Linux系统默认只从一个显示设备输出画面, 使用下列命令可以选择系统默认的显示设备:
$ npi-config
	6 Advanced Options|     Configure advanced setting
		A0 Display|         Select system default display device
			fb0| framebuffer0
                        fb1| fb_st7789v(X)
(X)表示对应的显示设备是使能的, 不同型号的板子的fb设备是不一样的, 在H3/H5的板子里fb0是HDMI, fb1是Matrix - 2'8 SPI Key TFT, 请根据实际情况进行选择, 设置完毕后需要重启系统。
3.2 A1 Audio: 选择系统默认音频设备
该功能仅支持全志芯片系列的开发板。
Linux系统默认只从一个音频设备输出音频, 使用下列命令可以选择系统默认的音频设备:
$ npi-config
	6 Advanced Options|     Configure advanced setting
		A1 Audio|           Select system default audio device
			card0| [Dummy], device 0: Dummy PCM
                        card1| [Loopback], device 0: Loopback PCM
                        card2| [H3 Audio Codec], device 0: CDC PCM Codec-0 (X)
                        card3| [allwinner,hdmi], device 0: 1c22800.i2s-i2s-hifi i2s-hifi-0
(X)表示对应的音频card设备是使能的, 不同型号的板子的card设备是不一样的, 请根据实际情况进行选择, 设置完毕后需要重启系统。
3.3 A2 Welcome message: 使能或关闭开机欢迎界面
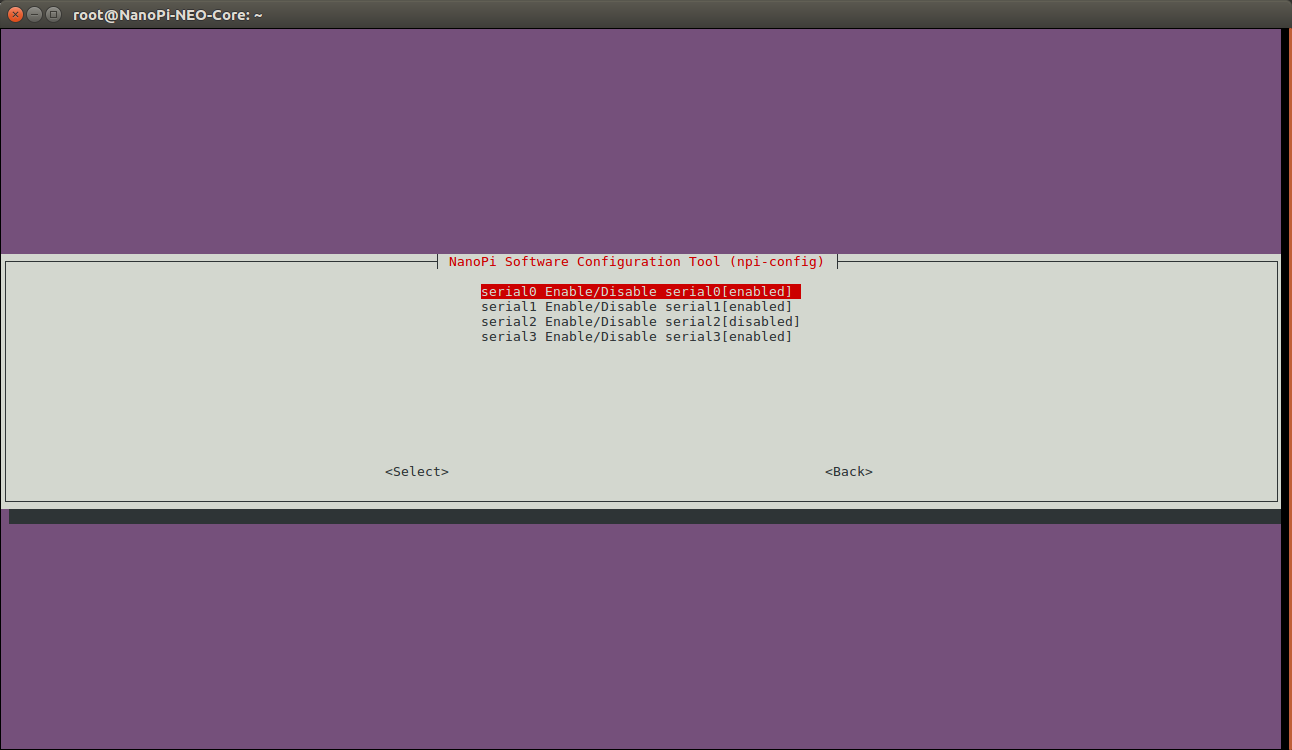
3.4 A3 Serial: 使能或关闭串口功能
该功能仅支持全志芯片系列并且使用Linux-4.x内核的开发板。
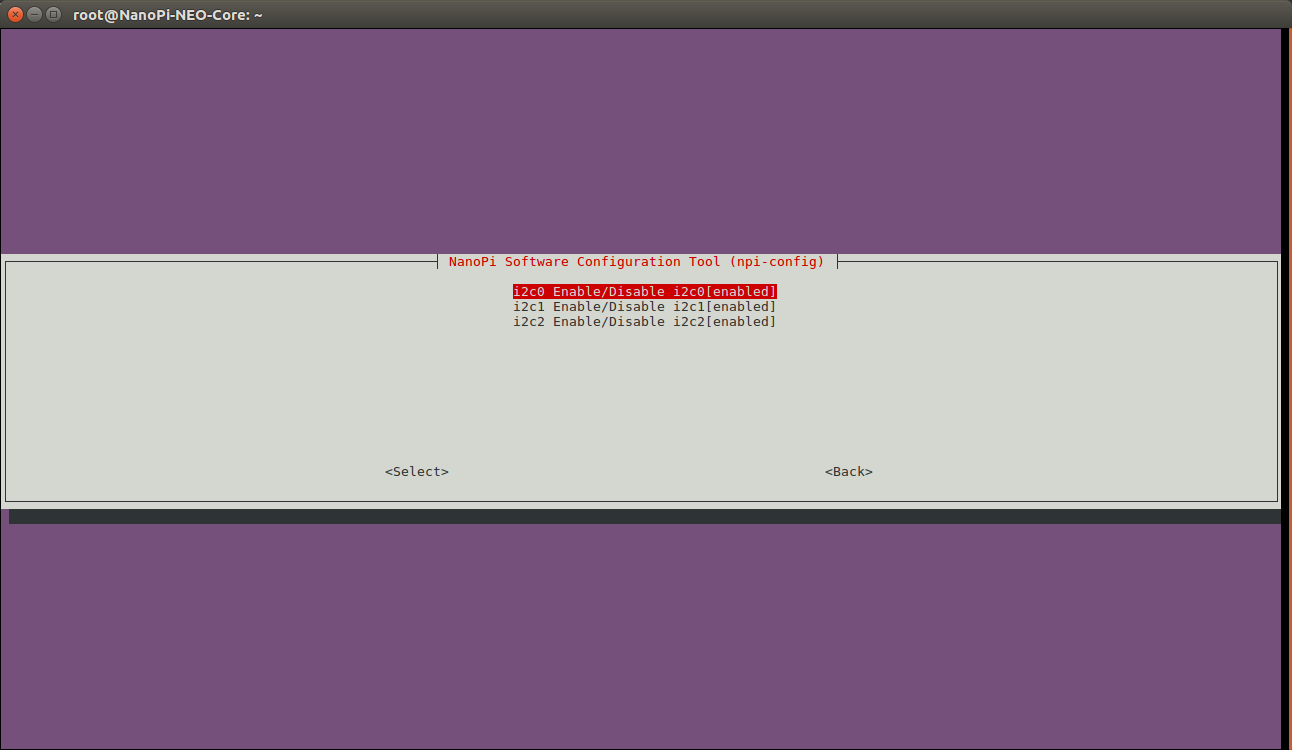
3.5 A4 I2C: 使能或关闭I2C功能
该功能仅支持全志芯片系列并且使用Linux-4.x内核的开发板。
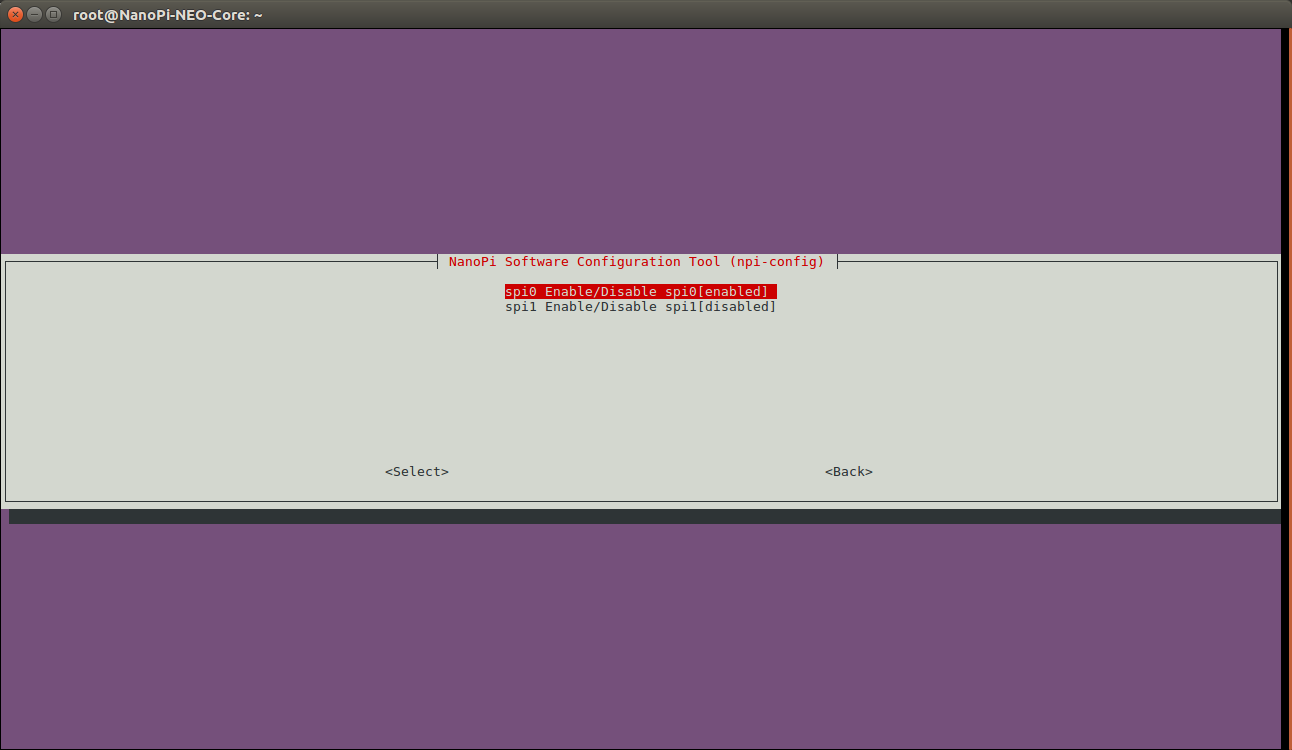
3.6 A5 SPI: 使能或关闭SPI功能
该功能仅支持全志芯片系列并且使用Linux-4.x内核的开发板。
支持使能部分SPI设备, 包括2.8寸TFT屏幕和SPI Flash。
3.6.1 使能Matrix - 2'8 SPI Key TFT
Matrix - 2'8 SPI Key TFT是一个2.8寸的TFT显示屏, 详细的使用方法请参考: Matrix - 2'8 SPI TFT/zh, 这里只关注如何使能该配件。
$ npi-config
	6 Advanced Options|     Configure advanced settings
		A5 SPI|             Enable/Disable SPI
			spi0 Enable/Disable spi0[enabled]
				spidev0.0|   SPI0 char device
				spi-2.8'tft| Matrix-2'8_SPI_Key_TFT(X)
				spi-flash|   SPI0 flash
(X)表示SPI0上连接的Matrix - 2'8 SPI Key TFT是使能的, 设置完毕后需要重启系统, 系统启动后屏幕上会显示校准的界面。
3.6.2 使能Mini Shield for NanoPi NEO Core/Core2的SPI Flash
$ npi-config
	6 Advanced Options|     Configure advanced setting
		A5 SPI|             Enable/Disable SPI
			spi0 Enable/Disable spi0[enabled]
				spidev0.0|   SPI0 char device
				spi-2.8'tft| Matrix-2'8_SPI_Key_TFT
				spi-flash|   SPI0 flash(X)
NEO Core/Core2是通过SPI0连接Mini Shield上板载SPI flash的, (X)表示SPI flash是被使能的, 设置完毕后需要重启系统。
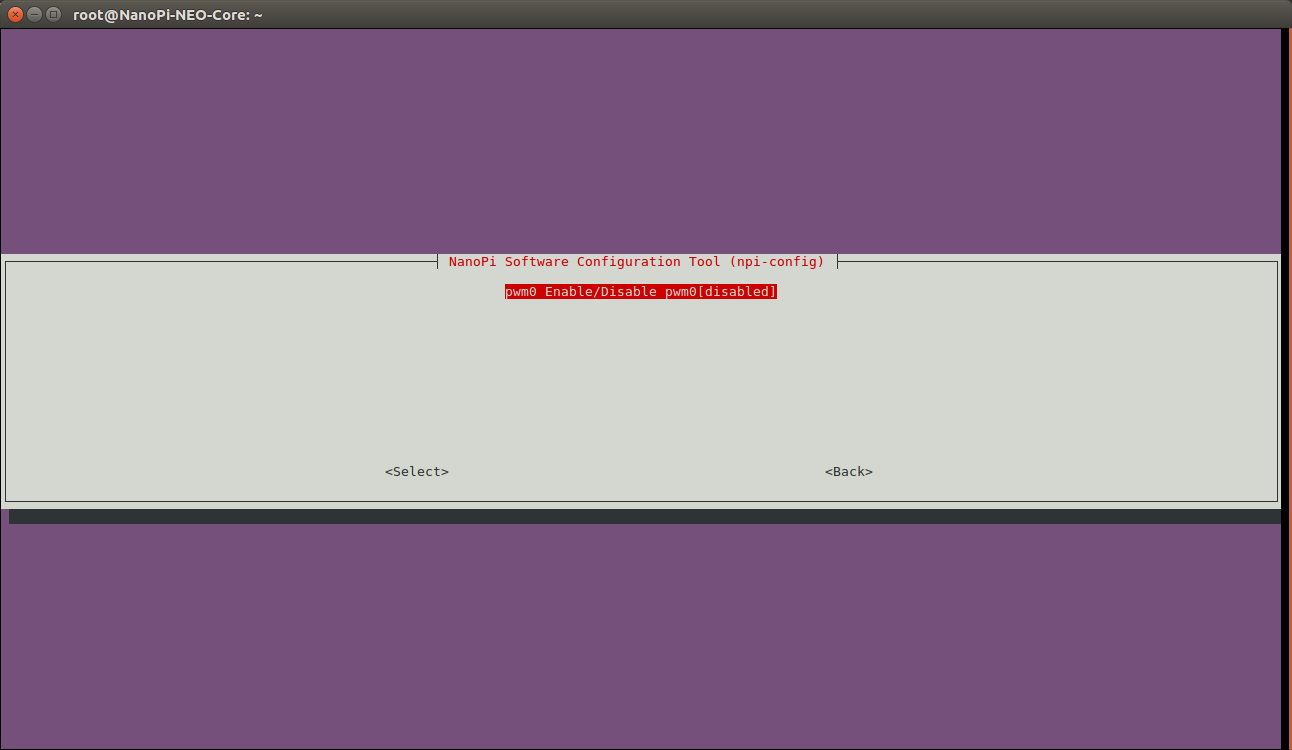
3.7 A6 PWM: 使能或关闭PWM功能
该功能仅支持全志芯片系列并且使用Linux-4.x内核的开发板。
3.8 A7 I2S: 使能或关闭I2S功能
该功能仅支持全志芯片系列并且使用Linux-4.x内核的开发板。
