Difference between revisions of "NanoPi R1"
(→How to Use OpenWrt) |
(→How to Use OpenWrt) |
||
| Line 119: | Line 119: | ||
By default a users logs in as "root" without a password. Click on the "Login" button you will login. | By default a users logs in as "root" without a password. Click on the "Login" button you will login. | ||
| − | |||
| − | |||
| − | |||
| − | |||
| − | |||
===Connect to R1's WiFi Hotspot=== | ===Connect to R1's WiFi Hotspot=== | ||
By default a NanoPi R1 that runs OpenWrt is configured as a secondary router. To achieve better performance you need to install a WiFi antenna to your board. By default the board's WiFi module AP6212 works in the AP mode and its hotspot's name is "OpenWrt". You can use a smart phone to connect to this hotspot without a password and browse the internet.<br> | By default a NanoPi R1 that runs OpenWrt is configured as a secondary router. To achieve better performance you need to install a WiFi antenna to your board. By default the board's WiFi module AP6212 works in the AP mode and its hotspot's name is "OpenWrt". You can use a smart phone to connect to this hotspot without a password and browse the internet.<br> | ||
| Line 150: | Line 145: | ||
* Go to Network ---> Wireless and you can check all the available WiFi hotspot devices listed in "Associated Stations".<br> | * Go to Network ---> Wireless and you can check all the available WiFi hotspot devices listed in "Associated Stations".<br> | ||
[[File:R1-Wireless-Associated_Stations.jpg|frameless|500px|R1-Wireless-Associated Stations]]<br> | [[File:R1-Wireless-Associated_Stations.jpg|frameless|500px|R1-Wireless-Associated Stations]]<br> | ||
| − | |||
| − | |||
| − | |||
| − | |||
---> | ---> | ||
{{DeveloperGuildH3|NanoPi-R1}} | {{DeveloperGuildH3|NanoPi-R1}} | ||
Revision as of 02:43, 17 January 2019
Contents
1 Introduction
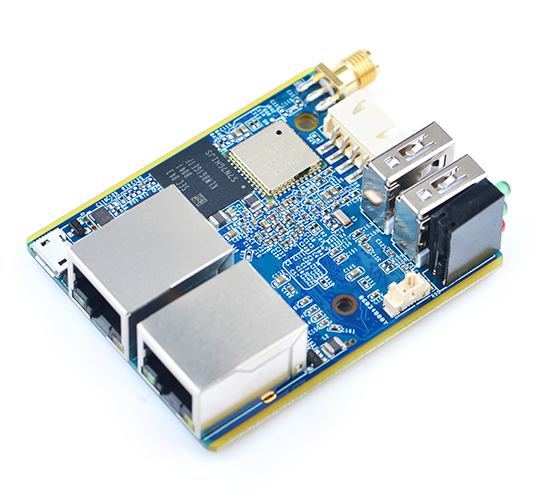
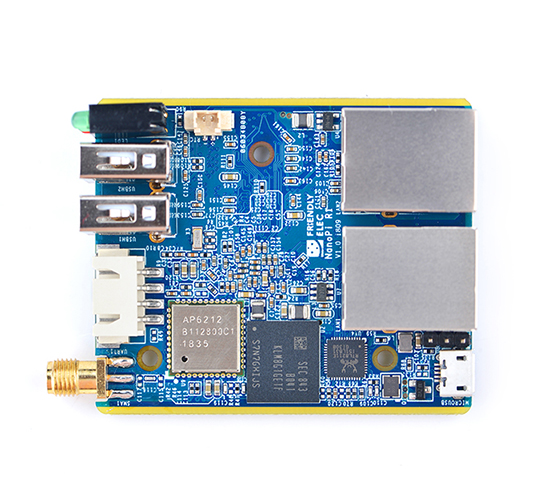
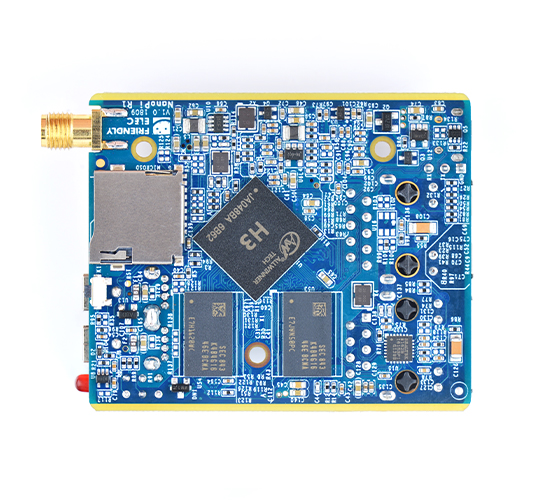
- The NanoPi R1("R1") is a complete open source board developed by FriendlyElec for makers, hobbyists, fans and etc.
- The NanoPi R1 has one Gbps Ethernet port and one Fast Ethernet port. It has an onboard 2.4G Wi-Fi module. FriendlyElec ported OpenWRT to the R1. With some additional settings it will work like a router.Its good networking performance and features make it a good platform for various network applications.
2 Hardware Spec
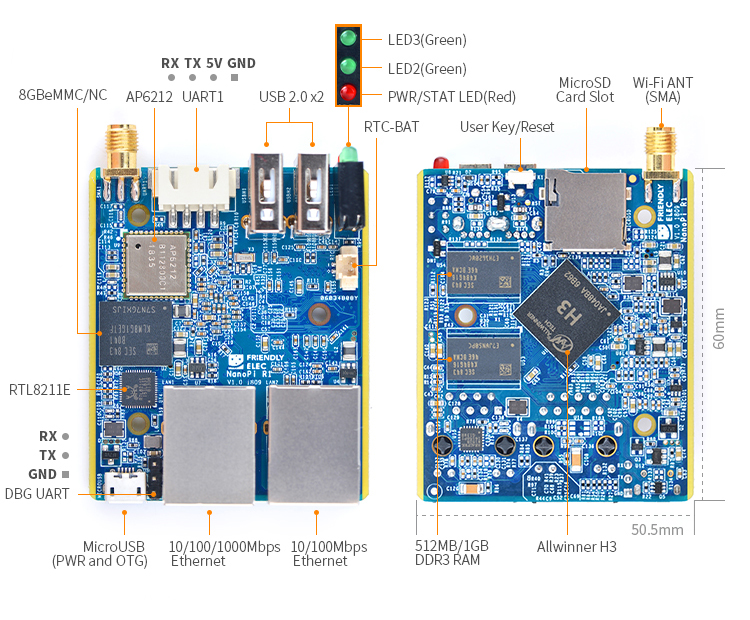
- CPU: Allwinner H3, Quad-core Cortex-A7 Up to 1.2GHz
- DDR3 RAM: 512MB/1GB
- Storage: NC/8GB eMMC
- Network:
- 10/100/1000M Ethernet x 1,
- 10/100M Ethernet x 1
- WiFi: 802.11b/g/n, with SMA antenna interface
- Bluetooth:4.0 dual mode
- USB Host: Type-A x2
- MicroSD Slot x 1
- MicroUSB: for OTG and power input
- Debug Serial Port: 3Pin 2.54mm pitch pin-header
- UART: 4Pin 2.54mm pitch pin-header
- LED: LED x 3
- KEY: KEY x 1
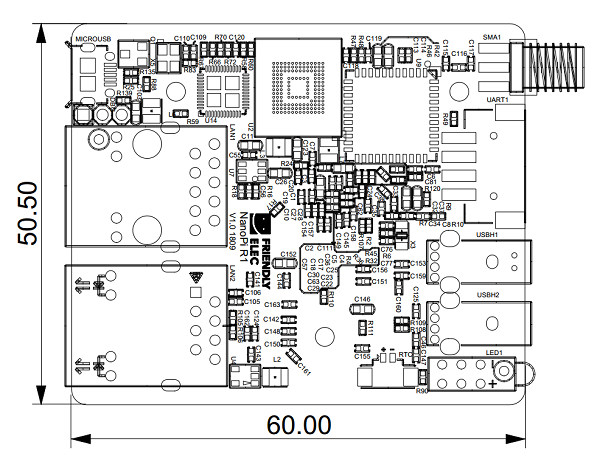
- PC Size: 50.5 x 60mm
- Power Supply: DC 5V/2A
- Temperature measuring range: -40℃ to 80℃
- OS/Software: U-boot,Ubuntu-Core,OpenWRT
- Weight: xxg
3 Diagram, Layout and Dimension
3.1 Layout
3.2 Board Dimension
- For more details refer to:NanoPi_R1 pcb file in dxf format
4 Get Started
4.1 Essentials You Need
Before starting to use your NanoPi R1 get the following items ready
- NanoPi R1
- MicroSD Card/TF Card: Class 10 or Above, minimum 8GB SDHC
- MicroUSB 5V/2A power adapter
- A host computer running Ubuntu 16.04 64-bit system
4.2 TF Cards We Tested
To make your NanoPi R1 boot and run fast we highly recommend you use a Class10 8GB SDHC TF card or a better one. The following cards are what we used in all our test cases presented here:
- SanDisk TF 8G Class10 Micro/SD High Speed TF card:
- SanDisk TF128G MicroSDXC TF 128G Class10 48MB/S:
- 川宇 8G C10 High Speed class10 micro SD card:
4.3 Install OS
4.3.1 Download Image Files
Go to download link to download the image files under the officail-ROMs directory and the flashing utility under the tools directory:
Image Files nanopi-r1_sd_friendlycore-xenial_4.14_armhf_YYYYMMDD.img.zip FriendlyCore based on UbuntuCore and Linux-4.14 kernel nanopi-r1_sd_openwrt_4.14_armhf_YYYYMMDD.img.zip OpenWrt and Linux-4.14 kernel nanopi-r1_eflasher_friendlycore-xenial_4.14_armhf_YYYYMMDD.img.zip eflasher image which is used to install FriendlyCore(Linux-4.14) to eMMC nanopi-r1_eflasher_openwrt_4.14_armhf_YYYYMMDD.img.zip eflasher image which is used to install OpenWrt(Linux-4.14) to eMMC Flashing Utility win32diskimager.rar Windows utility. Under Linux users can use "dd"
4.3.1.1 Flash to eMMC
4.3.1.1.1 Flash OS with eflasher Utility
- For more details about eflasher refer to the wiki link: EFlasher。
- Extract the eflasher Image and win32diskimager.rar files. Insert a TF card(at least 4G) into a Windows PC and run the win32diskimager utility as administrator. On the utility's main window select your TF card's drive, the wanted image file and click on "write" to start flashing the TF card.
- Insert this card into your board's BOOT slot and power on (with a 5V/2A power source). If the green LED is on and the blue LED is blinking this indicates your board has successfully booted.
- If your board doesn't support HDMI or no monitor is connected you can select an OS by running the following command:
$ su root
$ eflasher
The password for "root" is "fa".
We take "nanopi-r1_eflasher_friendlycore-xenial_4.14_armhf_YYYYMMDD.img" as an example. After you run the "eflasher" command you will see the following messages:
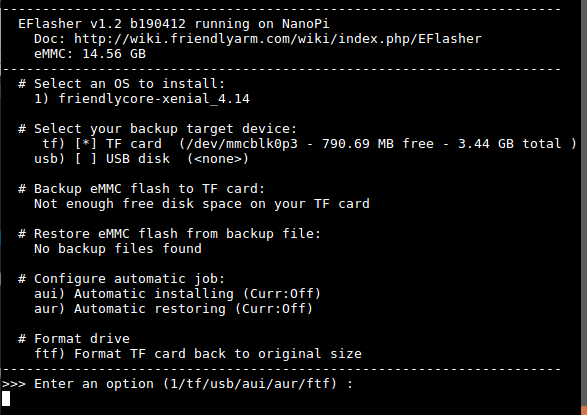
Type "1", select writing friendlycore system to eMMC you will see the following messages:
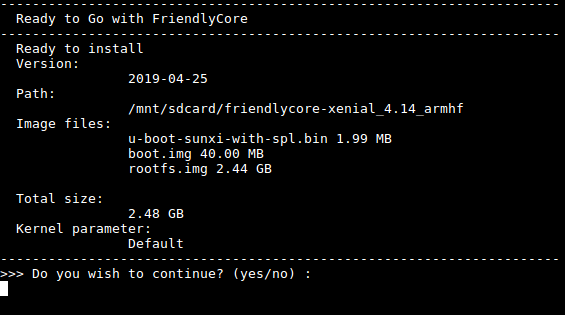
Type "yes" to start installation:

After it is done power off the system, take off the TF card, power on again your system will be booted from eMMC.
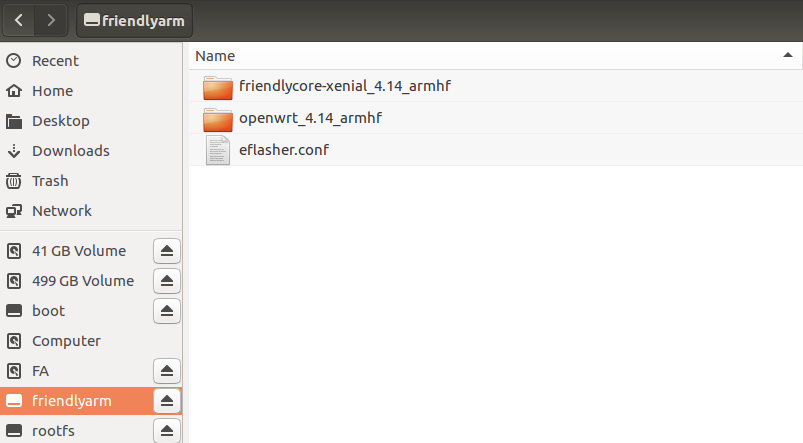
- If you want to flash other system to eMMC you can download the whole images-for-eflasher directory and extract the package under that directory to the FRIENDLYARM partition of an installation SD card.
5 How to Use OpenWrt
5.1 Introduction
OpenWrt is a highly extensible GNU/Linux variant for embedded devices. Unlike many other distributions for routers, OpenWrt is built from the ground up to be a full-featured, easily modifiable OS for a router. In practice this means you can have all the features with none of the bloat, powered by a Linux kernel that is more recent than most other distributions. For more details you can refer to OpenWrt website.
5.2 Login OpenWrt
- Login from serial port
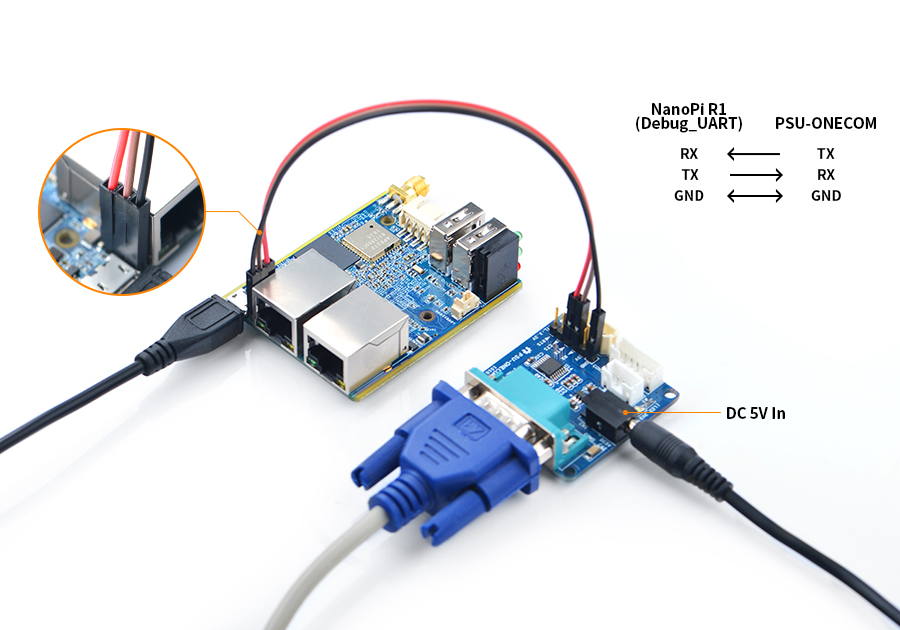
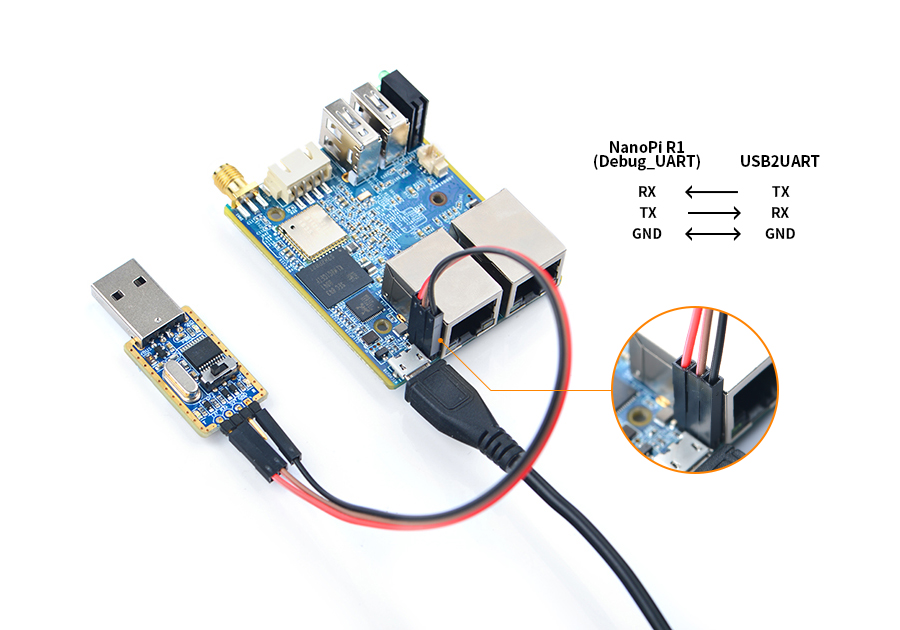
Here is a hardware setup to connect your board to a serial device:
1) Connect your board to a FriendlyElec's PSU_ONECOM module. Both the module's DC port and the board's MicroUSB need to be powered by a 5V/2A power supply.Note: insufficient power supply may not make the system work normally.
2) Connect your board to a FriendlyElec's Matrix-USB2UART module. The board's MicroUSB needs to be powered by a 5V/2A power supply
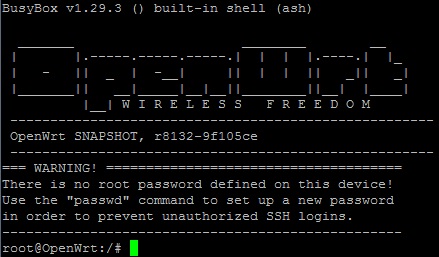
By default a user logs in as "root" and doesn't need a password for "root". You can set a password for "root" by using the "passwd" command.
When your board is booted for the first time it will automatically extend its TF card's rootfs file system to its max available space:

This will take a while and you need to wait for the process to complete.
- Login via SSH
A NanoPi R1 that runs FriendlyElec's OpenWrt by default is configured as a secondary router. Its Gbps Ethernet(eth0) is configured as WAN and Fast Ethernet(eth1) is configured as LAN.
If you want to login via SSH you need to connect your R1's Gbps Ethernet to a master router's LAN port. Here is a hardware setup:
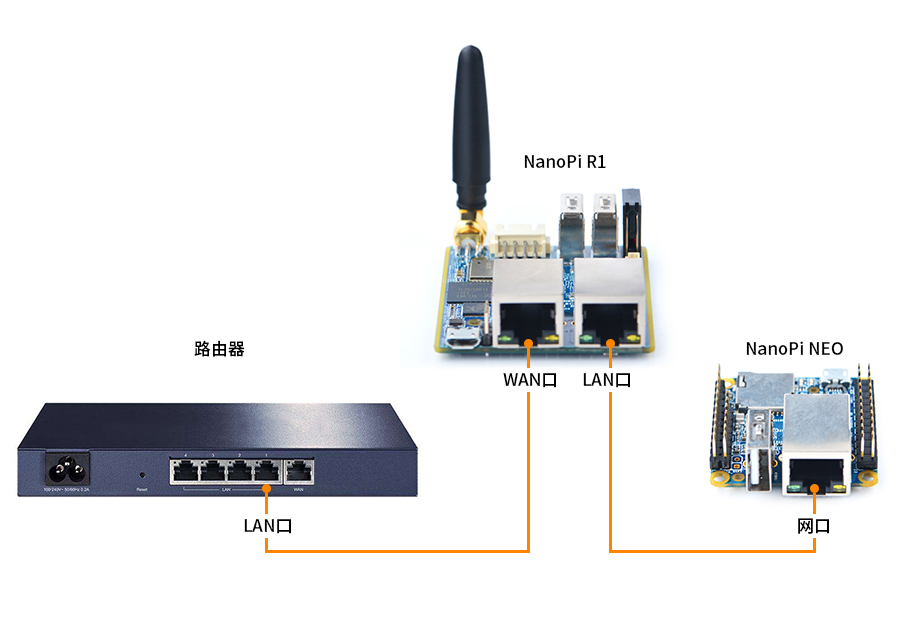
We assume the IP address for the board's Gbps Ethernet(eth0) is 192.168.1.163. Run the following command to login via SSH:
$ ssh root@192.168.1.163
By default a user logs in as "root" without a password.
- Login from Web
OpenWrt supports system login from a LuCI Web page. You can refer to <Login via SSH> to configure your system. We assume the IP address for your board's Gbps Ethernet is 192.168.1.163. After type in the IP address in a browser's address bar you will be able to login. Here is what you should see:
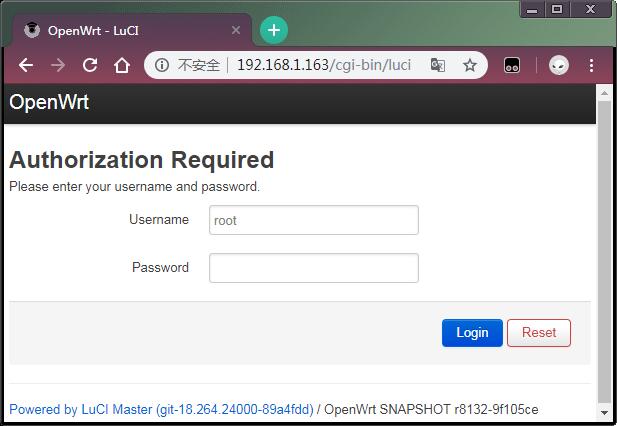
By default a users logs in as "root" without a password. Click on the "Login" button you will login.
5.3 Connect to R1's WiFi Hotspot
By default a NanoPi R1 that runs OpenWrt is configured as a secondary router. To achieve better performance you need to install a WiFi antenna to your board. By default the board's WiFi module AP6212 works in the AP mode and its hotspot's name is "OpenWrt". You can use a smart phone to connect to this hotspot without a password and browse the internet.
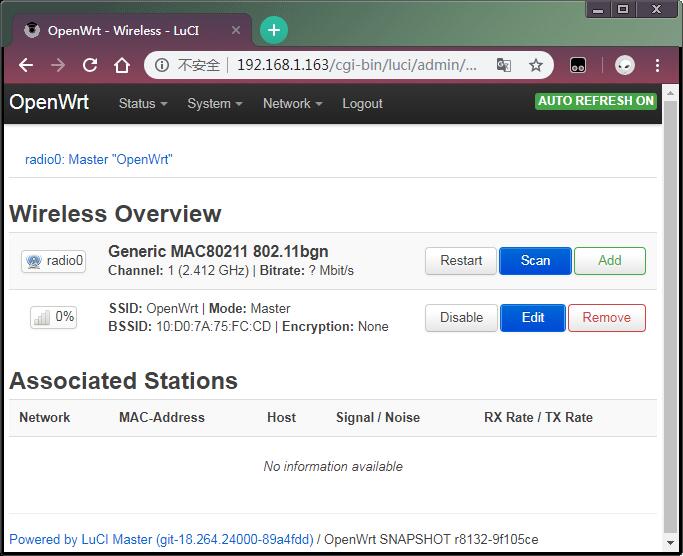
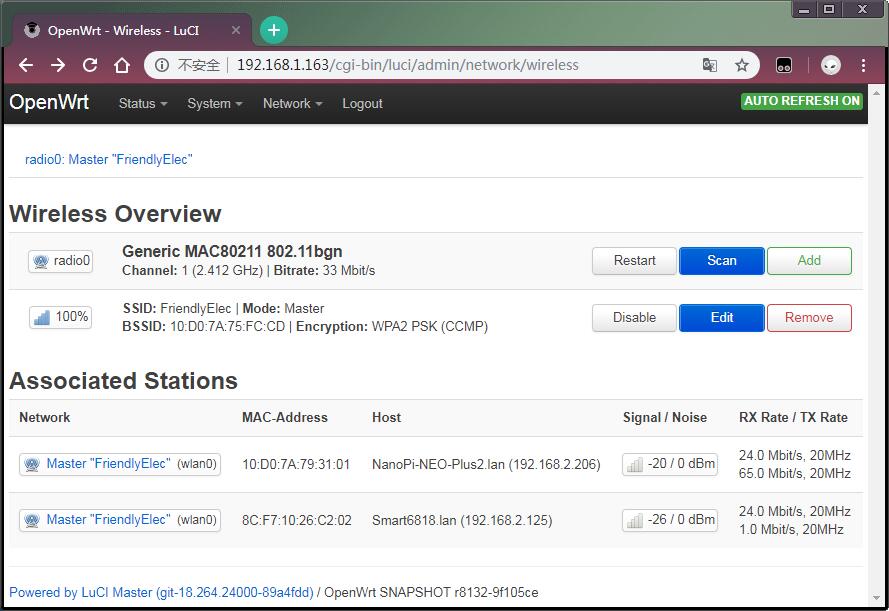
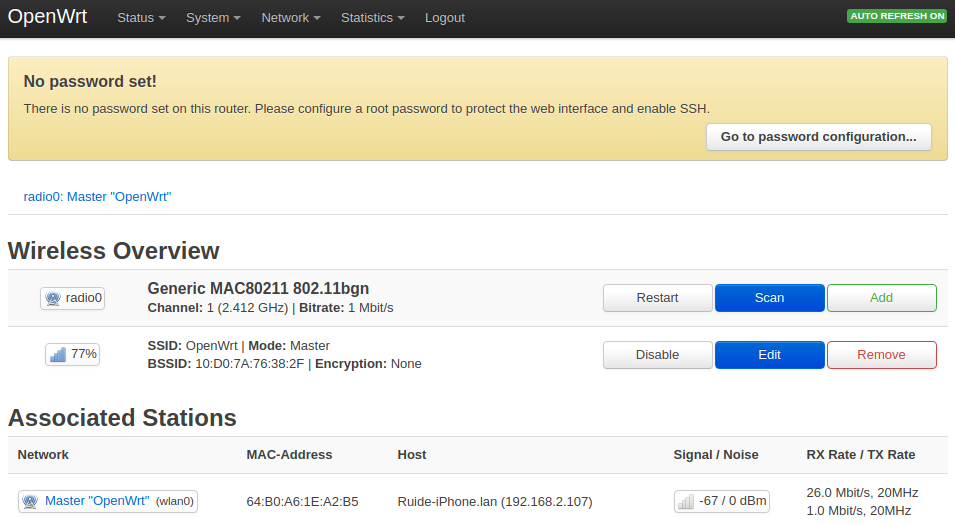
After your smart phone is successfully connected to the board's WiFi hotspot you can go to "LuCI" -> "Netwrok" -> "Wireless" to check your connection:
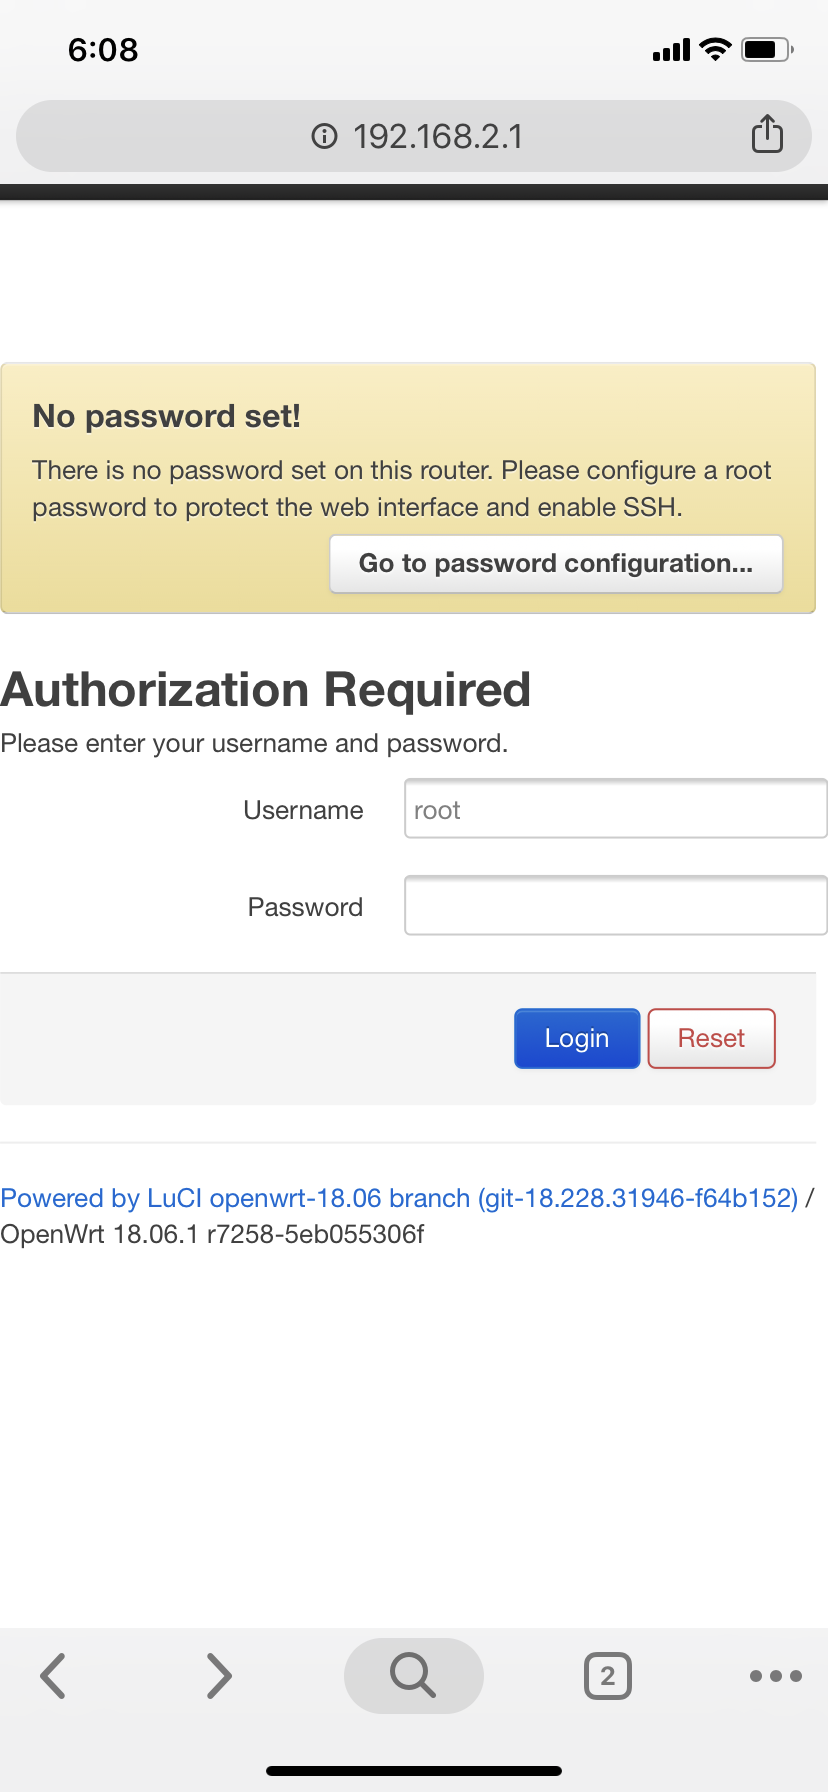
By default the WiFi hotspot falls into 192.168.2.x and you can open a browser on your phone and type 192.168.2.1 in the browser's address bar to visit LuCI:
5.4 Connect to R1's LAN Port
By default a NanoPi R1 that runs OpenWrt is configured as a secondary router.Its Fast Ethernet(eth1) is configured as LAN. You can connect a device to R1's LAN port and browse the internet:

You can browser the internet from a NanoPi NEO:
$ ping www.baidu.com
64 bytes from 14.215.177.38: icmp_seq=2 ttl=56 time=19.5 ms
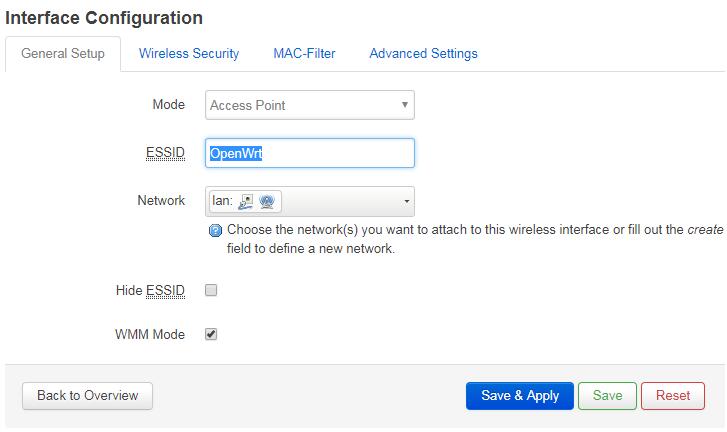
Wireless, enter the configuration page for WiFi hotspot and click on "Edit" to configure WiFi hotspot.
- Go to Interface Configuration ---> General Setup ---> ESSID and you can change your wifi hotspot's name. After you make your change click on Save & Apply to save your change.
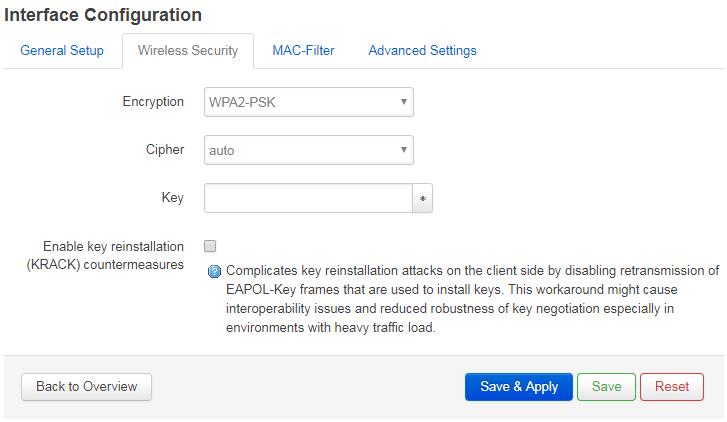
- Go to Interface Configuration ---> Wireless Security and you can reset your WiFi hotspot's Encryption. You can reset your WiFi hotspot's password in the "Key" field and click on Save & Apply to save your change.
- Go to Network ---> Wireless and you can check all the available WiFi hotspot devices listed in "Associated Stations".
6 Developer's Guide
- System Development
- System Configurations
- Hardware Access
7 Resources
7.1 Schematics and Datasheets
- Schematics
- Dimensional Diagram
- H3 datasheet Allwinner_H3_Datasheet_V1.2.pdf
8 Update Log
8.1 Jan-02-2019
- Released English Version
