EFlasher
Contents
1 Introduction to eFlasher
The eFlasher (eMMC-flasher) utility is released by FriendlyElec for users to install an OS image on a FriendlyElec board's eMMC easily.
The eFlasher utility provides users with a GUI with multiple OS options.
The eFlasher utility has two versions: eflasher-gui and eflasher-console:
1) eflasher-gui: a GUI based eFlasher utility. When a board is connected to an LCD or HDMI monitor users can use this utility to install an OS easily;
2) eflasher-console: a commandline based eFlasher utility. When a board is connected to a serial terminal or logged in with SSH users can use it to install an OS;
2 Install eFlasher
- Step 1: download an eflasher installation package
Go to the wiki page of the nano board you bought and download an eflasher file named as :XXXX-eflasher-YYYYMMDD-full.img.7z(the "XXXX" is the board type for the board you bought and "YYYYMMDD" is the release date of that eflasher file)
This package contains all the image files released by FriendlyElec such as Debian, Android5, Android4.4 and Ubuntu core(different boards may be provided with different OS image files)
Download a XXXX-eflasher-YYYYMMDD-full.img.7z file to a PC host and make an installation SD card with a windows utility: win32diskimager.rar
- Step 2: make an installation SD card with eflasher
Extract the eflasher file and you will get an ".img" file.Insert an SD card(at least 8G) into a Windows PC and run the win32diskimager utility as administrator. On the utility's main window select your SD card's drive, the wanted image file and click on "write" to start flashing the SD card.
You can use "dd" under a Linux PC to flash this ".img" to your SD card too
- Step 3: Start eFlasher
Insert this SD card to your board, press and hold the "BOOT" button, power on your board.
3 GUI Based eFlasher
By default after eFlash is started the GUI based version will be started. If your board is connected to an LCD or HDMI monitor you will see the following screen:

Select your wanted OS to start installation.
4 Commandline Based eFlasher
If your board is not connected to any display device you can login your board via SSH and start the eflahser by running "eflasher". Here is what you expect to observe:

5 Automate OS Installation at System Startup
You can automate OS installation with eFlash at system startup in three ways:
- No.1:on the GUI based eFlasher select your wanted OS and check the "Start automatically at startup" option on the "Ready to Go" window.
- No.2:mount an SD card to a Windows PC and create an "eflasher.conf" file with notepad on the FAT section of your SD card(or open an existing "eflasher.conf") and type the following lines if you want to install a Debian OS:
[General]
autoStart=/mnt/sdcard/debian
The "autoStart" field specifies the path to your ROM. In this example the ROM is a Debian OS image file.
- No.3:after your board starts open a terminal and create or edit "/mnt/sdcard/eflasher.conf" and type the lines presented in No.2 .
6 Make Your Own eFlasher
6.1 Manage Multiple OS Images with eFlasher
The eFlasher utility reads image files from the FAT section of an SD card. After an SD card is inserted to a Windows PC you can manage multiple OS images that exist in the SD card with eFlasher.
Under the FAT section of an SD card with multiple OS images each directory under the root directory contains an OS image. The name of such a directory should be named with letters or numbers
If the FAT section is not big enough to hold your multiple OS images you can store them in a USB drive with the same structure
For example there are four directories under the FAT section:

They stand for four OS:

Files under an OS directory:
Configuration File:
env.conf environmental variables for setting up uboot and kernel parameters info.conf system information:
title=Android 5 ---> OS name: Android 5
require-board=s5p4418 ---> SoC: S5P4418, options including S5P6818, H3, A64 etc
version=2016-11-17 ---> ROM's version number(or release date)
icon=androidos.png ---> icon
Here is a screenshot: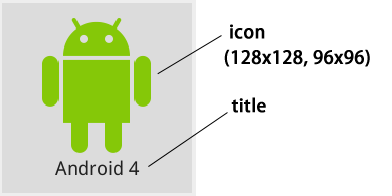

Image File:
2ndboot.bin Second Boot boot.img image file for boot section bootloader U-Boot cache.img image file for Android Cache section system.img image file for system section userdata.img image file for user data section partmap.txt description file for partition map
These image files by default are included in an eFlasher file. These files can be downloaded from a board's corresponding wiki site. Usually an image file is located at the images-for-eflasher directory of a server. Here is how a S5P6818's directory looks like:

You can download its image file and extract it to the FAT section of an SD card.
6.2 Make Your Own OS Image
6.2.1 Make Android Image for 4418/6818
First of all you need to compile your Android source code. After compilation is finished enter the "out/target/product/XXXXX" directory ("XXXXX" stands for a product's name. For example 4418 SoC's name is "nanopi2" and 6818 SoC's name is "nanopi3") and replace the following file with the one under the Android directory of the FAT section of your SD card:

6.2.2 Make Linux Image for 4418/6818
You need to make a boot.img file for the boot section and a rootfs.img file for the rootfs section and replace the corresponding files in the eFlasher.
1) Download https://github.com/friendlyarm/debian_nanopi2 ;
2) Copy the files under the boot section of your SD card to "debian_nanopi2/boot" and the files under the rootfs section of your SD card to "debian_nanopi2/rootfs"
Make necessary changes in the files under the boot section and rootfs section accordingly.
We recommend to delete the "etc/fs.resized" file under the rootfs directory otherwise this section will not be automatically extended.
3) Use the make_ext4fs utility under the "debian_nanopi2" directory to make an img file:
./tools/make_ext4fs -s -l 67108864 -a root -L boot boot.img boot
./tools/make_ext4fs -s -l 2097152000 -a root -L rootfs rootfs.img rootfs
4) Move your newly generated boot.img and root.img files to the core-qte directory under the FAT section of eflasher to replace corresponding files and this will be your new eFlasher.
6.2.3 Make Linux Image for H3/H5
You need to make a boot.img file for the boot section and a rootfs.img file for the rootfs section and replace the corresponding files in the eFlasher.
1) Download: EFlasher-build-tools;
2) Make the whole rootfs section an ext4 formatted img file:
$ ./make_ext4fs -s -l 2097152000 -a root -L /SD/rootfs rootfs.img rootfs
-l specifies the size of an img file in the unit of Byte, 2097152000 Byte=2000MB.,必须大于实际目录的大小。
3) Make the whole boot section a FAT formatted img file.
$ ./build-boot-fat.sh boot.img /SD/boot 40
40 means the size of boot.img is 40M.
4) Move your newly generated boot.img and root.img files to the FAT section of eflasher-ROM to replace corresponding files and this will be your new eFlasher.