Difference between revisions of "EFlasher"
(→启动命令行版本的eFlasher) |
(updated by API) |
||
| (83 intermediate revisions by 4 users not shown) | |||
| Line 7: | Line 7: | ||
1) eflasher-gui: a GUI based eFlasher utility. When a board is connected to an LCD or HDMI monitor users can use this utility to install an OS easily;<br /> | 1) eflasher-gui: a GUI based eFlasher utility. When a board is connected to an LCD or HDMI monitor users can use this utility to install an OS easily;<br /> | ||
2) eflasher-console: a commandline based eFlasher utility. When a board is connected to a serial terminal or logged in with SSH users can use it to install an OS;<br /> | 2) eflasher-console: a commandline based eFlasher utility. When a board is connected to a serial terminal or logged in with SSH users can use it to install an OS;<br /> | ||
| + | <br /> | ||
==Install eFlasher== | ==Install eFlasher== | ||
| Line 18: | Line 19: | ||
* Step 3: Start eFlasher | * Step 3: Start eFlasher | ||
Insert this SD card to your board, press and hold the "BOOT" button, power on your board. | Insert this SD card to your board, press and hold the "BOOT" button, power on your board. | ||
| + | |||
| + | == Update eflasher to the latest version == | ||
| + | Execute the following command on the development board: | ||
| + | <syntaxhighlight lang="bash"> | ||
| + | git clone https://github.com/friendlyarm/eflasher-updater | ||
| + | cd eflasher-updater/ | ||
| + | ./update.sh | ||
| + | </syntaxhighlight> | ||
| + | |||
| + | == Login to the eFlasher system == | ||
| + | Log in with the following account in command line:<br /> | ||
| + | User Name: root<br /> | ||
| + | Password: fa<br /> | ||
==GUI Based eFlasher== | ==GUI Based eFlasher== | ||
| Line 25: | Line 39: | ||
==Commandline Based eFlasher== | ==Commandline Based eFlasher== | ||
| + | ===Directly install the specified OS=== | ||
| + | Show help: | ||
| + | <pre> | ||
| + | # eflasher --help | ||
| + | ------------------------------------------------------- | ||
| + | USAGE: eflasher [-i, --install <arg>] | ||
| + | |||
| + | OPTIONAL: | ||
| + | -i, --install <path>: Install OS to eMMC without UI operation | ||
| + | -r, --restore <file>: Restore backup file to eMMC without UI operation | ||
| + | -e, --exclude <files>: Ignore certain files, multiple files separated by commas | ||
| + | --low-format: Low format the flash before burning | ||
| + | --auto-exit: Automatically exit eflahser after burning or restoring | ||
| + | --disable-overlayfs: Disable overlay filesystem | ||
| + | -c, --conf <arg>: Set eflasher configuration file | ||
| + | -l, --list-devices: List the supported board models | ||
| + | -v, --version: Output version information | ||
| + | -h, --help: Show this usage | ||
| + | -g, --gui: Start eflasher gui | ||
| + | </pre> | ||
| + | Directly install the specified OS: | ||
| + | <pre> | ||
| + | # eflasher -i /mnt/sdcard/friendlycore-xenial_4.14_armhf | ||
| + | Using config file: "/tmp/eflasher.conf" | ||
| + | ------------------------------------------------------- | ||
| + | >>friendlycore-xenial_4.14_armhf | ||
| + | Ready to Go with FriendlyCore,Total size: 1.10 GB, | ||
| + | Installing FriendlyCore ..., , , | ||
| + | Finish!,Speed: 20.71 MB/s | ||
| + | </pre> | ||
| + | ===Wizard mode=== | ||
If your board is not connected to any display device you can login your board via SSH and start the eflahser by running "eflasher". Here is what you expect to observe:<br /> | If your board is not connected to any display device you can login your board via SSH and start the eflahser by running "eflasher". Here is what you expect to observe:<br /> | ||
| − | :: | + | <pre> |
| − | < | + | ---------------------------------------------------------------------- |
| + | EFlasher v1.2 b190111 running on NanoPC-T4 | ||
| + | Doc: http://wiki.friendlyelec.com/wiki/index.php/EFlasher | ||
| + | eMMC: 14.56 GB | ||
| + | ---------------------------------------------------------------------- | ||
| + | # Select an OS to install: | ||
| + | 1) Android 8 | ||
| + | |||
| + | # Select your backup target device: | ||
| + | tf) [*] TF card (/dev/mmcblk0p1 - 4.27 GB free - 5.67 GB total - fuseblk) | ||
| + | usb) [ ] USB disk (<none>) | ||
| + | |||
| + | # Backup eMMC flash to TF card: | ||
| + | Not enough free disk space on your TF card | ||
| + | |||
| + | # Restore eMMC flash from backup file: | ||
| + | No backup files found | ||
| + | |||
| + | # Configure automatic job: | ||
| + | aui) Automatic installing (Curr:Off) | ||
| + | aur) Automatic restoring (Curr:Off) | ||
| + | |||
| + | # Format drive | ||
| + | ftf) Format TF card back to original size | ||
| + | ---------------------------------------------------------------------- | ||
| + | >>> Enter an option (1/tf/usb/aui/aur/ftf) : | ||
| + | </pre> | ||
| − | == | + | ==Automate OS Installation at System Startup== |
| − | + | You can automate OS installation with eFlasher at system startup in three ways:<br /> | |
| − | * | + | * No.1:on the GUI based eFlasher select your wanted OS and check the "Start automatically at startup" option on the "Ready to Go" window.<br /> |
| − | * | + | * No.2:mount an SD card to a Windows PC and create an "eflasher.conf" file with notepad on the FAT section of your SD card(or open an existing "eflasher.conf") and type the following lines if you want to install a Debian OS:<br /> |
<syntaxhighlight lang="bash"> | <syntaxhighlight lang="bash"> | ||
[General] | [General] | ||
autoStart=/mnt/sdcard/debian | autoStart=/mnt/sdcard/debian | ||
</syntaxhighlight> | </syntaxhighlight> | ||
| − | + | The "autoStart" field specifies the path to your ROM. In this example the ROM is a Debian OS image file. | |
| − | * | + | * No.3:after your board starts open a terminal and create or edit "/mnt/sdcard/eflasher.conf" and type the lines presented in No.2 .<br /> |
| − | == | + | == Do something else after burning or restoring the system == |
| + | You may want to do something extra after the installing system is finished, such as lighting up an LED, you can modify the /opt/run-eflasher.sh script in the beginning of the line "./eflasher-gui" to add code, such as the following example, after the installing is completed, set a GPIO pin: | ||
| + | <syntaxhighlight lang="bash"> | ||
| + | ./eflasher-gui -qws >/dev/null 2>&1 | ||
| + | echo 13 > /sys/class/gpio/export | ||
| + | echo out > /sys/class/gpio/gpio13/direction | ||
| + | echo 0 > /sys/class/gpio/gpio13/value | ||
| + | echo 13 > /sys/class/gpio/unexport | ||
| + | </syntaxhighlight> | ||
| + | The following script demonstrates writing the cpu id to the /etc/cpuid.txt file of the eMMC system after burning the system on the S5P4418/S5P6818 platform: | ||
| + | <syntaxhighlight lang="bash"> | ||
| + | ./eflasher-gui -qws >/dev/null 2>&1 | ||
| + | partprobe /dev/mmcblk1 | ||
| + | mount /dev/mmcblk1p2 /media/ | ||
| + | cat /sys/devices/platform/cpu/uuid > /media/etc/cpuid.txt | ||
| + | umount /media/ | ||
| + | </syntaxhighlight> | ||
| + | In order for the above script to work properly, we also need to set the eflasher-gui to automatically exit after the installing is completed. The following settings are required:<br /> | ||
| + | Edit and create a new file called eflasher.conf with the notepad+ text editor on the Fat partition of the SD card, set the autoExit field to True:<br /> | ||
| + | <syntaxhighlight lang="bash"> | ||
| + | [General] | ||
| + | autoStart=/mnt/sdcard/friendlycore-xenial | ||
| + | autoExit=true | ||
| + | </syntaxhighlight> | ||
| + | The autoStart field specifies that the specified system will be burned automatically without interaction, if no LCD is connected, the burn status can be identified by the LED burn, by default, the green LED flashes to indicate that it is burning. | ||
| + | <br /> | ||
| − | == | + | ==Backup & Restore Data on eMMC Flash== |
| + | This is pretty much like what the GHOST does with Windows. This function can either back up all the data on eMMC to an external storage device or copy all data from an external storage device to eMMC.<br /><br /> | ||
| + | <b>For mass production</b>:<br /> | ||
| + | This is especially useful for a case in which you have made a system on a board and want to install this system to massive boards. This works for both Android and Linux images.<br /> | ||
| + | <br /> | ||
| + | Prerequisites:<br /> | ||
| + | You need to have an external storage device whose storage is greater than the eMMC Flash. The external storage device should be formatted to exFat or ntfs. In some case eflasher may re-partition your external storage device. | ||
| + | <br /> | ||
| − | + | === System Backup and Restore via GUI === | |
| − | + | ||
| − | + | On EFlasher's main window click on "Backup and Restore" and proceed with the prompts:<br /> | |
| + | ::[[File:eflasher_index.png| frameless|800px|eflasher_index]]<br /> | ||
<br /> | <br /> | ||
| − | + | ||
| + | ====Select Location for Backup Files==== | ||
| + | You can backup your files to either a TF card or a USB drive. | ||
| + | =====Backup Files to TF Card===== | ||
| + | ::[[File:eflasher_backup_tf.png| frameless|800px|eflasher_backup_tf]]<br /> | ||
| + | The capacity of your TF card should be at least twice that of the eMMC on your board. For instance if your eMMC is 8G you should get a TF card with at least 16G.<br /> | ||
| + | By default the capacity of a TF card with at least 8G may not be fully recognized therefore you need to format such a card. Click on the "Format TF card back to original size" button to format the card.<br /> | ||
| + | * Click on "Backup eMMC Flash" to backup all the files in the eMMC; | ||
| + | * Click on "Restore eMMC Flash from backup file" to write all the files to the eMMC; | ||
| + | |||
| + | =====Backup Files to USB Drive===== | ||
| + | ::[[File:eflasher_backup_udisk.png| frameless|800px|eflasher_backup_udisk]]<br /> | ||
| + | We suggest you format your USB drive to "ext4/exfat/ntfs". If it is not click on the "Re-layout and format USB Drive" button on the GUI to format the drive.Attention:formatting a USB drive will remove all its existing data. | ||
| + | * Click on "Backup eMMC Flash" to backup all the files in the eMMC; | ||
| + | * Click on "Restore eMMC Flash from backup file" to write all the files to the eMMC; | ||
| + | |||
| + | =====Backup===== | ||
| + | Click on the "Backup eMMC Flash" button, select a location for your backup file whose format extention will be ".raw" and start to backup:<br /> | ||
| + | ::[[File:eflasher_backup.png| frameless|800px|eflasher_backup]]<br /> | ||
| + | |||
| + | =====Restore===== | ||
| + | Click on the "Restore eMMC Flash from backup file" button, select a ".raw" file and start to restore:<br /> | ||
| + | ::[[File:eflasher_restore.png| frameless|800px|eflasher_restore]]<br /> | ||
| + | |||
| + | ===Backup & Restore Data with Commandline Utility=== | ||
| + | Type the following command to start eflasher on an SSH or serial terminal: | ||
| + | <syntaxhighlight lang="bash"> | ||
| + | # eflasher | ||
| + | </syntaxhighlight> | ||
| + | |||
| + | You will see the following menu: | ||
| + | <pre> | ||
| + | ---------------------------------------------------------------------- | ||
| + | EFlasher v1.2 b190111 running on NanoPC-T4 | ||
| + | Doc: http://wiki.friendlyelec.com/wiki/index.php/EFlasher | ||
| + | eMMC: 14.56 GB | ||
| + | ---------------------------------------------------------------------- | ||
| + | # Select an OS to install: | ||
| + | 1) Android 8 | ||
| + | |||
| + | # Select your backup target device: | ||
| + | tf) [*] TF card (/dev/mmcblk0p1 - 4.27 GB free - 5.67 GB total - fuseblk) | ||
| + | usb) [ ] USB disk (<none>) | ||
| + | |||
| + | # Backup eMMC flash to TF card: | ||
| + | Not enough free disk space on your TF card | ||
| + | |||
| + | # Restore eMMC flash from backup file: | ||
| + | No backup files found | ||
| + | |||
| + | # Configure automatic job: | ||
| + | aui) Automatic installing (Curr:Off) | ||
| + | aur) Automatic restoring (Curr:Off) | ||
| + | |||
| + | # Format drive | ||
| + | ftf) Format TF card back to original size | ||
| + | ---------------------------------------------------------------------- | ||
| + | >>> Enter an option (1/tf/usb/aui/aur/ftf) : | ||
| + | </pre> | ||
| + | |||
| + | ===Select the storage location of the backup file === | ||
| + | You can place the backup file on a TF card, or a USB storage device, using the tf and usb commands to switch. | ||
| + | ====Backup to TF card ==== | ||
| + | Your TF card size should be greater than or equal to twice the eMMC size. For example, if eMMC is 8G, you should prepare a 16G TF card. <br /> | ||
| + | By default, TF cards above 8G do not use all the space in the eFlasher system. You need to do a format once, use the ftf command on the menu. <br /> | ||
| + | ====Backup to USB storage device ==== | ||
| + | The USB storage device is preferably in ext4/exfat/ntfs format. If not, you can use the fud on the menu to format the USB storage device once. Note that this operation will lose all data. | ||
| + | ====Start backup ==== | ||
| + | Type "bk" and enter to start data backup. All data will be saved in a file with the "raw" extension.<br /> | ||
| + | <syntaxhighlight lang="bash"> | ||
| + | ---------------------------------------------------------------------- | ||
| + | Backing up eMMC to /mnt/udisk/nanopc-t3-emmc.raw | ||
| + | ---------------------------------------------------------------------- | ||
| + | Speed: 15.01 MB/s | ||
| + | Remaining Time: 00:12:53 | ||
| + | [===========_______________________________________] 22% | ||
| + | ---------------------------------------------------------------------- | ||
| + | >>>If you want to cancel, input "c" then press <Enter> key. | ||
| + | </syntaxhighlight> | ||
| + | |||
| + | ===Additional Functions=== | ||
| + | EFlasher allows users to write Linux shell scripts to make changes to eMMC's boot partition and file systems. For instance:<br /> | ||
| + | 1) Add a customized startup LOGO<br /> | ||
| + | 2) Allocate a static IP or MAC for board<br /> | ||
| + | 3) Update system with the internet<br /> | ||
| + | 4) More...<br /> | ||
| + | If you have such a script it will be executed after EFlasher backs up eMMC's data.<br /> | ||
| + | Your scripts need to be put in a separate directory which should be under the same directory with the backup file. This separate directory should be named as "backup file's name + .d". For instance if the backup file's name is "xxxx.raw" this directory's name should be "xxxx.raw.d".<br/> | ||
| + | By default EFlasher will generate a script which will do clearance work such as removing temporary files under the tmp directory and log files under the var directory after backup is done.<br /> | ||
| + | You can learn how to access eMMC's boot and root partitions by studying this script.<br /> | ||
| + | <syntaxhighlight lang="bash"> | ||
| + | root@NanoPC-T3:/mnt/udisk/nanopc-t3-emmc.raw.d# tree | ||
| + | . | ||
| + | |-- cleanup.sh | ||
| + | `-- README.txt | ||
| + | |||
| + | 0 directories, 2 files | ||
| + | root@NanoPC-T3:/mnt/udisk/nanopc-t3-emmc.raw.d# | ||
| + | </syntaxhighlight> | ||
| + | |||
| + | (Note that this feature does not work when using the auto-restoring feature) | ||
| + | |||
| + | === Automatically restore the specified backup when booting === | ||
| + | You can automate restoring with eFlasher at system startup in two ways:<br /> | ||
| + | * No.1:On the GUI, enter the Backup and restore UI, first select the storage device where the backup file is located, select TF card or USB disk, then click "Turn on Automatic restoring", and select the file to be restored.<br /> | ||
| + | * No.2: Use the notepad+ text editor to create a new file called eflasher.conf in the root directory of the storage device (or open an existing "eflasher.conf"). The sample content is as follows:<br /> | ||
| + | <syntaxhighlight lang="bash"> | ||
| + | [General] | ||
| + | autoStart=/mnt/sdcard/nanopct3-backup-20190101.raw | ||
| + | </syntaxhighlight> | ||
| + | /mnt/sdcard/ indicates TF card, /mnt/udisk indicates USB disk. | ||
| + | |||
| + | ==Make Your Own eFlasher== | ||
| + | ===Manage Multiple OS Images with eFlasher=== | ||
| + | The eFlasher utility reads image files from the FAT section of an SD card. After an SD card is inserted to a Windows PC you can manage multiple OS images that exist in the SD card with eFlasher.<br /> | ||
| + | Under the FAT section of an SD card with multiple OS images each directory under the root directory contains an OS image. The name of such a directory should be named with letters or numbers<br /> | ||
| + | If the FAT section is not big enough to hold your multiple OS images you can store them in a USB drive with the same structure<br /> | ||
| + | For example there are four directories under the FAT section:<br /> | ||
[[File:Eflasher-folder.png| frameless|400px|Eflasher-folder]]<br /> | [[File:Eflasher-folder.png| frameless|400px|Eflasher-folder]]<br /> | ||
| − | + | They stand for four OS:<br /> | |
[[File:Eflasher-oslist.png| frameless|400px|Eflasher-oslist]]<br /> | [[File:Eflasher-oslist.png| frameless|400px|Eflasher-oslist]]<br /> | ||
<br /> | <br /> | ||
| − | + | Files under an OS directory:<br /> | |
| − | + | Configuration File:<br /> | |
::{| class="wikitable" | ::{| class="wikitable" | ||
|- | |- | ||
| − | | env.conf || | + | | env.conf || environmental variables for setting up uboot and kernel parameters |
|- | |- | ||
| − | | info.conf || | + | | info.conf || system information:<br /> |
| − | title=Android 5 ---> | + | title=Android 5 ---> OS name: Android 5<br /> |
| − | require-board=s5p4418 ---> | + | require-board=s5p4418 ---> SoC: S5P4418, options including S5P6818, H3, A64 etc<br /> |
| − | version=2016-11-17 ---> | + | version=2016-11-17 ---> ROM's version number(or release date)<br /> |
| − | icon=androidos.png ---> | + | icon=androidos.png ---> icon <br /> |
| − | + | Here is a screenshot:<br />[[File:Eflasher-infoconf.png| frameless|200px|Eflasher-infoconf]]<br /> | |
|- | |- | ||
|} | |} | ||
| − | + | Image File:<br /> | |
::{| class="wikitable" | ::{| class="wikitable" | ||
|- | |- | ||
| 2ndboot.bin || Second Boot | | 2ndboot.bin || Second Boot | ||
|- | |- | ||
| − | | boot.img || | + | | boot.img || image file for boot section |
|- | |- | ||
| bootloader || U-Boot | | bootloader || U-Boot | ||
|- | |- | ||
| − | | cache.img || Android | + | | cache.img || image file for Android Cache section |
|- | |- | ||
| − | | system.img || | + | | system.img || image file for system section |
|- | |- | ||
| − | | userdata.img || | + | | userdata.img || image file for user data section |
|- | |- | ||
| − | | partmap.txt || | + | | partmap.txt || description file for partition map |
|- | |- | ||
|} | |} | ||
| − | + | These image files by default are included in an eFlasher file. These files can be downloaded from a board's corresponding wiki site. Usually an image file is located at the images-for-eflasher directory of a server. Here is how a S5P6818's directory looks like:<br /> | |
::[[File:Images-for-eflasher.png| frameless|800px|EImages-for-eflasher.png]] <br /> | ::[[File:Images-for-eflasher.png| frameless|800px|EImages-for-eflasher.png]] <br /> | ||
| + | You can download its image file and extract it to the FAT section of an SD card. | ||
| − | + | ===Make eflasher File with Your OS=== | |
| + | Refer to [[How to make your own SD-bootable ROM]] | ||
| − | === | + | === Connect WiKi in the EFlasher system === |
| + | Write the following to the configuration file: /etc/wpa_supplicant/wpa_supplicant.conf, where SSID and PASSWORD should be replaced with the router's SSID and password: | ||
| + | <syntaxhighlight lang="bash"> | ||
| + | ctrl_interface=DIR=/var/run/wpa_supplicant GROUP=netdev | ||
| + | update_config=1 | ||
| + | country=CN | ||
| + | network={ | ||
| + | ssid="SSID" | ||
| + | psk="PASSWORD" | ||
| + | key_mgmt=WPA-PSK | ||
| + | } | ||
| + | </syntaxhighlight> | ||
| + | If the WiFi route does not set a password, set key_mgmt to NONE, delete this line: psk=. | ||
| − | ==== | + | == Change IP address == |
| + | For faster startup speed, we set the eflasher to static ip address: 192.168.1.231, <br /> | ||
| + | <br /> | ||
| + | If you want to change to dhcp, you can modify this file:<br /> | ||
| + | /etc/network/interfaces.d/eth0<br /> | ||
| + | <br /> | ||
| + | Change the contents of this file to:<br /> | ||
| + | <syntaxhighlight lang="bash"> | ||
| + | auto eth0 | ||
| + | iface eth0 inet dhcp | ||
| + | </syntaxhighlight> | ||
| − | + | ==Update Log== | |
| − | + | ===July-26-2017=== | |
| + | * Released English Version | ||
| + | ===August-22-2017=== | ||
| + | * Added section 6.2 | ||
| − | === | + | ===March-10-2018=== |
| + | * Updated sections 6.2 and 6.3 | ||
| − | + | ===July-26-2018=== | |
| − | + | * Added sections 6 and 7.3.2 | |
| − | + | ||
| − | + | ||
| − | + | ||
| − | + | ||
| − | + | ||
| − | + | ||
| − | + | ||
| − | + | ||
| − | === | + | |
| − | + | ||
| − | + | ||
| − | + | ||
| − | + | ||
| − | + | ||
| − | + | ||
| − | + | ||
| − | + | ||
| − | + | ||
| − | + | ||
| − | + | ||
| − | + | ||
| − | + | ||
Latest revision as of 07:17, 21 February 2022
Contents
- 1 Introduction to eFlasher
- 2 Install eFlasher
- 3 Update eflasher to the latest version
- 4 Login to the eFlasher system
- 5 GUI Based eFlasher
- 6 Commandline Based eFlasher
- 7 Automate OS Installation at System Startup
- 8 Do something else after burning or restoring the system
- 9 Backup & Restore Data on eMMC Flash
- 10 Make Your Own eFlasher
- 11 Change IP address
- 12 Update Log
1 Introduction to eFlasher
The eFlasher (eMMC-flasher) utility is released by FriendlyElec for users to install an OS image on a FriendlyElec board's eMMC easily.
The eFlasher utility provides users with a GUI with multiple OS options.
The eFlasher utility has two versions: eflasher-gui and eflasher-console:
1) eflasher-gui: a GUI based eFlasher utility. When a board is connected to an LCD or HDMI monitor users can use this utility to install an OS easily;
2) eflasher-console: a commandline based eFlasher utility. When a board is connected to a serial terminal or logged in with SSH users can use it to install an OS;
2 Install eFlasher
- Step 1: download an eflasher installation package
Go to the wiki page of the nano board you bought and download an eflasher file named as :XXXX-eflasher-YYYYMMDD-full.img.7z(the "XXXX" is the board type for the board you bought and "YYYYMMDD" is the release date of that eflasher file)
This package contains all the image files released by FriendlyElec such as Debian, Android5, Android4.4 and Ubuntu core(different boards may be provided with different OS image files)
Download a XXXX-eflasher-YYYYMMDD-full.img.7z file to a PC host and make an installation SD card with a windows utility: win32diskimager.rar
- Step 2: make an installation SD card with eflasher
Extract the eflasher file and you will get an ".img" file.Insert an SD card(at least 8G) into a Windows PC and run the win32diskimager utility as administrator. On the utility's main window select your SD card's drive, the wanted image file and click on "write" to start flashing the SD card.
You can use "dd" under a Linux PC to flash this ".img" to your SD card too
- Step 3: Start eFlasher
Insert this SD card to your board, press and hold the "BOOT" button, power on your board.
3 Update eflasher to the latest version
Execute the following command on the development board:
git clone https://github.com/friendlyarm/eflasher-updater
cd eflasher-updater/
./update.sh
4 Login to the eFlasher system
Log in with the following account in command line:
User Name: root
Password: fa
5 GUI Based eFlasher
By default after eFlash is started the GUI based version will be started. If your board is connected to an LCD or HDMI monitor you will see the following screen:

Select your wanted OS to start installation.
6 Commandline Based eFlasher
6.1 Directly install the specified OS
Show help:
# eflasher --help
-------------------------------------------------------
USAGE: eflasher [-i, --install <arg>]

OPTIONAL:
-i, --install <path>:  Install OS to eMMC without UI operation
-r, --restore <file>:  Restore backup file to eMMC without UI operation
-e, --exclude <files>: Ignore certain files, multiple files separated by commas
--low-format:          Low format the flash before burning
--auto-exit:           Automatically exit eflahser after burning or restoring
--disable-overlayfs:   Disable overlay filesystem
-c, --conf <arg>:      Set eflasher configuration file
-l, --list-devices:    List the supported board models
-v, --version:         Output version information
-h, --help:            Show this usage
-g, --gui:             Start eflasher gui
Directly install the specified OS:
# eflasher -i /mnt/sdcard/friendlycore-xenial_4.14_armhf
Using config file:  "/tmp/eflasher.conf"
-------------------------------------------------------
>>friendlycore-xenial_4.14_armhf
Ready to Go with FriendlyCore,Total size: 1.10 GB,
Installing FriendlyCore ..., , ,
Finish!,Speed: 20.71 MB/s
6.2 Wizard mode
If your board is not connected to any display device you can login your board via SSH and start the eflahser by running "eflasher". Here is what you expect to observe:
----------------------------------------------------------------------
  EFlasher v1.2 b190111 running on NanoPC-T4
    Doc: http://wiki.friendlyelec.com/wiki/index.php/EFlasher
    eMMC: 14.56 GB
----------------------------------------------------------------------
  # Select an OS to install:
    1) Android 8

  # Select your backup target device:
     tf) [*] TF card  (/dev/mmcblk0p1 - 4.27 GB free - 5.67 GB total - fuseblk)
    usb) [ ] USB disk  (<none>)

  # Backup eMMC flash to TF card:
    Not enough free disk space on your TF card

  # Restore eMMC flash from backup file:
    No backup files found

  # Configure automatic job:
    aui) Automatic installing (Curr:Off)
    aur) Automatic restoring (Curr:Off)

  # Format drive
    ftf) Format TF card back to original size
----------------------------------------------------------------------
>>> Enter an option (1/tf/usb/aui/aur/ftf) :
7 Automate OS Installation at System Startup
You can automate OS installation with eFlasher at system startup in three ways:
- No.1:on the GUI based eFlasher select your wanted OS and check the "Start automatically at startup" option on the "Ready to Go" window.
- No.2:mount an SD card to a Windows PC and create an "eflasher.conf" file with notepad on the FAT section of your SD card(or open an existing "eflasher.conf") and type the following lines if you want to install a Debian OS:
[General]
autoStart=/mnt/sdcard/debian
The "autoStart" field specifies the path to your ROM. In this example the ROM is a Debian OS image file.
- No.3:after your board starts open a terminal and create or edit "/mnt/sdcard/eflasher.conf" and type the lines presented in No.2 .
8 Do something else after burning or restoring the system
You may want to do something extra after the installing system is finished, such as lighting up an LED, you can modify the /opt/run-eflasher.sh script in the beginning of the line "./eflasher-gui" to add code, such as the following example, after the installing is completed, set a GPIO pin:
./eflasher-gui -qws >/dev/null 2>&1
echo 13 > /sys/class/gpio/export
echo out > /sys/class/gpio/gpio13/direction
echo 0 > /sys/class/gpio/gpio13/value
echo 13 > /sys/class/gpio/unexport
The following script demonstrates writing the cpu id to the /etc/cpuid.txt file of the eMMC system after burning the system on the S5P4418/S5P6818 platform:
./eflasher-gui -qws >/dev/null 2>&1
partprobe /dev/mmcblk1
mount /dev/mmcblk1p2 /media/
cat /sys/devices/platform/cpu/uuid > /media/etc/cpuid.txt
umount /media/
In order for the above script to work properly, we also need to set the eflasher-gui to automatically exit after the installing is completed. The following settings are required:
Edit and create a new file called eflasher.conf with the notepad+ text editor on the Fat partition of the SD card, set the autoExit field to True:
[General]
autoStart=/mnt/sdcard/friendlycore-xenial
autoExit=true
The autoStart field specifies that the specified system will be burned automatically without interaction, if no LCD is connected, the burn status can be identified by the LED burn, by default, the green LED flashes to indicate that it is burning.
9 Backup & Restore Data on eMMC Flash
This is pretty much like what the GHOST does with Windows. This function can either back up all the data on eMMC to an external storage device or copy all data from an external storage device to eMMC.
For mass production:
This is especially useful for a case in which you have made a system on a board and want to install this system to massive boards. This works for both Android and Linux images.
Prerequisites:
You need to have an external storage device whose storage is greater than the eMMC Flash. The external storage device should be formatted to exFat or ntfs. In some case eflasher may re-partition your external storage device.
9.1 System Backup and Restore via GUI
On EFlasher's main window click on "Backup and Restore" and proceed with the prompts:

9.1.1 Select Location for Backup Files
You can backup your files to either a TF card or a USB drive.
9.1.1.1 Backup Files to TF Card

The capacity of your TF card should be at least twice that of the eMMC on your board. For instance if your eMMC is 8G you should get a TF card with at least 16G.
By default the capacity of a TF card with at least 8G may not be fully recognized therefore you need to format such a card. Click on the "Format TF card back to original size" button to format the card.
- Click on "Backup eMMC Flash" to backup all the files in the eMMC;
- Click on "Restore eMMC Flash from backup file" to write all the files to the eMMC;
9.1.1.2 Backup Files to USB Drive

We suggest you format your USB drive to "ext4/exfat/ntfs". If it is not click on the "Re-layout and format USB Drive" button on the GUI to format the drive.Attention:formatting a USB drive will remove all its existing data.
- Click on "Backup eMMC Flash" to backup all the files in the eMMC;
- Click on "Restore eMMC Flash from backup file" to write all the files to the eMMC;
9.1.1.3 Backup
Click on the "Backup eMMC Flash" button, select a location for your backup file whose format extention will be ".raw" and start to backup:

9.1.1.4 Restore
Click on the "Restore eMMC Flash from backup file" button, select a ".raw" file and start to restore:

9.2 Backup & Restore Data with Commandline Utility
Type the following command to start eflasher on an SSH or serial terminal:
# eflasherYou will see the following menu:
----------------------------------------------------------------------
  EFlasher v1.2 b190111 running on NanoPC-T4
    Doc: http://wiki.friendlyelec.com/wiki/index.php/EFlasher
    eMMC: 14.56 GB
----------------------------------------------------------------------
  # Select an OS to install:
    1) Android 8

  # Select your backup target device:
     tf) [*] TF card  (/dev/mmcblk0p1 - 4.27 GB free - 5.67 GB total - fuseblk)
    usb) [ ] USB disk  (<none>)

  # Backup eMMC flash to TF card:
    Not enough free disk space on your TF card

  # Restore eMMC flash from backup file:
    No backup files found

  # Configure automatic job:
    aui) Automatic installing (Curr:Off)
    aur) Automatic restoring (Curr:Off)

  # Format drive
    ftf) Format TF card back to original size
----------------------------------------------------------------------
>>> Enter an option (1/tf/usb/aui/aur/ftf) :
9.3 Select the storage location of the backup file
You can place the backup file on a TF card, or a USB storage device, using the tf and usb commands to switch.
9.3.1 Backup to TF card
Your TF card size should be greater than or equal to twice the eMMC size. For example, if eMMC is 8G, you should prepare a 16G TF card.
By default, TF cards above 8G do not use all the space in the eFlasher system. You need to do a format once, use the ftf command on the menu.
9.3.2 Backup to USB storage device
The USB storage device is preferably in ext4/exfat/ntfs format. If not, you can use the fud on the menu to format the USB storage device once. Note that this operation will lose all data.
9.3.3 Start backup
Type "bk" and enter to start data backup. All data will be saved in a file with the "raw" extension.
----------------------------------------------------------------------
  Backing up eMMC to /mnt/udisk/nanopc-t3-emmc.raw
----------------------------------------------------------------------
  Speed: 15.01 MB/s
  Remaining Time: 00:12:53
  [===========_______________________________________]  22%
----------------------------------------------------------------------
  >>>If you want to cancel, input "c" then press <Enter> key.
9.4 Additional Functions
EFlasher allows users to write Linux shell scripts to make changes to eMMC's boot partition and file systems. For instance:
1) Add a customized startup LOGO
2) Allocate a static IP or MAC for board
3) Update system with the internet
4) More...
If you have such a script it will be executed after EFlasher backs up eMMC's data.
Your scripts need to be put in a separate directory which should be under the same directory with the backup file. This separate directory should be named as "backup file's name + .d". For instance if the backup file's name is "xxxx.raw" this directory's name should be "xxxx.raw.d".
By default EFlasher will generate a script which will do clearance work such as removing temporary files under the tmp directory and log files under the var directory after backup is done.
You can learn how to access eMMC's boot and root partitions by studying this script.
root@NanoPC-T3:/mnt/udisk/nanopc-t3-emmc.raw.d# tree
.
|-- cleanup.sh
`-- README.txt

0 directories, 2 files
root@NanoPC-T3:/mnt/udisk/nanopc-t3-emmc.raw.d#
(Note that this feature does not work when using the auto-restoring feature)
9.5 Automatically restore the specified backup when booting
You can automate restoring with eFlasher at system startup in two ways:
- No.1:On the GUI, enter the Backup and restore UI, first select the storage device where the backup file is located, select TF card or USB disk, then click "Turn on Automatic restoring", and select the file to be restored.
- No.2: Use the notepad+ text editor to create a new file called eflasher.conf in the root directory of the storage device (or open an existing "eflasher.conf"). The sample content is as follows:
[General]
autoStart=/mnt/sdcard/nanopct3-backup-20190101.raw
/mnt/sdcard/ indicates TF card, /mnt/udisk indicates USB disk.
10 Make Your Own eFlasher
10.1 Manage Multiple OS Images with eFlasher
The eFlasher utility reads image files from the FAT section of an SD card. After an SD card is inserted to a Windows PC you can manage multiple OS images that exist in the SD card with eFlasher.
Under the FAT section of an SD card with multiple OS images each directory under the root directory contains an OS image. The name of such a directory should be named with letters or numbers
If the FAT section is not big enough to hold your multiple OS images you can store them in a USB drive with the same structure
For example there are four directories under the FAT section:

They stand for four OS:

Files under an OS directory:
Configuration File:
env.conf environmental variables for setting up uboot and kernel parameters info.conf system information:
title=Android 5 ---> OS name: Android 5
require-board=s5p4418 ---> SoC: S5P4418, options including S5P6818, H3, A64 etc
version=2016-11-17 ---> ROM's version number(or release date)
icon=androidos.png ---> icon
Here is a screenshot: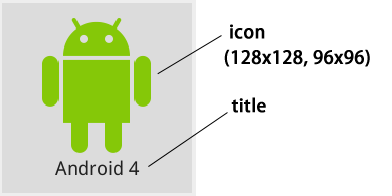

Image File:
2ndboot.bin Second Boot boot.img image file for boot section bootloader U-Boot cache.img image file for Android Cache section system.img image file for system section userdata.img image file for user data section partmap.txt description file for partition map
These image files by default are included in an eFlasher file. These files can be downloaded from a board's corresponding wiki site. Usually an image file is located at the images-for-eflasher directory of a server. Here is how a S5P6818's directory looks like:

You can download its image file and extract it to the FAT section of an SD card.
10.2 Make eflasher File with Your OS
Refer to How to make your own SD-bootable ROM
10.3 Connect WiKi in the EFlasher system
Write the following to the configuration file: /etc/wpa_supplicant/wpa_supplicant.conf, where SSID and PASSWORD should be replaced with the router's SSID and password:
ctrl_interface=DIR=/var/run/wpa_supplicant GROUP=netdev
update_config=1
country=CN
network={
  ssid="SSID"
  psk="PASSWORD"
  key_mgmt=WPA-PSK
}
If the WiFi route does not set a password, set key_mgmt to NONE, delete this line: psk=.
11 Change IP address
For faster startup speed, we set the eflasher to static ip address: 192.168.1.231,
If you want to change to dhcp, you can modify this file:
/etc/network/interfaces.d/eth0
Change the contents of this file to:
auto eth0
iface eth0 inet dhcp
12 Update Log
12.1 July-26-2017
- Released English Version
12.2 August-22-2017
- Added section 6.2
12.3 March-10-2018
- Updated sections 6.2 and 6.3
12.4 July-26-2018
- Added sections 6 and 7.3.2