Difference between revisions of "EFlasher"
(→针对量产用户的定制选项) |
(→针对量产用户的定制选项) |
||
| Line 66: | Line 66: | ||
|} | |} | ||
| − | + | Image File:<br /> | |
::{| class="wikitable" | ::{| class="wikitable" | ||
|- | |- | ||
| 2ndboot.bin || Second Boot | | 2ndboot.bin || Second Boot | ||
|- | |- | ||
| − | | boot.img || | + | | boot.img || image file for boot section |
|- | |- | ||
| bootloader || U-Boot | | bootloader || U-Boot | ||
|- | |- | ||
| − | | cache.img || Android | + | | cache.img || image file for Android Cache section |
|- | |- | ||
| − | | system.img || | + | | system.img || image file for system section |
|- | |- | ||
| − | | userdata.img || | + | | userdata.img || image file for user data section |
|- | |- | ||
| − | | partmap.txt || | + | | partmap.txt || description file for partition map |
|- | |- | ||
|} | |} | ||
| − | + | These image files by default are included in an eFlasher file. These files can be downloaded from a board's corresponding wiki site. Usually an image file is located at the images-for-eflasher directory of a server. Here is how a S5P6818's directory looks like:<br /> | |
::[[File:Images-for-eflasher.png| frameless|800px|EImages-for-eflasher.png]] <br /> | ::[[File:Images-for-eflasher.png| frameless|800px|EImages-for-eflasher.png]] <br /> | ||
| − | + | You can download its image file and extract it to the FAT section of an SD card. | |
| − | + | ||
=== 制作自已的系统映象 === | === 制作自已的系统映象 === | ||
Revision as of 13:43, 26 July 2017
Contents
1 Introduction to eFlasher
The eFlasher (eMMC-flasher) utility is released by FriendlyElec for users to install an OS image on a FriendlyElec board's eMMC easily.
The eFlasher utility provides users with a GUI with multiple OS options.
The eFlasher utility has two versions: eflasher-gui and eflasher-console:
1) eflasher-gui: a GUI based eFlasher utility. When a board is connected to an LCD or HDMI monitor users can use this utility to install an OS easily;
2) eflasher-console: a commandline based eFlasher utility. When a board is connected to a serial terminal or logged in with SSH users can use it to install an OS;
2 Install eFlasher
- Step 1: download an eflasher installation package
Go to the wiki page of the nano board you bought and download an eflasher file named as :XXXX-eflasher-YYYYMMDD-full.img.7z(the "XXXX" is the board type for the board you bought and "YYYYMMDD" is the release date of that eflasher file)
This package contains all the image files released by FriendlyElec such as Debian, Android5, Android4.4 and Ubuntu core(different boards may be provided with different OS image files)
Download a XXXX-eflasher-YYYYMMDD-full.img.7z file to a PC host and make an installation SD card with a windows utility: win32diskimager.rar
- Step 2: make an installation SD card with eflasher
Extract the eflasher file and you will get an ".img" file.Insert an SD card(at least 8G) into a Windows PC and run the win32diskimager utility as administrator. On the utility's main window select your SD card's drive, the wanted image file and click on "write" to start flashing the SD card.
You can use "dd" under a Linux PC to flash this ".img" to your SD card too
- Step 3: Start eFlasher
Insert this SD card to your board, press and hold the "BOOT" button, power on your board.
3 GUI Based eFlasher
By default after eFlash is started the GUI based version will be started. If your board is connected to an LCD or HDMI monitor you will see the following screen:

Select your wanted OS to start installation.
4 Commandline Based eFlasher
If your board is not connected to any display device you can login your board via SSH and start the eflahser by running "eflasher". Here is what you expect to observe:

5 Automate OS Installation at System Startup
You can automate OS installation with eFlash at system startup in three ways:
- No.1:on the GUI based eFlasher select your wanted OS and check the "Start automatically at startup" option on the "Ready to Go" window.
- No.2:mount an SD card to a Windows PC and create an "eflasher.conf" file with notepad on the FAT section of your SD card(or open an existing "eflasher.conf") and type the following lines if you want to install a Debian OS:
[General]
autoStart=/mnt/sdcard/debian
The "autoStart" field specifies the path to your ROM. In this example the ROM is a Debian OS image file.
- No.3:after your board starts open a terminal and create or edit "/mnt/sdcard/eflasher.conf" and type the lines presented in No.2 .
6 针对量产用户的定制选项
6.1 Manage Multiple OS Images with eFlasher
The eFlasher utility reads image files from the FAT section of an SD card. After an SD card is inserted to a Windows PC you can manage multiple OS images that exist in the SD card with eFlasher.
Under the FAT section of an SD card with multiple OS images each directory under the root directory contains an OS image. The name of such a directory should be named with letters or numbers
If the FAT section is not big enough to hold your multiple OS images you can store them in a USB drive with the same structure
For example there are four directories under the FAT section:

They stand for four OS:

Files under an OS directory:
Configuration File:
env.conf environmental variables for setting up uboot and kernel parameters info.conf system information:
title=Android 5 ---> OS name: Android 5
require-board=s5p4418 ---> SoC: S5P4418, options including S5P6818, H3, A64 etc
version=2016-11-17 ---> ROM's version number(or release date)
icon=androidos.png ---> icon
Here is a screenshot: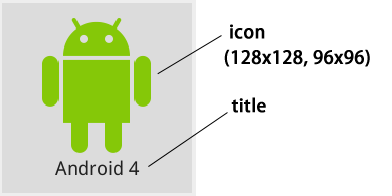

Image File:
2ndboot.bin Second Boot boot.img image file for boot section bootloader U-Boot cache.img image file for Android Cache section system.img image file for system section userdata.img image file for user data section partmap.txt description file for partition map
These image files by default are included in an eFlasher file. These files can be downloaded from a board's corresponding wiki site. Usually an image file is located at the images-for-eflasher directory of a server. Here is how a S5P6818's directory looks like:

You can download its image file and extract it to the FAT section of an SD card.
6.2 制作自已的系统映象
6.2.1 4418/6818平台Android系统映象制作
在制作Android映象为例,首先编译Android源代码,编译完成后,进入 out/target/product/XXXXX 目录 (其中XXXXX是产品名称,例如4418平台名字是nanopi2,6818平台是nanopi3) ,然后将该目录下的以下映象文件替换掉SD卡Fat分区Android目录下的同名文件即可,如下图的示例所示:

6.2.2 4418/6818平台Linux系统映象制作
重点是将SD卡中的boot和rootfs 这2个分区制作成boot.img 和 rootfs.img,然后就可以替换掉eMMC烧写ROM即 eflasher 中的文件即可以烧写到eMMC中。
1) 下载 https://github.com/friendlyarm/debian_nanopi2 ;
2) 复制 SD卡中的 boot 分区下的文件到debian_nanopi2/boot ; 复制SD卡中的 rootfs分区下的文件到 debian_nanopi2/rootfs ;
根据自己的需要可以再修改 boot 和 rootfs 目录下的文件。
建议删除rootfs 目录下的文件 etc/fs.resized 否则将不会自动扩展分区。
3) 使用 debian_nanopi2 下的 make_ext4fs 来制作 img:
./tools/make_ext4fs -s -l 67108864 -a root -L boot boot.img boot
./tools/make_ext4fs -s -l 2097152000 -a root -L rootfs rootfs.img rootfs
4) 复制新生成的 boot.img 和 root.img 替换 eflasher 的FAT分区 core-qte 目录下的文件,然后即可烧写;
6.2.3 H3/H5平台Linux系统映象制作
重点是将待烧写的 boot 和 rootfs 这2个分区目录制作成boot.img 和 rootfs.img,然后就可以替换掉eMMC烧写ROM即 eflasher 中的文件即可以烧写到eMMC中。在PC机上执行下列操作:
1) 下载相关工具: EFlasher-build-tools;
2) 将待烧写的 rootfs 分区目录制作为 ext4 格式的 img 文件:
$ ./make_ext4fs -s -l 2097152000 -a root -L /SD/rootfs rootfs.img rootfs
-l 用于指定 img 文件的大小,单位是Byte,2097152000 Byte=2000MB,必须大于实际目录的大小。
3) 将待烧写 boot 分区目录制作为 fat 格式的 img 文件:
$ ./build-boot-fat.sh boot.img /SD/boot 40
40 表示boot.img的大小为40M。
4) 用新生成的boot.img和root.img替换eflasher-ROM的FAT分区对应系统目录下的同名文件,然后参考前面的步骤进行烧写即可;