Difference between revisions of "EFlasher"
(→Install eFlasher) |
|||
| Line 10: | Line 10: | ||
==Install eFlasher== | ==Install eFlasher== | ||
* Step 1: download an eflasher installation package<br /> | * Step 1: download an eflasher installation package<br /> | ||
| − | Go to the wiki page of the nano board you bought and download an eflasher file named as :XXXX-eflasher-YYYYMMDD-full.img.7z (the "XXXX" is the board type for the | + | Go to the wiki page of the nano board you bought and download an eflasher file named as :XXXX-eflasher-YYYYMMDD-full.img.7z(the "XXXX" is the board type for the board you bought and "YYYYMMDD" is the release date of that eflasher file)<br/> |
| − | board you bought and "YYYYMMDD" is the release date of that eflasher file)<br /> | + | |
This package contains all the image files released by FriendlyElec such as Debian, Android5, Android4.4 and Ubuntu core(different boards may be provided with different OS image files)<br /> | This package contains all the image files released by FriendlyElec such as Debian, Android5, Android4.4 and Ubuntu core(different boards may be provided with different OS image files)<br /> | ||
Download a XXXX-eflasher-YYYYMMDD-full.img.7z file to a PC host and make an installation SD card with a windows utility: win32diskimager.rar<br /> | Download a XXXX-eflasher-YYYYMMDD-full.img.7z file to a PC host and make an installation SD card with a windows utility: win32diskimager.rar<br /> | ||
| Line 19: | Line 18: | ||
* 第三步: 启动eFlasher工具 | * 第三步: 启动eFlasher工具 | ||
将制作好的SD卡插入开发板, 按住标住有“BOOT”字样的按键,上电,如你有HDMI、LCD或者USB2LCD,可以在上电之前先连接好。 | 将制作好的SD卡插入开发板, 按住标住有“BOOT”字样的按键,上电,如你有HDMI、LCD或者USB2LCD,可以在上电之前先连接好。 | ||
| − | |||
== 启动图形界面版本的eFlasher == | == 启动图形界面版本的eFlasher == | ||
Revision as of 09:06, 26 July 2017
Contents
1 Introduction to eFlasher
The eFlasher (eMMC-flasher) utility is released by FriendlyElec for users to install an OS image on a FriendlyElec board's eMMC easily.
The eFlasher utility provides users with a GUI with multiple OS options.
The eFlasher utility has two versions: eflasher-gui and eflasher-console:
1) eflasher-gui: a GUI based eFlasher utility. When a board is connected to an LCD or HDMI monitor users can use this utility to install an OS easily;
2) eflasher-console: a commandline based eFlasher utility. When a board is connected to a serial terminal or logged in with SSH users can use it to install an OS;
2 Install eFlasher
- Step 1: download an eflasher installation package
Go to the wiki page of the nano board you bought and download an eflasher file named as :XXXX-eflasher-YYYYMMDD-full.img.7z(the "XXXX" is the board type for the board you bought and "YYYYMMDD" is the release date of that eflasher file)
This package contains all the image files released by FriendlyElec such as Debian, Android5, Android4.4 and Ubuntu core(different boards may be provided with different OS image files)
Download a XXXX-eflasher-YYYYMMDD-full.img.7z file to a PC host and make an installation SD card with a windows utility: win32diskimager.rar
- 第二步: 用eflasher固件制作SD启动卡
将固件用7z软件解压,得到.img结尾的文件,在Windows下插入SDHC卡(限4G及以上的卡),以管理员身份运行Win32DiskImager,选择 Image File载入固件,选择你的SD卡盘符,点 Write 即开始写Image到SD卡;
如果你的电脑用的是Linux系统,你也可以用 dd 命令将解压后得到的 .img 文件直接写入SD卡完成启动卡的制作;
- 第三步: 启动eFlasher工具
将制作好的SD卡插入开发板, 按住标住有“BOOT”字样的按键,上电,如你有HDMI、LCD或者USB2LCD,可以在上电之前先连接好。
3 启动图形界面版本的eFlasher
系统启动时,图形界面版本的eFlasher会随系统自动启动,如你有连接HDMI或者LCD,应该会看到如下所示的界面:

点击触摸屏,或者用鼠标选择你需要烧写到eMMC的系统即可。
4 启动命令行版本的eFlasher
如果板子没有连接显示设备,可以通过串口或ssh登录开发板,在命令行终端下输入命令 eflasher也可以进入eflasher的命令行交互界面,命令行交互界面如下图所示:

5 开机自动烧写指定的系统
有三种途径可以进行配置:
- 方法1:在图形界面上,选择你要烧写的系统,在Ready to Go预览界面上,在屏幕下方钩选 "Start automatically at startup" 。
- 方法2: 将SD卡挂载到Windows电脑上,用notepad+文本编辑器在SD卡的Fat分区上新建一个名为eflasher.conf文件 (如果已存在就直接编辑即可),例如,要开机自动烧写debian系统,其内容如下:
[General]
autoStart=/mnt/sdcard/debian
其中,autoStart字段所保存的路径,是你要烧写的系统的rom路径,本例是 Fat分区的 debian 目录。
- 方法3: 开发板运行状态下,通过串口终端,用vi编辑文件:/mnt/sdcard/eflasher.conf,文件不存在就新增一个,内容同上面的方法2。
6 针对量产用户的定制选项
6.1 EFlasher对系统映象的管理
EFlasher会从SD卡的Fat分区读取系统映象文件,将SD卡插入Windows的电脑,你可以直接管理这些映象文件。
在SD卡的Fat分区,根目录下的每一个子目录,代表一个OS,目录名称可随意命令(但不能是中文),
如果SD卡的Fat分区空间不够用,你也可以在一个U盘中存放这些系统文件,目录结构与SD卡的相同。
例如Fat分区有下面4个目录:

对应以下4个可安装的系统:

每个目录下的文件,分别说明如下:
烧写配置文件:
env.conf 用于设置uboot环境变量,内核启动参数 info.conf 用于个性化烧写程序界面上的名称、图标以及定义该系统所属的硬件平台,示例说明:
title=Android 5 ---> 系统名称显示为Android5
require-board=s5p4418 ---> 所属平台 s5p4418, 可选的值还有 s5p6818, h3, a64 等
version=2016-11-17 ---> 该rom的版本 (或制作的日期)
icon=androidos.png ---> 图标
上面的定义对应的显示所下: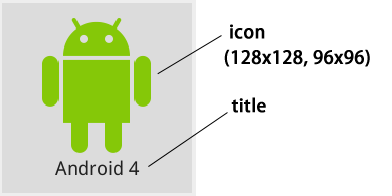

系统映象文件, 不同的系统可能不同:
2ndboot.bin Second Boot boot.img boot分区映象文件 bootloader U-Boot cache.img Android Cache分区映象 system.img 系统分区的映象 userdata.img 数据分区的映象 partmap.txt 分区描述文件
以上映象文件默认已经预装在eFlasher的固件中,不过你也可以到指定板子的下载地址下载它们,进入官方的下载地址指向的网盘目录,这些系统映象放在一个名为 images-for-eflasher 的目录下,以下是S5P6818开发板的网盘目录:

可以下载这个目录下的文件然后解压到SD卡的Fat分区或者U盘即可。
6.2 制作自已的系统映象
6.2.1 4418/6818平台Android系统映象制作
在制作Android映象为例,首先编译Android源代码,编译完成后,进入 out/target/product/XXXXX 目录 (其中XXXXX是产品名称,例如4418平台名字是nanopi2,6818平台是nanopi3) ,然后将该目录下的以下映象文件替换掉SD卡Fat分区Android目录下的同名文件即可,如下图的示例所示:

6.2.2 4418/6818平台Linux系统映象制作
重点是将SD卡中的boot和rootfs 这2个分区制作成boot.img 和 rootfs.img,然后就可以替换掉eMMC烧写ROM即 eflasher 中的文件即可以烧写到eMMC中。
1) 下载 https://github.com/friendlyarm/debian_nanopi2 ;
2) 复制 SD卡中的 boot 分区下的文件到debian_nanopi2/boot ; 复制SD卡中的 rootfs分区下的文件到 debian_nanopi2/rootfs ;
根据自己的需要可以再修改 boot 和 rootfs 目录下的文件。
建议删除rootfs 目录下的文件 etc/fs.resized 否则将不会自动扩展分区。
3) 使用 debian_nanopi2 下的 make_ext4fs 来制作 img:
./tools/make_ext4fs -s -l 67108864 -a root -L boot boot.img boot
./tools/make_ext4fs -s -l 2097152000 -a root -L rootfs rootfs.img rootfs
4) 复制新生成的 boot.img 和 root.img 替换 eflasher 的FAT分区 core-qte 目录下的文件,然后即可烧写;
6.2.3 H3/H5平台Linux系统映象制作
重点是将待烧写的 boot 和 rootfs 这2个分区目录制作成boot.img 和 rootfs.img,然后就可以替换掉eMMC烧写ROM即 eflasher 中的文件即可以烧写到eMMC中。在PC机上执行下列操作:
1) 下载相关工具: EFlasher-build-tools;
2) 将待烧写的 rootfs 分区目录制作为 ext4 格式的 img 文件:
$ ./make_ext4fs -s -l 2097152000 -a root -L /SD/rootfs rootfs.img rootfs
-l 用于指定 img 文件的大小,单位是Byte,2097152000 Byte=2000MB,必须大于实际目录的大小。
3) 将待烧写 boot 分区目录制作为 fat 格式的 img 文件:
$ ./build-boot-fat.sh boot.img /SD/boot 40
40 表示boot.img的大小为40M。
4) 用新生成的boot.img和root.img替换eflasher-ROM的FAT分区对应系统目录下的同名文件,然后参考前面的步骤进行烧写即可;