Difference between revisions of "1-bay NAS Dock v1.2 for NanoPi NEO/NEO2"
(→硬件组装步骤) |
|||
| Line 3: | Line 3: | ||
==Introduction== | ==Introduction== | ||
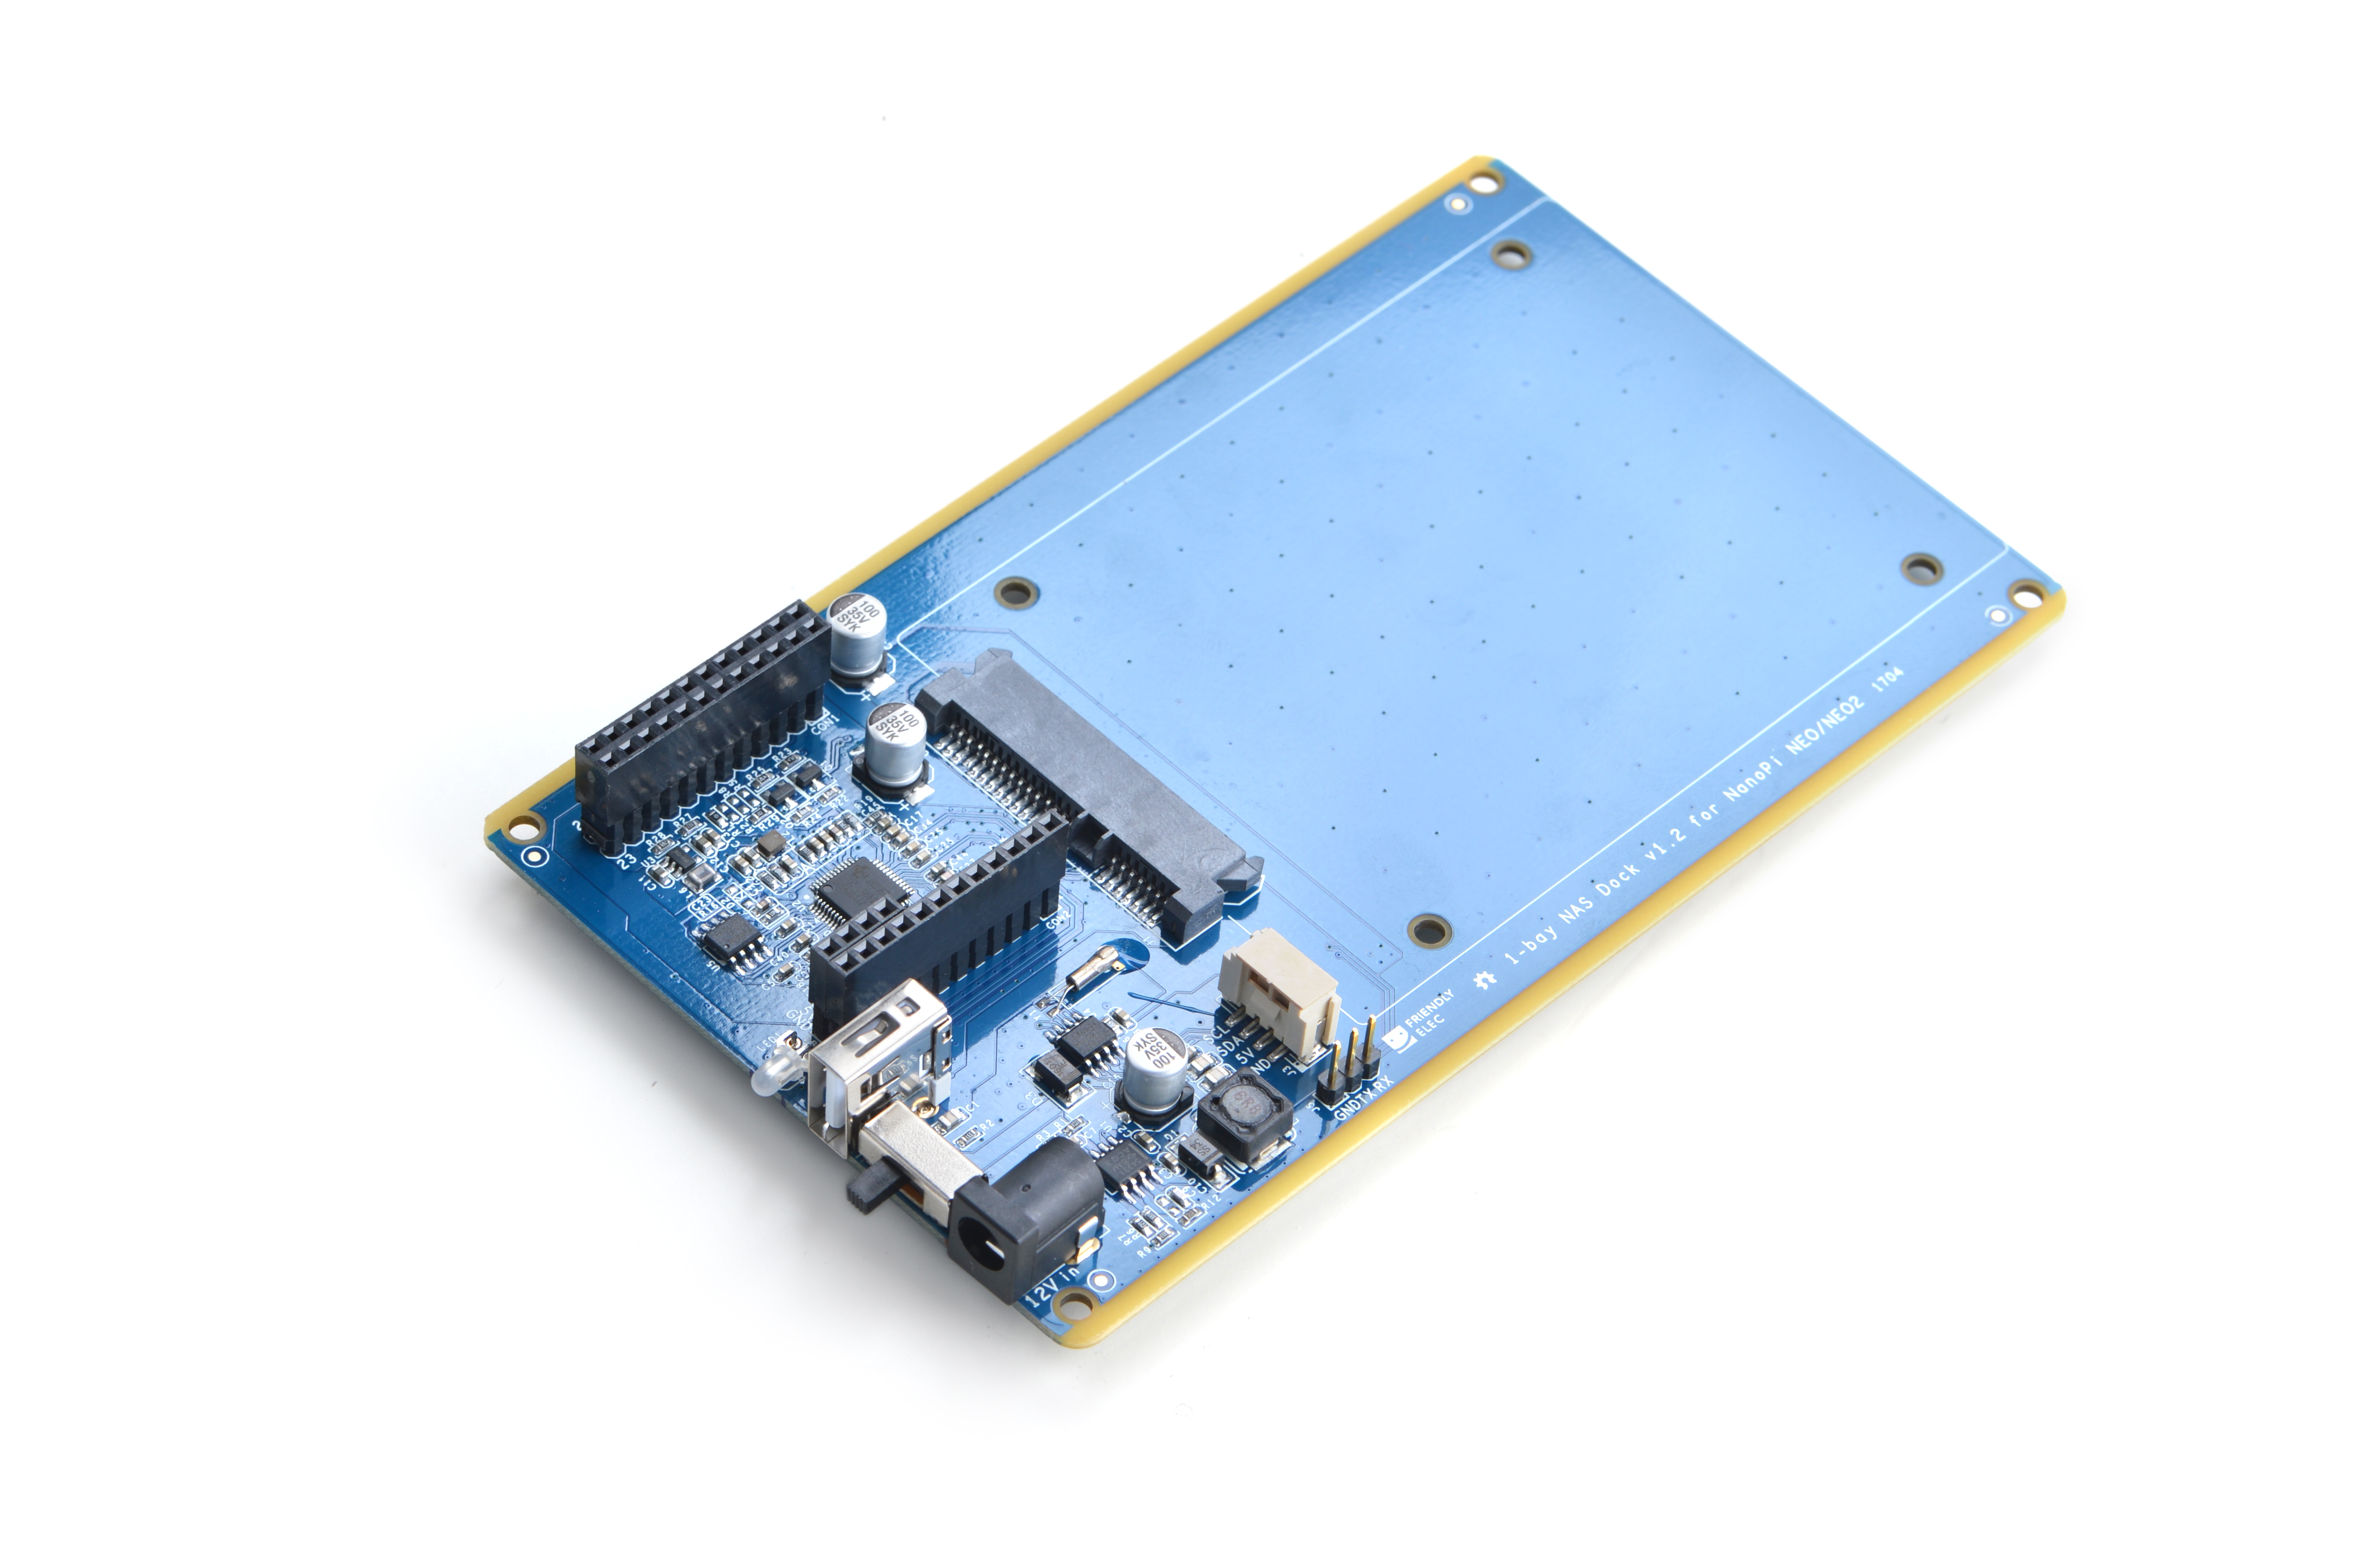
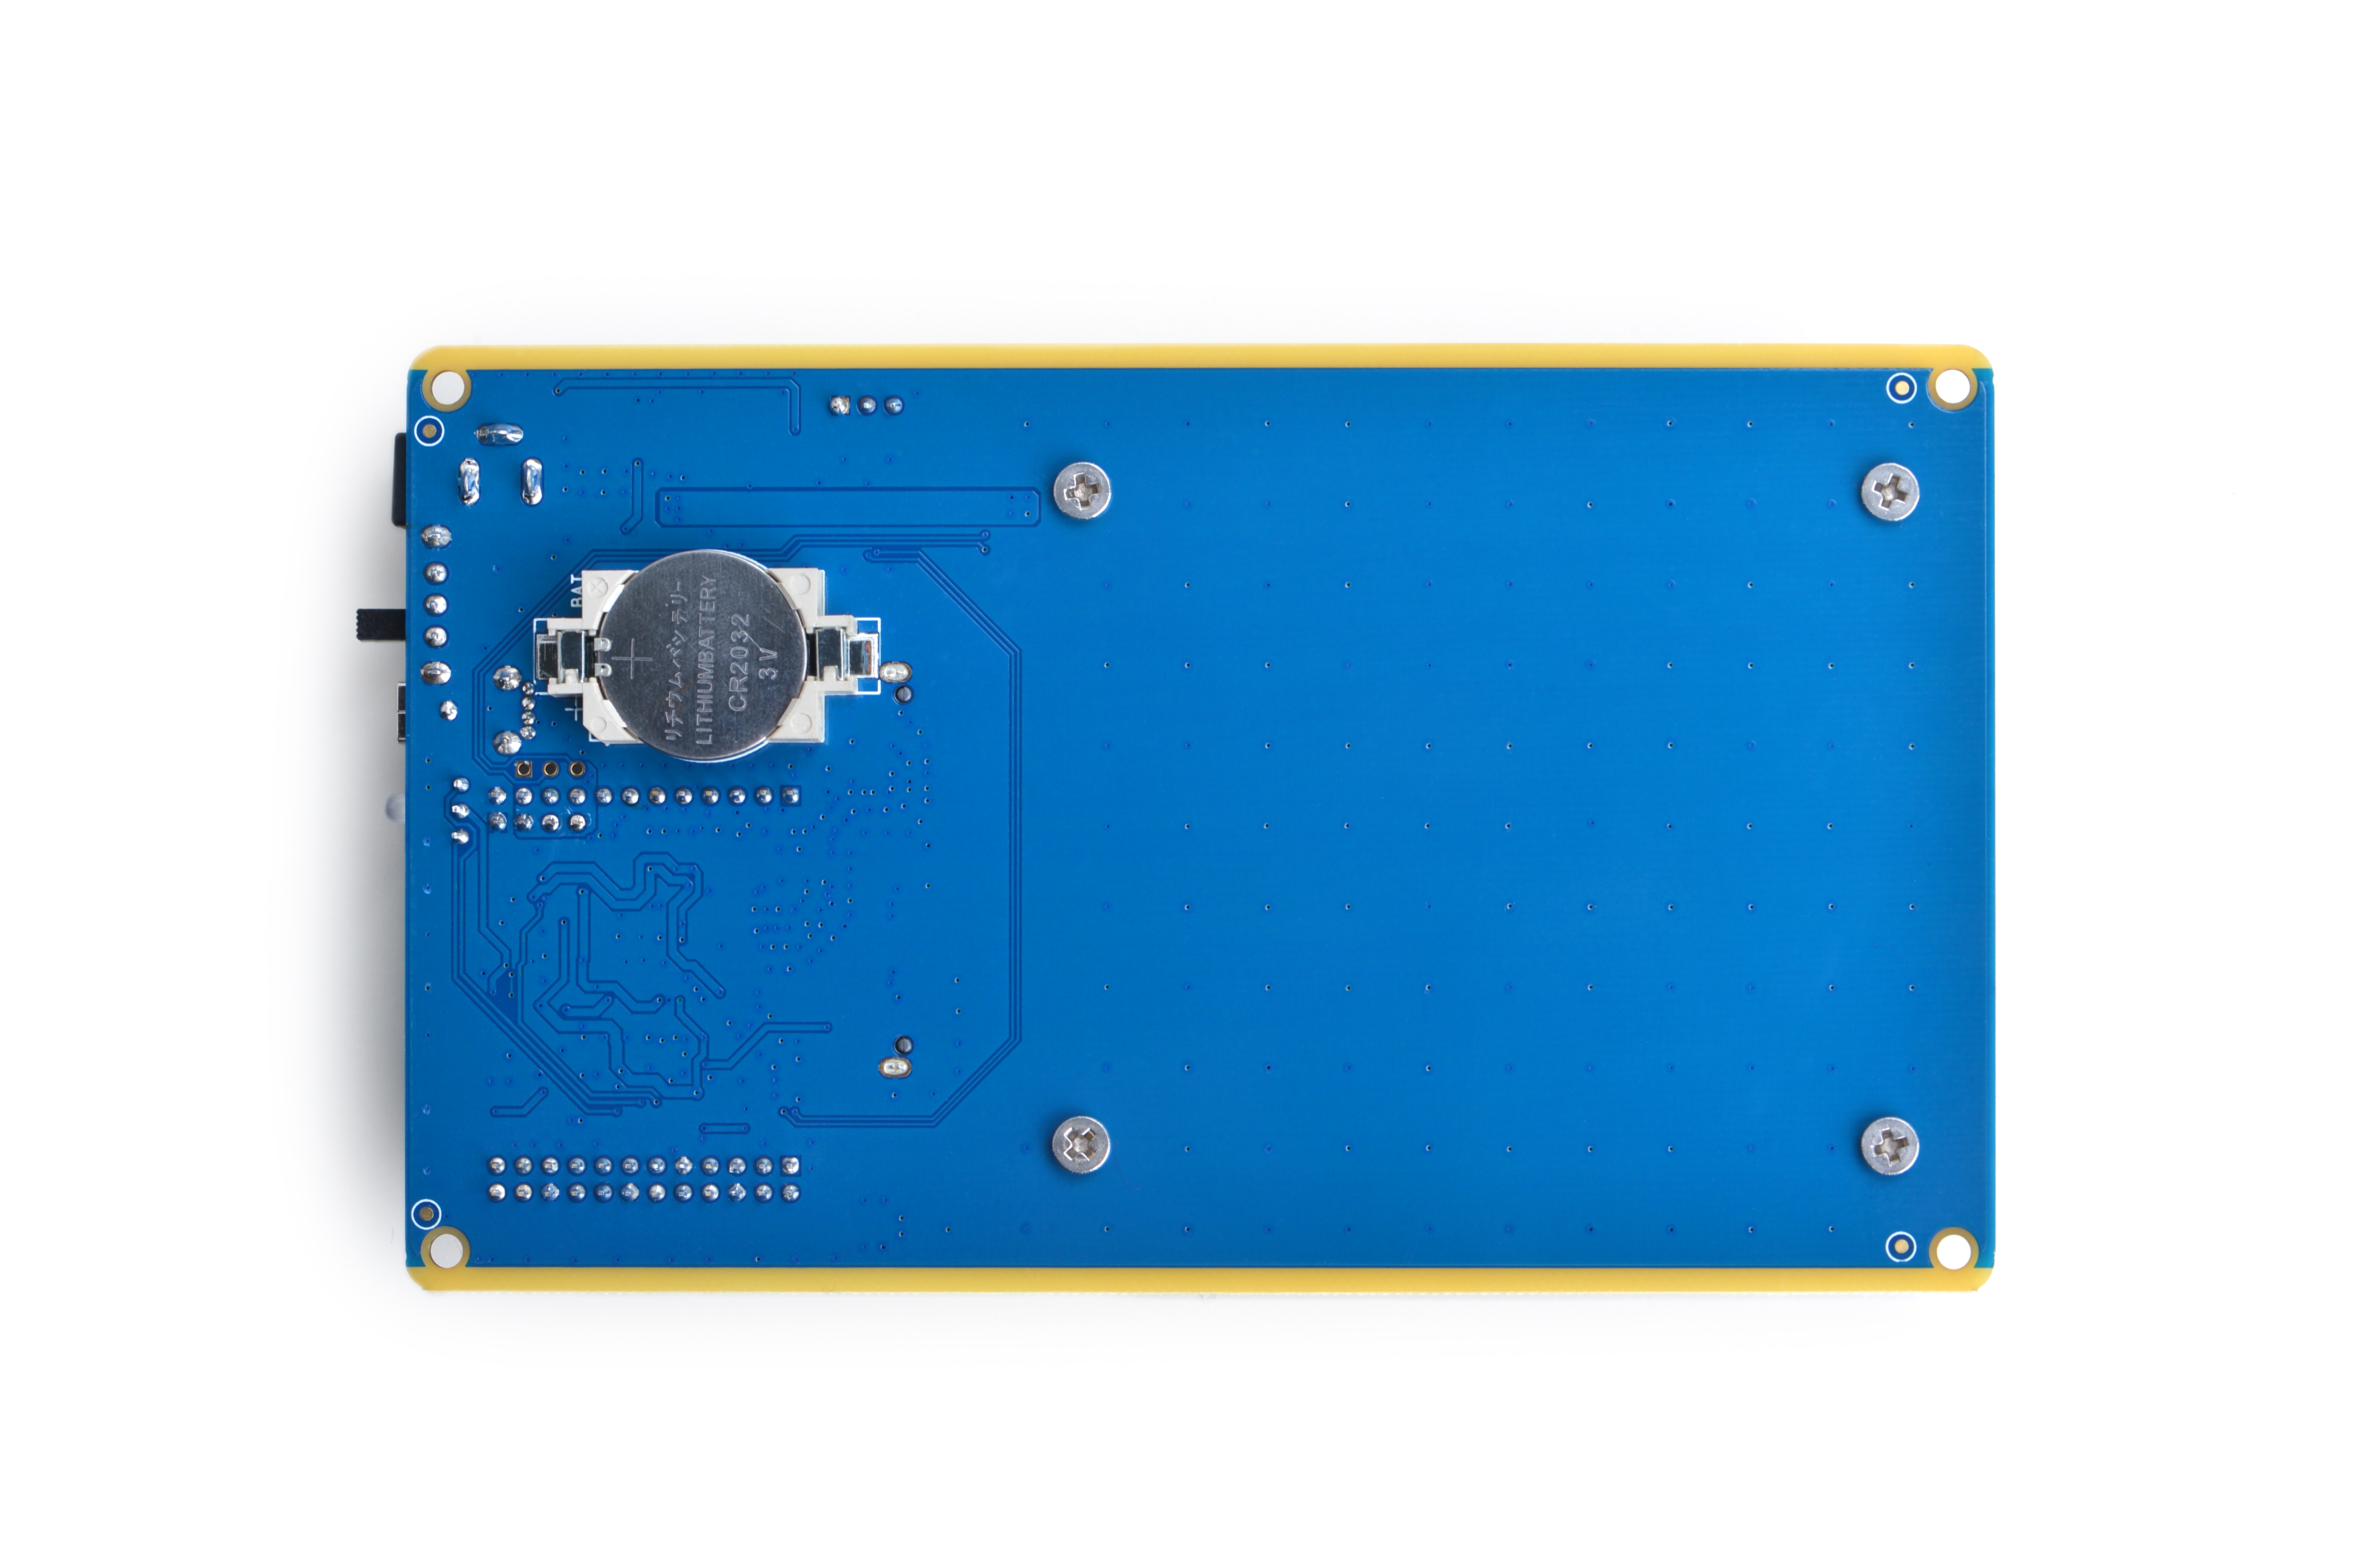
[[File:1-bay NAS Dock v1.2.jpg|thumb|1-bay NAS Dock v1.2 for NanoPi NEO/NEO2]] | [[File:1-bay NAS Dock v1.2.jpg|thumb|1-bay NAS Dock v1.2 for NanoPi NEO/NEO2]] | ||
| − | * The 1-bay NAS Dock v1.2 for NanoPi NEO/NEO2 is an expansion board which can be used to connect an external hard disk to a FriendlyElec's NanoPi NEO | + | * The 1-bay NAS Dock v1.2 for NanoPi NEO/NEO2 is an expansion board which can be used to connect an external hard disk to a FriendlyElec's NanoPi NEO/NEO2. Together with FriendlyElec's customized aluminum case and NanoPi NEO/NEO2 you can quickly assemble a storage server. |
| − | * It uses JM20329 USB2SATA IC and communicates with a NanoPi NEO | + | * It uses JM20329 USB2SATA IC and communicates with a NanoPi NEO/NEO2 via USB interface. |
* It works with a 2.5" SATA hard disk or SSD. | * It works with a 2.5" SATA hard disk or SSD. | ||
* It uses TI's DC-DC chipset to convert a 12V input to 5V. It has a power switch for users to turn on/off the device. | * It uses TI's DC-DC chipset to convert a 12V input to 5V. It has a power switch for users to turn on/off the device. | ||
| Line 28: | Line 28: | ||
(2) Screw set;<br> | (2) Screw set;<br> | ||
(3) 2.5" HDD hard disk;<br> | (3) 2.5" HDD hard disk;<br> | ||
| − | (4) NanoPi NEO | + | (4) NanoPi NEO/NEO2 with heat sink<br> |
[[File:step0-v1.2.png | frameless|500px| List]]<br> | [[File:step0-v1.2.png | frameless|500px| List]]<br> | ||
Steps to Assemble a NAS Device:<br> | Steps to Assemble a NAS Device:<br> | ||
(1) Connect a 2.5"SATA hard disk to the dock and mount the disk on the dock with four screws<br> | (1) Connect a 2.5"SATA hard disk to the dock and mount the disk on the dock with four screws<br> | ||
[[File:step1-v1.2.png | frameless|500px| Step (1)]] [[File:step2-v1.2.png | frameless|500px| Step (2)]] <br> | [[File:step1-v1.2.png | frameless|500px| Step (1)]] [[File:step2-v1.2.png | frameless|500px| Step (2)]] <br> | ||
| − | (2) Connect a NanoPi NEO | + | (2) Connect a NanoPi NEO/NEO2 with pin-headers to the NAS Dock<br> |
[[File:step3-v1.2.png | frameless|500px| Step (3)]]<br> | [[File:step3-v1.2.png | frameless|500px| Step (3)]]<br> | ||
(3) Connect a 12V power to the NAS Dock and all done<br> | (3) Connect a 12V power to the NAS Dock and all done<br> | ||
[[File:step4-v1.2.png | frameless|500px| Step(4)]]<br> | [[File:step4-v1.2.png | frameless|500px| Step(4)]]<br> | ||
| − | ==1-bay NAS Dock | + | ==Introduction to 1-bay NAS Dock V1.2 for NanoPi NEO/NEO2's Software== |
| − | + | The software system for the 1-bay NAS Dock V1.2 is based on Debian8 Jessie but has OpenMediaVault and its plugins. | |
| − | 1-bay NAS Dock | + | OpenMediaVault is a popular solution for NAS applications under Linux. It has various services such as SSH,(S)FTP,SMB/CIFS,DAAP media server, RSync,BitTorrent and more. |
| − | + | ||
| − | + | ||
| − | + | ||
| − | + | ||
| − | + | ||
| − | + | ||
| − | + | ||
| + | ==Software Installation== | ||
| + | ===Make a Bootable TF Card=== | ||
| + | ====Download Debian for NAS Image==== | ||
| + | Download a proper image file for your Dock based on your master device(NEO/NEO2). The image file is under the "officail-ROMs" directory and the utility is under the "tools" directory:<br /> | ||
::{| class="wikitable" | ::{| class="wikitable" | ||
|- | |- | ||
| − | | | + | |Master Device||Image File||Download Link |
|- | |- | ||
| − | |NanoPi NEO|| nanopi-neo_debian-nas-jessie_4.11.0_YYYYMMDD.img.zip||[http://pan.baidu.com/s/1boQFxN5 | + | |NanoPi NEO|| nanopi-neo_debian-nas-jessie_4.11.0_YYYYMMDD.img.zip||[http://pan.baidu.com/s/1boQFxN5 Download Link] |
|- | |- | ||
| − | |NanoPi NEO2|| nanopi-neo2_debian-nas-jessie_4.11.0_YYYYMMDD.img.zip||[https://pan.baidu.com/s/1eRDbeG6 | + | |NanoPi NEO2|| nanopi-neo2_debian-nas-jessie_4.11.0_YYYYMMDD.img.zip||[https://pan.baidu.com/s/1eRDbeG6 Download Link] |
|- | |- | ||
| − | |colspan=3| | + | |colspan=3| Flash Utility: |
|- | |- | ||
| − | |win32diskimager.rar ||colspan=2| | + | |win32diskimager.rar ||colspan=2| Windows utility. Under Linux users can use "dd" |
|- | |- | ||
|} | |} | ||
| − | + | This system is based on Debian but has OpenMediaVault . | |
| − | ==== | + | ====Make TF Card==== |
| − | + | Extract the "Debian-for-nas-YYYYMMDD.img.zip" and "win32diskimager.rar". Insert an SD card(at least 8G) into a Windows PC and run the win32diskimager utility as administrator. On the utility's main window select your SD card's drive, the wanted image file and click on "write" to start flashing the SD card.<br /> | |
| − | + | ||
<br /> | <br /> | ||
| − | + | Insert this card into your NanoPi NEO/NEO2 and connect the 1-Bay NAS Dock V1.2 to a 12V power.Turn on the Dock's switch and if the blue LED on your NEO/NEO2 blinks this indicates your NanoPi NEO/NEO2 has successfully booted.<br /> | |
| − | + | ||
| − | == | + | ==Configure NAS== |
| − | + | Visit the router your NEO/NEO2 is connected to and check your NEO/NEO2's IP address (in our case the Hostname was "FriendlyELEC"). Open a browser and type this IP address in the browser's address bar. The default user name and password for OpenMediaVault are:<br /> | |
| − | + | User Name: admin<br /> | |
| − | + | Password: openmediavault<br > | |
| − | + | ||
<br /> | <br /> | ||
| − | + | Here is what OpenMediaVault looks like after a user logs in:<br /> | |
[[File:Omv version411.jpg|frameless|824px|OpenMediaVault]] | [[File:Omv version411.jpg|frameless|824px|OpenMediaVault]] | ||
| − | == | + | ==Resources== |
| − | + | * [Schematic]([http://wik 1-bay NAS Dock v1.2 for NanoPi NEO/NEO2.pdf]) | |
| − | + | * OpenMediaVault's home site: http://www.openmediavault.org/。 | |
| − | * | + | |
| − | == | + | ==Update Log== |
| − | + | ===April-28-2017=== | |
| − | + | * Released English Version | |
Revision as of 09:42, 28 April 2017
Contents
1 Introduction
- The 1-bay NAS Dock v1.2 for NanoPi NEO/NEO2 is an expansion board which can be used to connect an external hard disk to a FriendlyElec's NanoPi NEO/NEO2. Together with FriendlyElec's customized aluminum case and NanoPi NEO/NEO2 you can quickly assemble a storage server.
- It uses JM20329 USB2SATA IC and communicates with a NanoPi NEO/NEO2 via USB interface.
- It works with a 2.5" SATA hard disk or SSD.
- It uses TI's DC-DC chipset to convert a 12V input to 5V. It has a power switch for users to turn on/off the device.
- Its dual-color LED can indicate a connected hard disk's status. When the LED is green it means the power is on. When it is red-blinking it means the connected hard disk is reading/writing.Warning: when the status LED is red-blinking do NOT shut down the power or plug/unplug the power.
- The onboard DS1307 RTC IC can provide precise clock for the board. A button cell can be used to power the RTC when the board is disconnected from power supply.
- It has an I2C interface.
2 Hardware Spec
- High-speed USB2SATA IC JM20329
- Input voltage:12V
- Onboard switch
- Onboard RTC
- Dual-color LED
- USB Host
- Customized aluminum case
- Ready-to-go software system
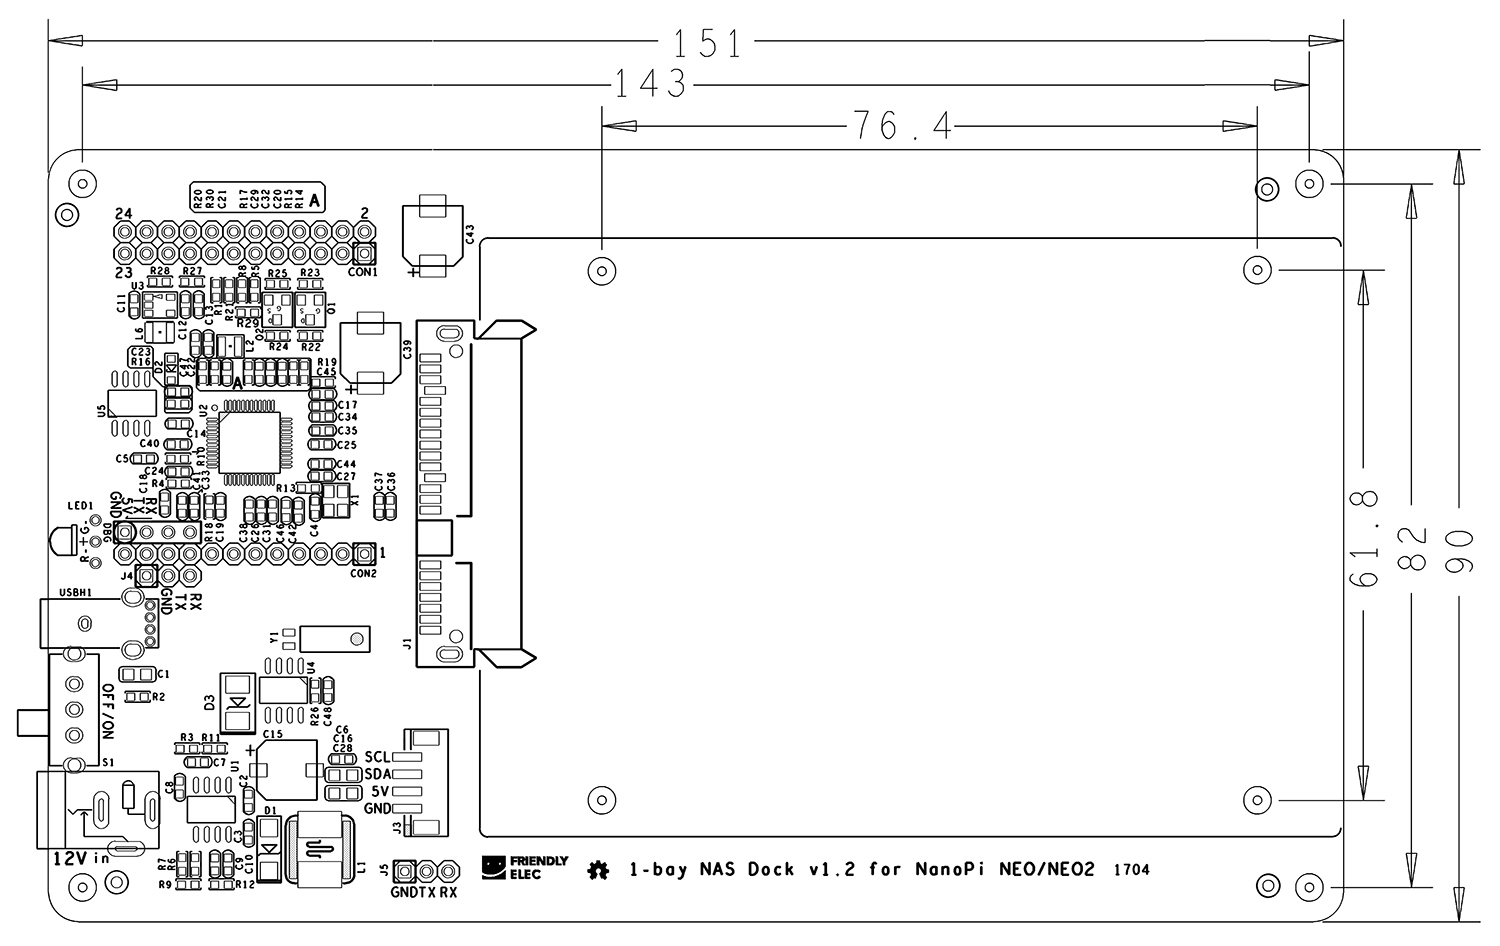
- PCB dimension(mm): 151 x 90
3 Hardware Setup
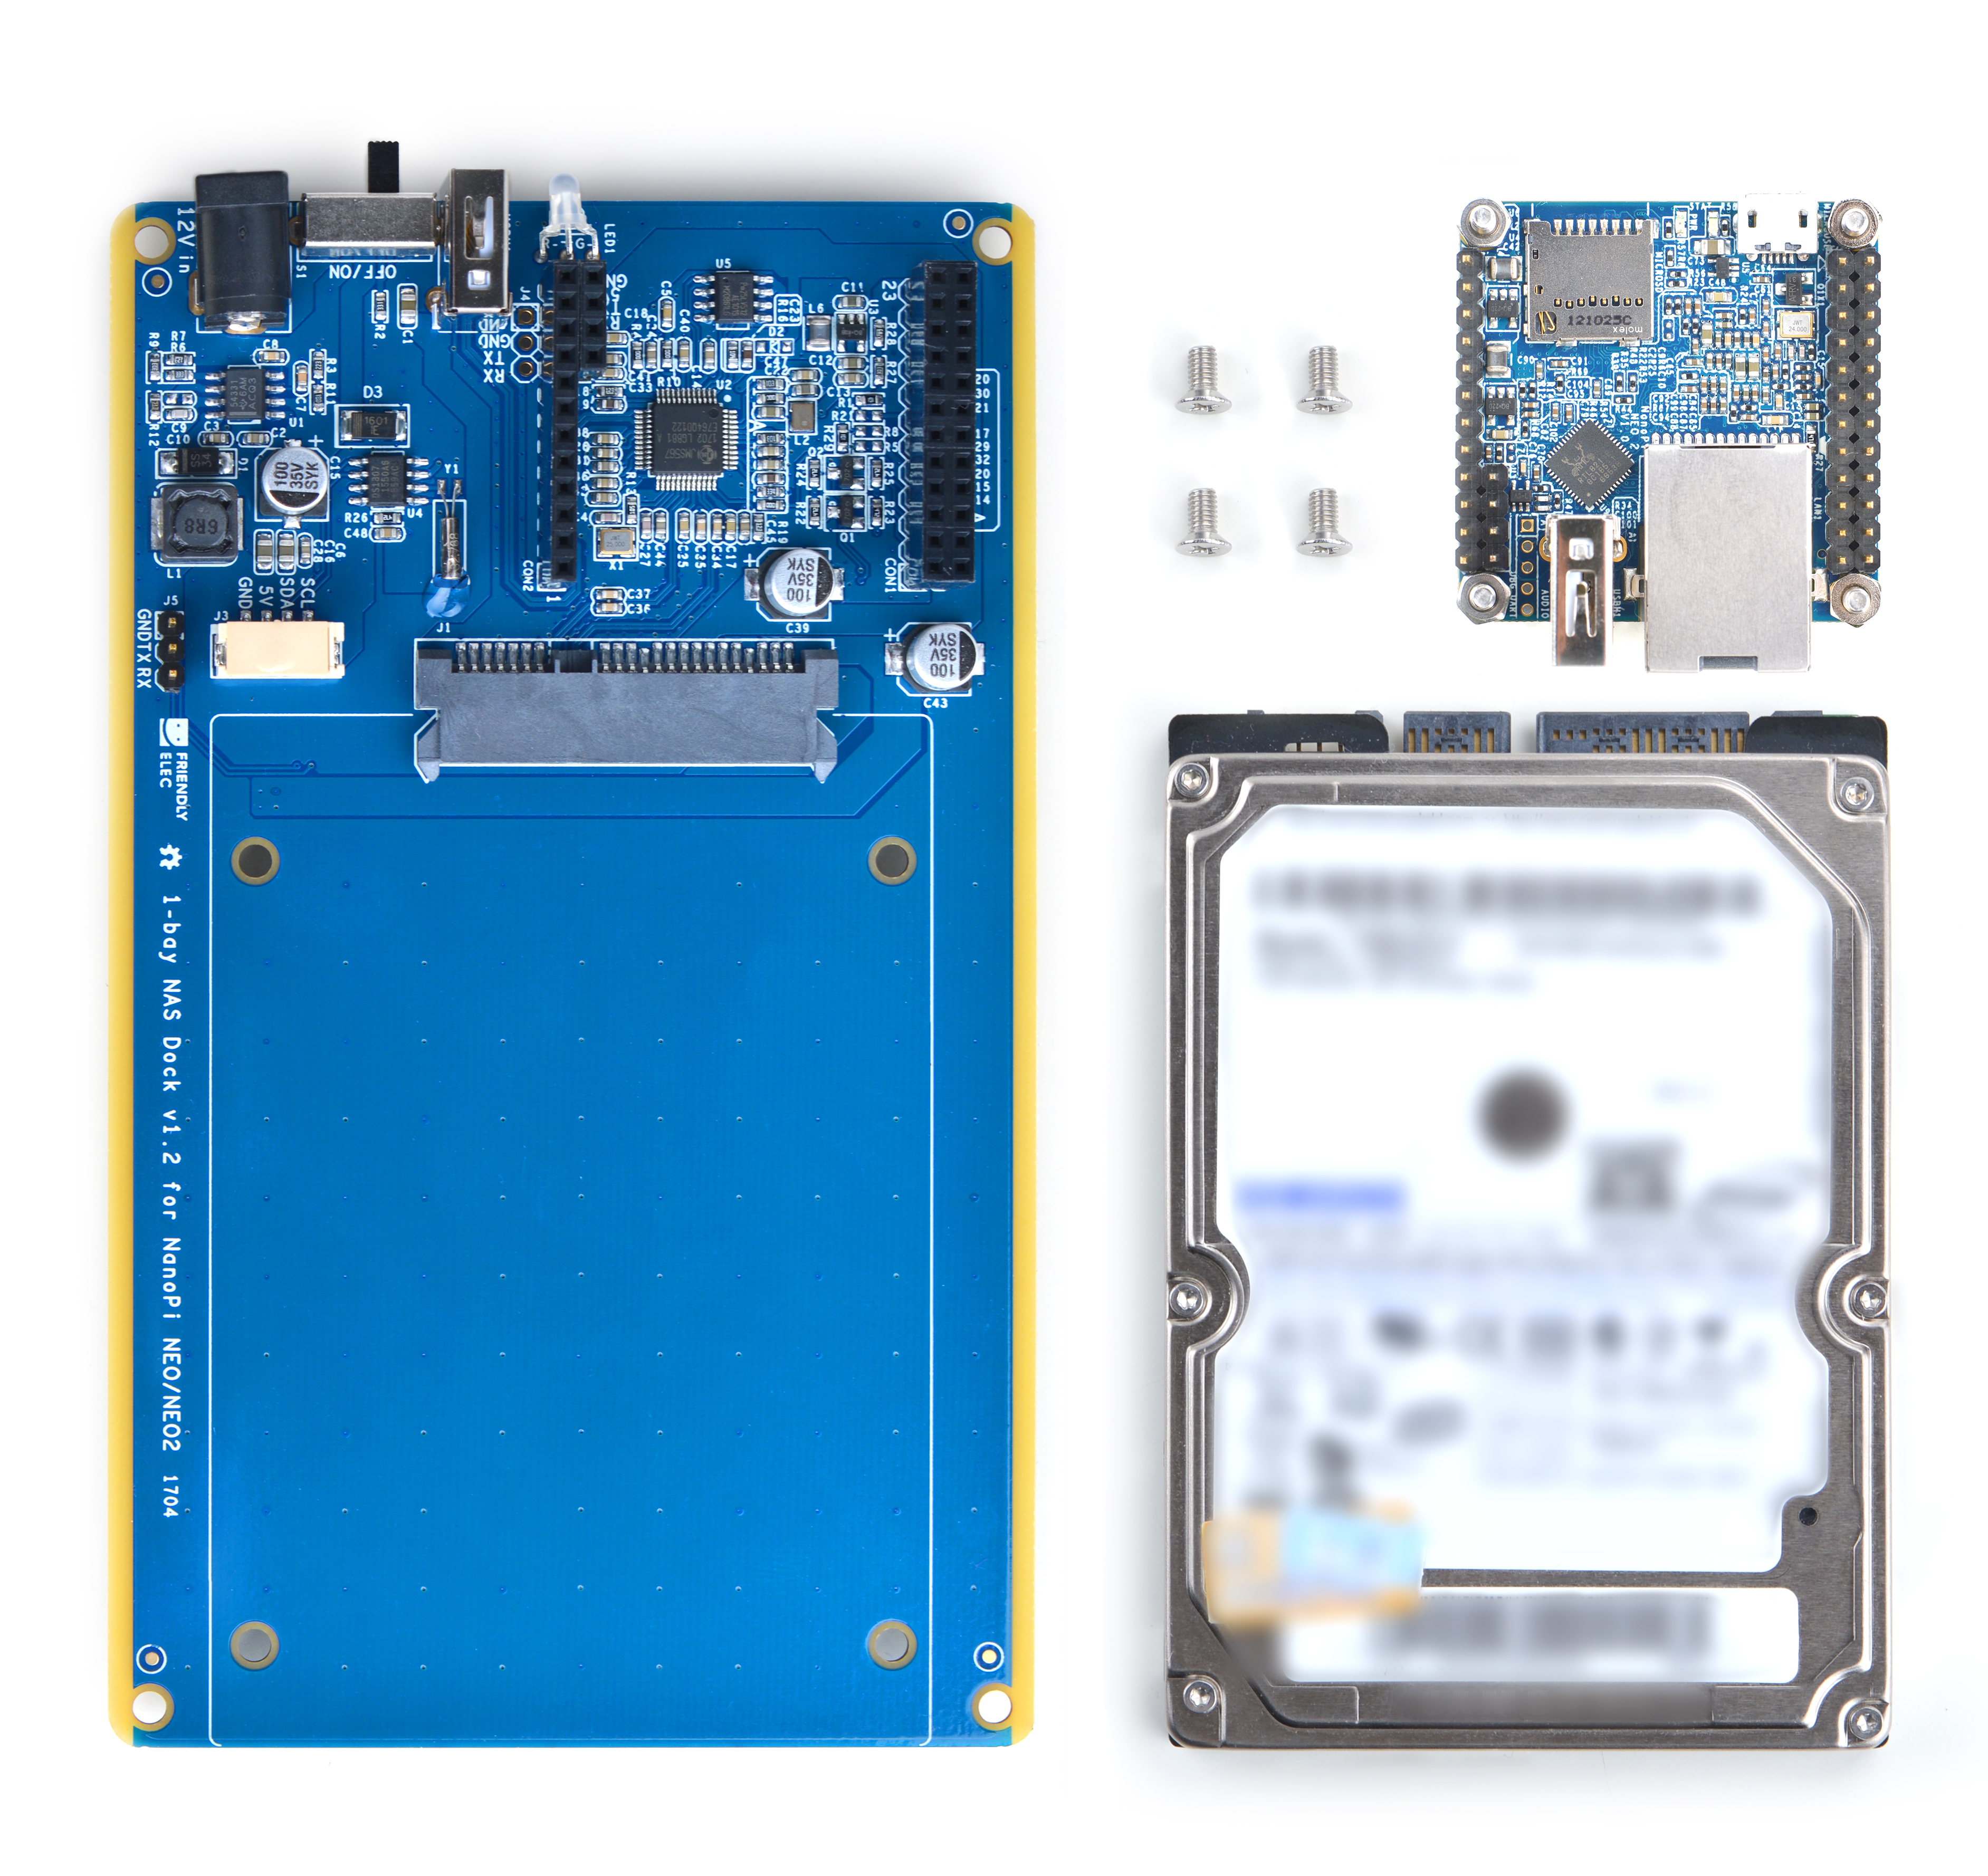
Essentials You Need for a Complete NAS Solution:
(1) 1-bay NAS Dock v1.2 for NanoPi NEO/NEO2;
(2) Screw set;
(3) 2.5" HDD hard disk;
(4) NanoPi NEO/NEO2 with heat sink
Steps to Assemble a NAS Device:
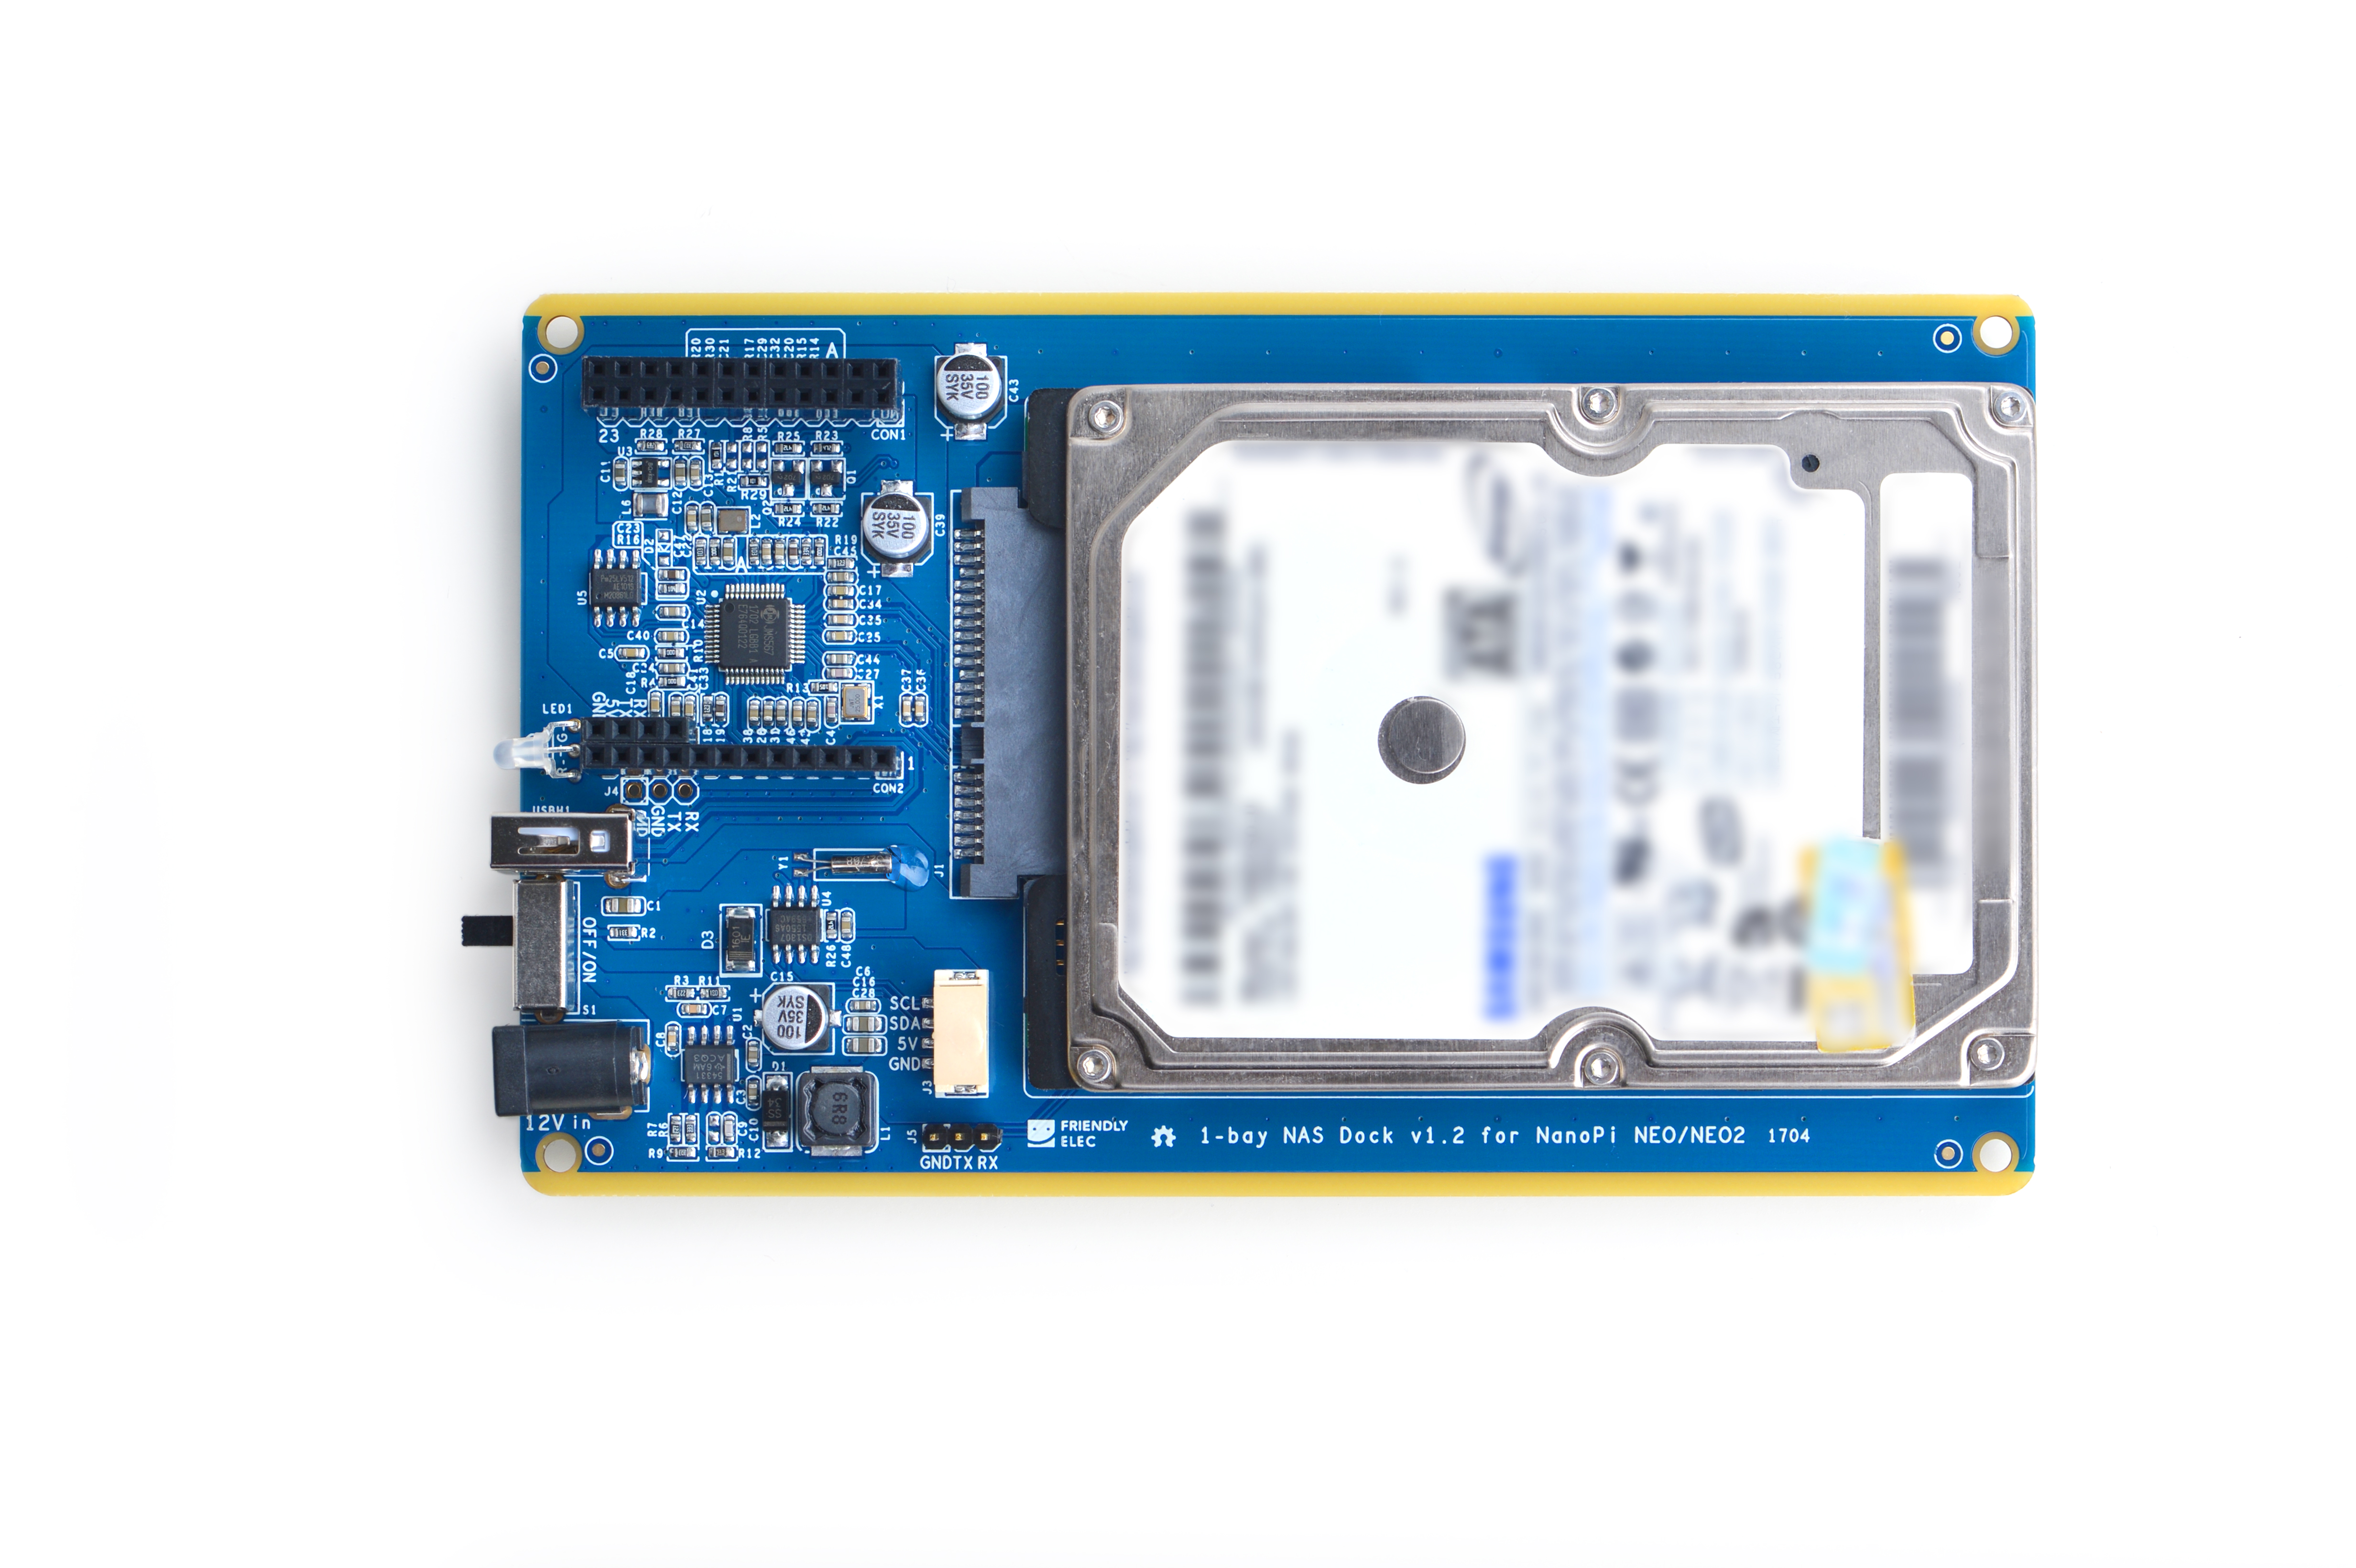
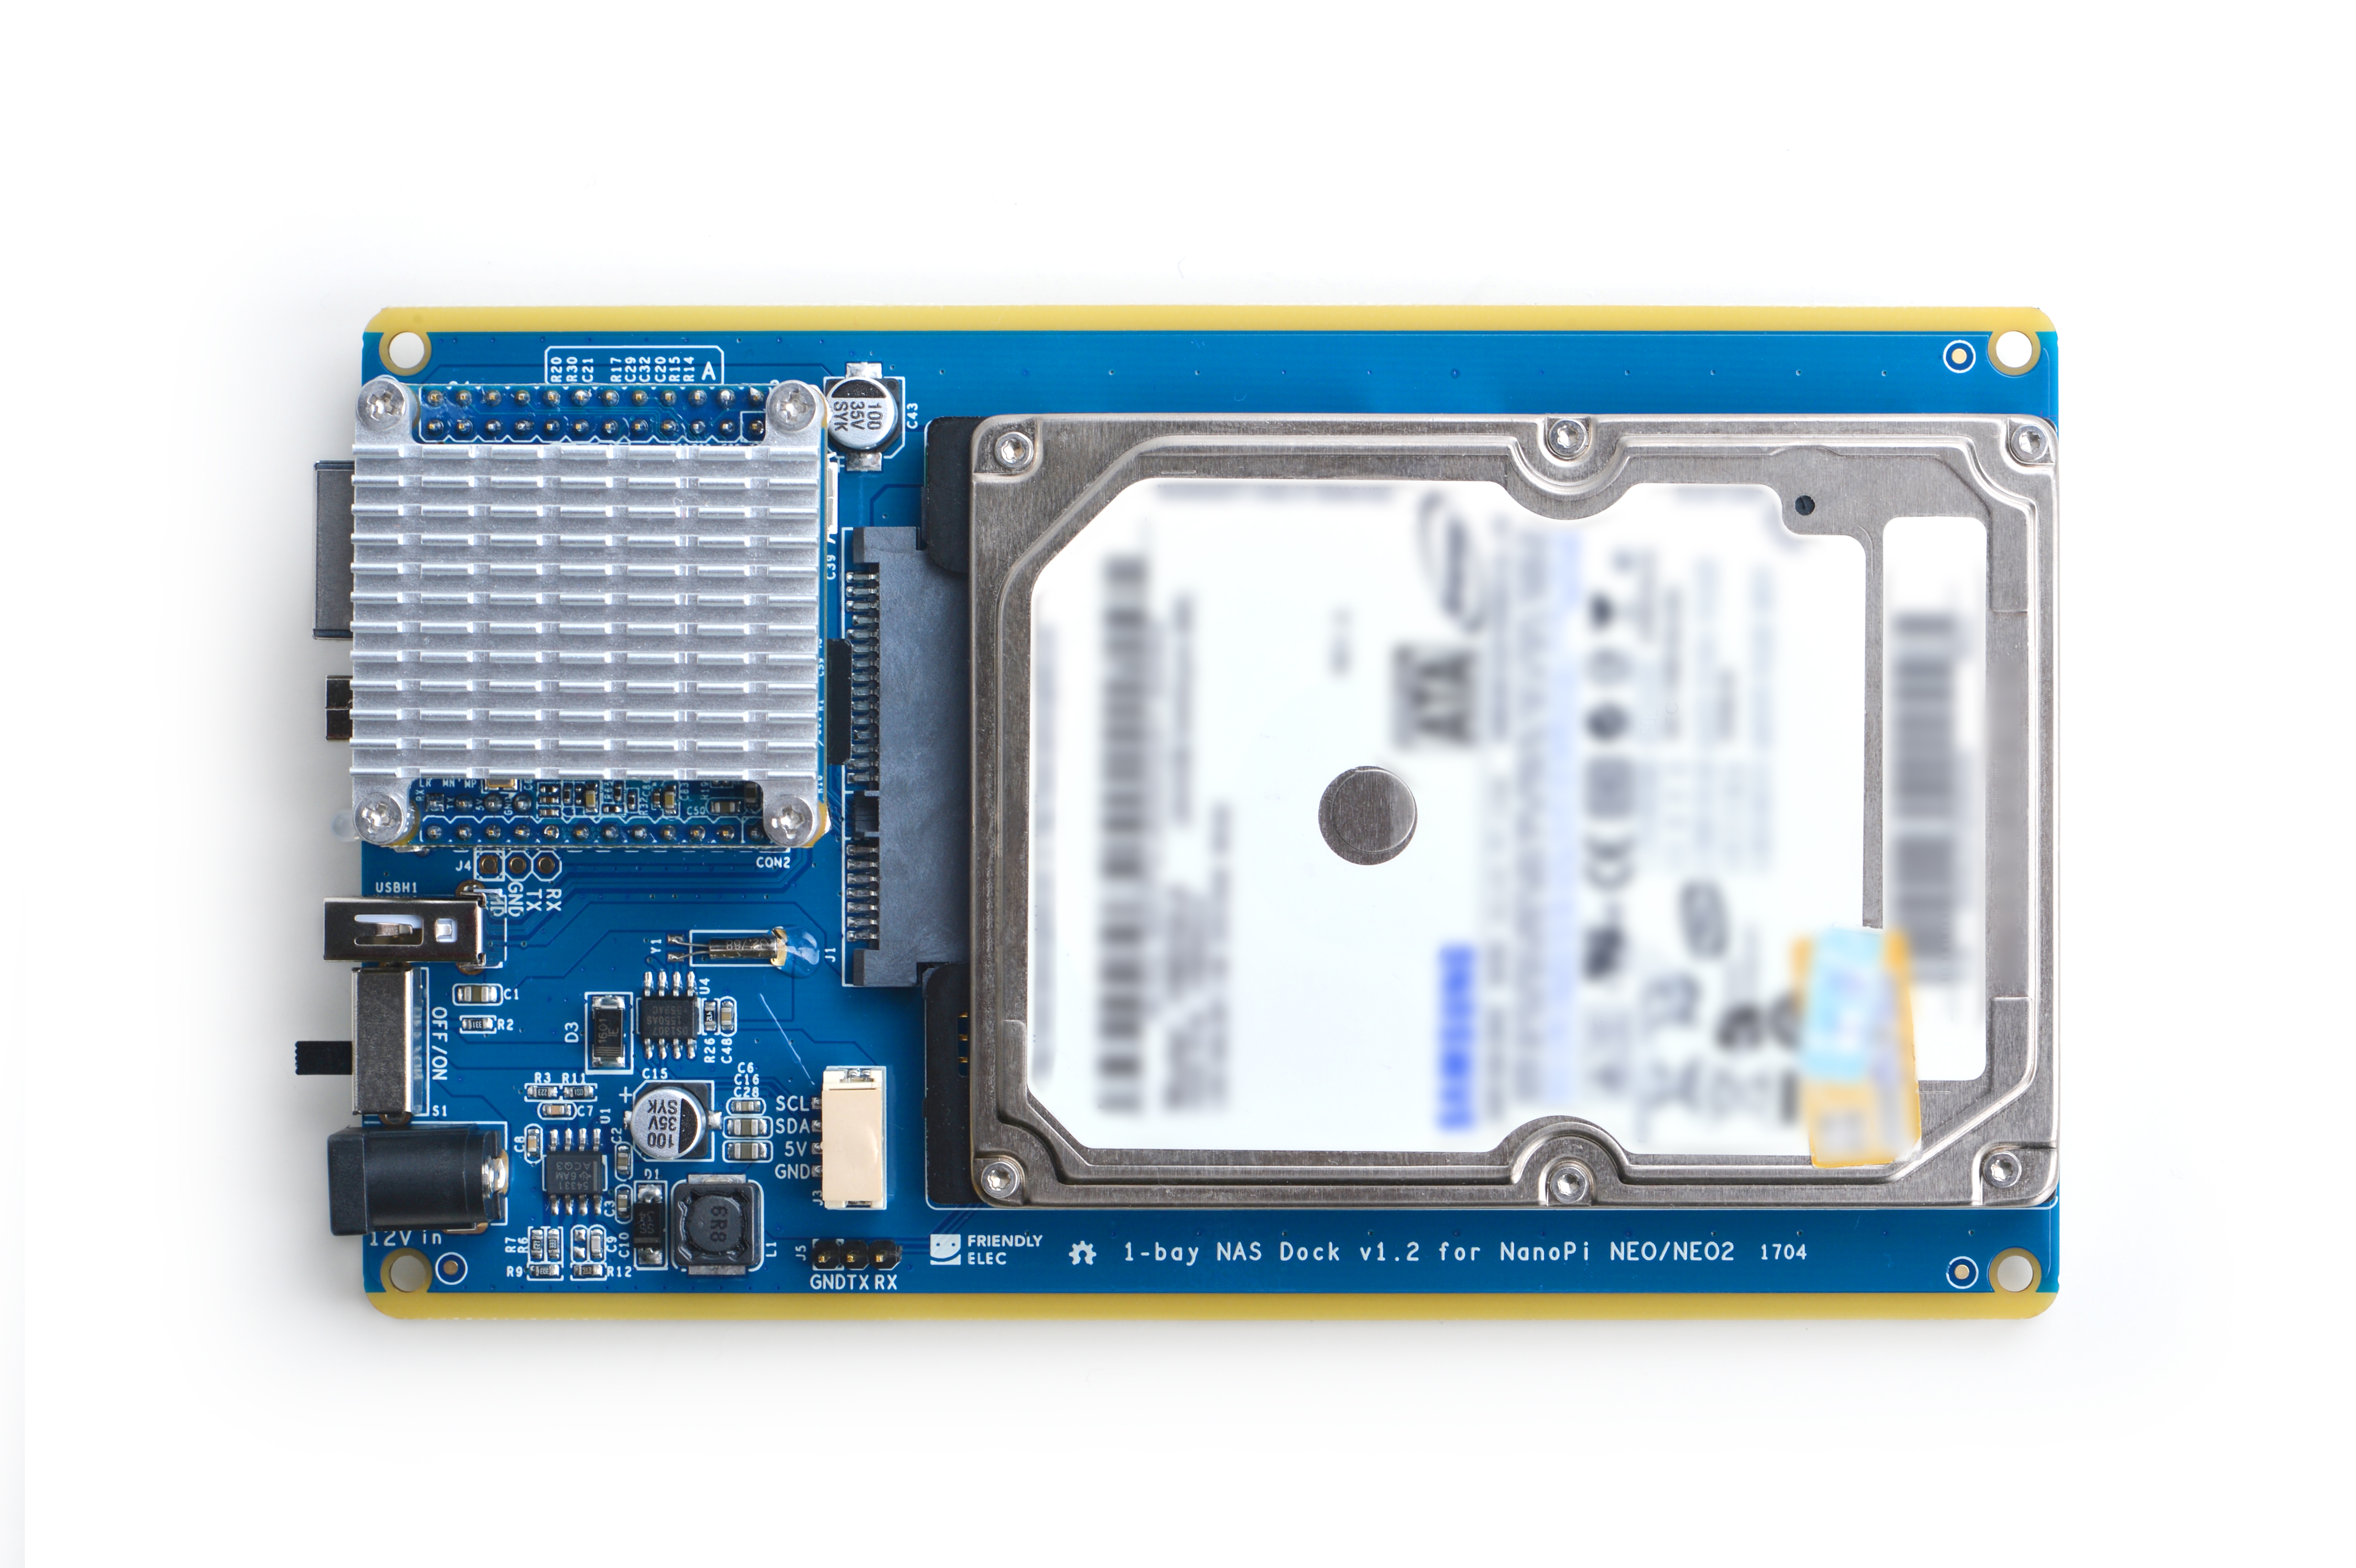
(1) Connect a 2.5"SATA hard disk to the dock and mount the disk on the dock with four screws
(2) Connect a NanoPi NEO/NEO2 with pin-headers to the NAS Dock
(3) Connect a 12V power to the NAS Dock and all done
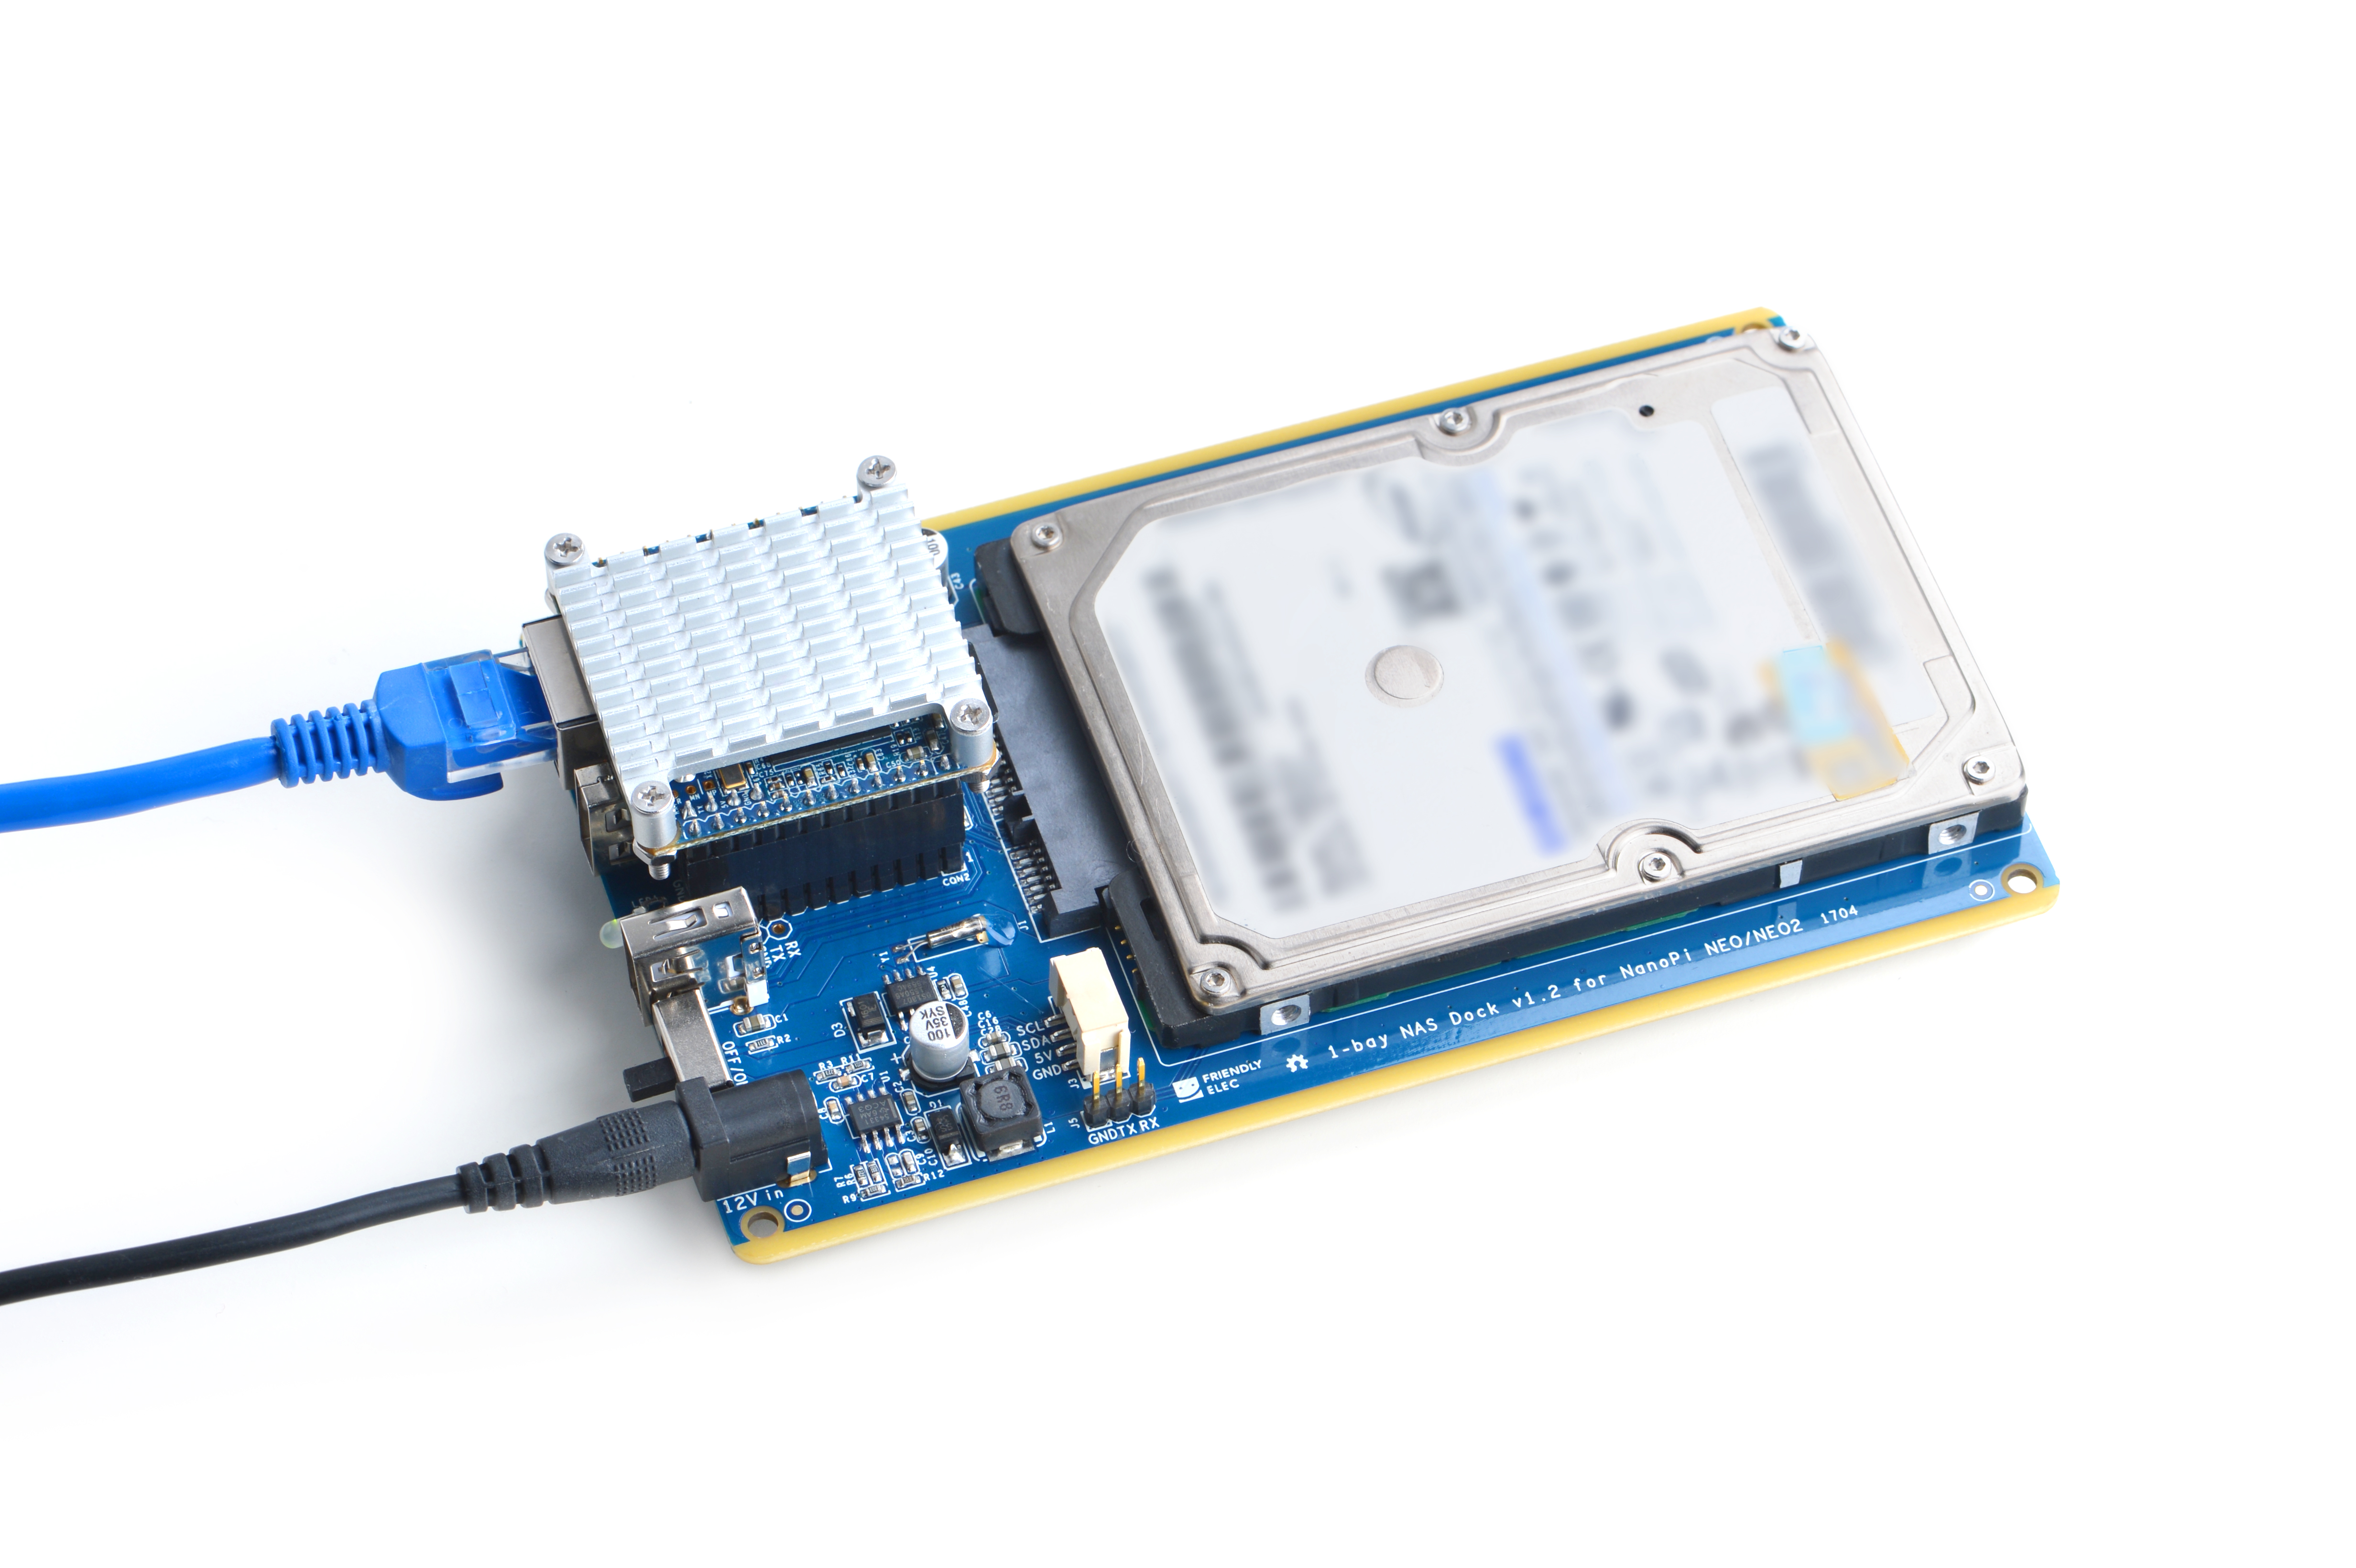
4 Introduction to 1-bay NAS Dock V1.2 for NanoPi NEO/NEO2's Software
The software system for the 1-bay NAS Dock V1.2 is based on Debian8 Jessie but has OpenMediaVault and its plugins. OpenMediaVault is a popular solution for NAS applications under Linux. It has various services such as SSH,(S)FTP,SMB/CIFS,DAAP media server, RSync,BitTorrent and more.
5 Software Installation
5.1 Make a Bootable TF Card
5.1.1 Download Debian for NAS Image
Download a proper image file for your Dock based on your master device(NEO/NEO2). The image file is under the "officail-ROMs" directory and the utility is under the "tools" directory:
Master Device Image File Download Link NanoPi NEO nanopi-neo_debian-nas-jessie_4.11.0_YYYYMMDD.img.zip Download Link NanoPi NEO2 nanopi-neo2_debian-nas-jessie_4.11.0_YYYYMMDD.img.zip Download Link Flash Utility: win32diskimager.rar Windows utility. Under Linux users can use "dd"
This system is based on Debian but has OpenMediaVault .
5.1.2 Make TF Card
Extract the "Debian-for-nas-YYYYMMDD.img.zip" and "win32diskimager.rar". Insert an SD card(at least 8G) into a Windows PC and run the win32diskimager utility as administrator. On the utility's main window select your SD card's drive, the wanted image file and click on "write" to start flashing the SD card.
Insert this card into your NanoPi NEO/NEO2 and connect the 1-Bay NAS Dock V1.2 to a 12V power.Turn on the Dock's switch and if the blue LED on your NEO/NEO2 blinks this indicates your NanoPi NEO/NEO2 has successfully booted.
6 Configure NAS
Visit the router your NEO/NEO2 is connected to and check your NEO/NEO2's IP address (in our case the Hostname was "FriendlyELEC"). Open a browser and type this IP address in the browser's address bar. The default user name and password for OpenMediaVault are:
User Name: admin
Password: openmediavault
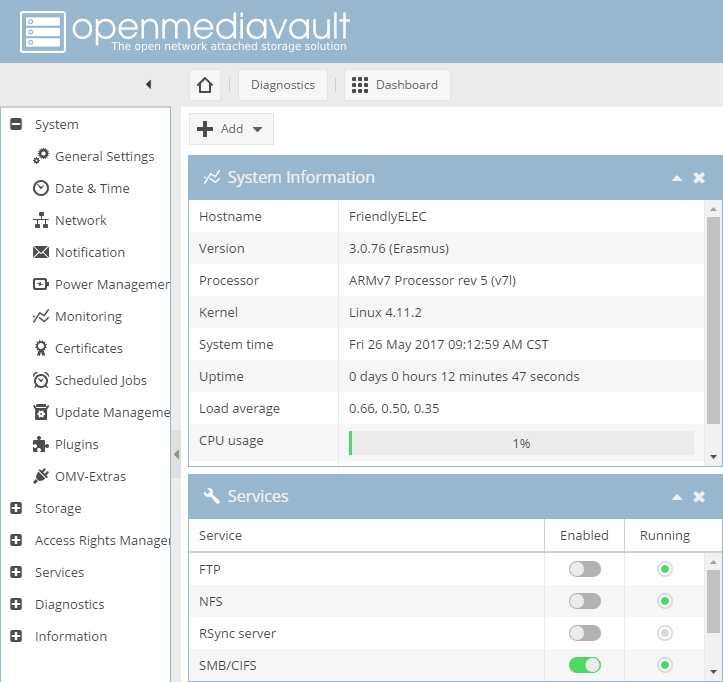
Here is what OpenMediaVault looks like after a user logs in:
7 Resources
- [Schematic](1-bay NAS Dock v1.2 for NanoPi NEO/NEO2.pdf)
- OpenMediaVault's home site: http://www.openmediavault.org/。
8 Update Log
8.1 April-28-2017
- Released English Version
