1-bay NAS Dock v1.2 for NanoPi NEO/NEO2
Contents
1 Introduction
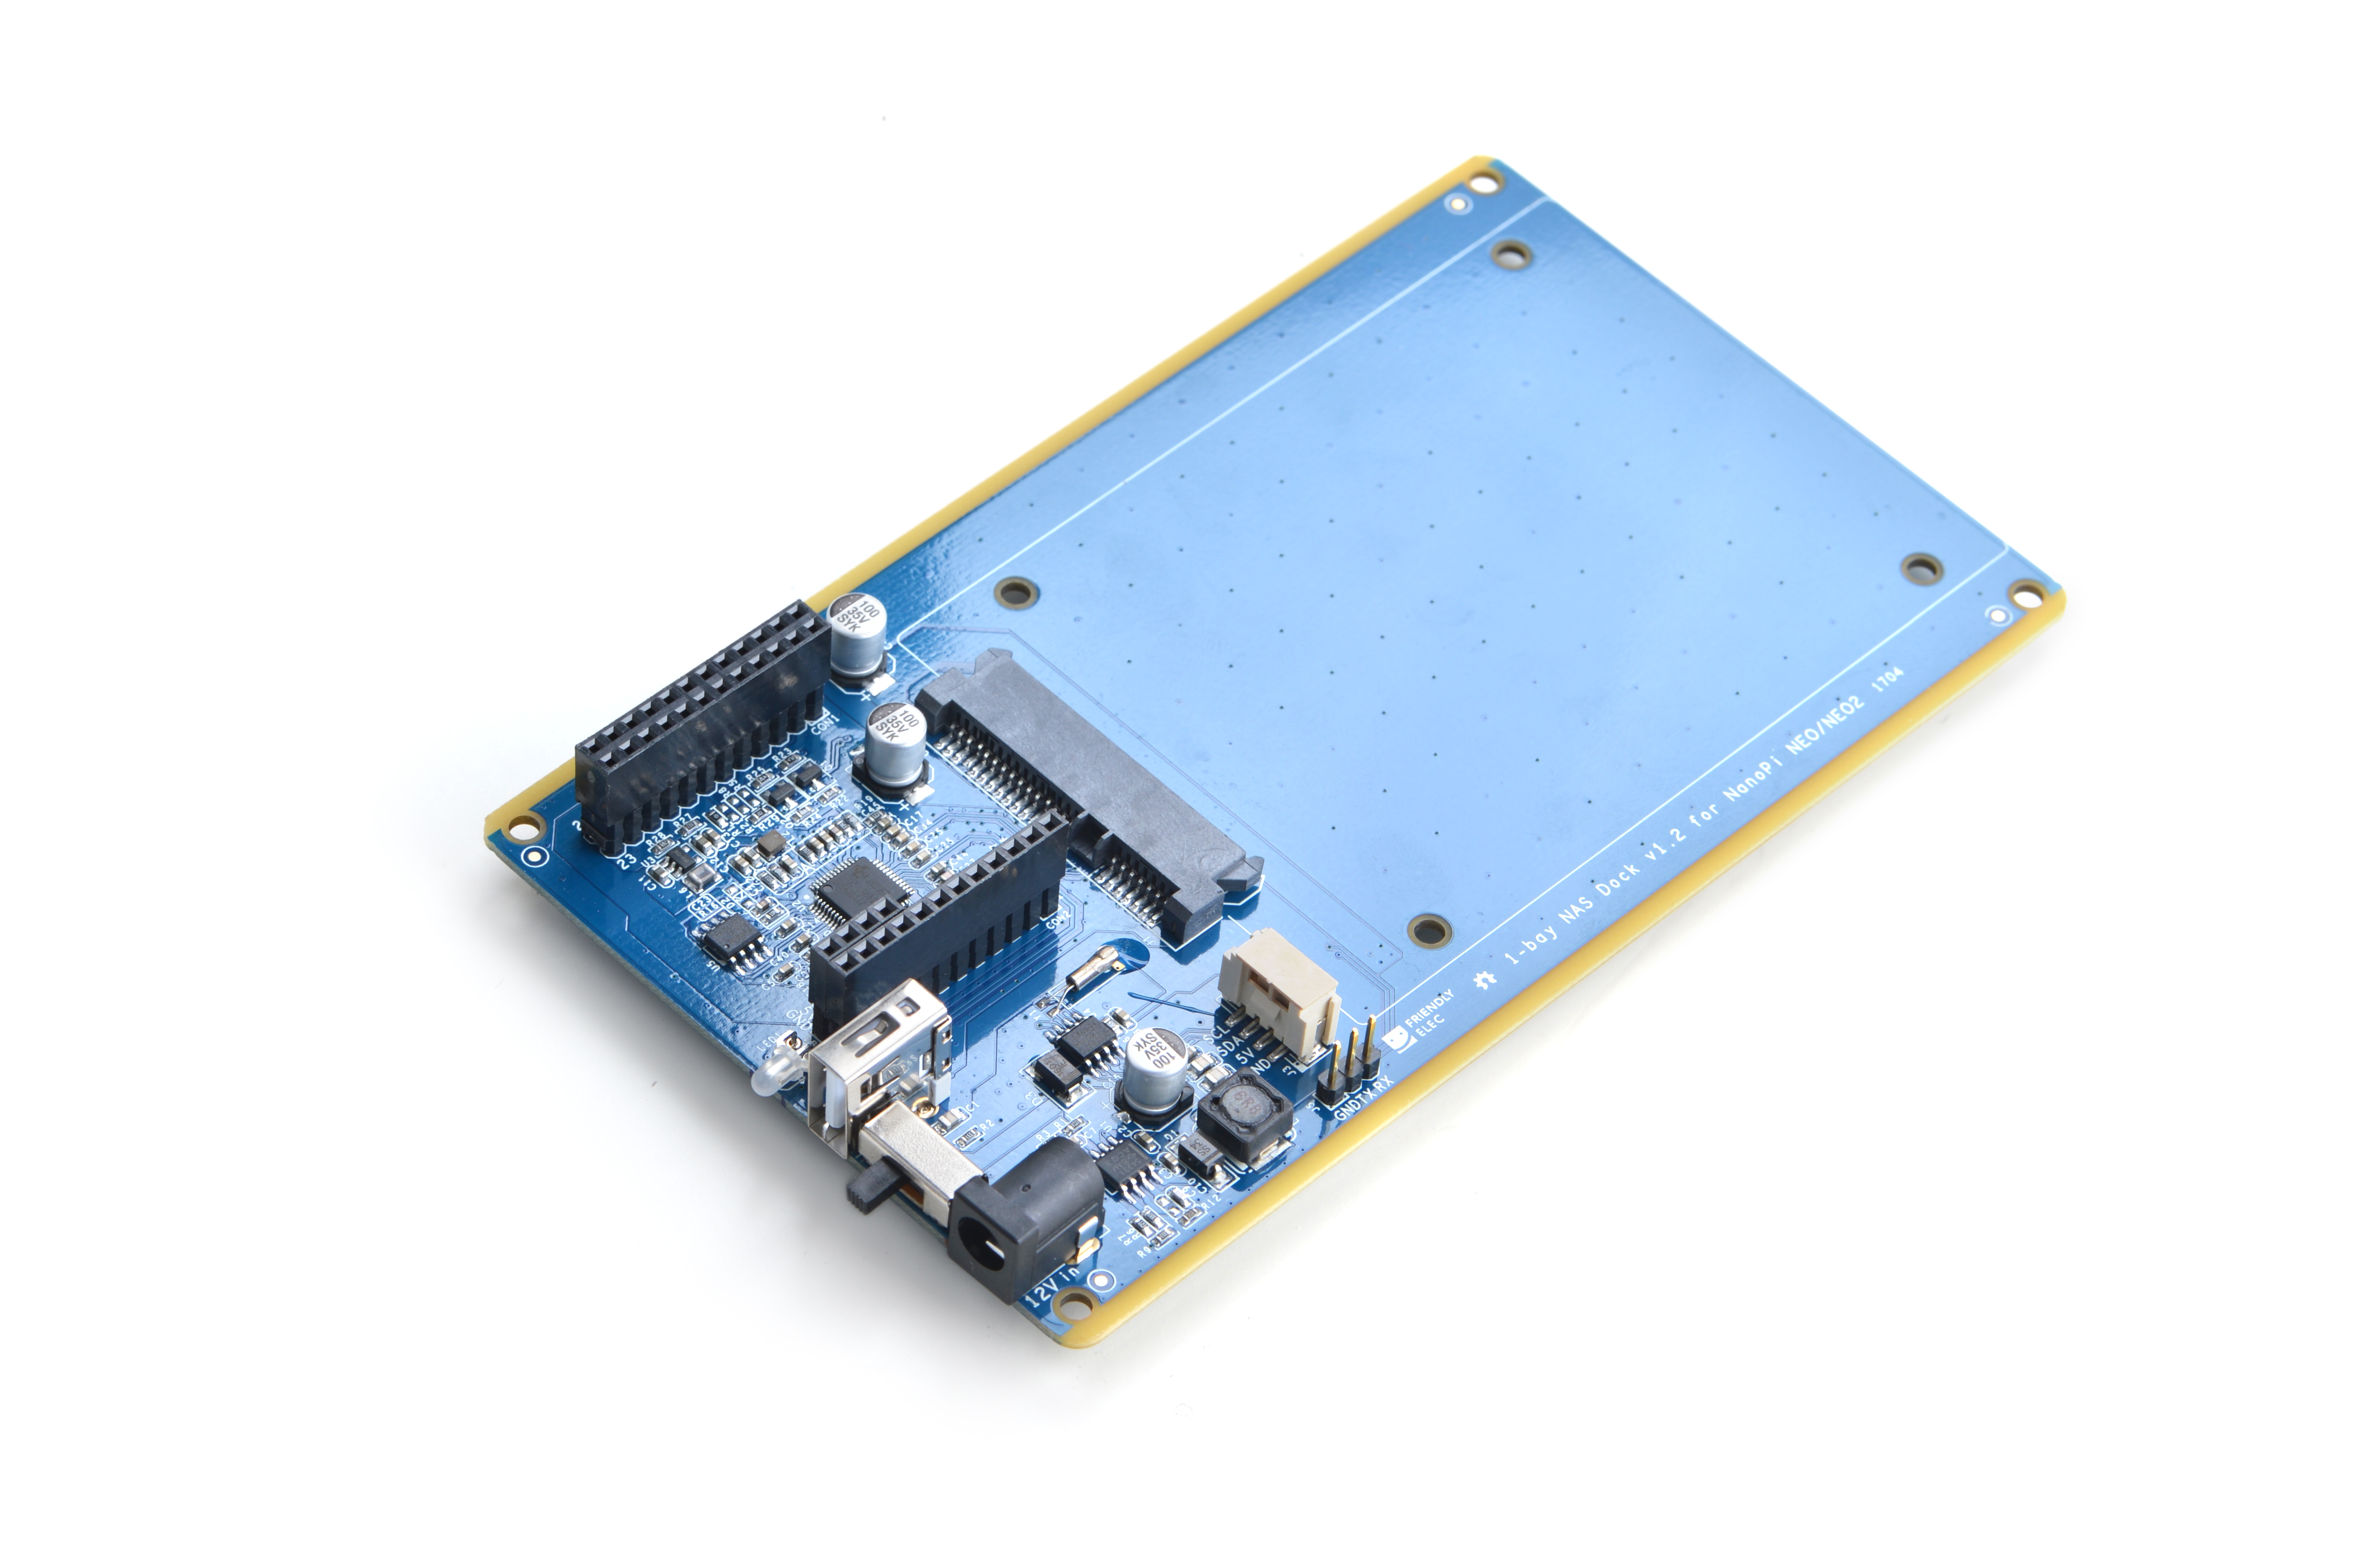
- The 1-bay NAS Dock v1.2 for NanoPi NEO/Air/NEO2 is an expansion board which can be used to connect an external hard disk to a FriendlyElec's NanoPi NEO/Air/NEO2. Together with FriendlyElec's customized aluminum case and NanoPi NEO/Air/NEO2 you can quickly assemble a storage server.
- It uses JM20329 USB2SATA IC and communicates with a NanoPi NEO/Air/NEO2 via USB interface.
- It works with a 2.5" SATA hard disk or SSD.
- It uses TI's DC-DC chipset to convert a 12V input to 5V. It has a power switch for users to turn on/off the device.
- Its dual-color LED can indicate a connected hard disk's status. When the LED is green it means the power is on. When it is red-blinking it means the connected hard disk is reading/writing.Warning: when the status LED is red-blinking do NOT shut down the power or plug/unplug the power.
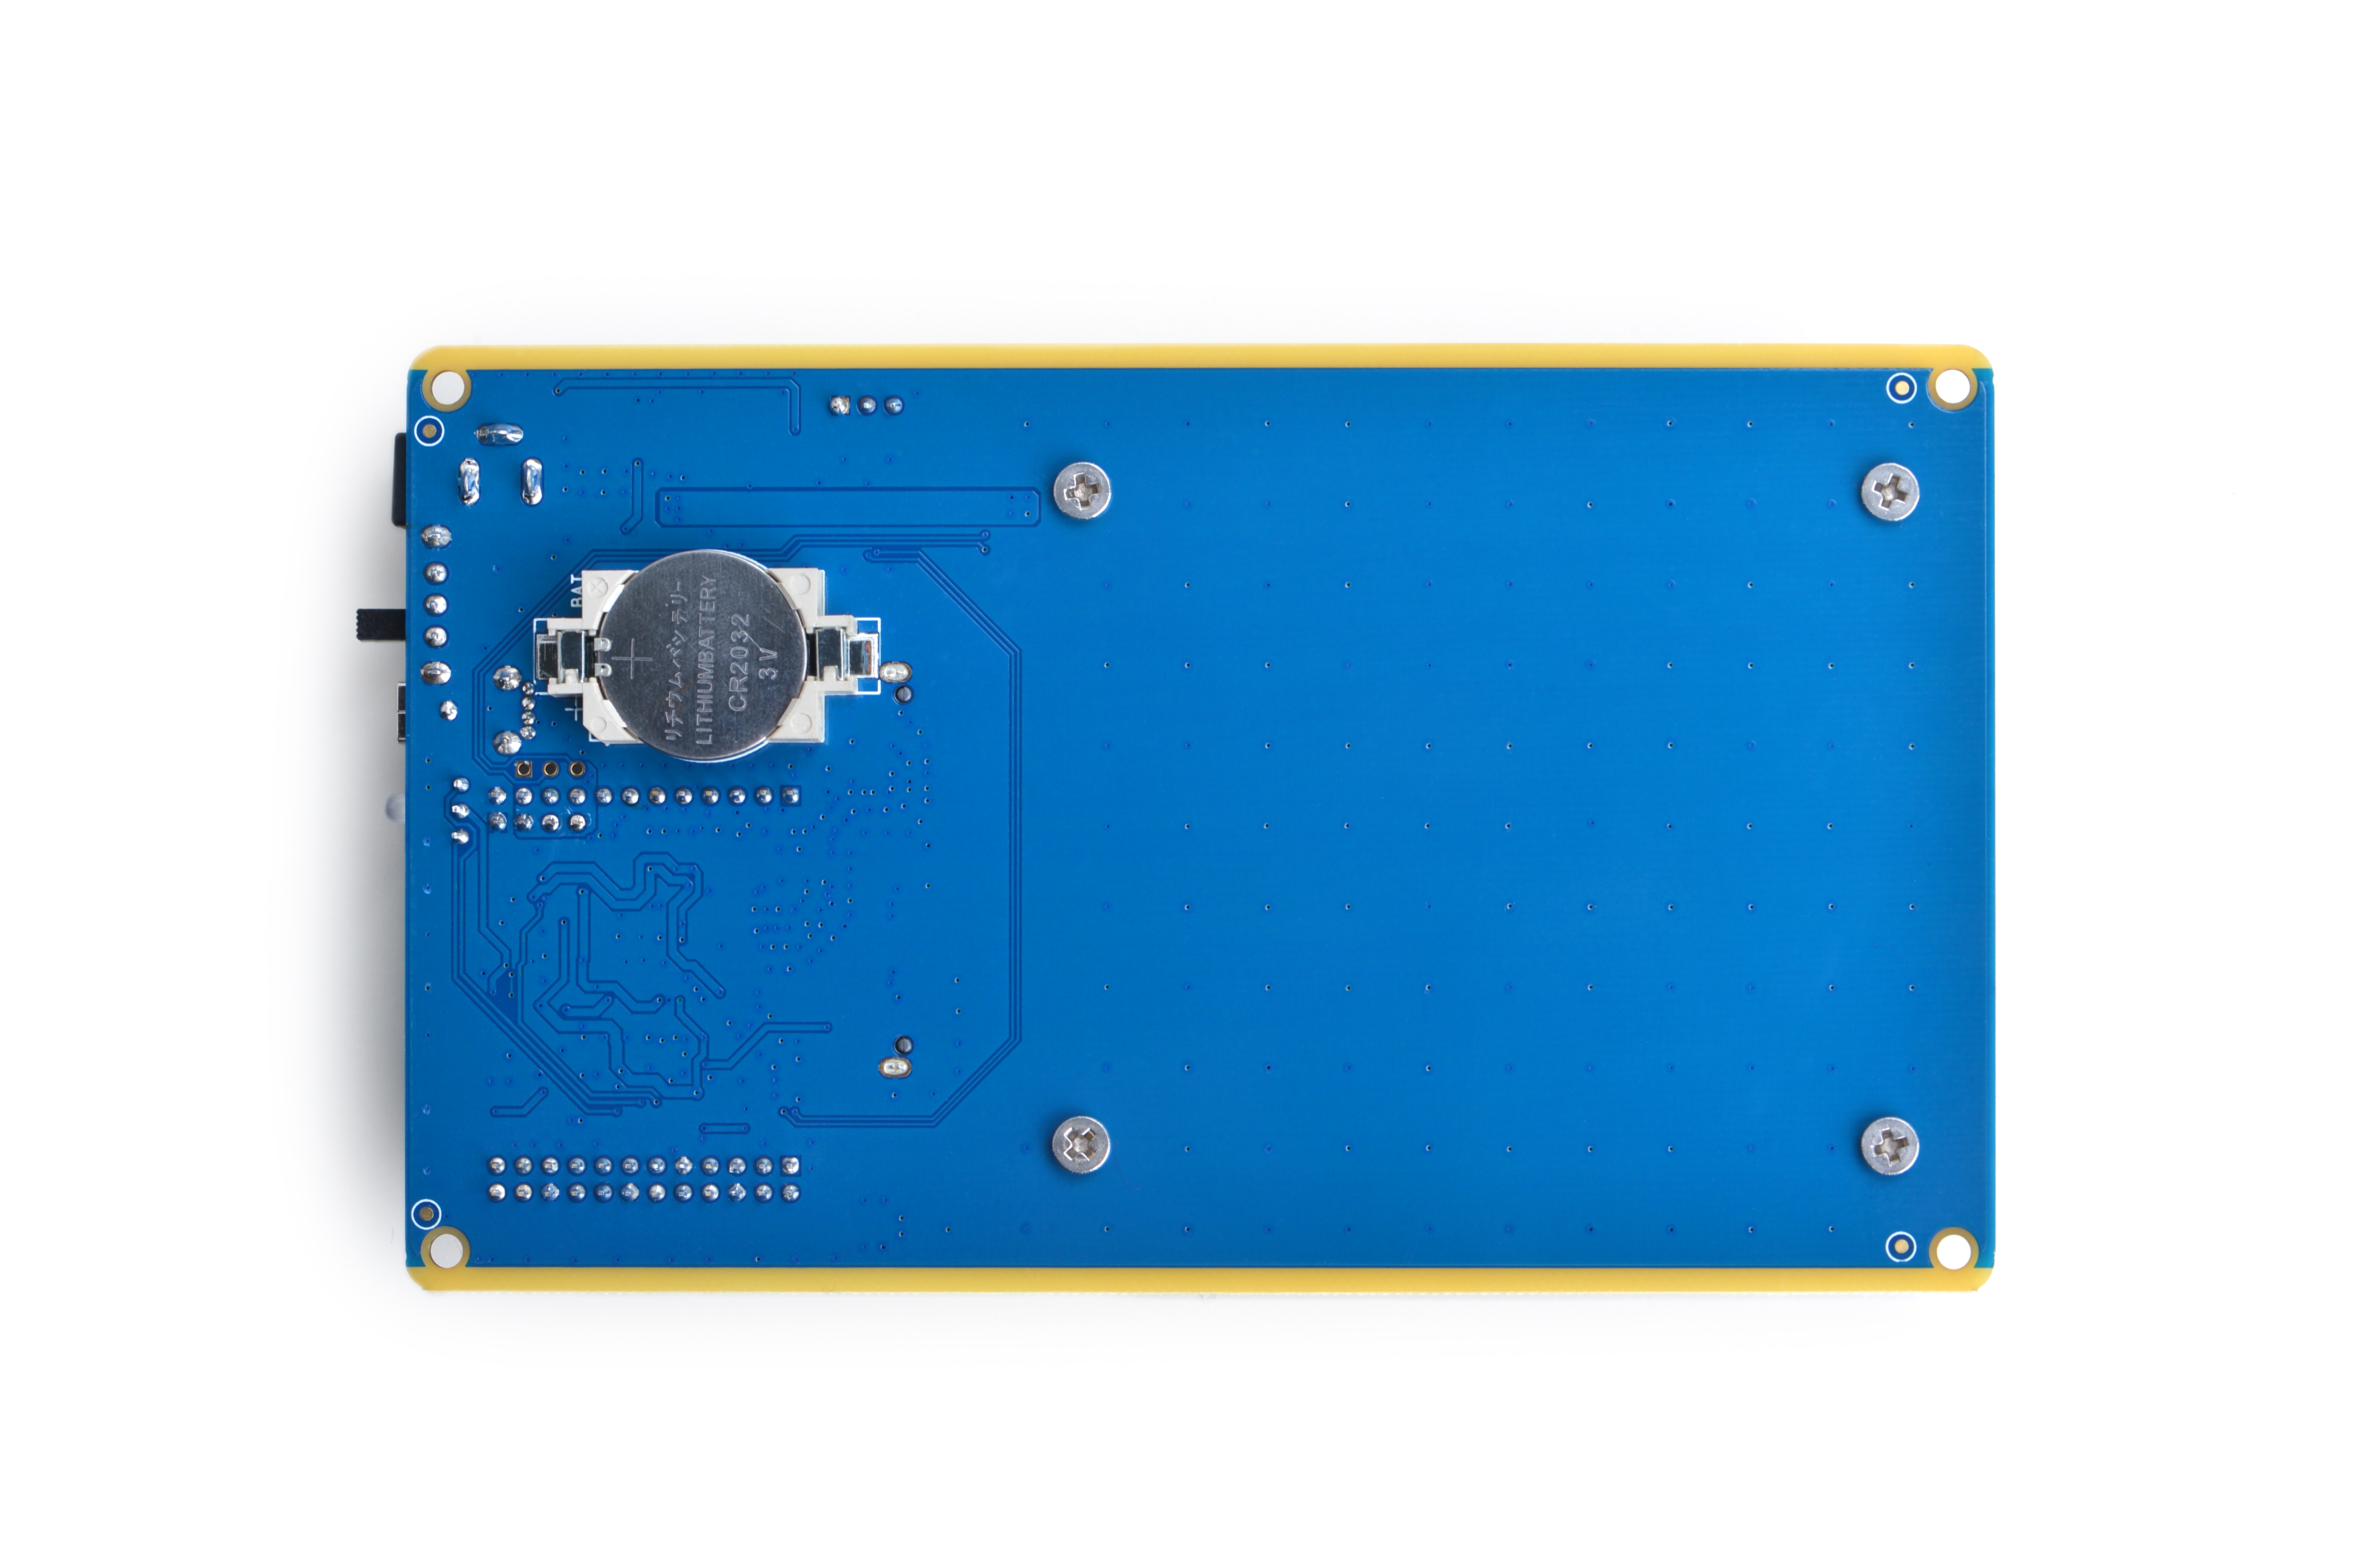
- The onboard DS1307 RTC IC can provide precise clock for the board. A button cell can be used to power the RTC when the board is disconnected from power supply.
- It has an I2C interface.
2 Hardware Spec
- High-speed USB2SATA IC JM20329
- Input voltage:12V
- Onboard switch
- Onboard RTC
- Dual-color LED
- USB Host
- Customized aluminum case
- Ready-to-go software system
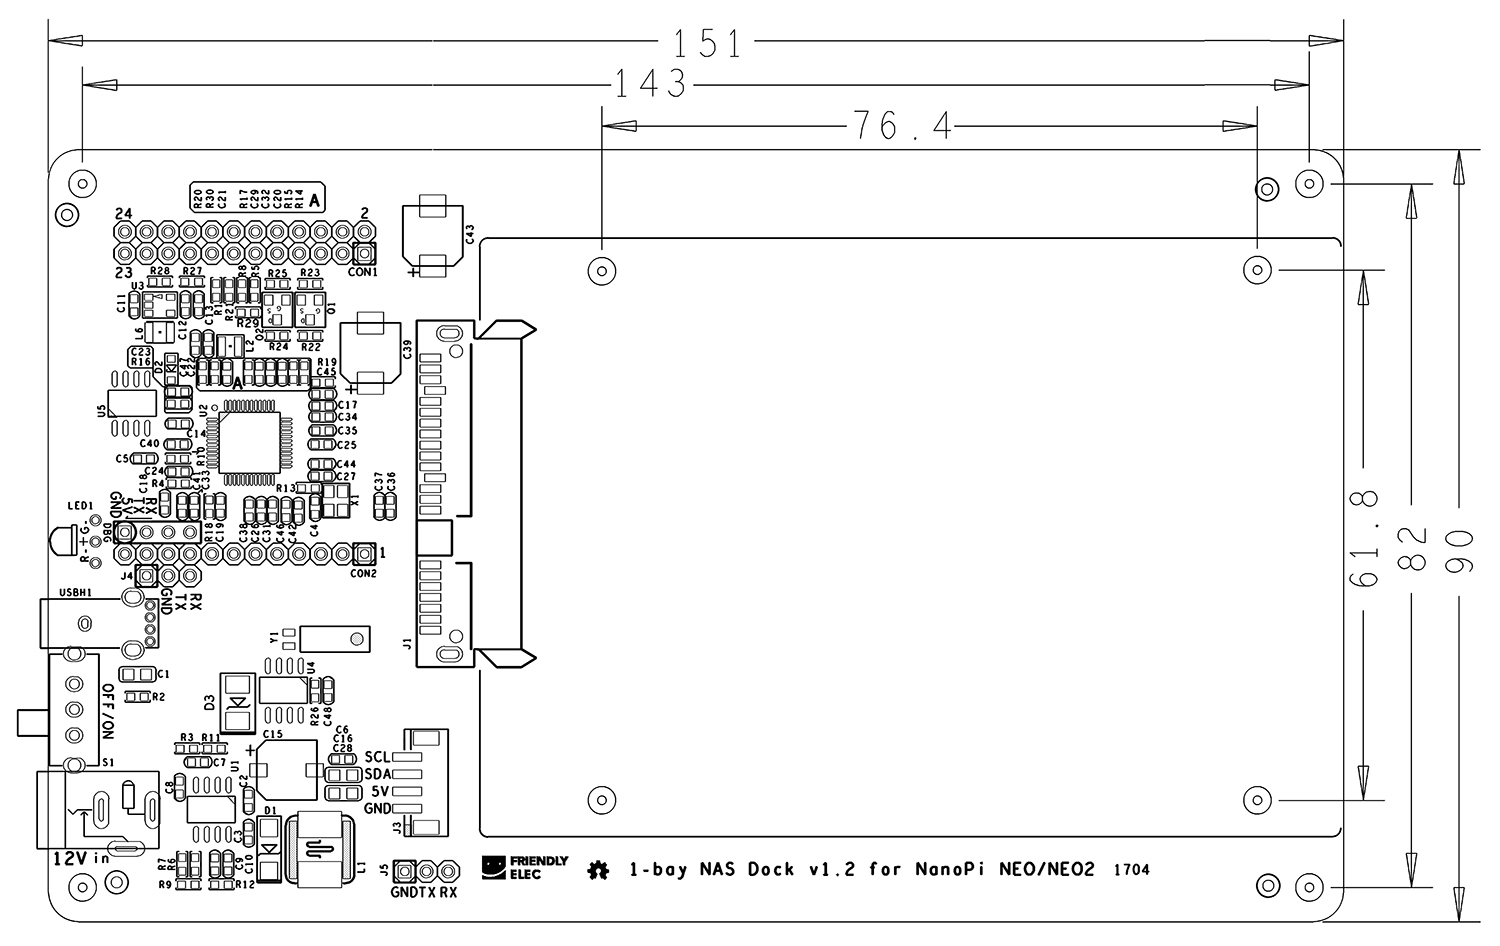
- PCB dimension(mm): 151 x 90
3 Software Features
Note: the NAS Dock is a slave device. It must work with a master device which has software support for it. Therefore the software features listed here refer to the features that the OS systems running on a master device NanoPi NEO/NEO2 have.
3.1 Debian8 Jessie for NanoPi NEO
- Kernel: mainline Linux;4.x.y
- OpenMediaVault
3.2 Debian8 Jessie for NanoPi NEO2
- Kernel: mainline Linux;4.x.y
- OpenMediaVault
4 Hardware Setup
Essentials You Need for a Complete NAS Solution:
(1) 1-bay NAS Dock v1.2 for NanoPi NEO/NEO2;
(2) Screw set;
(3) 2.5" HDD hard disk;
(4) NanoPi NEO/NEO2 with heat sink
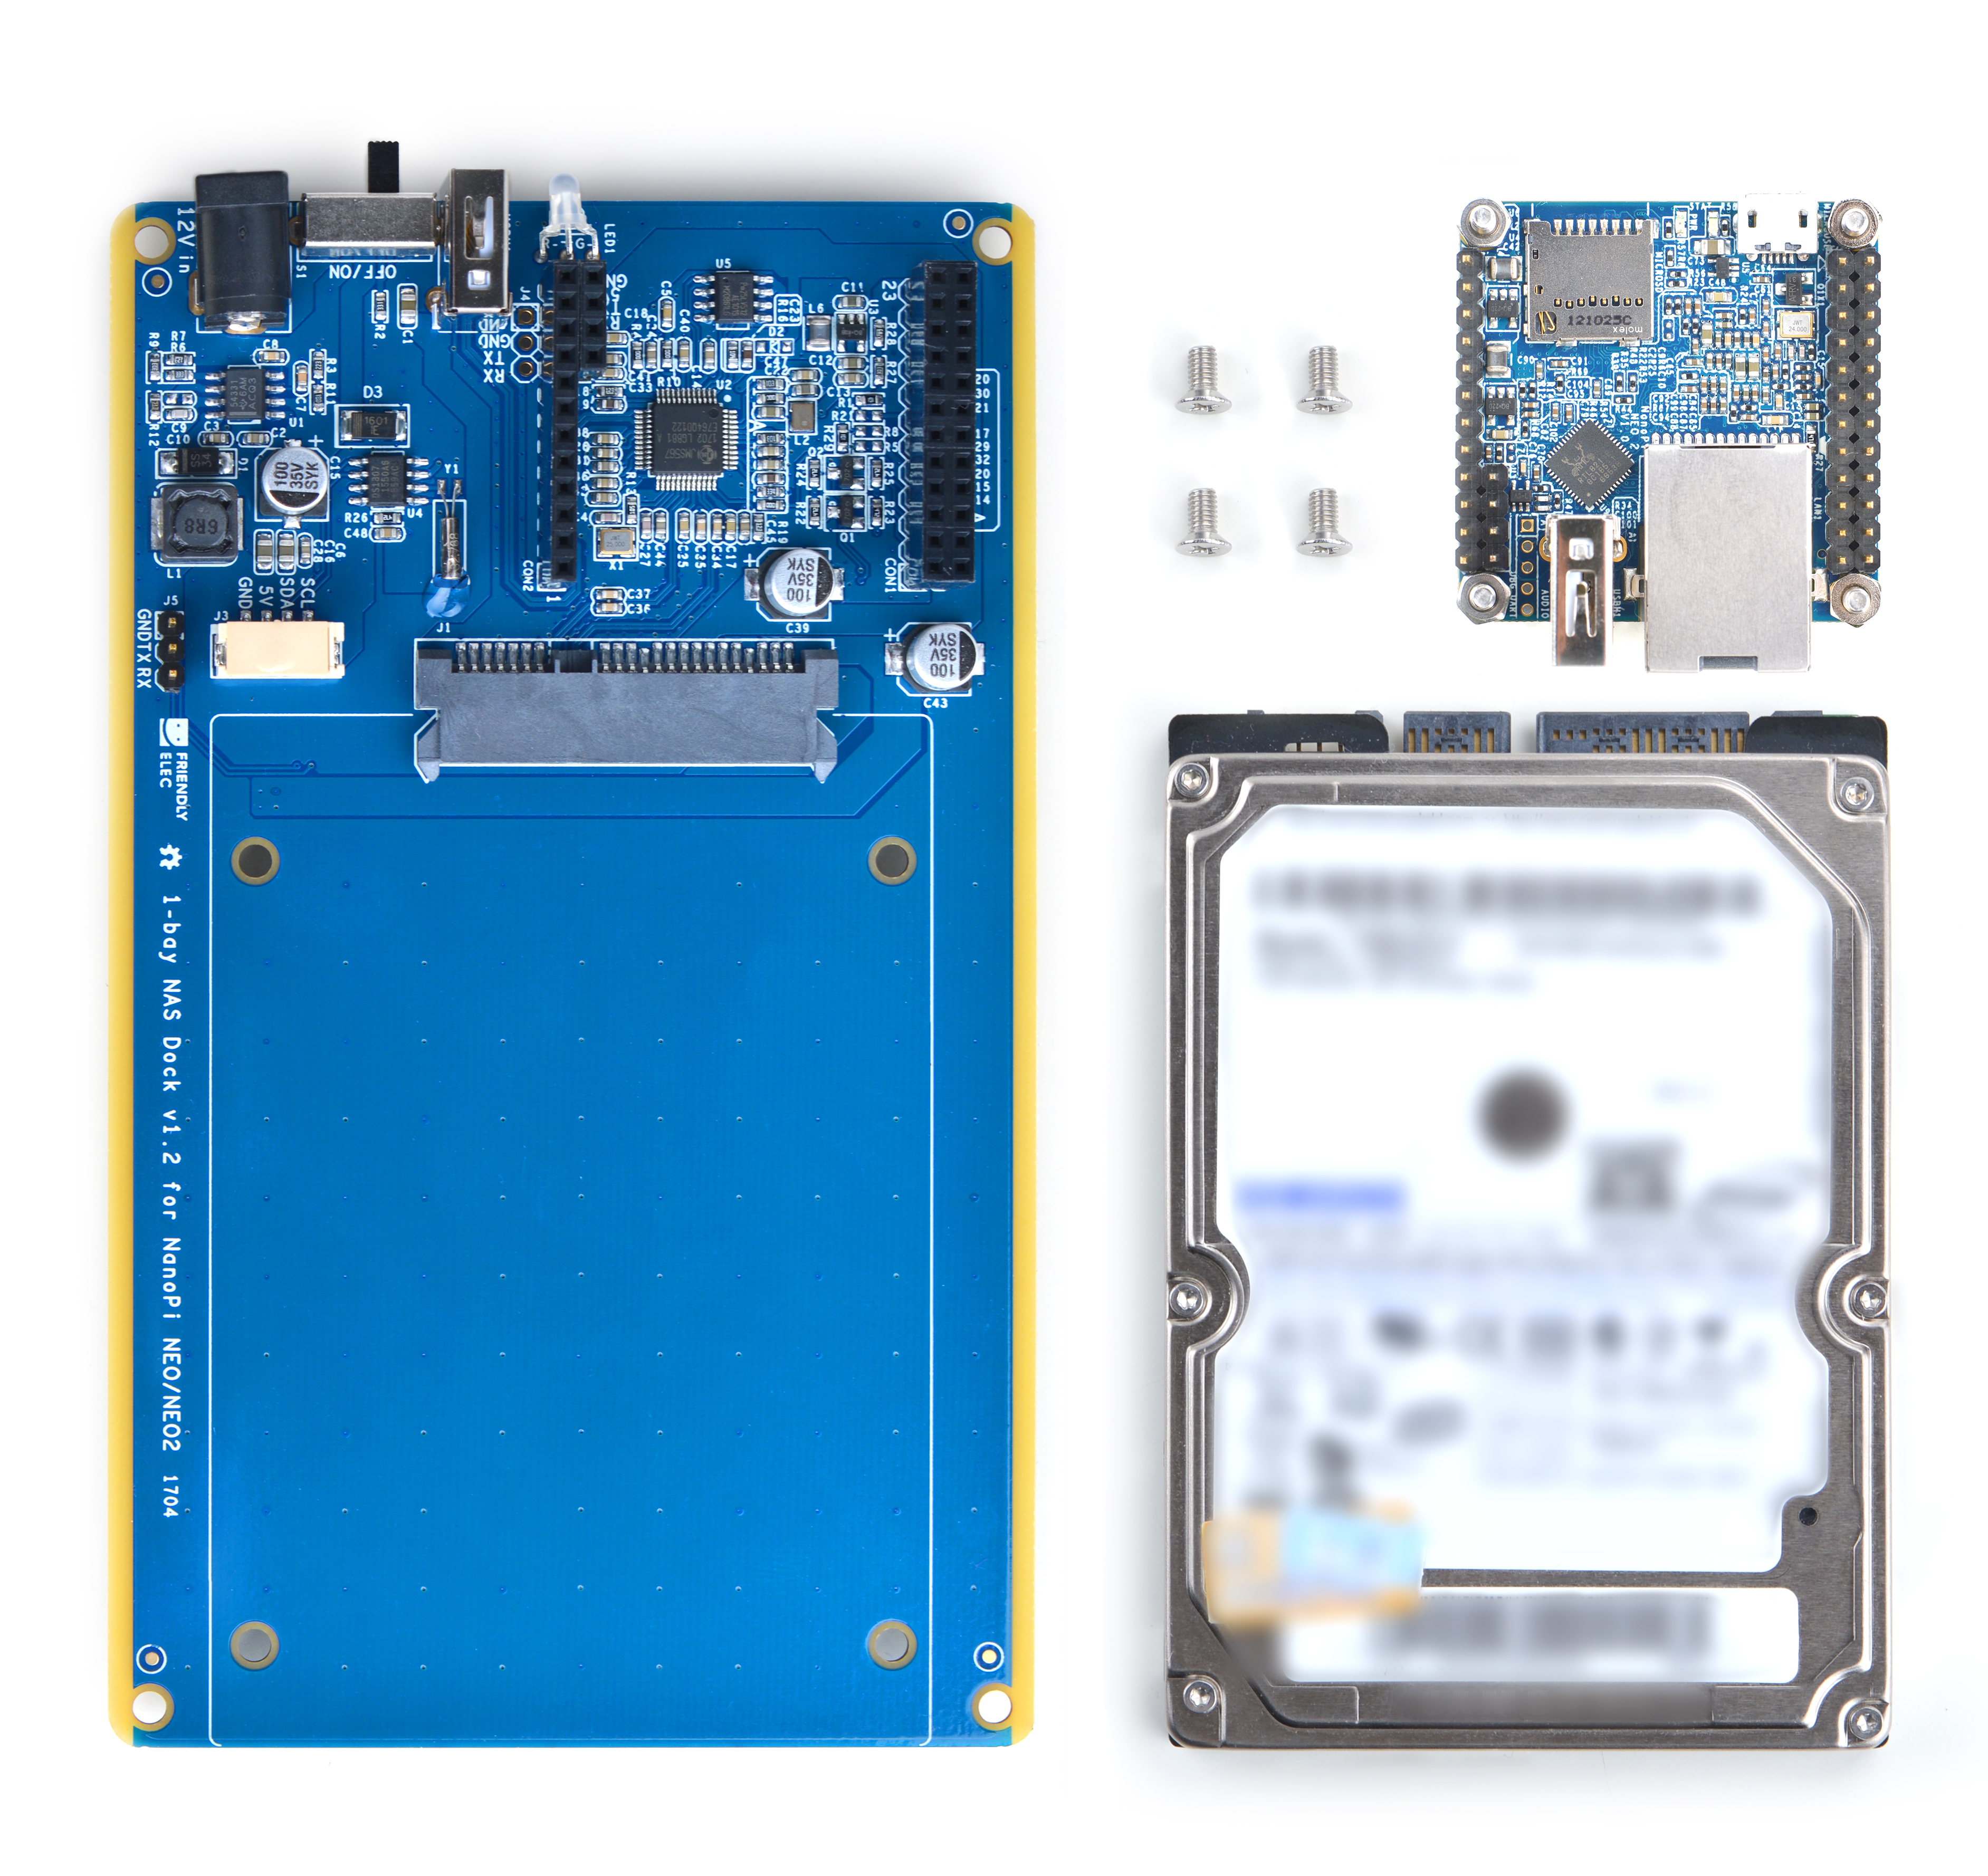
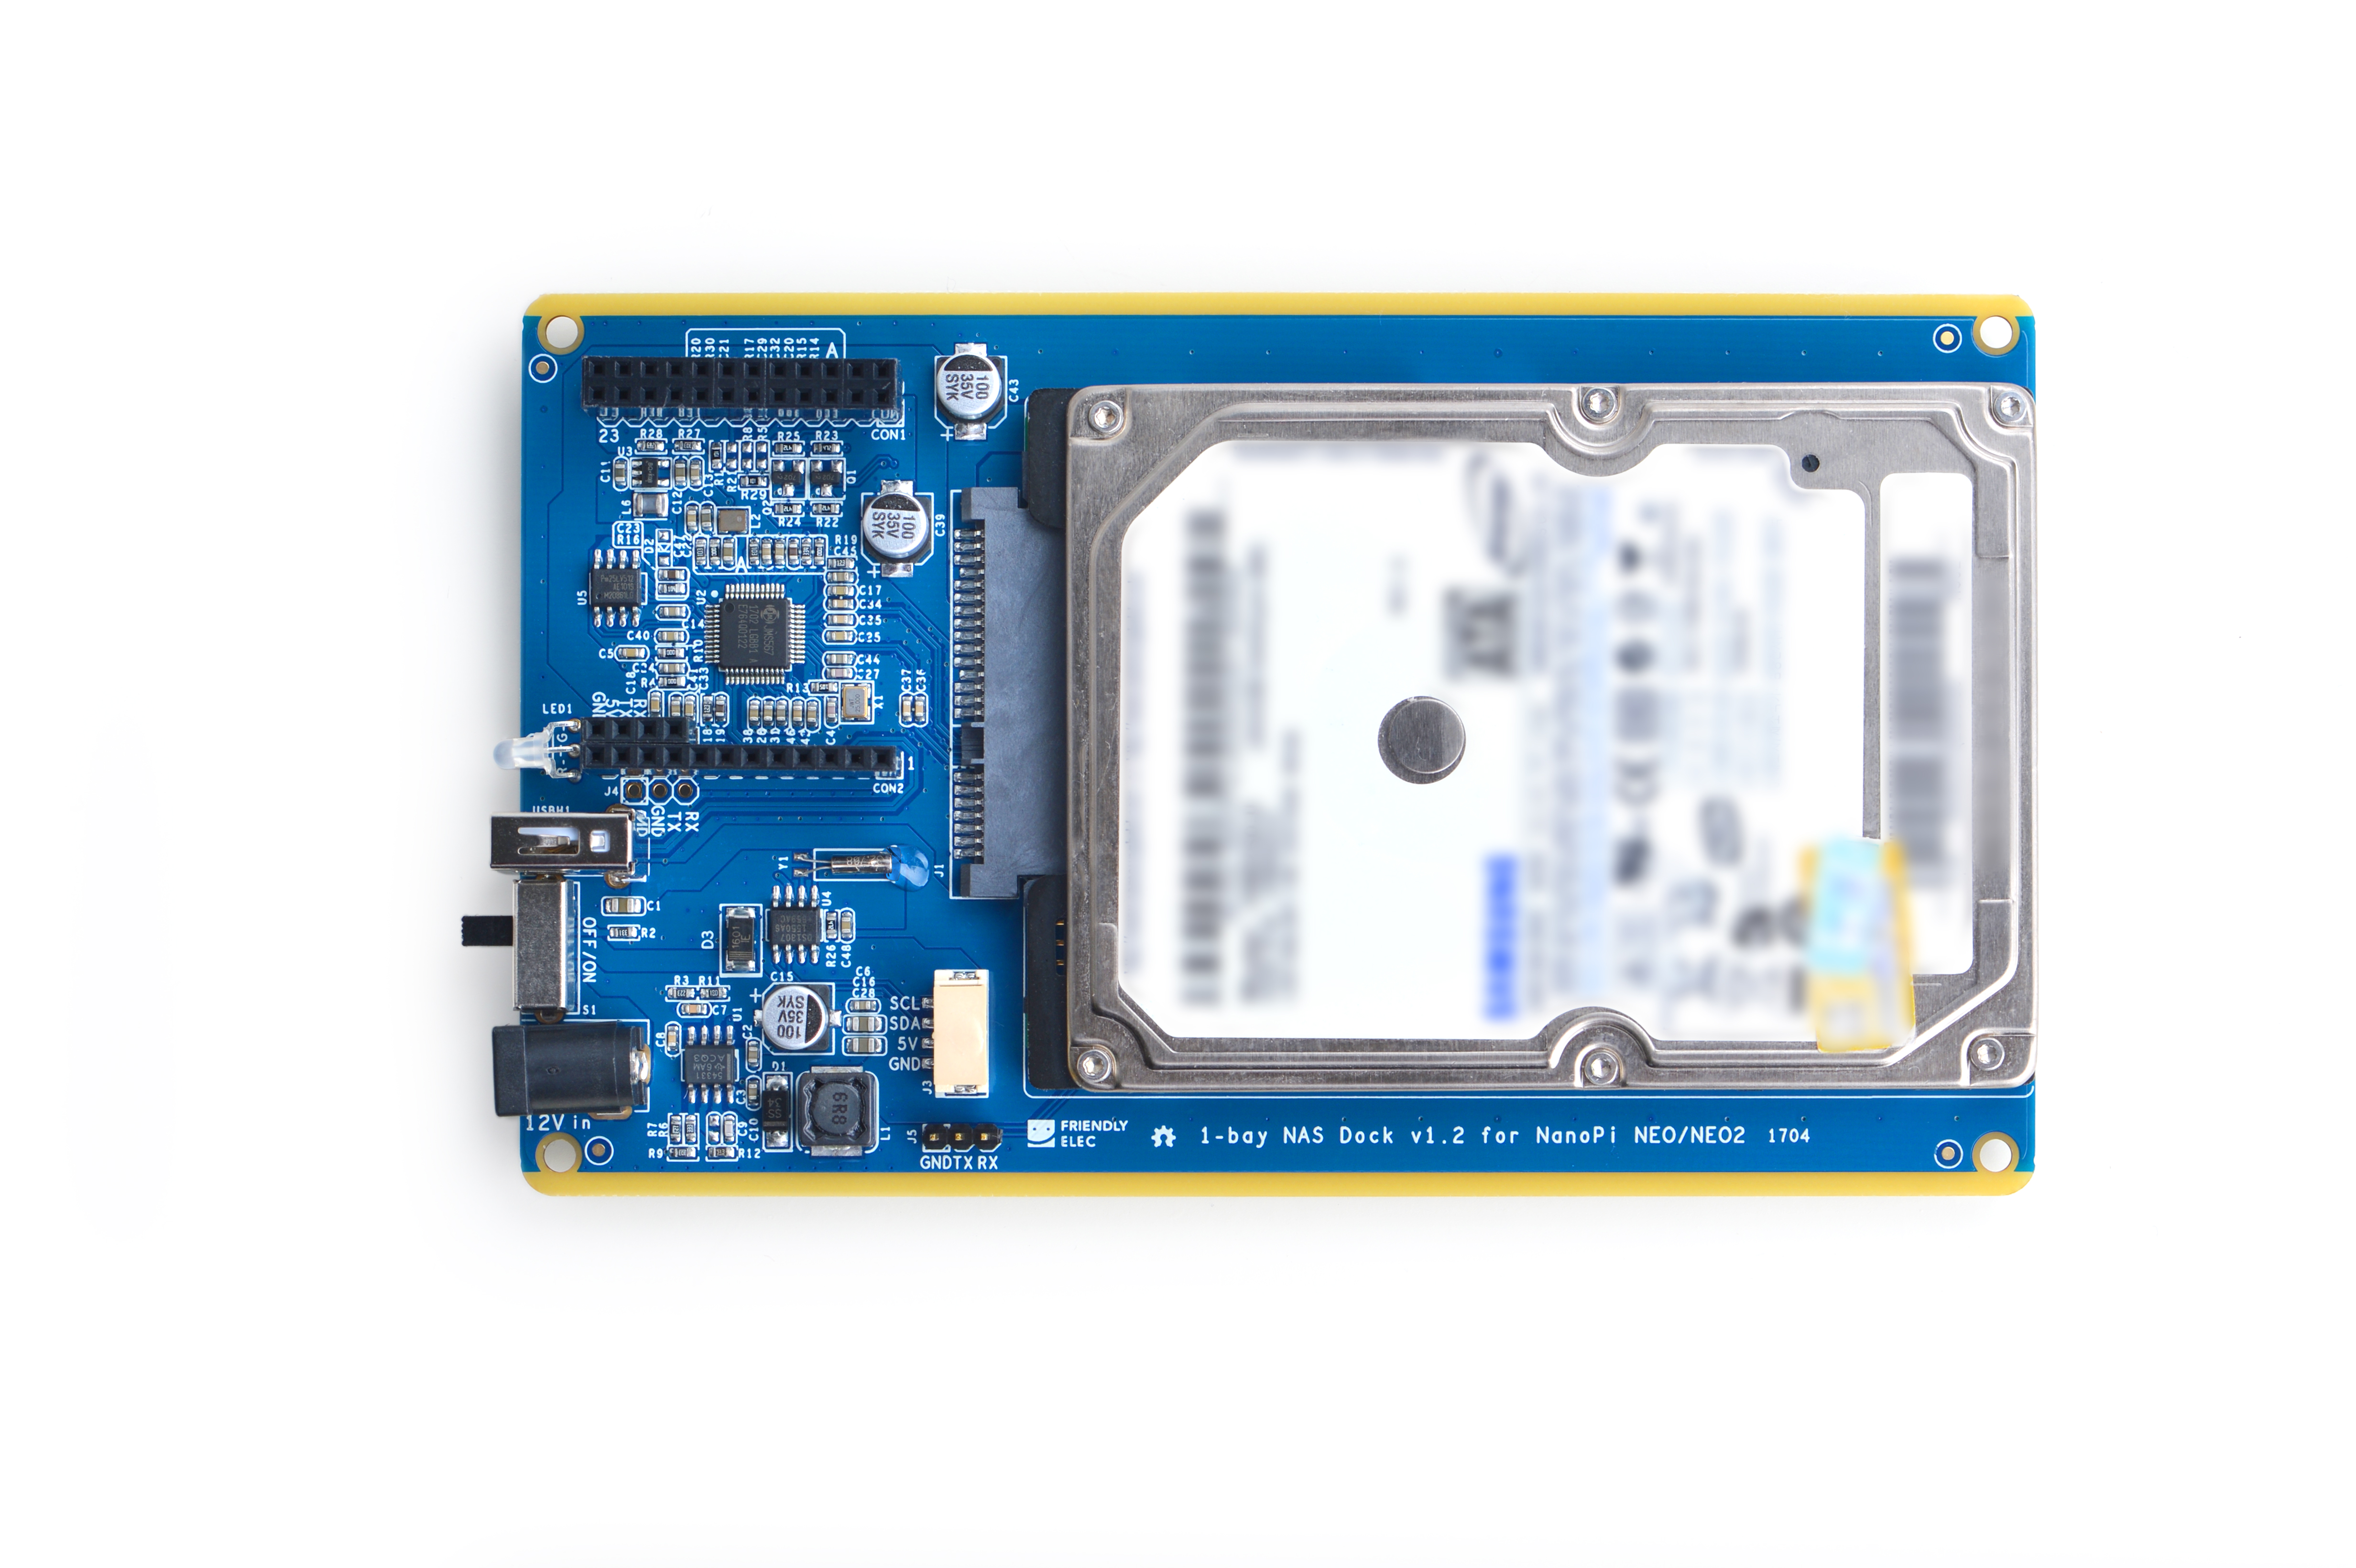
Steps to Assemble a NAS Device:
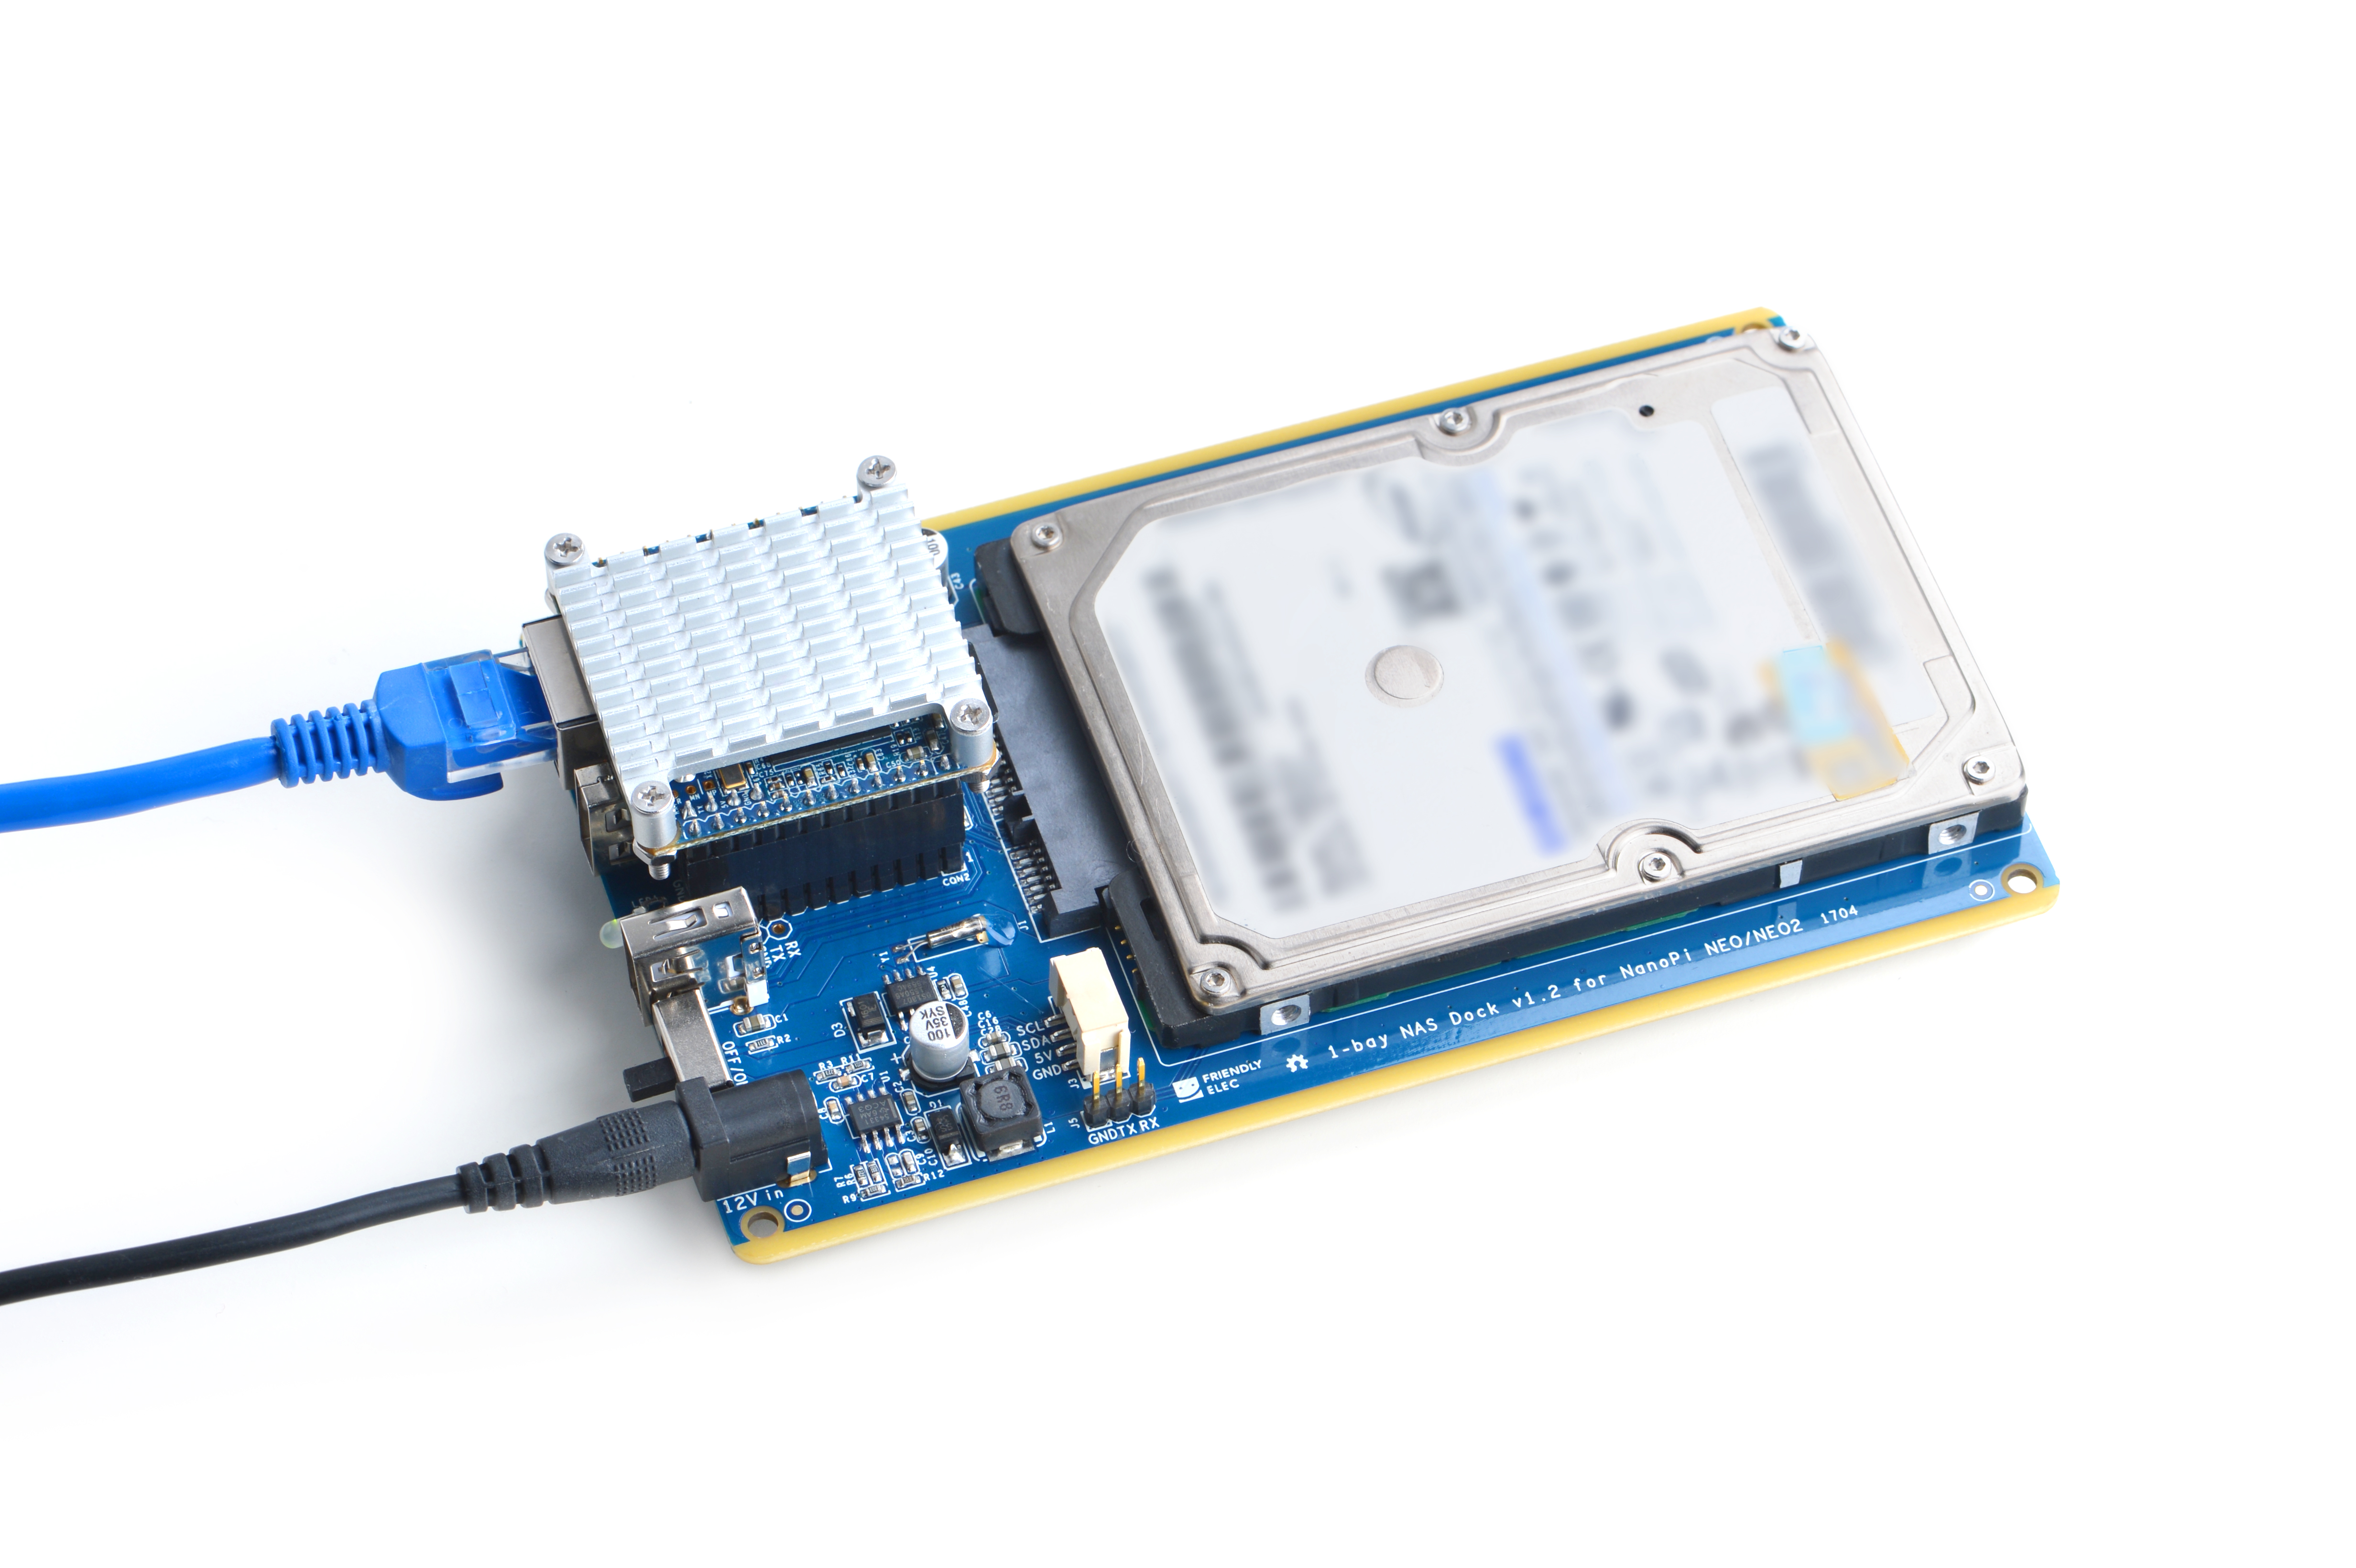
(1) Connect a 2.5"SATA hard disk to the dock and mount the disk on the dock with four screws
(2) Connect a NanoPi NEO/NEO2 with pin-headers to the NAS Dock
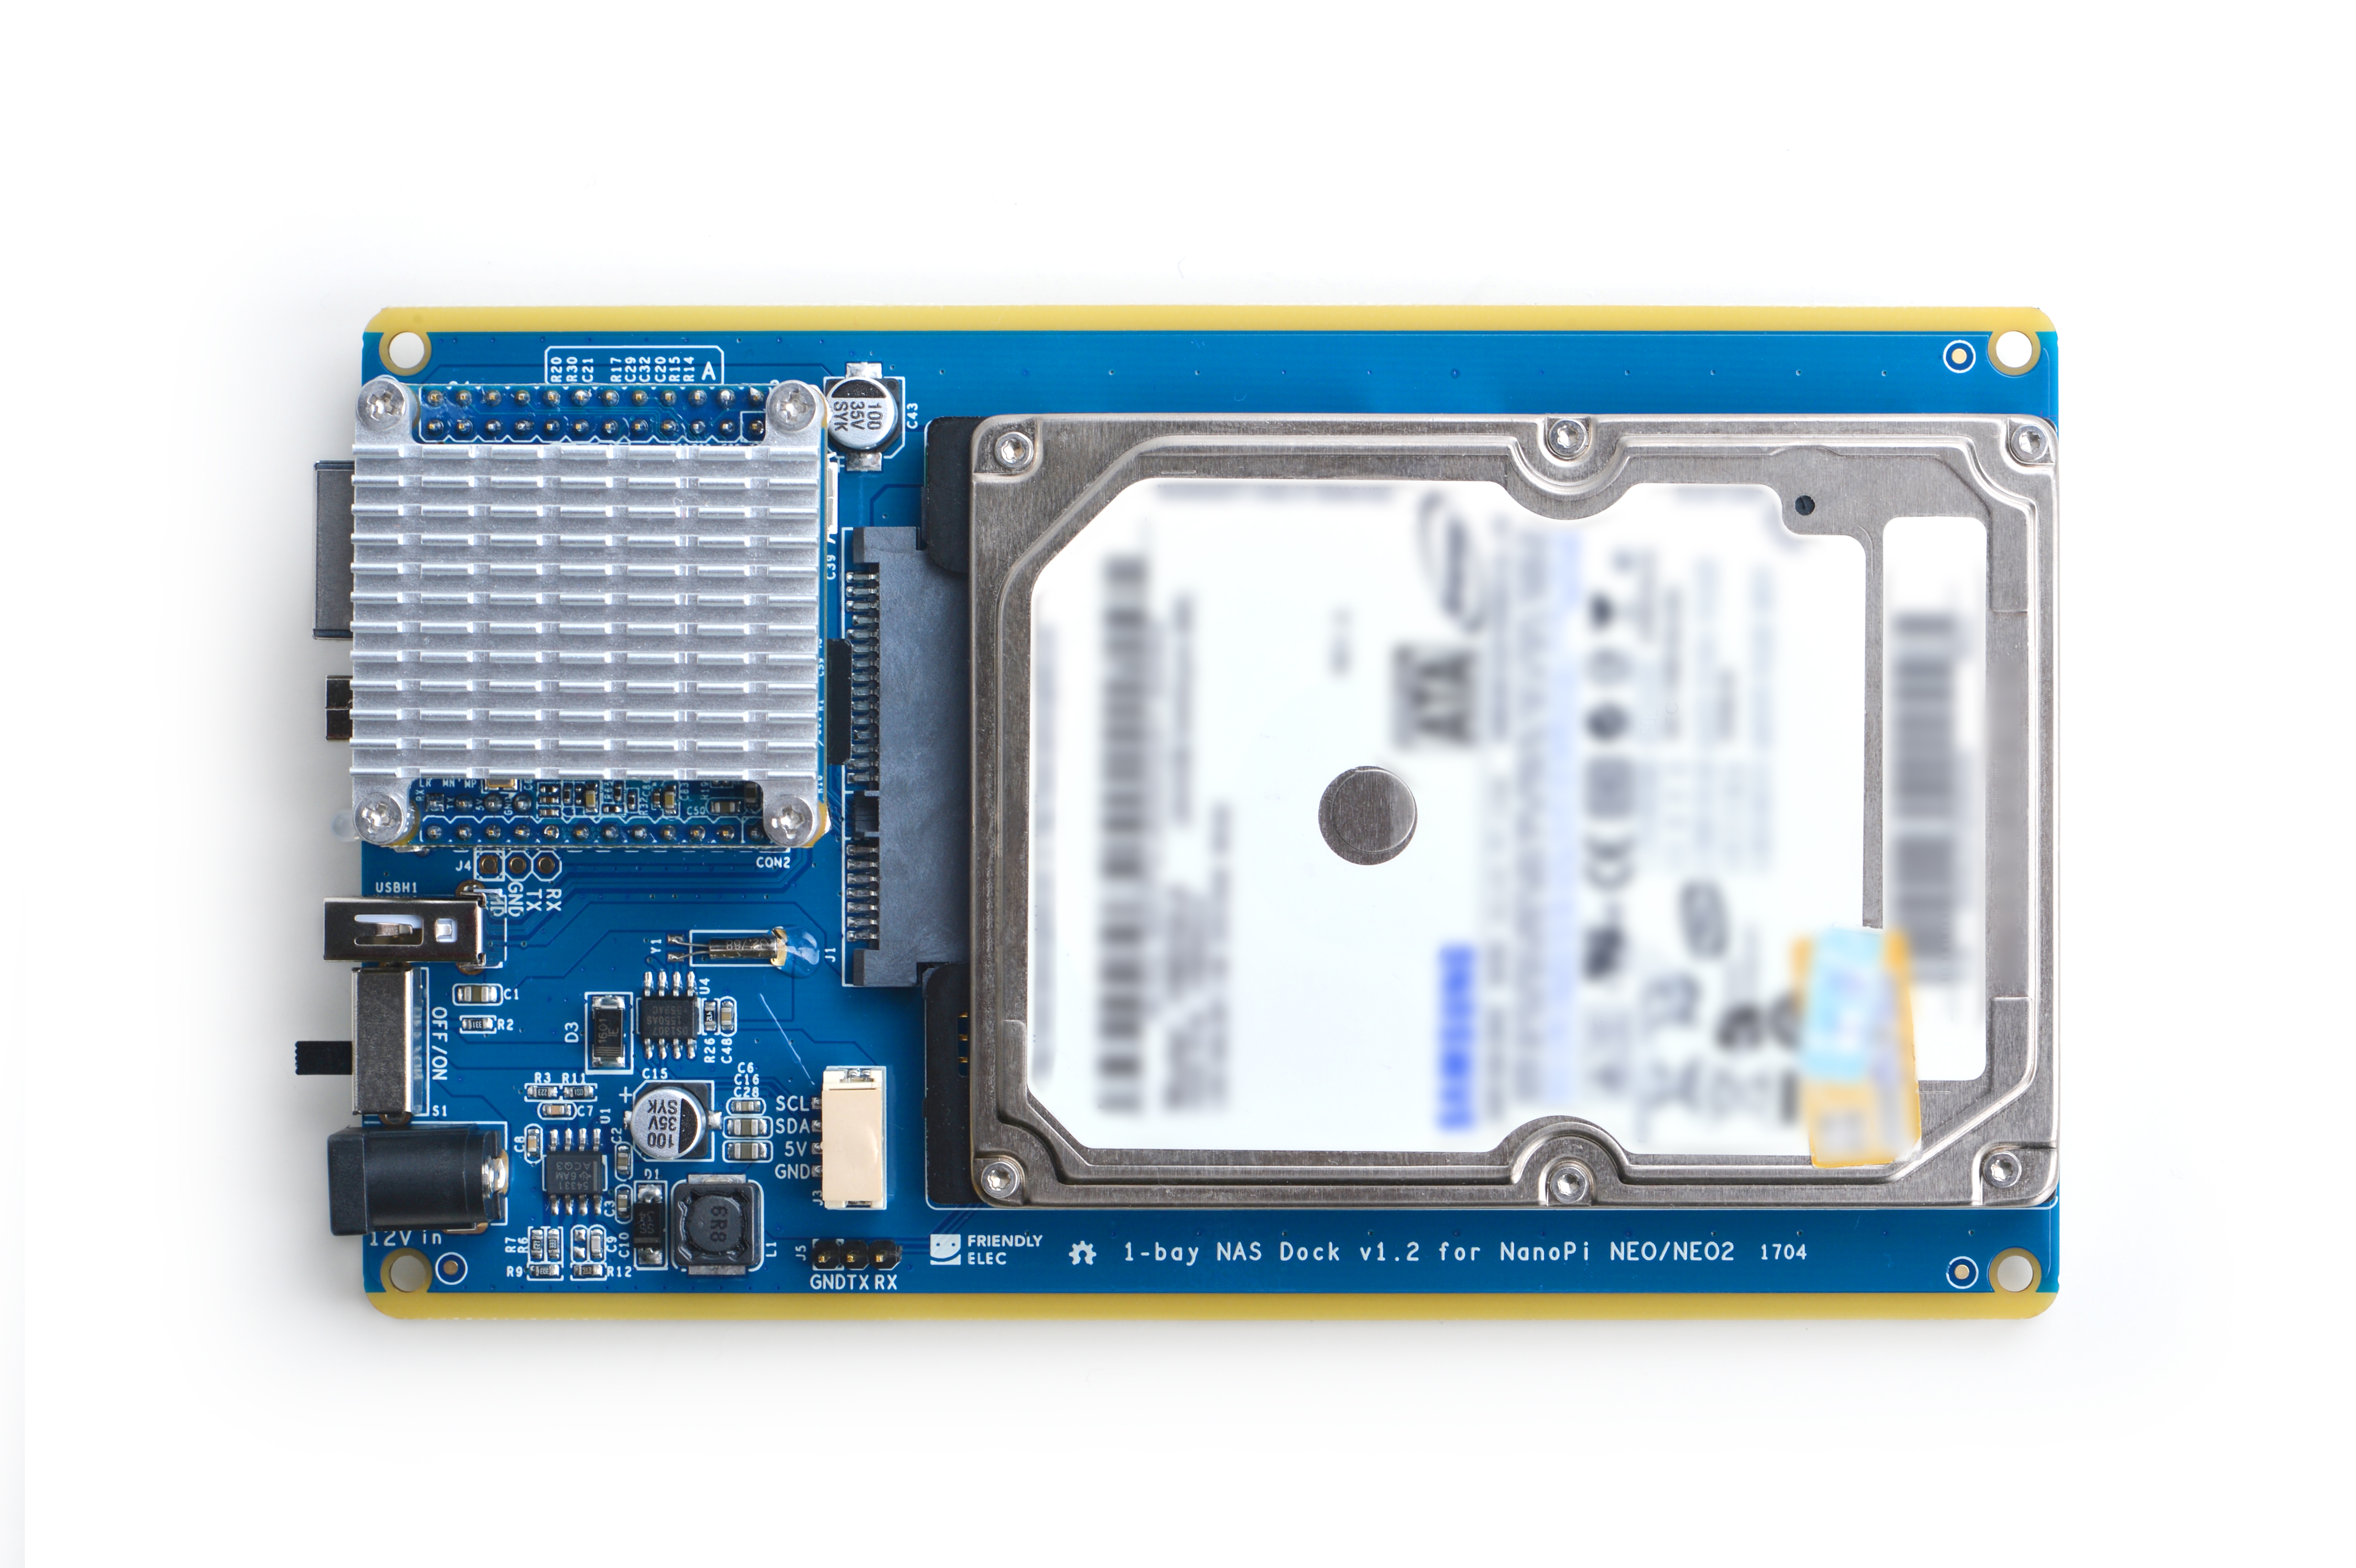
(3) Connect a 12V power to the NAS Dock and all done
5 Introduction to 1-bay NAS Dock V1.2 for NanoPi NEO/NEO2's Software
The software system for the 1-bay NAS Dock V1.2 is based on Debian8 Jessie but has OpenMediaVault and its plugins. OpenMediaVault is a popular solution for NAS applications under Linux. It has various services such as SSH,(S)FTP,SMB/CIFS,DAAP media server, RSync,BitTorrent and more.
6 Software Installation
6.1 Make a Bootable TF Card
6.1.1 Download Debian for NAS Image
Download a proper image file for your Dock based on your master device(NEO/NEO2). The image file is under the "officail-ROMs" directory and the utility is under the "tools" directory:
Master Device Image File Download Link NanoPi NEO nanopi-neo_debian-nas-jessie_4.x.y_YYYYMMDD.img.zip Download Link NanoPi NEO2 nanopi-neo2_debian-nas-jessie_4.x.y_YYYYMMDD.img.zip Download Link Flash Utility: win32diskimager.rar Windows utility. Under Linux users can use "dd"
This system is based on Debian but has OpenMediaVault .
6.1.2 Make TF Card
Extract the "nanopi-neoN_debian-nas-jessie_4.x.y_YYYYMMDD.img.zip" and "win32diskimager.rar". Insert an SD card(at least 8G) into a Windows PC and run the win32diskimager utility as administrator. On the utility's main window select your SD card's drive, the wanted image file and click on "write" to start flashing the SD card.
Insert this card into your NanoPi NEO/NEO2 and connect the 1-Bay NAS Dock V1.2 to a 12V power.Turn on the Dock's switch and if the blue LED on your NEO/NEO2 blinks this indicates your NanoPi NEO/NEO2 has successfully booted.
7 Configure NAS
Visit the router your NEO/NEO2 is connected to and check your NEO/NEO2's IP address (in our case the Hostname was "FriendlyELEC"). Open a browser and type this IP address in the browser's address bar. The default user name and password for OpenMediaVault are:
User Name: admin
Password: openmediavault
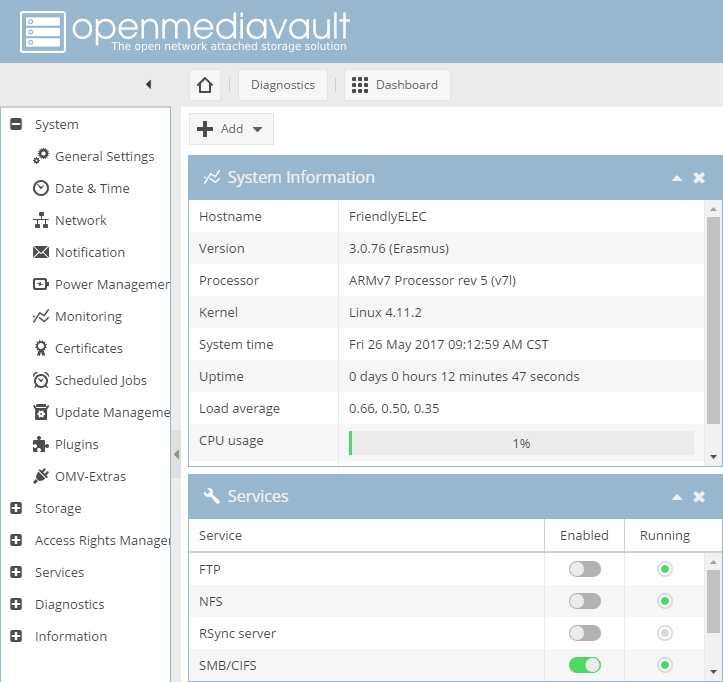
Here is what OpenMediaVault looks like after a user logs in:
8 运行IPFS
8.1 IPFS简介
星际文件系统(InterPlanetary File System,缩写IPFS)是一个旨在创建持久且分布式存储和共享文件的网络传输协议。它是一种内容可寻址的对等超媒体分发协议,在IPFS网络中的节点将构成一个分布式文件系统。
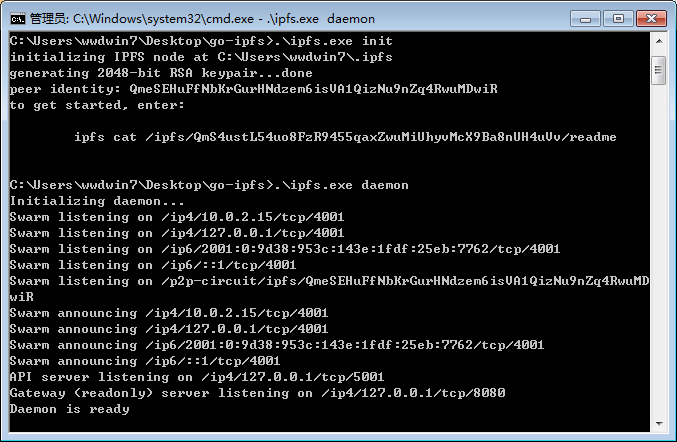
8.2 将PC机初始化为IPFS节点
Windows系统
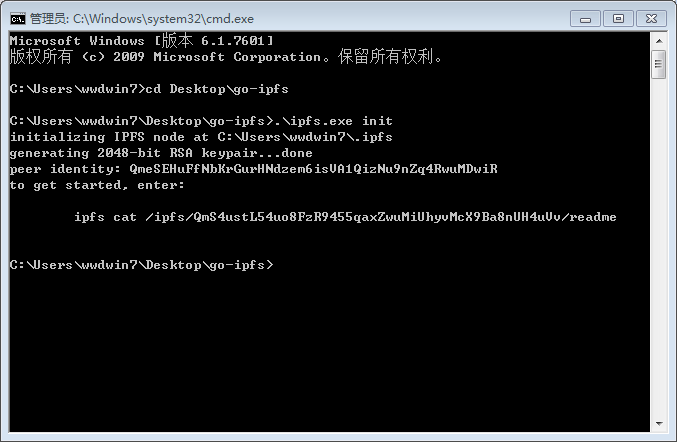
访问这里,下载tools/ipfs目录里的 go-ipfs_v0.4.17_windows-amd64.zip,解压后在cmd窗口执行下列命令将PC机初始化为IPFS节点:
Ubuntu系统
访问这里,下载tools/ipfs目录里的 go-ipfs_v0.4.17_linux-amd64.tar.gz,在命令行终端中执行下列命令将PC机初始化为IPFS节点:

8.3 在PC机 IPFS节点里上传文件
在PC Ubuntu系统上运行IPFS
$ ipfs daemon
API server listening on /ip4/127.0.0.1/tcp/5001
Gateway (readonly) server listening on /ip4/127.0.0.1/tcp/8080
Daemon is ready
在PC机 IPFS节点里上传文件
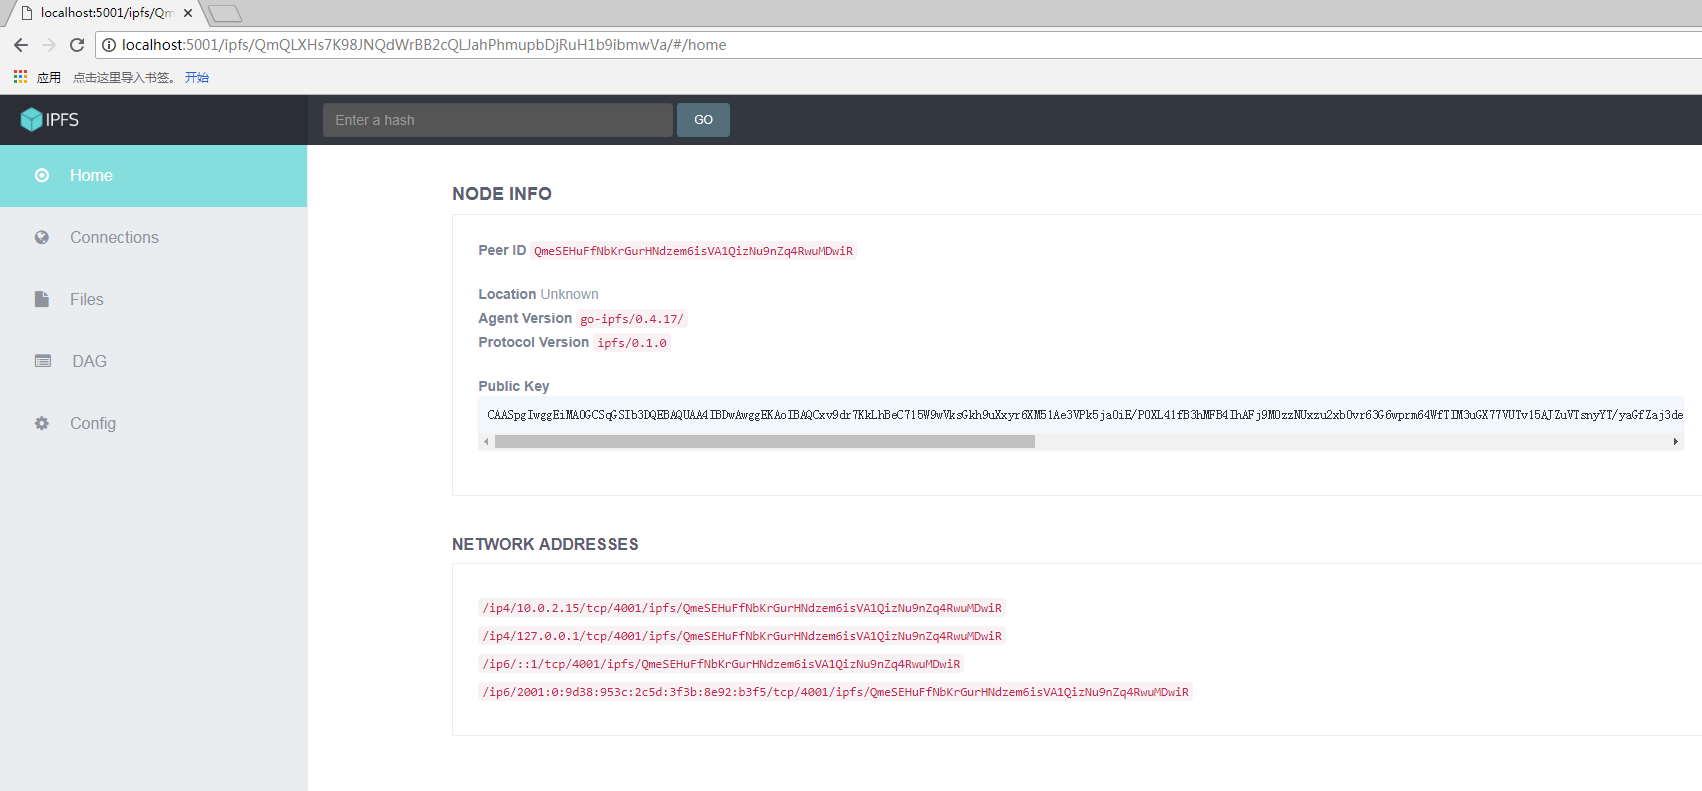
然后在PC上使用浏览器访问:
http://localhost:5001/webui
点击Files菜单,然后点击Upload,选择想要上传文件,这里以文本文件test.txt为例,上传后可以看到如下界面:
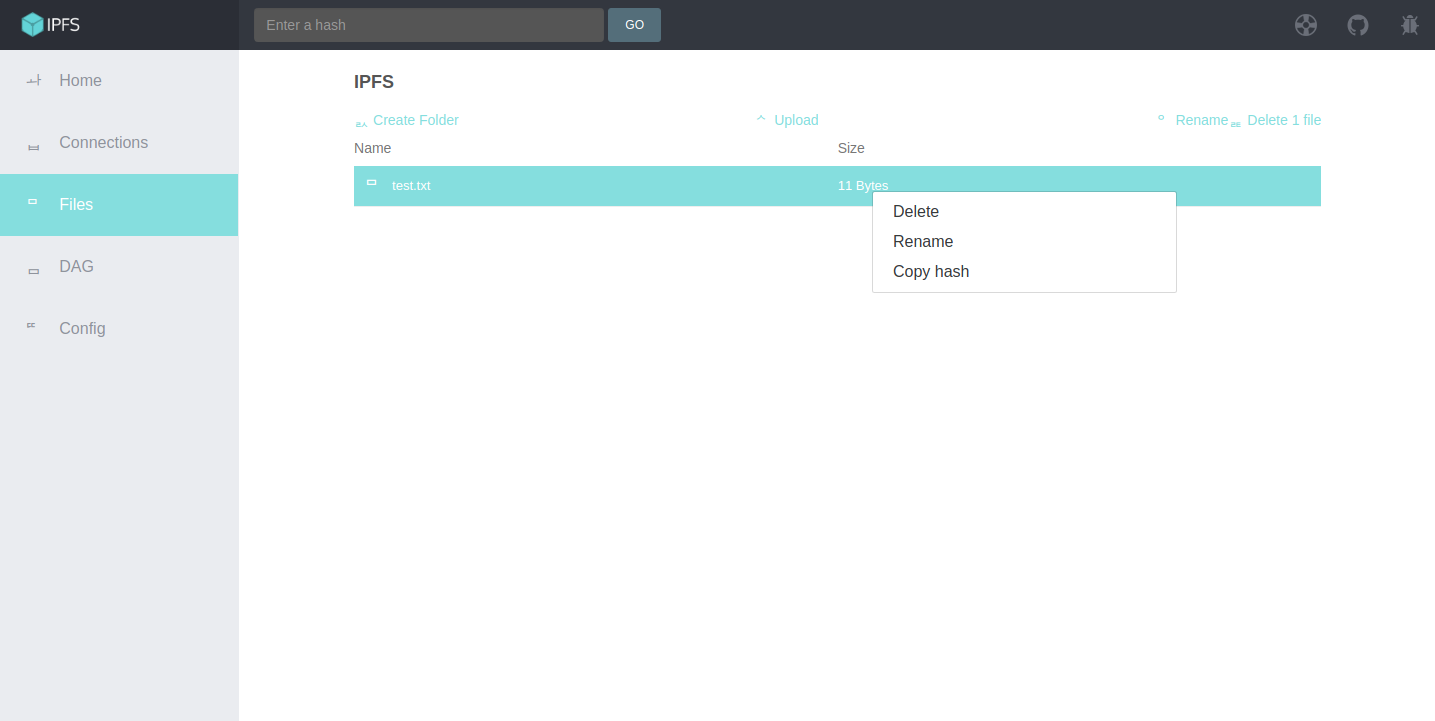
对着文件点击鼠标右键,选择Copy hash,将文件的唯一hash值复制到剪切板中,再新建一个文本文件将hash值粘贴进去并保存下来:
QmNfcvc8m911hJgMf6bvtCvuneeiiWfLWRX7wbawjw5var
后面开发板会通过这个唯一hash值来获取该文件test.txt。
8.4 在开发板 IPFS节点里下载文件
访问这里,下载tools/ipfs目录下的go-ipfs_v0.4.17_linux-arm.tar.gz。通过路由器查看开发板的IP地址,将go-ipfs_v0.4.17_linux-arm.tar.gz拷贝到开发板上,执行下列命令将开发板初始化为IPFS节点:
$ tar xzf go-ipfs_v0.4.17_linux-amd64.tar.gz
$ cd go-ipfs
$ ./install
Moved ./ipfs to /usr/local/bin
$ ipfs init
initializing IPFS node at /root/.ipfs
generating 2048-bit RSA keypair...done
peer identity: QmT7rYxLVhkhCWnLg7URJcubZvEnJmtiXQ5LYwr5XXXXXX
to get started, enter:

	ipfs cat /ipfs/QmS4ustL54uo8FzR9455qaxZwuMiUhyvMcX9Ba8nXXXXXX/readme
运行IPFS:
$ ipfs daemon &
使用下列命令下载文件:
$ ipfs get QmNfcvc8m911hJgMf6bvtCvuneeiiWfLWRX7wbawjw5var
$ cat QmNfcvc8m911hJgMf6bvtCvuneeiiWfLWRX7wbawjw5var
Hello IPFS
上述信息表明开发板已经成功通过IPFS获取到其他节点分享的文件。
9 Resources
- [Schematic](1-bay NAS Dock v1.2 for NanoPi NEO/NEO2.pdf)
- OpenMediaVault's home site: http://www.openmediavault.org/。
10 Update Log
10.1 April-28-2017
- Released English Version
10.2 May-05-2017
- Updated Section 1 by adding support for NEO Air
10.3 May-24-2017
- Added Section 3: software features
